AWS Cloud9 is a cloud-based integrated development environment (IDE) that lets you write, run, and debug your code with just a browser.
:::info
The EC2 instance used in this guide is not within AWS's Free-Tier so please see EC2 Pricing to see if you're comfortable with these costs. Cloud9 has a cost-saving setting to help reduce costs by automatically hibernating after 30 minutes of inactivity. Running Docker in development is CPU intensive so these are the EC2 instances I recommend:
:::
- Minimum:
t2.medium (4 GiB RAM + 2 vCPU) - Recommended:
t2.large (8 GiB RAM + 2 vCPU)
Summary of Pricing:
- t2.medium costs $0.0464 per hour
- t2.large costs $0.0928 per hour
- 30GB Amazon Elastic Block Storage (EBS) costs $3 per month
Cost Estimate Per Month:
| t2.medium | t2.large | |
|---|---|---|
| Cost per hour | $0.0464 | $0.0928 |
| Hours per day | 8 | 8 |
| Days per month | 30 | 30 |
| Sub-total | $11.14 | $22.27 |
| 30GB EBS Volume | $3 | $3 |
| Total | $14.14 | $25.27 |
- Create an AWS Account. You can watch this part of the AWS Certified Cloud Practitioner course on creating an account if you need help.
- Sign into your AWS Account
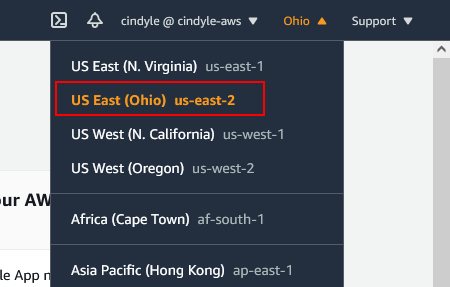
- In the upper-right hand corner of your AWS Management Console, select a region. In this tutorial,
US East (Ohio) us-east-2is selected as yourRegion - In the upper-left hand corner of your AWS Management Console, click on
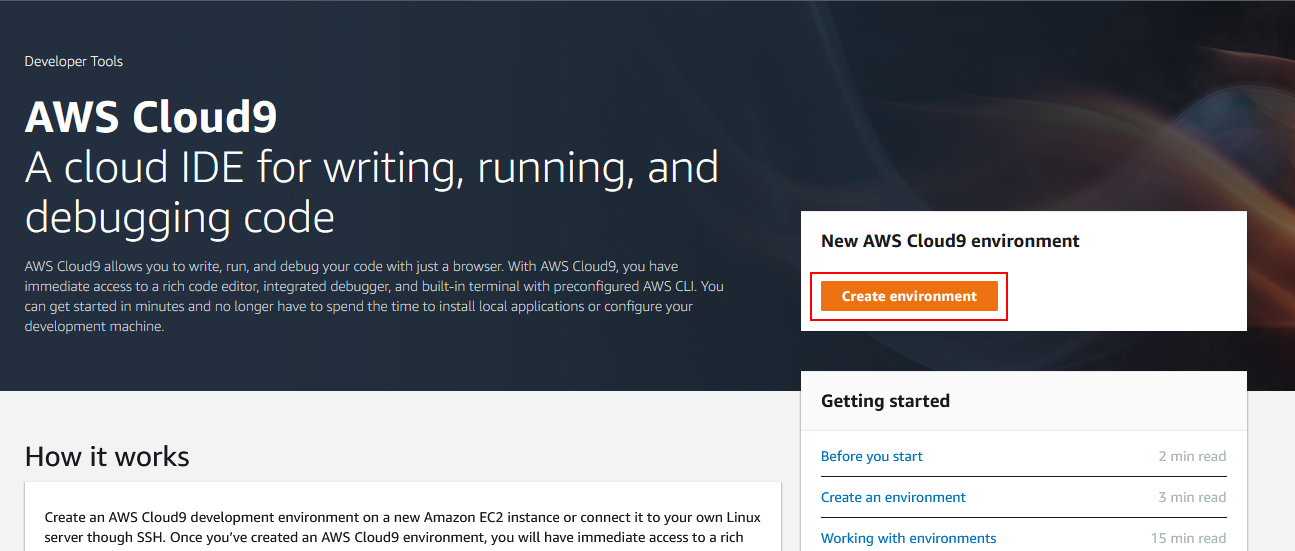
Services. This is bring up a list of AWS Services, search forCloud9. - Click on
Create Environment
-
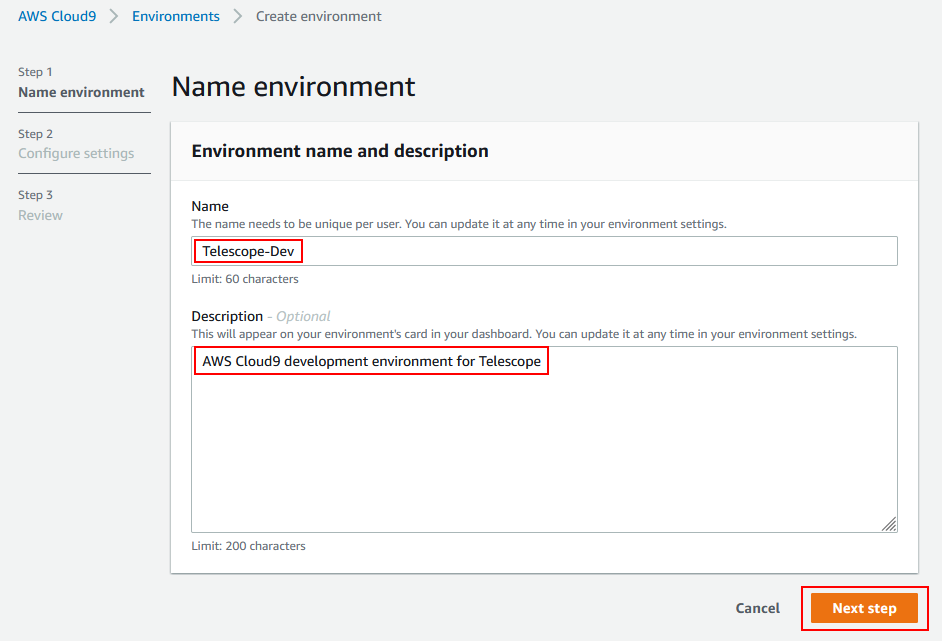
Step 1 - Name environment:
Name:
Telescope-Dev(whatever you want)Description (optional):
AWS Cloud9 development environment for Telescope -
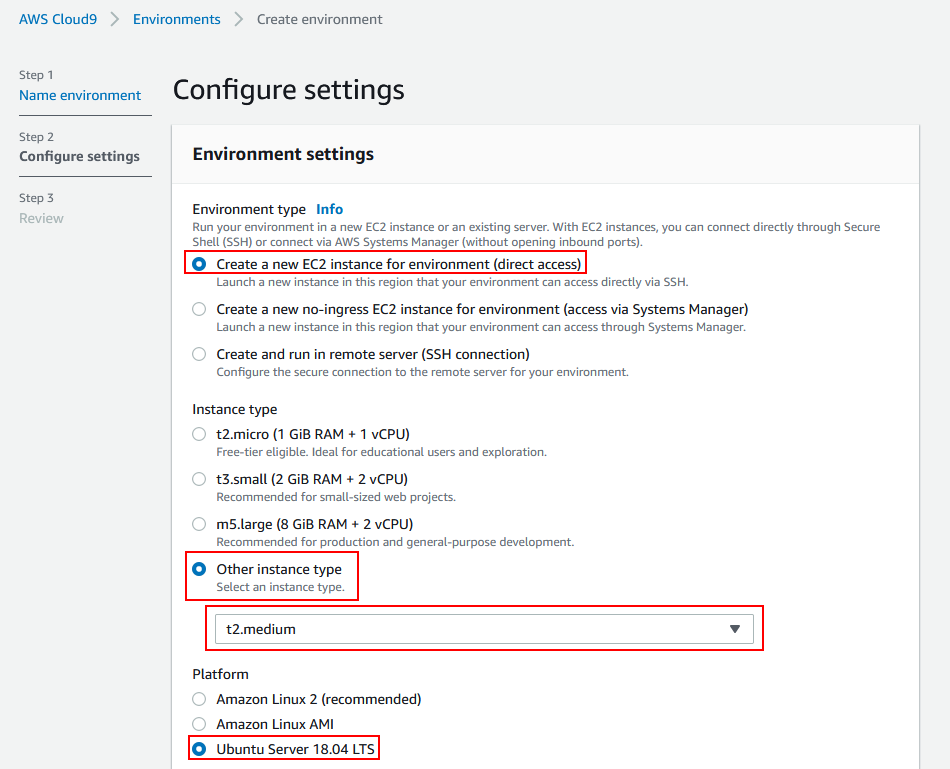
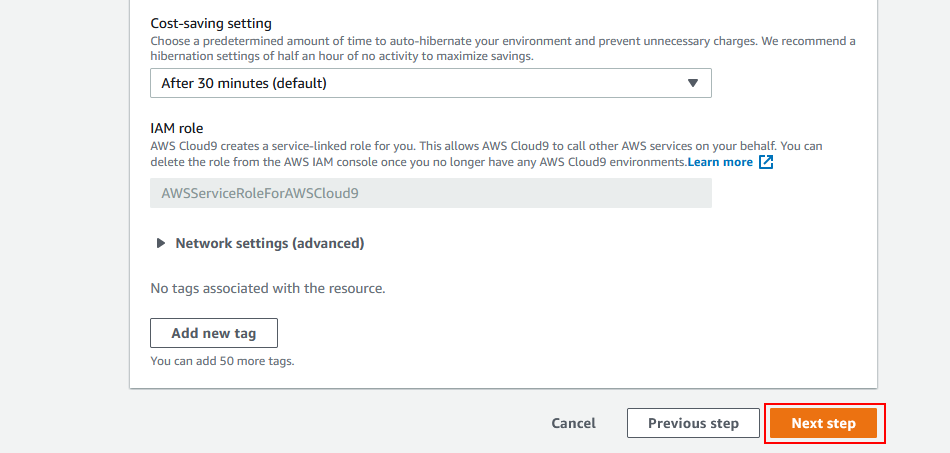
Step 2 - Configure settings:
Environment type:
Create a new EC2 instance for environment (direct access)Instance type:
Other instance type: t2.medium (4 GiB RAM + 2 vCPU) -
Step 3 - Review and click
Create Environment
It will take a few minutes for AWS to create your new C9 environment
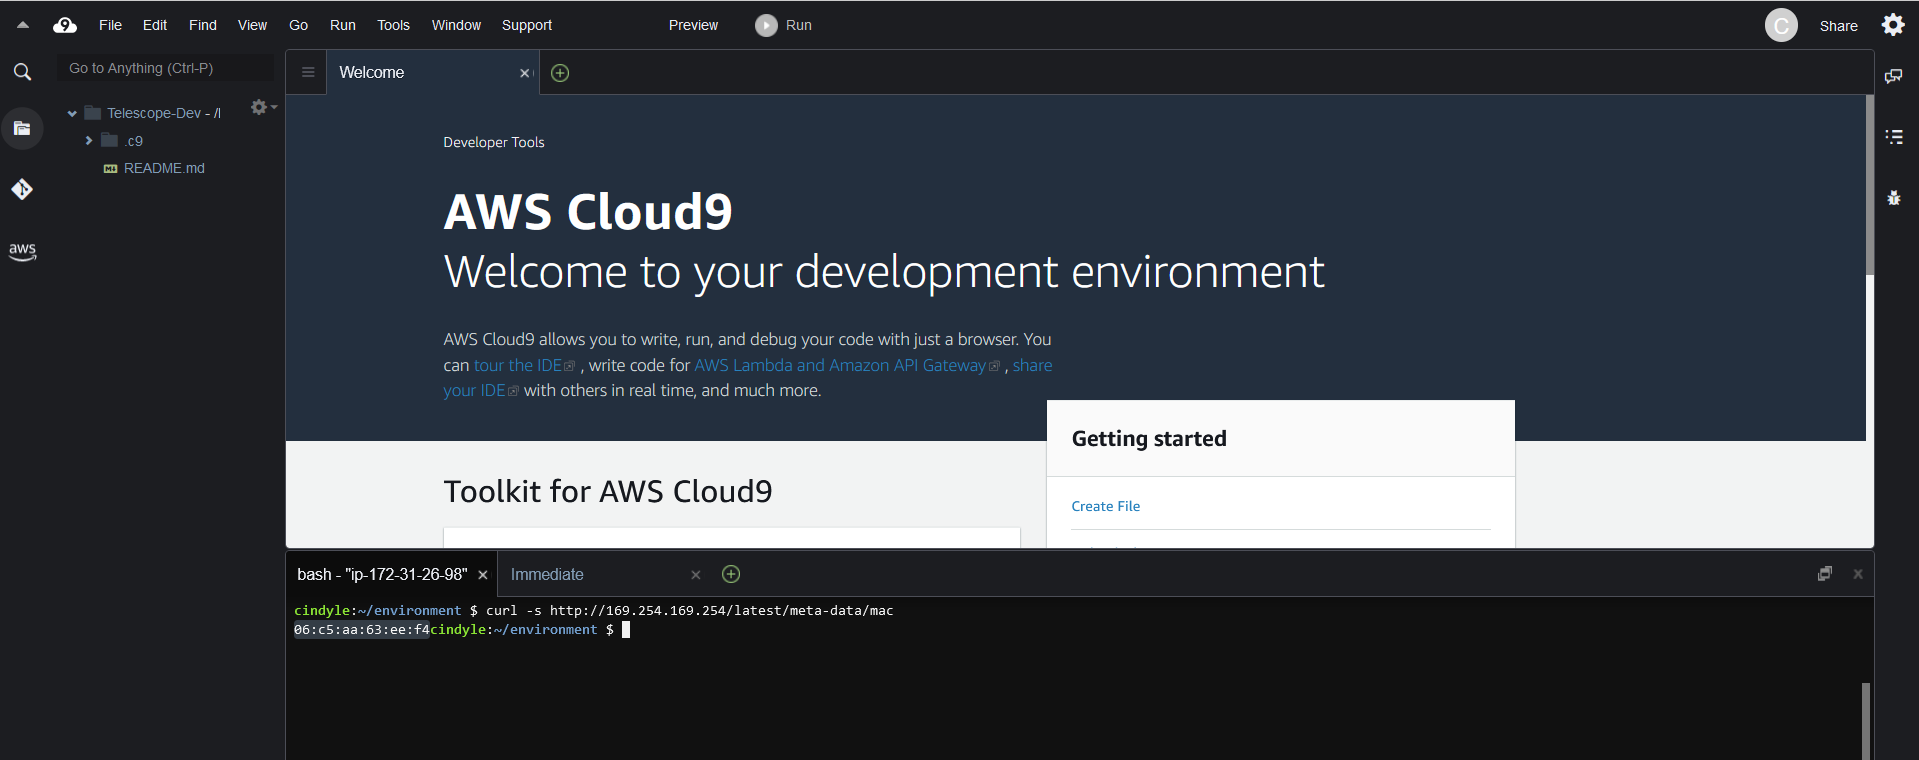
- Firstly, we'll need the MAC address of our EC2 instance
$ curl -s http://169.254.169.254/latest/meta-data/mac

06:c5:aa:63:ee:f4
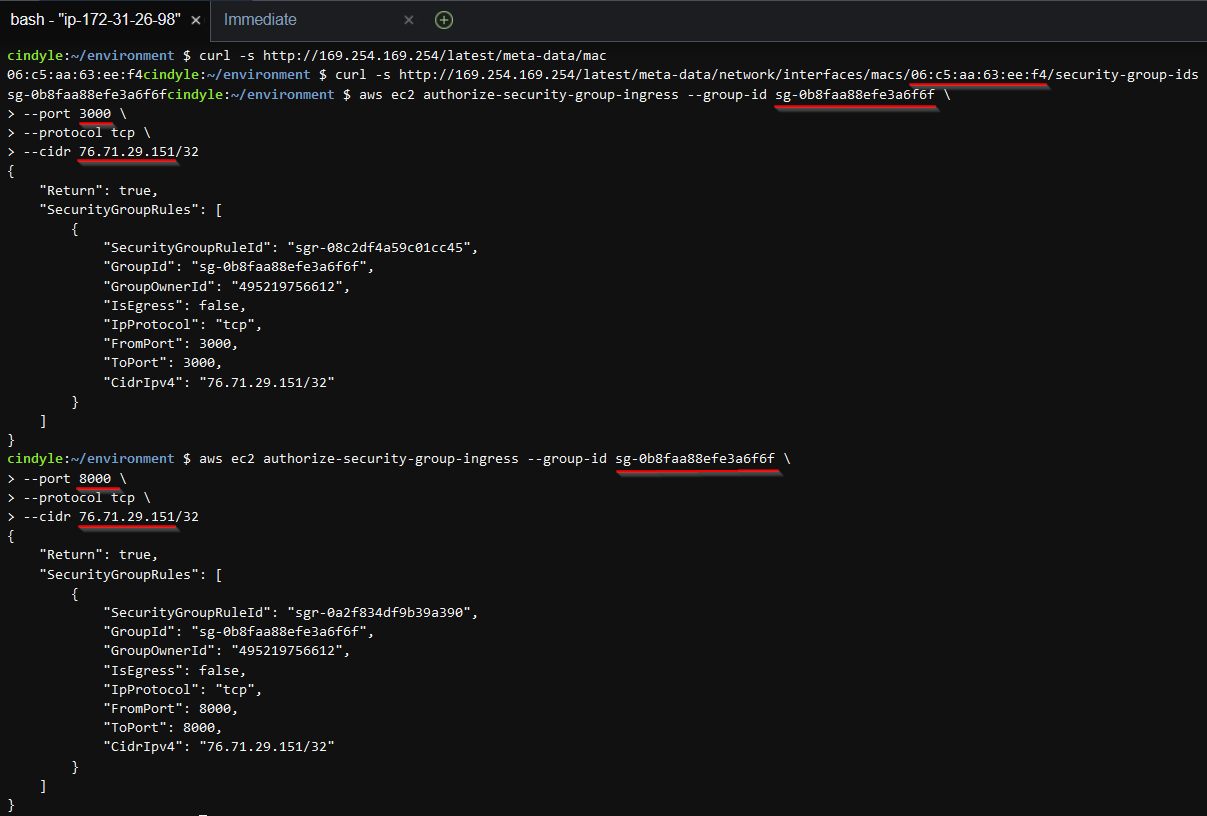
- Using your EC2 instance's MAC address, we can get a list of Security Groups
$ curl -s http://169.254.169.254/latest/meta-data/network/interfaces/macs/<your_mac>/security-group-ids

sg-0c63c6f026a2b9288
- Find out what your IP address is using http://checkip.amazonaws.com/
- You will need to authorize your IP address access to ports 3000, 8000, and 8443
aws ec2 authorize-security-group-ingress --group-id <sg-id> \
--port 3000 \
--protocol tcp \
--cidr <my-ip>/32
aws ec2 authorize-security-group-ingress --group-id <sg-id> \
--port 8000 \
--protocol tcp \
--cidr <my-ip>/32
aws ec2 authorize-security-group-ingress --group-id <sg-id> \
--port 8443 \
--protocol tcp \
--cidr <my-ip>/32
Check first using df -h in the terminal
Filesystem      Size  Used Avail Use% Mounted on
/dev/xvda1      9.7G  9.3G  371M  97% /
When you first create an EC2 instance, it has an EBS Volume of 10GB. To increase it to 20GB, create a new file called resize.sh in ~/environment directory and copy the following script:
#!/bin/bash

# Specify the desired volume size in GiB as a command-line argument. If not specified, default to 20 GiB.
SIZE=${1:-20}

# Get the ID of the environment host Amazon EC2 instance.
INSTANCEID=$(curl http://169.254.169.254/latest/meta-data/instance-id)

# Get the ID of the Amazon EBS volume associated with the instance.
VOLUMEID=$(aws ec2 describe-instances \
  --instance-id $INSTANCEID \
  --query "Reservations[0].Instances[0].BlockDeviceMappings[0].Ebs.VolumeId" \
  --output text)

# Resize the EBS volume.
aws ec2 modify-volume --volume-id $VOLUMEID --size $SIZE

# Wait for the resize to finish.
while [ \
  "$(aws ec2 describe-volumes-modifications \
    --volume-id $VOLUMEID \
    --filters Name=modification-state,Values="optimizing","completed" \
    --query "length(VolumesModifications)"\
    --output text)" != "1" ]; do
sleep 1
done

# Check if we're on an NVMe filesystem
if [ $(readlink -f /dev/xvda) = "/dev/xvda" ]
then
  # Rewrite the partition table so that the partition takes up all the space that it can.
  sudo growpart /dev/xvda 1

  # Expand the size of the file system.
  # Check if we are on AL2
  STR=$(cat /etc/os-release)
  SUB="VERSION_ID=\"2\""
  if [[ "$STR" == *"$SUB"* ]]
  then
    sudo xfs_growfs -d /
  else
    sudo resize2fs /dev/xvda1
  fi

else
  # Rewrite the partition table so that the partition takes up all the space that it can.
  sudo growpart /dev/nvme0n1 1

  # Expand the size of the file system.
  # Check if we're on AL2
  STR=$(cat /etc/os-release)
  SUB="VERSION_ID=\"2\""
  if [[ "$STR" == *"$SUB"* ]]
  then
    sudo xfs_growfs -d /
  else
    sudo resize2fs /dev/nvme0n1p1
  fi
fi
:::info
AWS Free-Tier includes 30GB of Storage, 2 million I/Os, and 1GB of snapshot storage with Amazon Elastic Block Store (EBS) free for 12 months.
:::
In the terminal, execute the script by running
sh resize.sh
Verify size change with df -h again
Filesystem      Size  Used Avail Use% Mounted on
/dev/xvda1       20G  9.3G   11G  48% /
By default, Docker is installed on AWS EC2's Ubuntu but Docker-Compose is not, so we have to install it ourselves.
- Run to download the current stable version of Docker-Compose:
sudo curl -L "https://github.com/docker/compose/releases/download/1.29.2/docker-compose-$(uname -s)-$(uname -m)" -o /usr/local/bin/docker-compose
- Apply executable permissions to the downloaded file:
sudo chmod +x /usr/local/bin/docker-compose
- Check installation using:
$ docker-compose --version

docker-compose version 1.29.2, build 5becea4c
- In the terminal, clone the Telescope repository and name the remote
upstreamby entering
git clone -o upstream https://github.com/Seneca-CDOT/telescope.git
- Change to the telescope directory
cd telescope
- Set all the necessary environment variables in your .env file to contain your EC2 instance's public IPv4 address by executing the
aws-ip.shscript
sh ./tools/aws-ip.sh
- Install all dependencies
npm install -g pnpm
pnpm install
- Start all Telescope services. This will take some time to complete
docker-compose --env-file .env up -d
- Start the Telescope development server on Port 3000
PORT=3000 pnpm start
- Find your EC2 instance's public IPv4
$ curl -s http://169.254.169.254/latest/meta-data/public-ipv4

35.174.16.133
-
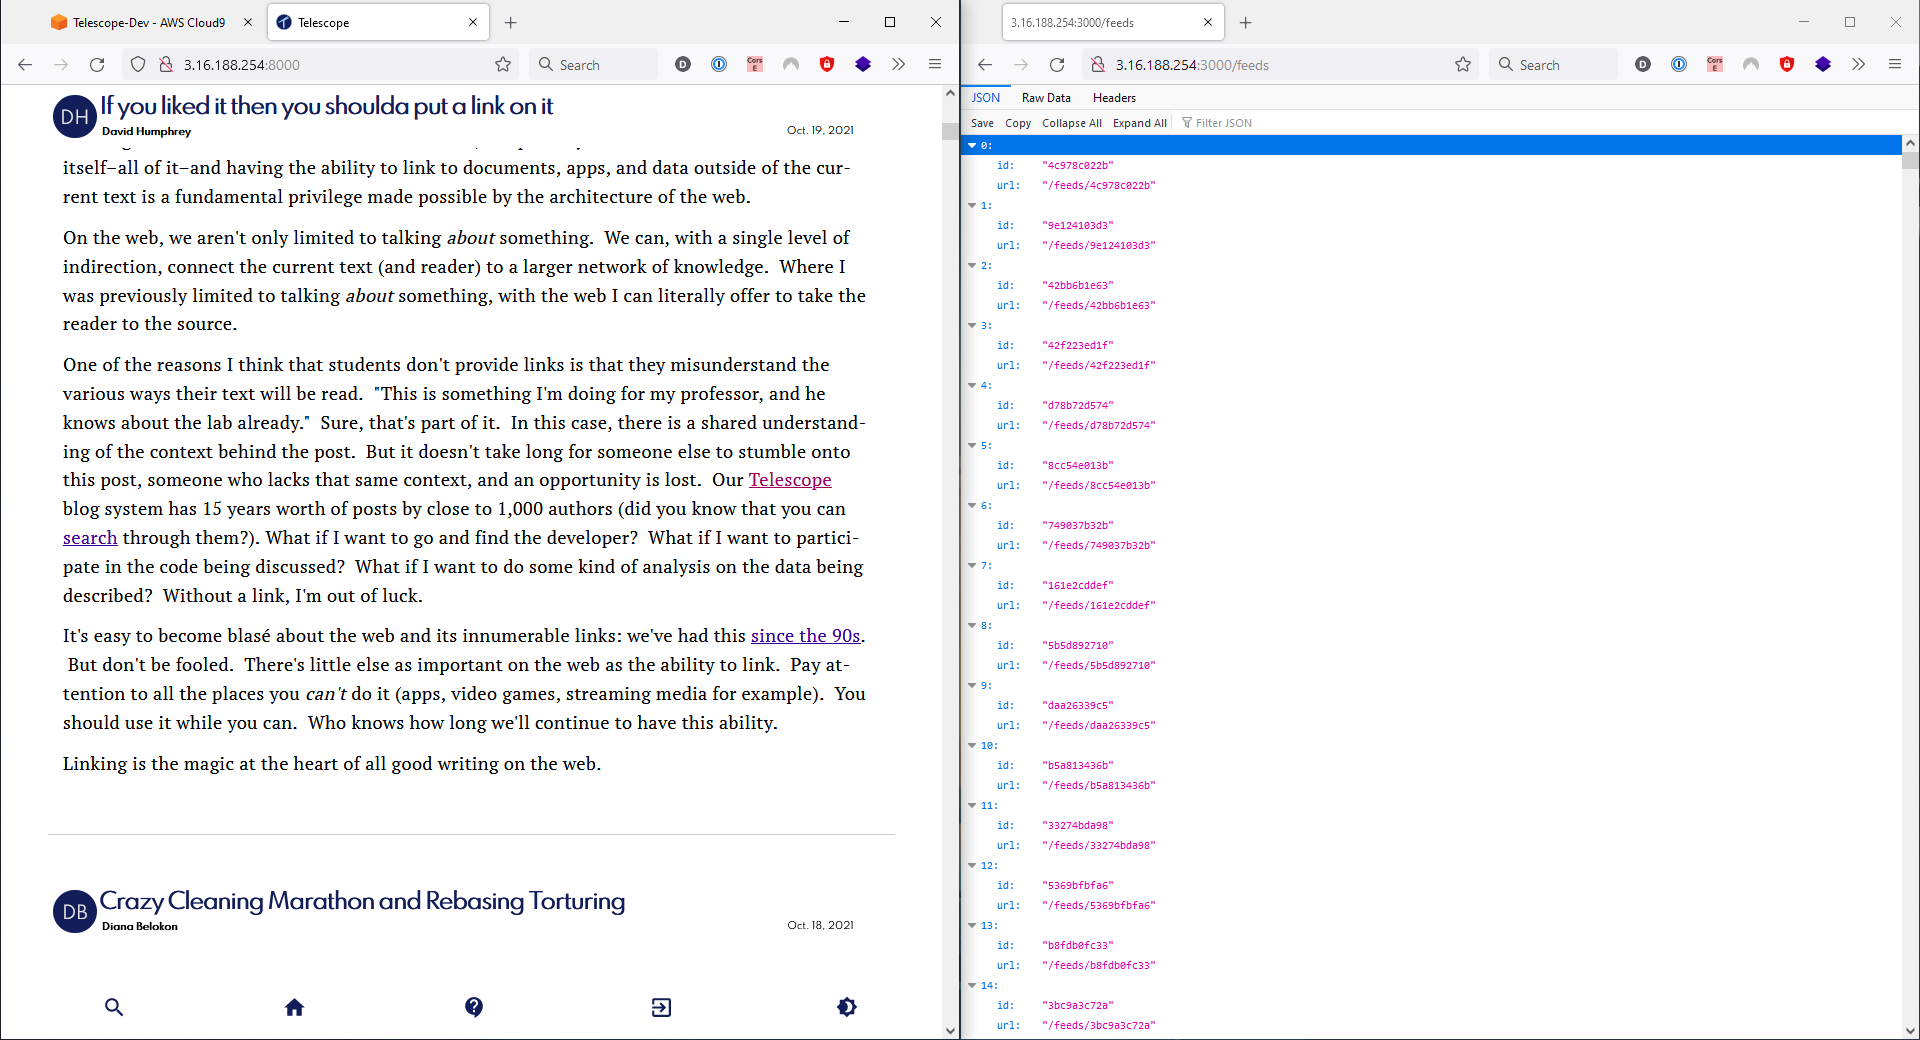
Open
<public-ip>:8000browser tab to see Telescope running on a AWS Cloud9 environment! -
Open
<public-ip>:3000/feedsin another browser tab to see all the feeds in the backend -
Open
<public-ip>:8443/v1/<microservice-port>in another browser tab to see the microservices. For example35.174.16.133:8443/v1/posts
pnpm services:stop
docker system prune -af --volumes
To see a list of all running services and what ports they're binding to
sudo lsof -i -P -n | grep LIST
-
If you have a VPN on, turn it off and get your IP address by visiting http://checkip.amazonaws.com/ then allow your IP address to access the ports 3000 and 8000.
-
AWS may change your EC2 instance IP address when you stop or restart your EC2 instance. One solution is to purchase an Elastic IP address to reserve the particular public IP address. However, you can just clean out your
.envfile and run the./tools/aws-ip.shscript again to set your new EC2 IP address in the appropriate environment variables. Just remember to use the new EC2 IP address in the browser as well.
