An Polygon Starter Kit Tutorial containing React, @web3-react, Alchemy.
Install fundamental environments, including node, web3, react, truffle, etc
\0. Environment Setup
Use Starter Kits build your DAPP right away!
An Polygon Starter Kit Tutorial containing React, @web3-react, Alchemy.
Developer Docs - A Polygon Starter Kit tutorial from Alchemy
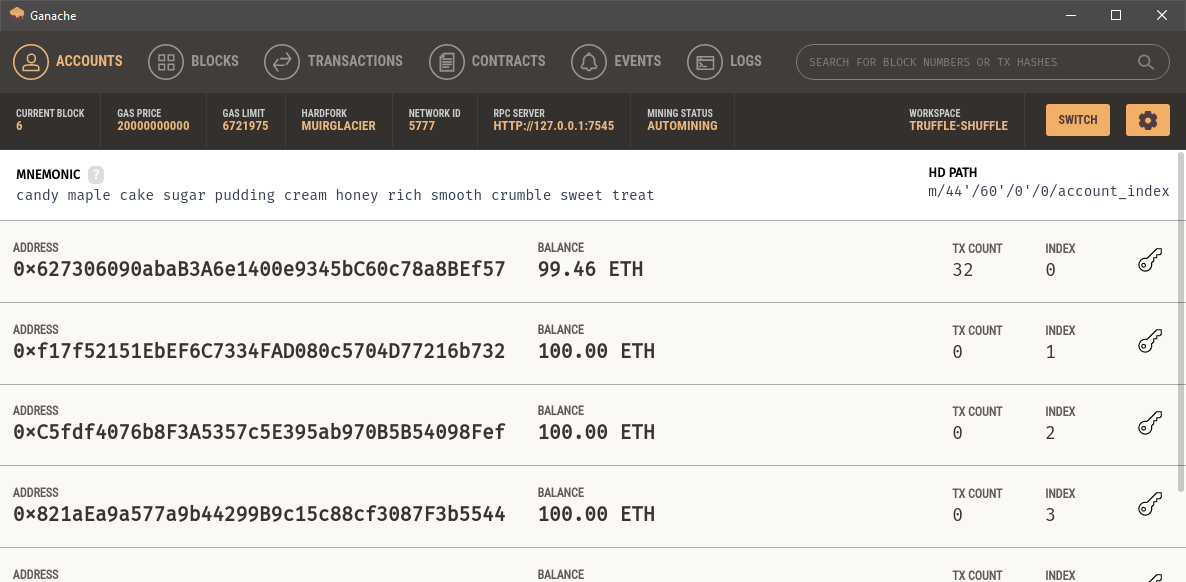
Download Package from https://www.trufflesuite.com/ganache
Ganache Screenshot
granache is needed for dapp development on local blockchain, its capable of viewing txns informations, create workspace folder, deploy smart contracts and tracking its interface.
npm install -g truffle
truflle is used for develop, test, and deploy smart contracts.
More tutorials about truffle: https://learnblockchain.cn/docs/truffle/
\0. Environment Setup
npx create-react-app {YOUR_PROJECT_NAME} --template polygon-starter-kit
cd {YOUR_PROJECT_NAME}
npm run start
(npx comes from npm 5.2+ or later)
Then fireup your browser and go to http://localhost:3000/ to check your application.
When you are preparing to deploy your project to production settings, use npm run build to create a compressed bundle and deploy.
There is no need for you to install or configurate tools like Webpack or Babel. They comes pre-configurated and hiddened, therefore you are provided with the full environment pack where you only need to worry about coding part.
Just create a project with the template, then you are good to go!
You will need to use Node that is higher or equal to version 6 on your local computer(on server you don't have to). There is nvm(macOS/Linux) or nvm-windows to help you eaily switch between different Node versions.
Create a new application
npx create-react-app {YOUR_PROJECT_NAME} --template polygon-starter-kit
Then a new folder named {YOUR_PROJECT_NAME} will be created under current folder location. The File structures under this new folder is as below:
{YOUR_PROJECT_NAME}
├── README.md
├── node_modules
├── package.json
├── migrations
├── .gitignore
├── public
│   ├── favicon.ico
│   ├── index.html
│   └── manifest.json
└── src
	├── App.css
	├── App.js
	├── App.test.js
	├── assets
	│   ├── icon-devx.svg
	│   ├── logo512.png
	│   └── polygon-logo.svg
	├── components
	│   ├── Contents
	│   │   └── index.js
	│   ├── Footer
	│   │   ├── footer.css
	│   │   └── index.js
	│   ├── Headers
	│   │   └── index.js
	│   └── Wallet
	│       ├── ConnectWallet.js
	│       └── WalletInfo.js
	├── contracts
	│   └── Migrations.sol
	├── hooks
	│   └── index.js
	├── index.css
	├── index.js
	├── lib
	│   └── connectors
	│       └── index.js
	├── reportWebVitals.js
	└── setupTests.js
└── truffle-config.js
\0. Environment Setup
const mnemonic = process.env.MNEMONIC;
const HDWalletProvider = require("@truffle/hdwallet-provider");


module.exports = {
  networks: {
    development: {
      host: "127.0.0.1",
      port: 8545,
      network_id: "*" // Match any network id
    },
    polygon: {
      provider: new HDWalletProvider(mnemonic, process.env.POLYGON_RPC),
      network_id: 137,
      confirmations: 2,
      timeoutBlocks: 200,
      skipDryRun: true
    },
    mumbai: {
      provider: new HDWalletProvider(mnemonic, process.env.POLYGON_MUMBAI_RPC),
      network_id: 80001,
      confirmations: 2,
      timeoutBlocks: 200,
      skipDryRun: true
    }
Create .env File under root folder
vim .env
MNEMONIC=" {YOUR_MNEMONIC OR YOUR_PRIVATE_KEY} "
POLYGON_RPC = " {PUBLIC_POLYGON_RPC} OR https://rpc-mainnet.matic.network"
POLYGON_MUMBAI_RPC = " {PUBLIC_POLYGON_MUMBAI_RPC} or https://rpc-mumbai.maticvigil.com/"
More about PUBLIC_RPC please reference on:Development Docs
Polygon-Starter-Kit Project Template Introduction, and how to utilize different modules in it.
1.Project Structure
{YOUR_PROJECT_NAME}
├── README.md
├── node_modules
├── package.json
├── migrations
├── .gitignore
├── public
│   ├── favicon.ico
│   ├── index.html
│   └── manifest.json
└── src
	├── App.css
	├── App.js
	├── App.test.js
	├── assets
	│   ├── icon-devx.svg
	│   ├── logo512.png
	│   └── polygon-logo.svg
	├── components
	│   ├── Contents
	│   │   └── index.js
	│   ├── Footer
	│   │   ├── footer.css
	│   │   └── index.js
	│   ├── Headers
	│   │   └── index.js
	│   └── Wallet
	│       ├── ConnectWallet.js
	│       └── WalletInfo.js
	├── contracts
	│   └── Migrations.sol
	├── hooks
	│   └── index.js
	├── index.css
	├── index.js
	├── lib
	│   └── connectors
	│       └── index.js
	├── reportWebVitals.js
	└── setupTests.js
└── truffle-config.js
migrationsis used to contain JS scripts for smart contract migration and deploymentsrcDAPP Client source codesrc/contractsFor containingsmart contract,and its also the contract location pointer in the truffle configurationsrc/abisfor containing abi files after Truffle Compilationhooks/index.jsinitializeProvider‘s request hook in@web3-react

