A basic demo/example of how to use
Microsoft Auth in a Phoenix aplication.
We love full working examples with step-by-step instructions. This demo shows you how to get up-and-running as fast as possible.
A barebones demo/exampe Phoenix app using
elixir-auth-microsoft
to add "Sign-in with Microsoft".
This demos is intended for people of all Elixir/Phoenix skill levels.
Anyone who wants the "Sign-in with Microsoft"
without the extra steps to configure a whole auth framework.
Following all the steps in this example should take around 10 minutes. However if you get stuck, please don't suffer in silence! Open an issue
Create a new Phoenix project if you don't already have one.
mix phx.new app --no-ecto We don't need a database for this demo.
When prompted to install dependencies
Fetch and install dependencies? [Yn]
Type y and hit the [Enter] key to install.
Make sure that everything works before proceeding:
mix testYou should see:
Generated app app
...

Finished in 0.02 seconds
3 tests, 0 failures
The default tests pass
and you know the Phoenix app is compiling.
Run the app:
mix phx.serverand visit the endpoint in your web browser: http://localhost:4000/
Open your mix.exs file
and add the following line
to your deps list:
def deps do
  [
    {:elixir_auth_microsoft, "~> 1.0.0"}
  ]
end
Run mix deps.get to download.
If you're not sure how to proceed with Azure Portal and
setup your Active Directory application,
please follow the
azure_app_registration_guide.md
to get your client_id
and secret.
By the end of this step you should have these two environment variables defined:
export MICROSOFT_CLIENT_SECRET=rDq8Q~.uc-237FryAt-lGu7G1sQkKR
export MICROSOFT_CLIENT_ID=a3d22eeb-85aa-4650-8ee8-3383931
⚠️ Don't worry, these keys aren't valid. They are just here for illustration purposes.
We need to create two files in order to handle the requests to the Microsoft Azure APIs and display data to people using our app.
So as to display the data returned by the Microsoft Graph API,
we need to create a new controller.
Create a new file called
lib/app_web/controllers/microsoft_auth_controller.ex
and add the following code:
defmodule AppWeb.MicrosoftAuthController do
  use AppWeb, :controller

  @doc """
  `index/2` handles the callback from Google Auth API redirect.
  """
  def index(conn, %{"code" => code, "state" => state}) do

    # Perform state change here (to prevent CSRF)
    if state !== "random_state_uid" do
      # error handling
    end

    {:ok, token} = ElixirAuthMicrosoft.get_token(code, conn)
    {:ok, profile} = ElixirAuthMicrosoft.get_user_profile(token.access_token)

    conn
    |> put_view(AppWeb.PageView)
    |> render(:welcome, profile: profile)
  end
end
Let's review this code:
-
Creates a one-time authentication token based on the
codeand, optionallystatesent by Microsoft after the person authenticates. -
Request the account profie data from Microsoft based on the received
access_token. -
Render a
:welcomeview displaying some profile data to confirm that login with Azure was successful.
Create a new file with the following path:
lib/app_web/templates/page/welcome.html.eex
And type (or paste) the following code in it:
<section class="phx-hero">
  <h1> Welcome <%= @profile.displayName %>!</h1>
  <p> You are <strong>signed in</strong>
    with your <strong>Microsoft Account</strong> <br />
    <strong style="color:teal;"><%= @profile.userPrincipalName %></strong>
  </p>
</section>Note: we are placing the
welcome.html.eextemplate in thetemplate/pagedirectory to save having to create any more directories and view files. You are free to organise your code however you prefer.
The Microsoft Graph API
get_profile
request returns profile data in the following format:
%{
  businessPhones: [],
  displayName: "Test Name",
  givenName: "Test",
  id: "192jnsd9010apd",
  jobTitle: nil,
  mail: nil,
  mobilePhone: '+351928837834',
  officeLocation: nil,
  preferredLanguage: nil,
  surname: "Name",
  userPrincipalName: "[email protected]"
}Open your lib/app_web/router.ex file
and locate the section that looks like scope "/", AppWeb do
Add the following line:
get "/auth/microsoft/callback", MicrosoftAuthController, :indexThat will direct the API request response
to the MicrosoftAuthController :index function we defined above.
In order to display the "Sign-in with Microsoft" button in the UI, we need to generate the URL for the button in the relevant controller, and pass it to the template.
Open the lib/app_web/controllers/page_controller.ex file
and update the index function:
From:
def index(conn, _params) do
  render(conn, "index.html")
end
To:
def index(conn, _params) do
  state = "random_state_uid"

  oauth_microsoft_url = ElixirAuthMicrosoft.generate_oauth_url_authorize(conn, state)
  render(conn, "index.html",[oauth_microsoft_url: oauth_microsoft_url])
endOpen the /lib/app_web/templates/page/index.html.eex file
and type the following code:
<section class="phx-hero">
  <h1>Welcome to Awesome App!</h1>
  <p>To get started, login to your Microsoft Account: </p>
  <a href={@oauth_microsoft_url}>
    <img src="https://learn.microsoft.com/en-us/azure/active-directory/develop/media/howto-add-branding-in-azure-ad-apps/ms-symbollockup_signin_light.png" alt="Sign in with Microsoft" />
  </a>
</section>
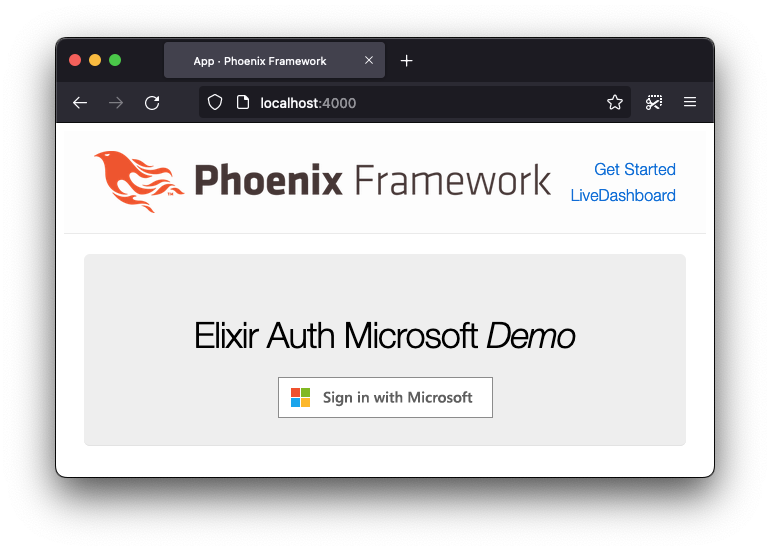
The home page of the app now has a big "Sign in with Microsoft" button:
e.g:
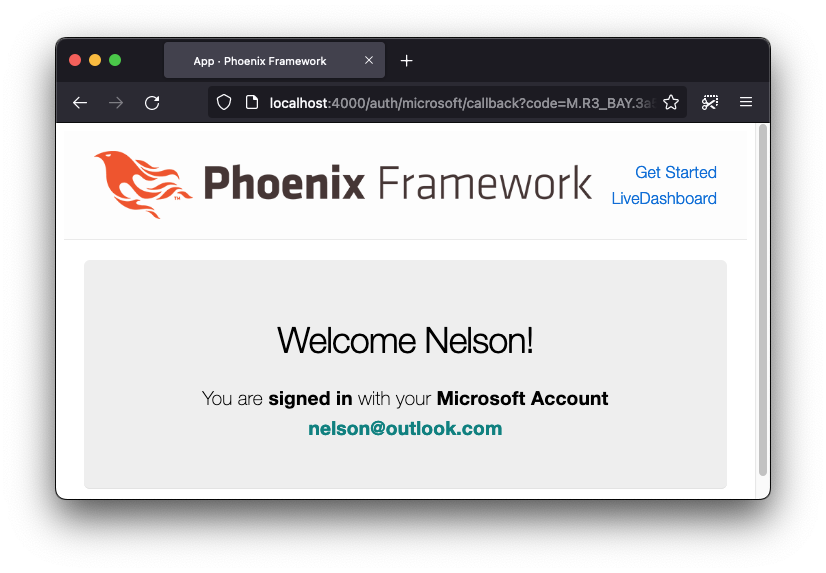
Once the person completes their authentication with Microsoft, they should see the following welcome message, with your account name and display name:
Currently, if you refresh the page, the token is not persisted and you lose your "logged in" status.
To fix this,
we are going to put the retrieved token
in the conn session.
Firstly, let's change the
"app" page to its own.
Go to lib/app_web/router.ex
and add the following route
in the scope "/".
scope "/", AppWeb do
  pipe_through :browser

  get "/", PageController, :index
  get "/welcome", PageController, :welcome   # add this one
  get "/auth/microsoft/callback", MicrosoftAuthController, :index
end
We're going to make the person
redirect to /welcome after successful login.
Go to lib/app_web/controllers/page_controller.ex
and add the following function.
  def welcome(conn, _params) do

    # Check if there's a session token
    case conn |> get_session(:token) do

      # If not, we redirect the person to the login page
      nil ->
        conn |> redirect(to: "/")

      # If there's a token, we render the welcome page
      token ->
        {:ok, profile} = ElixirAuthMicrosoft.get_user_profile(token.access_token)

        conn
        |> put_view(AppWeb.PageView)
        |> render(:welcome, profile: profile)
    end
  end
We are using the
get_session
to retrieve the token from the session.
We've yet to place it there in the first place,
but don't worry, we'll do it next!
If no token is found,
we redirect the person to the homepage to login.
If it is, we render the page normally!
Now let's put the token in the session
after the person logs in successfully.
In lib/app_web/controllers/microsoft_auth_controller.ex,
change the index function to the following:
  def index(conn, %{"code" => code, "state" => state}) do

    # Perform state change here (to prevent CSRF)
    if state !== "random_state_uid" do
      # error handling
    end

    {:ok, token} = ElixirAuthMicrosoft.get_token(code, conn)


    conn
    |> put_session(:token, token)
    |> redirect(to: "/welcome")
  end
We are simply using the
put_session
function to persist the token within the connection session
to later be retrieved by the page
after successful login.
The person is redirected to the /welcome page
we've defined earlier if they manage to login.
And that's it!
If you refresh the /welcome page,
the token won't be lost! 🎉
The person can log in. We should let them log out.
The process of logging out is quite simple:
- the person clicks on the
Sign Outbutton. - they are redirected to Microsoft's website to end their account's session.
- after successfully logging out,
the person is redirected to a
post-logout redirect URI.
For this,
we are going to define a post-logout redirect URI
as part of our app's config.
We can do this by setting the
MICROSOFT_POST_LOGOUT_REDIRECT_URI env variable.
Let's set its value to
http://localhost:4000/auth/microsoft/logout.
Add this to your .env file.
export MICROSOFT_POST_LOGOUT_REDIRECT_URI=http://localhost:4000/auth/microsoft/logout
In addition to this,
we are going to need to define this in
the App Registration in Azure of our app.
If you navigate to the app's App Registration
and to the Authentication tab,
we add the post-logout redirect URI to the
Redirect URIs form.

You'll need to run source .env
so the terminal has access to the newly set env variable.
We need to define our post-logout page in our application.
For this, open lib/app_web/router.ex
and add the following line to the scope.
  scope "/", AppWeb do
    pipe_through :browser

    get "/", PageController, :index
    get "/welcome", PageController, :welcome
    get "/auth/microsoft/callback", MicrosoftAuthController, :index
    get "/auth/microsoft/logout", MicrosoftAuthController, :logout   # add this
  end
Let's add the logout function
to lib/app_web/controllers/microsoft_auth_controller.ex.
This will handle the behaviour once the person
is redirected from the Microsoft page
after logging out.
Open the file and add the following function:
  def logout(conn, _params) do

    # Clears token from user session
    conn = conn |> delete_session(:token)

    conn
    |> redirect(to: "/")
  end
We are simply clearing the person's session and redirecting them to the homepage (so they can log in again, if they wish to).
All there's left to do is adding the sign out button so the person can log out.
Inside lib/app_web/templates/page/welcome.html.heex,
add the button.
  <a href={@logout_microsoft_url}>
    <button type="button" class="rounded-md bg-indigo-50 px-3.5 py-2.5 text-sm font-semibold text-indigo-600 shadow-sm hover:bg-indigo-100">Sign Out</button>
  </a>
We are using the @logout_microsoft_url connection assign.
We need to define this connection assign
inside lib/app_web/controllers/page_controller.ex.
  def welcome(conn, _params) do
    case conn |> get_session(:token) do

      nil ->
        conn |> redirect(to: "/")

      token ->
        {:ok, profile} = ElixirAuthMicrosoft.get_user_profile(token.access_token)

        conn
        |> put_view(AppWeb.PageView)
        |> render(:welcome, %{profile: profile, logout_microsoft_url: ElixirAuthMicrosoft.generate_oauth_url_logout()})   # change here
    end
  end
We are using the generate_oauth_url_logout library function
to create the logout URI that the person is redirected into
after clicking the button.
We use this value to assign it to the conn object with key logout_microsoft_url.
Hurray! 🎉
We've just added log out capabilities to the app!
Now the person will be prompted with a Sign Out button.

Once they click the button,
they're redirected to the Microsoft page
to end the account's session on their identity server.

After they click the account they wish to sign out from, depending on whether or not a post-logout redirect URI was defined, the person is redirected back to the homepage, or shown the following screen if not.

Awesome! We've successfully logged out of our application and from Microsoft's server 😃.


