UTBot has many dependencies, so the easiest way to build the tool from source and develop it is to use the docker container.
UTBot has a published docker package called base_env. It contains all the needed dependencies such as Git, LLVM, GRPC, GoogleTest and others. base_env has multiple versions tagged with dates. If you are developing the tool, you are most likely to need the most recent version from here.
Supported and tested development configuration are Ubuntu 20.04 or Windows Subsystem for Linux (Ubuntu 20.04).
-
Install docker for Ubuntu or WSL+Ubuntu
-
Install docker plugin that allows to mount host filesystem and remap owner and group:
docker plugin install lebokus/bindfs -
Login into github docker registry:
docker login -u <github-username> -p <github-personal-access-token> ghcr.ioYou can create new on this github page. Don't forget to check
read:packagespermission.
More details are described here. -
Run
docker/utbot_docker_dev.shscript. It will unpack the docker image and mount UTBot sources inside it. UTBot binary can be built in the docker and run in it. The script will prompt you to enter docker image tag. You can find the most recent tag here, for example24-11-2021.Installer will ask about
ssh_porton host machine. This port will be forwarded inside container's ssh port (by defaultsshdin container listens 2020). You may then login inside docker viassh utbot@host -p $ssh_port, wherehostis a host machine IP address.⚠ Specify free port that is not in use on host machine!
Also, you will be prompted to enter a gRPC port on host machine that will be forwarded inside container's 2121 port where UTBot listens gRPC requests.
Script will run docker image, mount specified folder on host filesystem into container's filesystem and forward ports for ssh and gRPC.
-
Login via ssh into newly started container
ssh utbot@host -p $ssh_portYou can type
localhostashostif you are inside terminal of a host machine) If you are prompted a password, enterutbot.
- Clone UTBotCpp repository into home directory inside docker container, preferably with ssh.
cdintoUTBotCppdirectory and runbuild.sh— it is the script that builds KLEE UTBot and runs UTBot unit tests- Clone submodules
git submodule update --init --recursive - Navigate to
UTBotCpp/server/builddirectory and launch the binary with./utbot servercommand. Now the server is running.
- Launch VS Code on your local machine. Use VS Code Remote-SSH to get
access to the docker insides. Navigate to
UTBotCpp/serverdirectory and runbuild.shscript. - Install necessary plugins C/C++ Extension Pack , GDB Debug
- Add debug configuration
Run -> Add configurationand choose(gdb) launchset:"program": "${workspaceFolder}/build/utbot""args": ["server", "--verbosity=trace"]
- Configure from CMake
- Build and Run
You can edit UTBot sources, rebuild and rerun the server.
To setup it:
- Open UTBotCpp project in CLion on your local machine.
- Open Settings > Build, Execution, Deployment > Toolchains.
- Add a new Remote Host toolchain.
- In Credentials section, set up an
sshconnection to the UTBot docker container you have. Consider enabling connection via OpehSSH authentification agent to ease files synchronization. -
- Cmake:
/utbot_distr/install/bin/cmake - Makes:
/usr/bin/make - C Compiler:
/utbot_distr/install/bin/clang - C++ Compiler:
/utbot_distr/install/bin/clang++
- Cmake:
- Open Settings > Build, Execution, Deployment > Deployment in mappings Add new mapping from
/utbot_distr/gtestto new local folder - Sync files
- If you work on Windows, in docker install dos2unix and run
find . -type f -print0 | xargs -0 dos2unixin UTBotCpp directory - In docker run
build.shfrom project directory - Load cmake from server/CMakeLists.txt
- Launch VS Code on your local machine. Use VS Code Remote-SSH to get
access to the docker insides. Navigate to
UTBotCpp/vscode-plugindirectory and runbuild.shscript. - Press F5 (Run Extension). This will run UTBot VS Code plugin.
- A new VS Code window will open; this window will have UTBot VS Code plugin enabled. In this new folder,
open
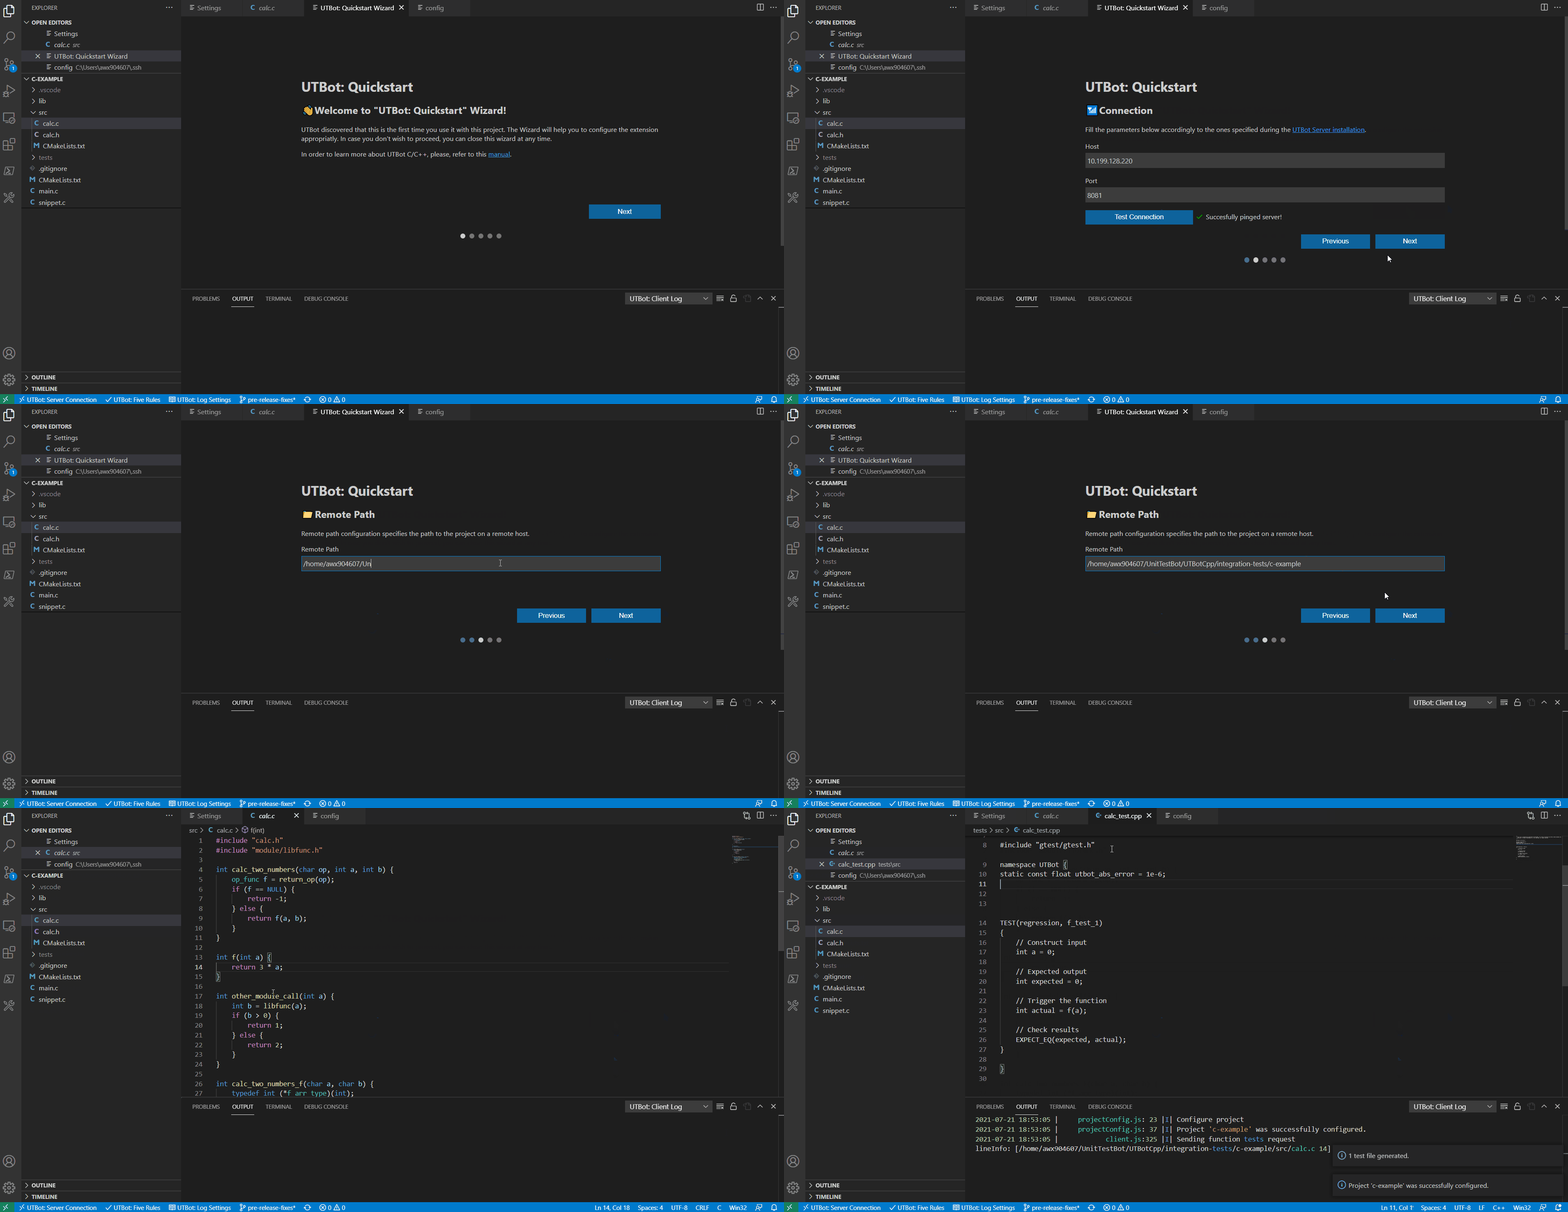
UTBotCpp/integration-tests/c-exampledirectory. - When UTBot Quickstart Wizard requests you to enter server host and port, specify
localhostand UTBot server run port 2121, respectively.
- Select project path as
/home/utbot/UTBotCpp/integration-tests/c-example; - You are now ready to experience UTBot capabilities! You can view possible commands in Command Palette (Press F1 and type in UTBot).
If you want to change UTBot test generation preferences, you can edit them in File > Preferences > Settings > Extensions > UnitTestBot. After UTBot configuration, you can select your source directories with the tab on the VSCode toolbar on the left. Then, you can generate tests with the use of Command Palette. Press F1 and type in "UTBot": You will see tests generation options.