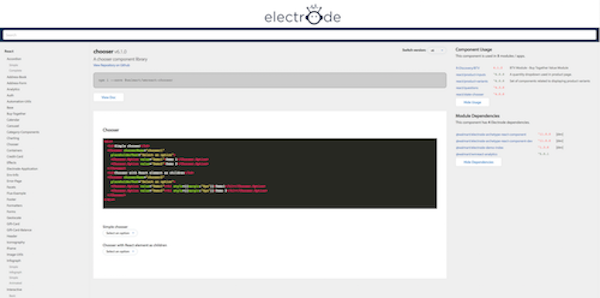
An electrode application that allows you to view all the components in your organization, play with the components, read the component docs, view the different versions of the component, and more - All in your browser.
- node: ">=4.2.0"
- npm: ">=3.0.0"
- Github access token
This is a central place where you can view the following resources.
- Demos of all the components under the organizations you specified
- Documentation of your components
- Dependencies your components have (dependencies)
- Additional components and applications that depend on your components (usages)
There are two ways the components can update dynamically:
- Add GitHub hooks to send POST requests to
/api/update/{org}/{repoName}when a new tag is created - Enable
./server/pollplugin to set up cron job that sends the POST requests every day
To see updates in near real time, use Method #1.
After the server receives the POST request, it fetches the package.json file under {yourGithubUrl}/{org}/{repoName}, and updates data/orgs.json and data/{org}/{repoName}.jsonfiles. If there is a newer version, it will try to download the new component using npm (scripts/install-module.sh) after a waiting period, babel transpile, and webpack the demo module (scripts/post-install-module.sh).
To make the server update immediately or force an update, add a URL parameter to the POST request,/api/update/{org}/{repoName}?updateNow=1.
This post processing script works well with all electrode components. These are components that use our archetype. If you have non-electrode components, you can modify your scripts/post-install-module.sh to babel transpile and bundle your demo files.
// config/default.json
{
  "plugins": {
    "./server/poll": {
      "options": {
        "enable": true
      }
    }
  },

  "githubApi": {
    "version": "3.0.0",
    "pathPrefix": "/api/v3",
    "protocol": "https",
    "host": "github.com"
  },

  "ORGS": [
    // org/user names under which components will be included in the explorer
    // for example, put ["xxx", "yyy"] to include every repo under github.com/xxx and github.com/yyy
  ],

  "REPOS_USAGE_INCLUDE": [
    // consumers need to contain one of these substrings to be included in usages
    // for example, put ["react"] so consumers named /*react*/ will be included in usages
  ],

  "REPOS_USAGE_EXCLUDE": [
    // consumers containing any of these substrings won't be included in usages
    // for example, put ["training"] so consumers named /*training*/ will be excluded in usages
  ],

  "MODULE_PREFIXES_INCLUDE": [
    // only module names beginning with one of these strings will be included in dependencies
    // for example, put ["react"] so only modules with name starting with "react" will be included in dependencies
  ],

  "NPM_WAITING_TIME": 300000, // wait for 5 minutes before `npm install`

  "GHACCESS_TOKEN_NAME": "GHACCESS_TOKEN" // github token variable name, your token would be accessible via `process.env["GHACCESS_TOKEN"]`
}- Install the dependencies.
$ npm install- Export the Github access token or set it as an environment variable.
export GHACCESS_TOKEN=YOUR_GITHUB_TOKENFor development mode, use the following command:
$ clap devOr you can enter the following command:
GHACCESS_TOKEN=YOUR_GITHUB_TOKEN clap devFor production mode, use the following commands:
$ clap buildand
NODE_ENV=production node .Or you can enter the following command:
GHACCESS_TOKEN=YOUR_GITHUB_TOKEN NODE_ENV=production node .Since this is an Electrode application, it can be deployed the same way as any other Electrode app. You can use Heroku by following the steps in our Quick Start or use the More Deployments as a resource.
*Just remember to set your GitHub token as an environment variable.
Want to learn more? Check out our wiki page!
