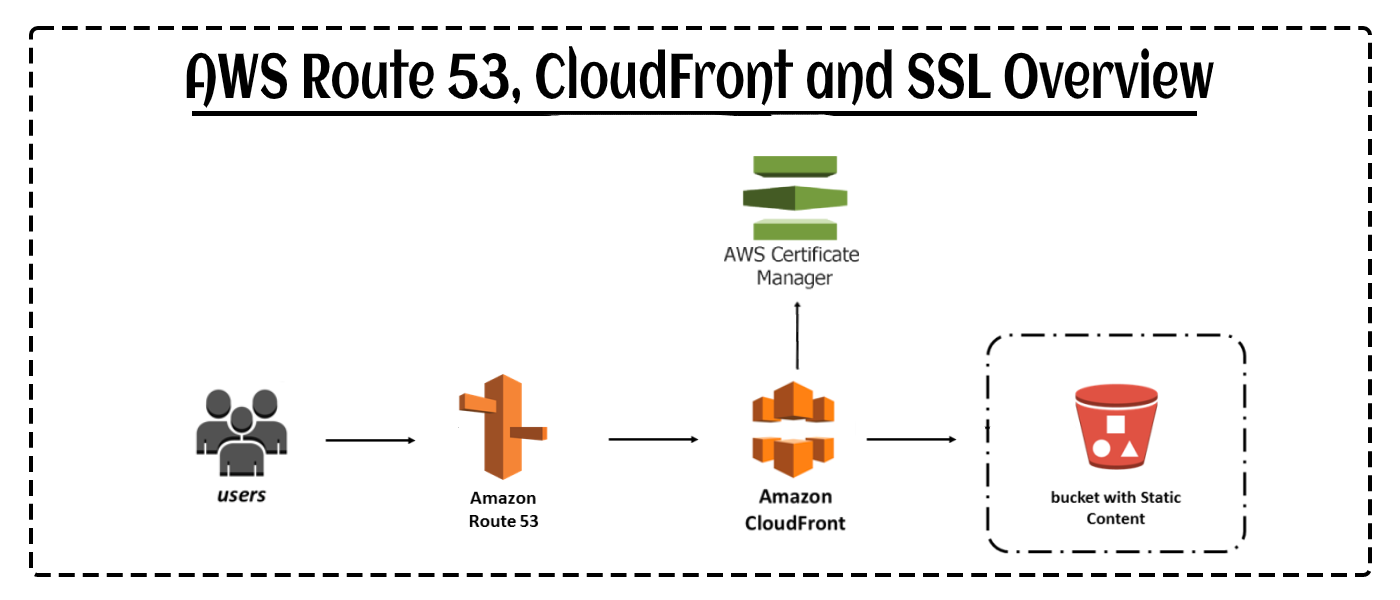
We will learn how to deploy a serverless site from CloudFront using Route 53 and also add SSL Certficate using ACM (Amazon Certificate Manager)
- HTTPS (Secured Protocol with SSL Certificate)
- Custom Domain
Here are the steps for Configuring AWS Route 53, CloudFront and SSL Certificate :
-
Check the previous day documentations for the steps done till now regarding IAM, S3, CloudFormation and CloudFront
-
Add the following Snippet to the
template.yamlbelow the resource tag (This creates a Record in Route 53)
MyRoute53Record:
   Type: "AWS::Route53::RecordSetGroup"
   Properties:
     HostedZoneId: Z04723851ZV06PPOSS6A2 # TODO: Don't hardcode me
     RecordSets:
       - Name: ronitbanerjee.xyz # TODO: Don't hardcode me
         Type: A
         AliasTarget:
           HostedZoneId: Z2FDTNDATAQYW2  # This is CloudFront HostedZoneId (Constant)
           DNSName: !GetAtt MyDistribution.DomainName
For instance, My domain provider is ".xyz"
- Login to your "Manage Domain" page in your Domain Provider's dashboard
- Copy the Name Servers from Hosted Zones in Route53 and paste it in the Custom Name Servers of Domain Provider's dashboard as shown below
Please wait for few hours, it takes time for DNS Propagation
Now it will definitely throw an error, because the process is not completed yet. If you see this screen mentioned below, the above steps are followed correctly
-
Now, ACM (Amazon Certificate Manager) will come into picture
-
Go to ACM in AWS Dashboard
-
Click on "Request" for a certificate and mention your domain name (For Example:
ronitbanerjee.xyzin my case) -
Now verify via DNS Method
- An option to create CNAME automatically will be present
- Click on that and wait for 5 minutes
- This will complete the verification process for the SSL Certificate
-
Go to your IAM User Permissions in AWS Dashboard and give the permission
AWSCertificateManagerFullAccess(Else, it will not make the required changes for HTTPS and throw an error) -
Add the following Snippet to the
template.yamlin the MyCertificate tag and Update MyDistribution tag (This adds the Certificate to your Custom Domain)
MyCertificate:
   Type: AWS::CertificateManager::Certificate
   Properties:
     DomainName: ronitbanerjee.xyz # TODO: Don't hardcode me
     ValidationMethod: DNS


 # MyDistribution:
   # Properties:
     # DistributionConfig:
       ViewerCertificate:
           AcmCertificateArn: !Ref MyCertificate
           SslSupportMethod: sni-only
- Now run command
make deploy-infra - Lastly, add "Alternate Domain" as
ronitbanerjee.xyzin the CloudFront CDN.
AND HOLA! Custom Domain Site is Deployed with HTTPS Protocol


