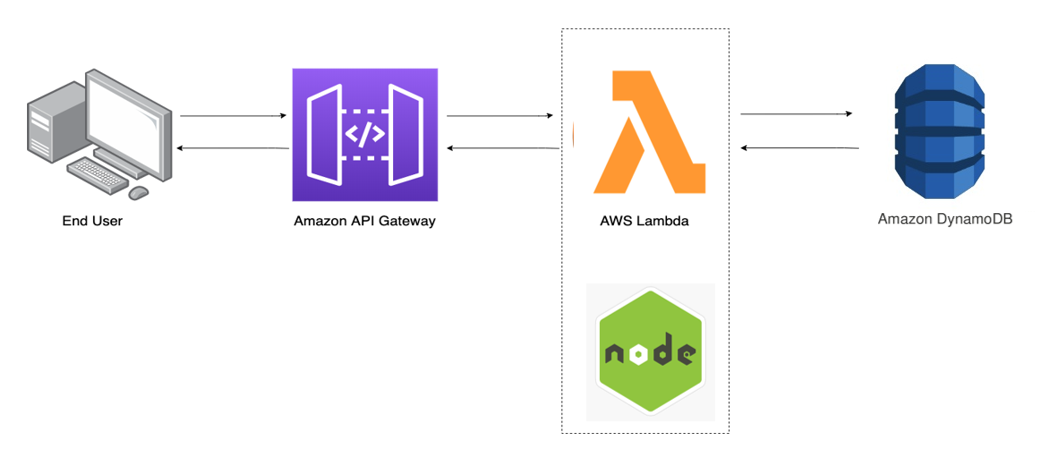
What is DynamoDB?
- It is a NoSQL proprietary Database by AWS
- It can sustain large amount of traffic and highly scalable (It's not relevant in our case though)
- It is also Schema-less, So we don't need to define our data-types upfront
Here, we will setup the DynamoDB and change the configuration in the infrastructure
- Database
- API calls
Here are the steps for Setting up DynamoDB using AWS SAM :
-
Check the previous day documentations for the steps done till now regarding IAM, S3, CloudFormation, CloudFront, Certificate Manager and API GateWay
-
Add
AmazonDynamoDBFullAccessPermission to the IAM user for executing the later tasks -
Add the following Snippet to the
template.yamlbelow Resource tab: (This adds a Table named "ronit-cloud-resume" in DynamoDB)
DynamoDBTable:
   Type: AWS::DynamoDB::Table
   Properties:
     TableName: ronit-cloud-resume
     BillingMode: PAY_PER_REQUEST
     AttributeDefinitions:
       - AttributeName: "ID"
         AttributeType: "S"
     KeySchema:
       - AttributeName: "ID"
         KeyType: "HASH"
- Run command
make deploy-infraand check the tables page in AWS DynamoDB Dashboard, and Click on the table we created viatemplate.yaml - Click on "Explore Items" and Create an item named
example
So, a Sample Table and Item is made in DynamoDB
There are two types of Architectural Patterns -->
1. Monolithic Function
(Putting all code in single Lambda Deployment)
2. Single Purposed Function
(Each Lambda per Functionality)
We are using Single Purposed Function for our case
- We will update the Lambda Functions in the
template.yamlwith the following snippet: (It createsgetandputfuntions, deleting the existingHelloWorldFunction
  GetFunction:
    Type: AWS::Serverless::Function
    Properties:
      CodeUri: get-function/
      Handler: get-function
      Runtime: go1.x
      Architectures:
        - x86_64
      Events:
        CatchAll:
          Type: Api
          Properties:
            Path: /get
            Method: GET
  PutFunction:
    Type: AWS::Serverless::Function
    Properties:
      CodeUri: put-function/
      Handler: put-function
      Runtime: go1.x
      Architectures:
        - x86_64
      Events:
        CatchAll:
          Type: Api
          Properties:
            Path: /put
            Method: GET
-
We also need to replace the
Hello-worldfolder withget-functionandput-functionfolders -
Inside those folders, modify the
go.modfor changing the function name into respective folder names -
And lastly, Change the
invoke URLin JavaScript snippet ofindex.htmlby replacinghello/withget, as mentioned below :
<script>
    fetch('https://lyurpfjw7f.execute-api.us-east-1.amazonaws.com/Prod/get')
        .then(response => response.json())
        .then((data) => {
            document.getElementById('replaceme').innerText = data.count
        })
</script>
- Run command
make deploy-siteandmake deploy-infrato make changes to the stack - Check if the invoke link is returning { "count": "2" } in the Browser Window
AND The DynamoDB is ready to store data over it and turn it Dynamic !
Representation of the Stages in the API GateWay after Deployment


