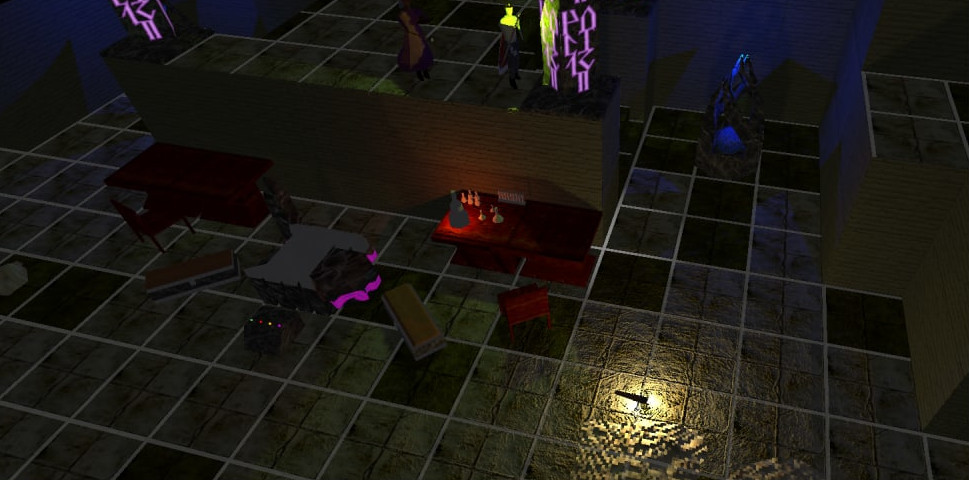
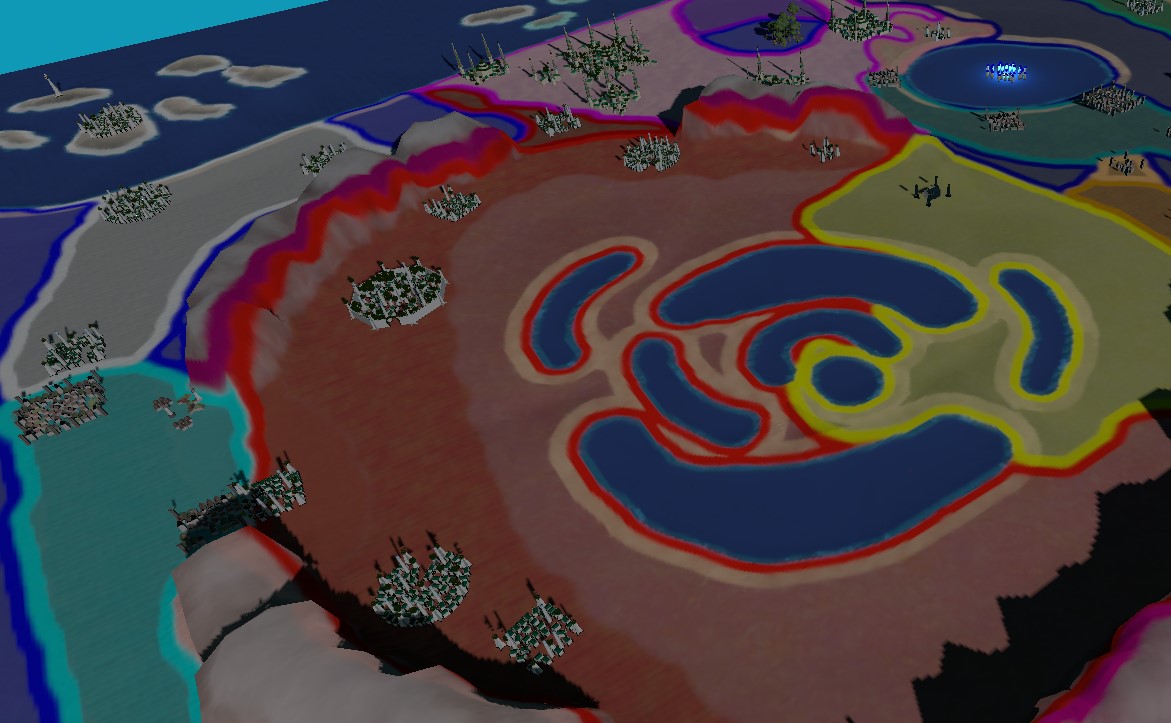
VTT is a multiplayer environment for you and your friends to host and play tabletop roleplaying games. Create magnificent 3D environments or more traditional 2D ones.
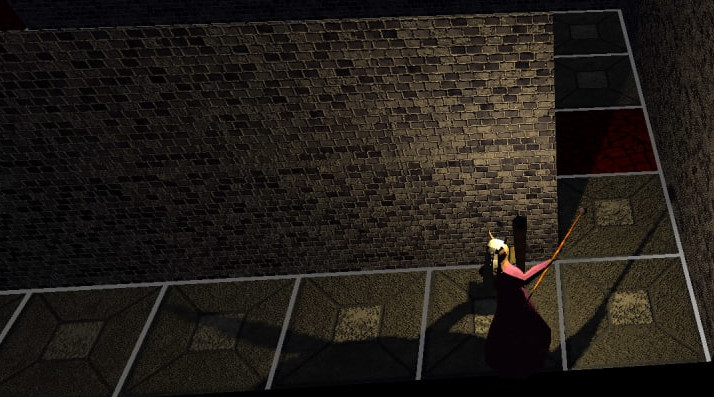
Fully functional shadows with many light sources all casting them at the same time, in real time. Make your players' dungeon experience a completely new one
Create worlds at any scale, from small conflict maps to large overworld ones. No restrictions. No limits.
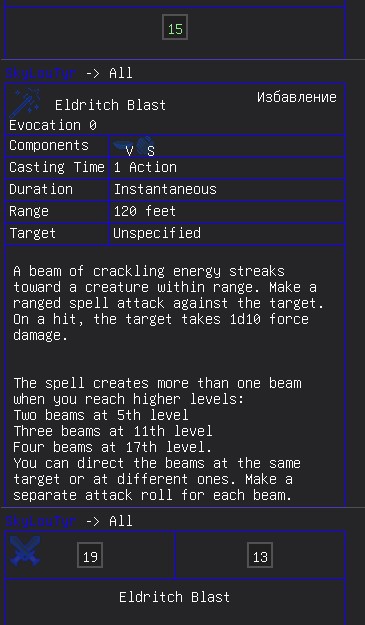
An advanced chat system supporting cryptographically secure dice rolls in various combinations, complex expressions, animated images and much more!
And much, much more, hundreds of features intertwined together to let you create the worlds of your imagination and truly wow your players!
- Displays 3d models or 2d sprites in complex environments of any scale.
- 3D and 2D square grids with customizable grid sizes and grid snapping, extending to infinity.
- A sky system, with the sun positioned according to pitch/yaw controls.
- Fully dynamic real-time 3d shadows for both the sun and up to 16 light sources on the screen (though the scenes themselves support any amounts of light sources)
- A very rich property editor for both objects and maps allows for fine control over any value or property to create truly any environment imaginable. Many of the finer controls have tooltips, explaining exactly what a given property controls in great detail.
- A dynamic fog of war system for both 3D and 2D environments, with all the scalability and fine controls you'd ever need.
- Easy to setup multiplayer - just click host, enter the desired port and let your players connect.
- An advanced distance measuring system that allows you to measure lines, circles, spheres, squares, cubes and cones, highlighting which objects fall into the measured shape, with the ability to leave those measurements in the scene with custom tooltips.
- A fully fledged turn order tracker, reminiscent of those in turn-based games, with portraits and highlights, which even notifies the players when it is their turn.
- Full controls for fine object positioning, rotating and scaling, similar to those in professional 3d game engines such as unity.
- A powerful particle system editor which allows for visual creation of complex particle systems which evolve according to complex rules, all setup with simple interface controls.
- Thousands of icons for status effects, with a built-in search bar.
- Custom health/mana/armour/anything bars for objects, with automatic value calculation for mathematical inputs for ease of use.
- Journals for storing arbitrary text information.
- A rich chat system that uses cryptography for random dice rolls, allows up to 10 million rolls (in a single chat message) that are all rolled and delivered within milliseconds, that supports advanced templates (such as attacks, spells, fancy dice rolls and more) and images (including animated gifs)
- An advanced asset system that supports .glb models and image (.png, .jpeg, .tiff, .gif and similar) sprites. If the required libraries are present on the uploader's side, supports animated images (.webm) too!
- Skeletal animation support for 3d models.
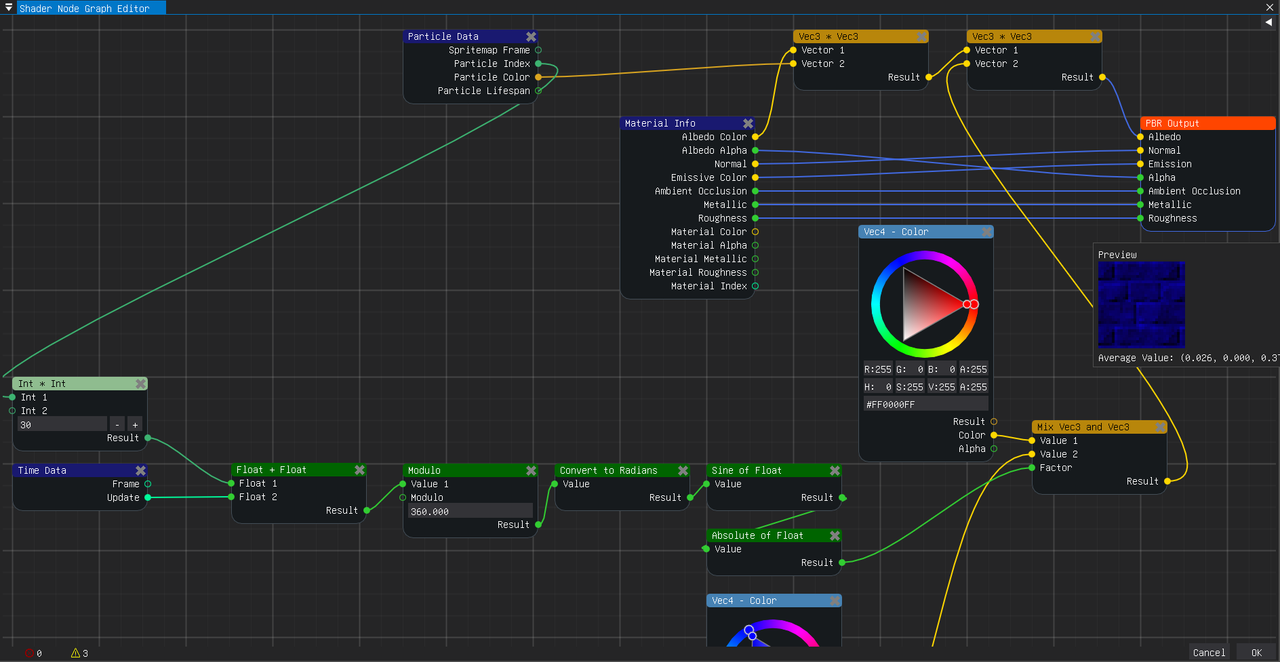
- Custom shaders for objects through a powerful node graph editor.
- Good performance - both the networking and rendering parts of the application offer many optimizations and are built for older hardware, allowing the rendering of very complex scenes with millions upon millions of triangles, dynamic shadows, particles and high-resolution textures, that get delivered to the clients within seconds, all that with a consistently high framerate.
- Audio assets support (.mp3, .wav and .ogg), with automatic compression if ffmpeg is installed that is streamed over network to clients, creating the ability to quickly and easily do music in your games. Supports ambient sounds for the map.
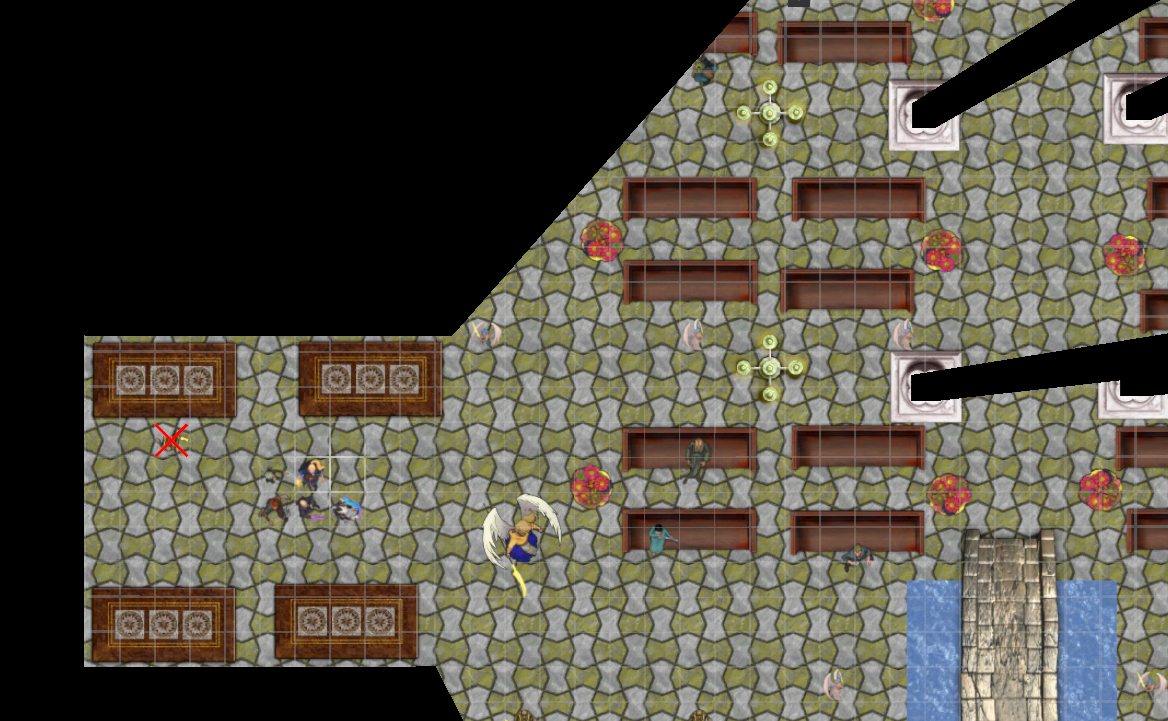
- Dynamic real-time 2D light and shadow powered by ray-tracing.
You can download the application in the releases section. VTT is still in its beta stage and has bugs that are regularly patched, so be sure to check for new releases frequently.
An automatic updater companion app is built-in. When it detects a new version being released it will notify you in the main menu. Updating is as simple as pressing the "Update" button there.
Windows only, but since the application is built with .net core and uses opengl 3.3 it should be relatively simple to run on linux. Note that for a linux installation you will need a compiled glfw3.so library available, as well as any openal library.
There is no installation process, simply unpack the application into any directory and run the VTT.exe executable.
- Application doesn't start-up: Make sure that you have the required components installed and they match the architecture of your os.
- Your players can't connect: Make sure that they are using the right ip address and port, and you have port-forwarded the port you are using for the application.
- Application crashes: Whenever VTT encounters an unrecoverable problem it will shutdown, generating a crash report file in the main application directory. Please submit a bug report in the issues section here, including this file and other relevant information (such as log files).
- My 2D map is fully black for players after switching it from 3D!: Make sure that if you have disabled the sun in your map settings you also disable the sun shadows. If there is no sun, everything is considered to be in shadow by default.
- I can't delete a player's ruler marker: Sometimes the players somehow place their markers slightly above the terrain in 2D mode. You can use the eraser tool to fix that. Make sure to set the radius for the eraser - an eraser with aa radius of 0 won't erase anything. This applies to the eraser for drawings too. Also make sure you are using the right eraser - there is one for drawings, and one for ruler markers.
You can import any 3d model that is a .glb embedded file format. However to display them properly a few things must be present in the model structure itself:
- The model MUST be an embedded glTF 2.0 binary. All textures must be contained within the same file as the model itself.
- At least 1 light should be present, otherwise the preview and portrait will fail to properly render with lighting and will be pitch black.
- The model must use the Z axis as the upwards axis. Many model editors will by default export .glb models with Y axis as the upwards one. Make sure you specify Z as upwards.
- Multiple material slots per object are not supported. Please separate your objects into distinct ones, with 1 material per object.
- The albedo texture must be present for all materials, even if it is a 1x1 white square. Other textures are optional.
- If your modelling software allows, it is recommended to export tangents and bitangents with the model, as automatically generated ones may differ from those of the software and cause rendering differences.
- If multiple cameras are used the first one encountered in the file structure will be used as the preview one. If you want a custom camera for the portrait (turn tracker, inspect menu, etc) you can name the camera object node exactly portrait_camera.
- VTT uses raycasting for object picking in the editor. If your model is very complex it is recommended to simplify the mesh for the raycasting process. You can name a mesh object node exactly simplified_raycast, and if such node is encountered it will not be drawn, but will be used for raycasting purposes.
- It is recommended that you don't export translated, rotated or scaled nodes. Please apply the transformations to the mesh instead, and make the node's origin at 0,0,0. While node transformations are rendered correctly they are not applied when calculating the bounding box for raycasting purposes and when raycasting for performance reasons. Camera and light nodes are exceptions and are allowed transformations.
- All point and directional lights will be exported with the model, and this is in fact how you create lights in your scenes. However due to rendering differences (notably the lack of reflections) the lights may appear dimmer in your modelling editor than they are in VTT.
- It is recommended that you include all required textures with the material (albedo, metallic, roughness, normal and ambient), and that their dimensions match.
- Whichever animation was defined first will be the default animation for the model.
VTT now supports custom material shaders with nodegraph editor!
A custom shader allows you to finely control the output parameters for your material and make them as dynamic as you want. If you are familiar with nodegraph editors then this system should be intuitive.
Hold left click and move the cursor to move the graph. Hold left click over a header of a node to move that specific node. Press the X in the node header to delete it and all its connections. Right-click anywhere that isn't a node to add a new one. Hold Alt while moving any node around to make it snap to grid. Hold shift to preview the output of a given node (experimental). To connect inputs and outputs hold left click on either and drag the line to the connection you want to make. Inputs can only have one connection to them, but a single output can connect to different inputs. If the input is not connected you can manualy edit the values of said input, making it a constant.
The main node is the PBR Output. It can't be deleted and there is only one per material. It has the following inputs:
- Albedo - the color of the pixel, before light calculations.
- Normal - the normal vector of the pixel, used for calculating reflections and specular highlights.
- Emission - the additive color of the pixel after light calculation.
- Alpha - the transparency of the pixel.
- Ambient Occlusion - the multiplier to ambient lighting for the pixel.
- Metallic - a value indicating whether a given pixel is metal or not. Metals have different reflective properties to non-metals.
- Roughness - a surface roughness indicator for a given pixel, controling specular highlight.
You can read more about PBR here (though this guide is very technical).
Certain inputs expect a certain value - a pixel albedo value is a combination of 3 float values, each controling the Red, Green and Blue channels. To help distinguish different required values VTT uses colors.
A boolean value
An integer value
An unsigned integer value
A float (number with a decimal point) value
A 2D vector (2 floats)
A 3D vector (3 floats)
A 4D vector (4 floats)
If a wrong output type is connected to the input it will automatically convert. Note that some data may be lost (a 4d vector converting to a 3d one drops the 4th component entirely). This will also show a warning at the bottom-left of the node graph editor.
Custom shaders are by their nature not friendly to performance. They will require the application to switch between shaders on the fly, which is costly. If UBOs are enabled in the setting (on by default) the switch is much cheaper than with them disabled. Try to avoid having many different custom shaders in a given scene.
VTT now supports 2D raytraced light and shadows!
To use these a given map must have the "Enable 2D Shadows" box ticked. There must also be a background object of any kind present - shadows can't be cast over the void. These are only available for maps that have the 2D mode enabled. 3D maps do not support 2D lights and shadows.
All objects may be marked as either a "2D Shadow Viewer", "2D Light" or both.
An object marked as the viewer will be the central view point for all 2D lights and shadows on the map. If multiple objects are marked as viewers, one will be chosen by the following rules:
- If the object is selected by the player, and they either own the object directly, or the object is owned by all, it will be used.
- Otherwise, if no objects are selected, the object that the player directly owns closest to the cursor will be chosen.
- Otherwise, if no objects are directly owned, the closest object owned by all will be used. Note, that if no objects match these rules, the player will not be able to see the map, as it will be considered shaded fully from their non-existing perspective!
For administrators and observers the rules are slightly different:
- If the object is directly selected, it will be the view point
- Otherwise, the current cursor position will be the view position. Additionally, for administrators and observers any 2D Light marked object also counts as a viewer.
TL;DR; - an object marked as a "2D Shadow Viewer" will be used as the "eyes" for the purposes of shadow casting for the player that owns it. Administrators and observers can preview the player's vision by selecting such object.
The viewer also specifies two distances - the maximum view distance and the "undimmed" distance. Everything located within the "undimmed" radius from the object will be brightly visible. Everything futher away and up to the maximum distance will become progressively dimmer the further away it is. Nothing is visible past the maximum view distance - but other light sources on the map may allow the player to see past their view distance.
A player may also hold the Shift key and move their cursor to slightly adjust their view point - as if their character was slightly moving their head shile staying in one spot. The adjustment distance is based on the size of the object they are viewing from.
An administrator or an observer may hold the Control key to see the shadows as fully opaque - useful for previewing what your players see. The opaqueness of shadows can also be adjusted in the map parameters, and only applies to the administrators and observers - shadows are always fully opaque for players.
If an object is marked as a "2D Light" it will allow all viewers to see past their maximum viewing distance, so long as that point is illuminated by at least one light. A light also specifies two distances - the maximum distance the light reaches, and the distance past which the light will become progressibely dimmer. There is an absolute limit of 64 lights per given map.
For all 2d maps the shadows tool will be visible in the tools panel. To add a blocker for vision/light use the "Add Blocker" tool. Simply draw a box that will block the light/vision. In addition to blockers there are illumination boxes that can be added in the same way. All light viewers within any illumination box will have an effective maximum view distance of infinity, and nothing will be dimmed. Note that illumination boxes themselves do not currently provide any light - though that is subject to change in the future. All boxes can be moved, rotated or deleted with the respective tools. All boxes can also be toggled, which makes them no longer perform their functions, while still being present within the map itself - may be used to toggle doors, or change the outdoors to night, which does not provide illumination.
There is no limit on how many boxes (illumination and blockers) can be present within a map, though there is a less than linear performance decrease as their number increases.
VTT supports webm animated sprites for 2D images (and technically 3D model textures). However before such sprite may be used 3rd party libraries must be installed.
- Download full FFmpeg binaries. The ones that include both the .exe and .dll files are required (specifically, the following files must be present:)
- avcodec-**.dll
- avdevice-**.dll
- avfilter-*.dll
- avformat-**.dll
- avutil-**.dll
- postproc-**.dll
- swresample-*.dll
- swscale-*.dll
- ffmpeg.exe
- ffplay.exe
- ffprobe.exe
- Navigate to VTT data directory. On windows it is SystemDrive/Users/UserName/AppData/Local/VTT. Note that VTT must have been started at least once for the directory to exist.
- Navigate to the Client folder in the Data directory.
- Navigate to the FFmpeg folder in the Client directory. If the folder doesn't exist - create it with the exact name.
- Move all required FFmpeg files listed above into the directory.
After you've done this start up VTT. It should now be able to handle .webm files as animated sprites.
- Please note, that parsing all frames of a video file (which .webm is), baking them onto a single texture and uploading that to the GPU takes quite a while. Animated textures take a considerable amount of time to upload and download, and may take upwards of minutes to do so.
- Only the uploader (server host) needs FFmpeg installed for animated textures to work. VTT will convert the video file into an image sequence that other clients will download and use.
- Please make sure your video file uses a reasonable resolution, length and framerate. VTT for performance reasons will use a single texture for the entire animation, and if there is too much data, all extra frames will be lost. The maximum texture size is limited by the GPU, and is typically 32k x 32k pixels at most on the hardware VTT is built for. If you import a 4k 166fps hour long video there is only so much data that can be packed onto that texture.
The uploader (server host) also needs to perform this process if they wish their game's audio assets to be compressed. As with the animated sprites only the uploader needs ffmpeg installed, the clients do not need to do so.
- Note that the hardware running the server itself (in case VTT is launched as dedicated server) does not need ffmpeg installed. Conversion of both video and audio data happens on the uploader's client side.
In case it is necessary all VTT data can be found at SystemDrive/Users/UserName/AppData/Local/VTT and is stored in one of several formats: .json is editable text data. .ab is raw asset binary. .ued is a custom packed data format. .png is an image (asset preview)
You can edit, move and delete files. An asset file can't be loaded if either .ab or .json are not present, however it is recommended that you delete both if you want to delete either. Please note that .ab is not necessarily the .glb or .png that you've uploaded, and your modelling software may be unable to open them.
Never edit these files while the application is running.
Please do not edit the map fog of war .png files manually. They may be stored as .png but they don't contain easily editable data for any image editing software.
If the uploader for audio had ffmpeg installed and audio is compressed (metadata will specify "SoundType" as 1, and include an array of "CompressedChunkOffsets"), the .ab file is a raw .mp3 file, which probably can be opened by any audio player. Please do not edit the file as the metadata's "CompressedChunkOffsets" array must be extremely precise, and editing the file without reflecting those changes in the metadata will cause issues.
VTT supports partial VSCC integration.
Start the "Roll20" server in VSCC, then in VTT press the "Connect VSCC" button in the escape menu. If it glows green, then the connection is established and you may use VSCC integration as you would with Roll20.
The following options are not implemented:
- Custom scripts that send raw R20 messages, such as the initiative script.
- The "Poll Roll Result" macro action
VTT's chat supports a few commands that a user can input to manipulate the resulting message.
- /r or /roll interprets the next text as a mathematical expression, with xdy syntax for roll commands. Example: /r 10d20 + 3 will roll 10 20-sided dice, and add 3 to a result. It also causes the chat line to be uniquely displayed.
- /w or /whisper will cause the message to only be sent to the recepient specified by a nickname after the first space. Example: /whisper Ally hello! will send the "hello!" message to a player named Ally. Instead of a player nickname, a user may write gm, to send the message to a server admin. Example: /w gm what do they say? Will send the "what do they say?" message to the administrator only.
- /gr, /gm roll or /gmroll functions as a combination of the /roll and /whisper gm commands, sending an expression result to the administrator only.
- /as will send a message as if a currently selected object was the sender. It will display the object's name instead of the sender's and will try to display a little icon (portrait) of that object. Note that this will only work if the currently active map contains that exact selected object.
- /session start and /session end mark the start or the end of a game session. It will display the text "Session Start" or "Session End" respectively aswell as the current timestamp (client's).
Additionally, it is possible to manipulate the chat in a more advanced way with the square bracket syntax. Unlike slash commands these can be present anywhere within the message.
- Simply putting anything in a set of square brackets will interpret it as a mathematical expression and evaluate it. Example: The result is [10 + 20] will display the message "The result is 30", with 30 being hoverable for a preview.
- [d:NAME] is the equivalent of the /w and /whisper commands. Accepts gm as a valid name, which causes the destination to be a server admin, but unlike a typical whisper command accepts spaces and direct client IDs in the form of GUIDs. Example: [d:Alice] you hear a squeal! Will show " you hear a squeal!" message to a player named Alice.
- [c:COLOR] allows you to specify the text color of all text that comes afterwards for this message. It accepts either a hexadecimal number (that may start with #, 0x, or nothing at all and simply be input as a number) in the Argb format a letter u, which will set the color to that of the sender, or the letter r to reset the color to the default. Example: [c:0xffff2222]The Blade[c:r] [c:0xff770077]whispers into your mind[c:r] the command word... will display the message "The Blade whispers into your mind the command word..." with "The Blade" being colored red and "whispers into your mind" being colored purple.
- [t:TEXT] will create a tooltip when mousing over the message with the tooltip's text being the contents of the block.
- [p:TEXT] will not display anything written inside of the block.
- [r:] allows recursive block nesting. Anything past the : will be treated as a chat line to be interpreted.
- [n:TEXT] will replace the sender's name in chat with the contents of the block. Mousing over the name will reveal the real sender's name.
- [o:GUID] replicates the effects of the /as command but allows a direct GUID input instead of the object selection.
- [m:MODE] specifies the message render mode. This is highly internal and will cause crashes if used improperly, but you are welcome to see the expected message structure in this repo's VSCC integration namespace.
- You can escape square brackets in chat by putting a backslash \ before the bracket.
- You can draw in 3D and 2D with the draw tool, located in the toolbar to the left. It is quite primitive due to the 3d requirement but gets the job done.
- For many color edit dialogues the A field at the bottom can control the transparency of the relevant item. For example auras and objects can be made more transparent with this feature.
- VTT includes a very powerful turn tracker, styled to be rpg-like at the top of the screen, with teams, sorting, particles, and more. It even dings your players when it is their turn!
- The turn tracker can be scrolled with the scrollwheel if the mouse is over it. You can return to the default scroll value by pressing the refresh button that appears to the left.
- There are a few camera control tools in the map tab, including the camera snap tool which moves everybody's camera to yours, so they can see from your perspective.
- Uploaded image assets can be right-clicked and have their properties edited in the asset browser for finer display control. You can even mark them as emissive to always glow in the dark without any light.
- Most things have a setting to fine-tune them in the settings tab. Make sure to browse it to tailor VTT to your desires!
- Darkvision is intended for 3D maps, as it siply places a client-only light on the specified object. It won't work for 2D maps, unless they are secretly 3D.
- The fast light system can be used to place hundreds or thousands of lights in your map with little to no impact on performance. These lights don't have shadows, but they can create a wonderful ambiance!
- There are thousands of status effect icons to place on your objects! The status effect window even has a search bar.
- Objects can have their name color be changed through the properties panel. Use the A value to control the blending between the baseline color (specified by the style) and the selected color.
- Objects can have custom nameplates, which are the UI elements the object's names are displayed upon. These custom nameplates also support animations!
- If you hold ALT and then left-click you will open a ping menu. Pings are visible to all players, and they are especially visible if they are offscreen. Pings also make a noise! If you also hold control while holding alt and left-clicking you will open a 'secret' reaction menu. Reactions work like pings, but they dissappear faster, don't make a sound and don't show up if they are offscreen.
- Particles support both animated images and 3D models.
- If you control-click the transition button in the animations section of an object it will transition the animation for all clients immediately.
- Objects can be marked as info objects. When marked as such they will also display their description when moused-over.
- Particles may have variety by using sprite sheets, with fine control over the selection of a given sprite.
- A rudimentary music player that has different playing modes, volume slider, ordering and basic controls.
- Alt-clicking a portrait in the turn tracker will ping that object on the map, so long as it is not hidden. You can also right-click a portrait in the turn tracker to bring up that object's context menu - provided you could do that by regularly right-clicking that object.
- If you control-click the button to move all clients to a map, then it will only move the connected clients to that map.
You can see all the currently known issues in the issues section on github. These are the features currently missing that are planned to be implemented:
- Correct bounding box + raycast position calculation for rotated .glb nodes
- More graceful bad data rejection instead of shutting down
- Automated reconnect attempts with a finer timeout control for clients
- A non-debug interface for connected client information + ability to ban clients.
- Allow for multiple administrators and observers
- Improvements on shadow maps, maybe cascade shadow maps implementation
- Path curves and path following for particles
- Animations for 3D models
- Automatic decimation for shadow meshes
- In app asset deletion
- Better asset management interface
- Sounds (in app and assets)
- Custom material shaders
- Moving away from imgui to a custom interface library
- Moving away from BCnEncoder .Net to manual stb_dxt implementation (for memory management reasons)
If you have any suggestions on what you would like to see implemented, please leave them in the issues tracker here.
- Voice chat client: There are enough dedicated VC clients like Discord that have already perfected VC. A dedicated VC would take a lot of effort to develop and maintain, while adding very little to the overall application.
- Webcam feed: Similar to the VC it would take a lot of effort, reduce the portability of the app, and significantly load the network for relatively little gain.
- Fully-fledged document editor: While journals are intended to store text data, they are not intended to be a fully-fledged document editor. There are great online document editors such as google drive that are intended for this exact purpose.
- Character sheets: VTT is intended to be a general-purpose application, that can be used for virtually any system. Character sheets are usually very specific to their system (dnd, pathfinder, vtm, etc) and introducing them would break the general-purpose nature of VTT.
- Dedicated servers: VTT is currently self-hosted by users who press the Host button. It runs a dedicated server in the background to which all (including the host) connect. While VTT is able to run in a host-less environment (with the -server console parameter) setting up and maintaining dedicated servers is too costly for me at the moment. In addition, VTT was designed with the concept of being self-hosted. At most the dedicated server could serve as a hub for players to see each other's games and connect to them.
Simply clone the repo, open it with Visual Studio and build. Nuget is used to fetch all dependencies and the application is self-contained. In case you don't wish to use Visual Studio the following nuget packages are used:
- CoreCLR-NCalc
- FFmpeg.AutoGen
- glTF2Loader
- ImGui .NET
- NetCoreServer
- Newtonsoft.Json
- NLayer
- NVorbis
- Any native Glfw distribution (project uses Ultz.Native.GLFW but any native package should work)
- NetStandard.Library
- SixLabours.ImageSharp
Everything in the Embed folder is a manifest resource of the resulting VTT.dll
The following command line arguments are available (do not include the square brackets):
-debug [true/false]: Enables/disables debug mode information and hooks without the debugger attached.

-server [port]: Launches VTT without the graphical shell, terminal only, and starts a server on the specified port.

-quick [true/false]: Launches VTT, hosts a server on the default port and connects to that server, bypassing the main menu.

-connect [ip:port]: Launches VTT and tries to connect to the address specified, bypassing the main menu.

-loglevel [Off/Debug/Info/Warn/Error/Fatal]: Specifies the logging level for the internal logger.

-gldebug [true/false]: Launches the app with the OpenGL Debug flag set and sets up the necessary hooks.

-timeout [number][postfix]: Sets the timeout bound for both the client and the server to a specified value. If there was no client/server communication over this period of time the connection closes. Number is any positive number. Postfix indicates the rank, and can be ms(millisecond), s(seconds), m(minutes) or h(hours)

-nocache [true]: If this argument is encountered the server will startup with the asset caching system disabled, regardless of the -servercache parameter.

-servercache [number][postfix]: Sets the maximum server cache buffer before it is trimmed. Number is any positive number. Postfix indicates the rank, and can be b(bytes), kb(kilobytes), mb(megabytes) or gb(gigabytes)

-console [true/false]: forces the console window being shown (true) or hidden (false). If not present the -debug parameter may force the console window to stay open. Win32 only.

-serverstorage [path]: specifies the file system location for the server. This is the folder where all assets/client info/previews/maps/chat/etc are stored.

-clientstorage [path]: specifies the file system location for the client. This is where the client logs/settings/etc are stored.
