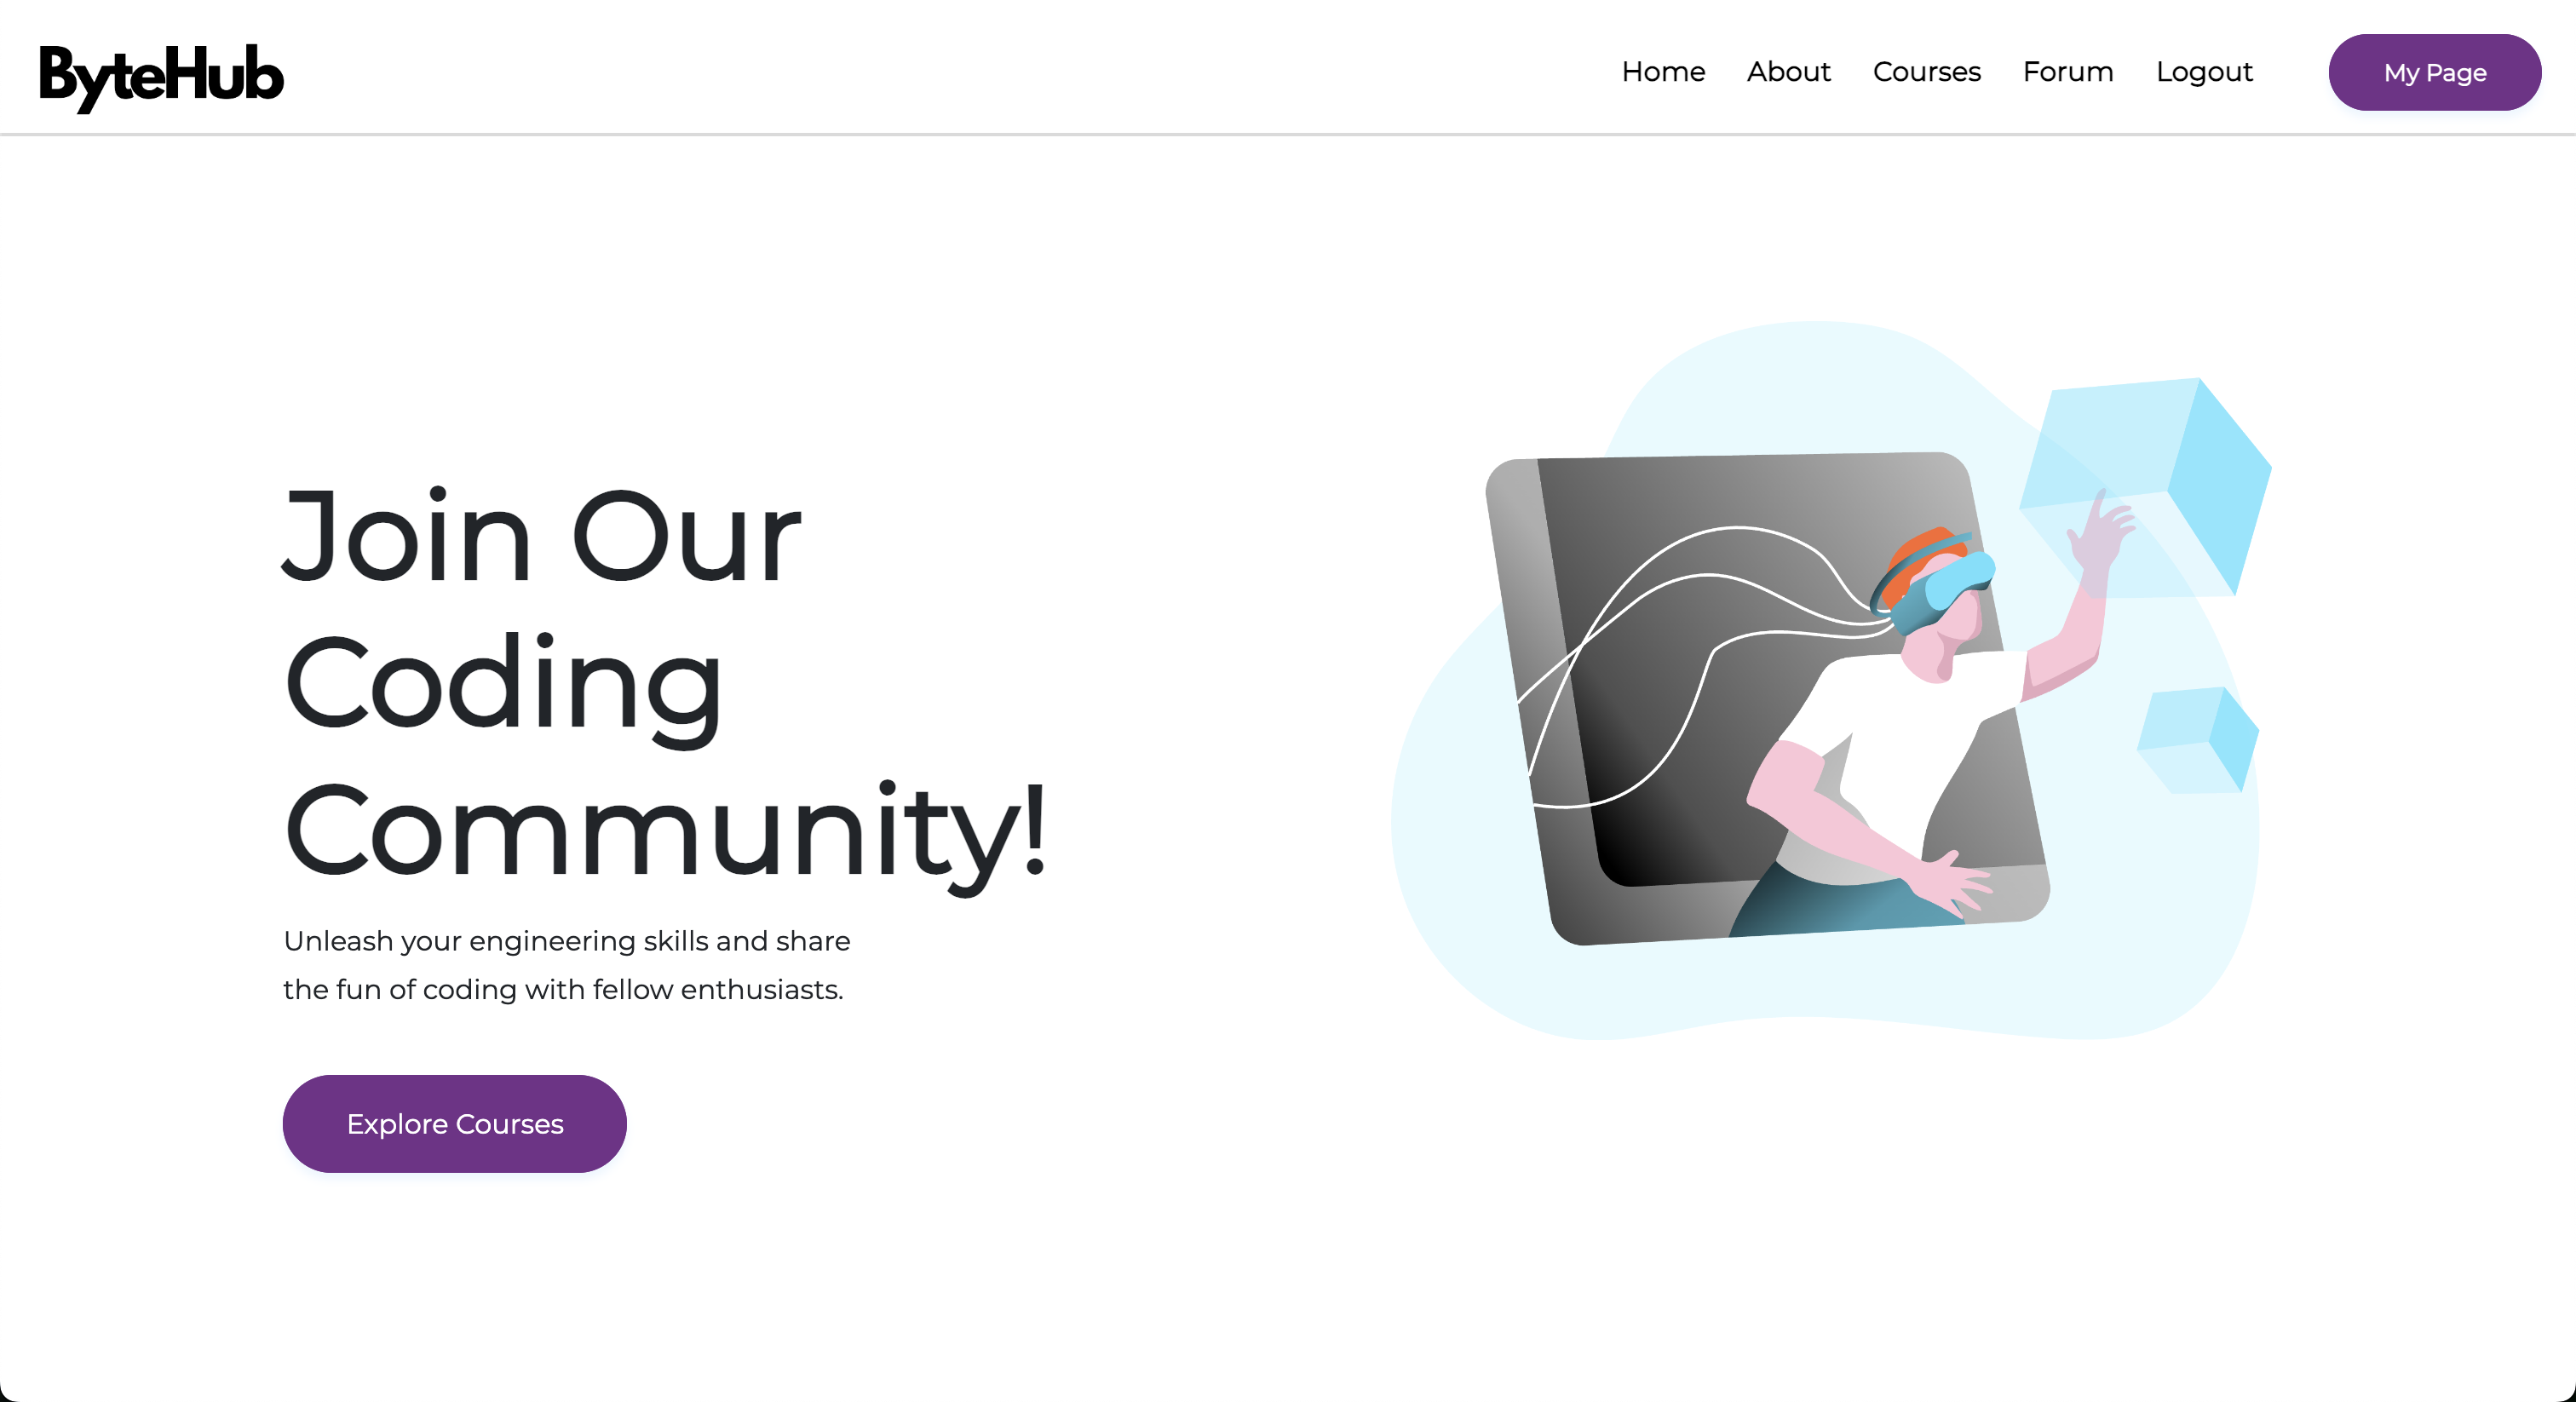
ByteHub is a free and open-source online learning platform template built with Ruby on Rails.
- Highly customizable
- Responsive design
- User authentication/login support
- Account confirmation via mailer daemon
- Online forum where users can post and reply on board
- Multi-language support (I18n)
- Ruby: Version >= 3.x
- Node.js: Version >= 14.x
- npm or yarn for package management
- (Recommended) Ruby version managers, such as RVM, rbenv, chruby, or asdf to adjust the version
ruby -vThe ouput should start with something like ruby 3.0.0
rails -vThe ouput should start with something like Rails 6.0.6.1
node -vThe ouput should start with something like v14.21.3
-
Open your terminal.
-
Navigate to the directory where you want to clone the repository.
-
Execute the following command to clone the repository:
git clone [email protected]:yujisatojr/rails-lms-template.git
-
Once the repository is cloned, navigate into the directory using the
cdcommand:cd rails-lms-template
-
Install dependencies
bundle && yarn -
Initialize the database
rails db:create db:migrate db:seed
-
Start the development server:
rails s
After starting the development server, navigate to
http://localhost:3000in your web browser to view the application.
It's essential to properly set up the master.key and credentials.yml.enc files to manage sensitive information. This guide outlines the steps to set up these files so that you can access credentials within your Rails application.
-
Generate master.key
The
master.keyfile is used to decryptcredentials.yml.enc. If you're starting a new Rails application, this file is generated automatically. However, if you're working on an existing application or have lost themaster.key, you'll need to generate a new one.rails credentials:edit
# Use the command below to specify an editor. (e.g., use 'code' if your preferred editor is Visual Studio Code)
EDITOR="code --wait" bin/rails credentials:edit
Save and close the editor.
-
Setup Credentials
Once you have opened up your editor, add your credentials in YAML format like so:
email:
    username: [email protected]
    password: your_password
Save and close the editor.
-
Access Credentials in Rails Application
To access these credentials in your Rails application, you can use
Rails.application.credentialsfollowed by the key you've defined incredentials.yml.enc.For example, to access the email username:
Rails.application.credentials.email[:username]
-
Ignoring master.key
It's crucial not to commit your
master.keyto version control, especially in production environments. Ensure thatmaster.keyis listed in your.gitignorefile:/config/master.key
This instruction outlines how to configure SMTP settings in specific files such as config/environments/development.rb, config/environments/production.rb, and config/initializers/devise.rb, since this app uses the Devise library for user authentication.
-
Open
config/environments/development.rbThis file contains configuration settings for the development environment of your Rails application. -
Locate the SMTP Settings Section Within
config/environments/development.rb, find the section where SMTP settings are defined. It typically looks like this:config.action_mailer.smtp_settings = { :address => 'smtp.example.com', :port => 587, :user_name => 'your_mailer_username', :password => 'your_mailer_password', :authentication => :plain, :enable_starttls_auto => true }
-
Update SMTP Settings Replace the placeholder values with your actual SMTP settings. For example:
config.action_mailer.smtp_settings = {
    :address              => 'mail.yourmailerdomain.com',
    :port                 => ###,  # Replace ### with your SMTP port number
    :user_name            => Rails.application.credentials.email[:username],
    :password             => Rails.application.credentials.email[:password],
    :authentication       => :plain,
    :enable_starttls_auto => true
}
-
Repeat for
config/environments/production.rb(if applicable) If you have a separate configuration for the production environment, repeat steps 1-4 forconfig/environments/production.rb. -
Update
config/initializers/devise.rbModify the mailer sender to match those used in your development or production environments. For example:config.mailer_sender = Rails.application.credentials.email[:username]
-
Save the Changes
Below is how to use the Rails console to assign an admin role to a specific user.
-
Open Terminal/Command Prompt: Navigate to your Rails application directory using the terminal or command prompt.
-
To start the Rails console, type the following command and press Enter:
rails console -
Once inside the Rails console, execute the following commands to find the user by their email:
u = User.where(email: "[email protected]")
user = u[0]
Replace
"[email protected]"with the actual email of the user you want to assign the admin role to. -
After retrieving the user, you can assign the admin role to the user using the following command:
user.role = "admin"
If the user already has a different role and you want to assign the admin role conditionally, you can use the logical OR operator (
||):user.role = (user.role == "tester") ? "admin" : "tester"
-
After assigning the admin role, save the changes to the user record by executing:
user.save
-
Once you have completed the necessary changes, exit the Rails console by typing:
exit
This section outlines the steps to create a locale value in the en.yml file, stored in the config/locales directory. It also demonstrates how to incorporate this locale value into an .erb file for rendering purposes.
-
Navigate to
config/localesDirectory: Open your Rails application directory in your terminal or code editor. -
Locate or Create
en.ymlFile: Inside theconfig/localesdirectory, locate theen.ymlfile. If it doesn't exist, create it. -
Define Locale Value: Open
en.ymlfile and add the desired locale value. For example:en: greetings: hello: "Hello, world!"
Here,
greetingsis a key, andhellois a sub-key with the corresponding value "Hello, world!". -
Save Changes: Save the changes made to the
en.ymlfile. -
Incorporating Locale into
.erbFile: Now, you can incorporate this locale value into your.erbfile for rendering.For example, assuming you want to use the
hellovalue in a view file (index.html.erb), you can do the following:<h1><%= t('greetings.hello') %></h1>
This
thelper method fetches the translation string from the locale file based on the provided key. -
Verify Changes: Start or restart your Rails server (
rails server) and navigate to the corresponding page where you've included the locale value. You should see the translated text rendered.
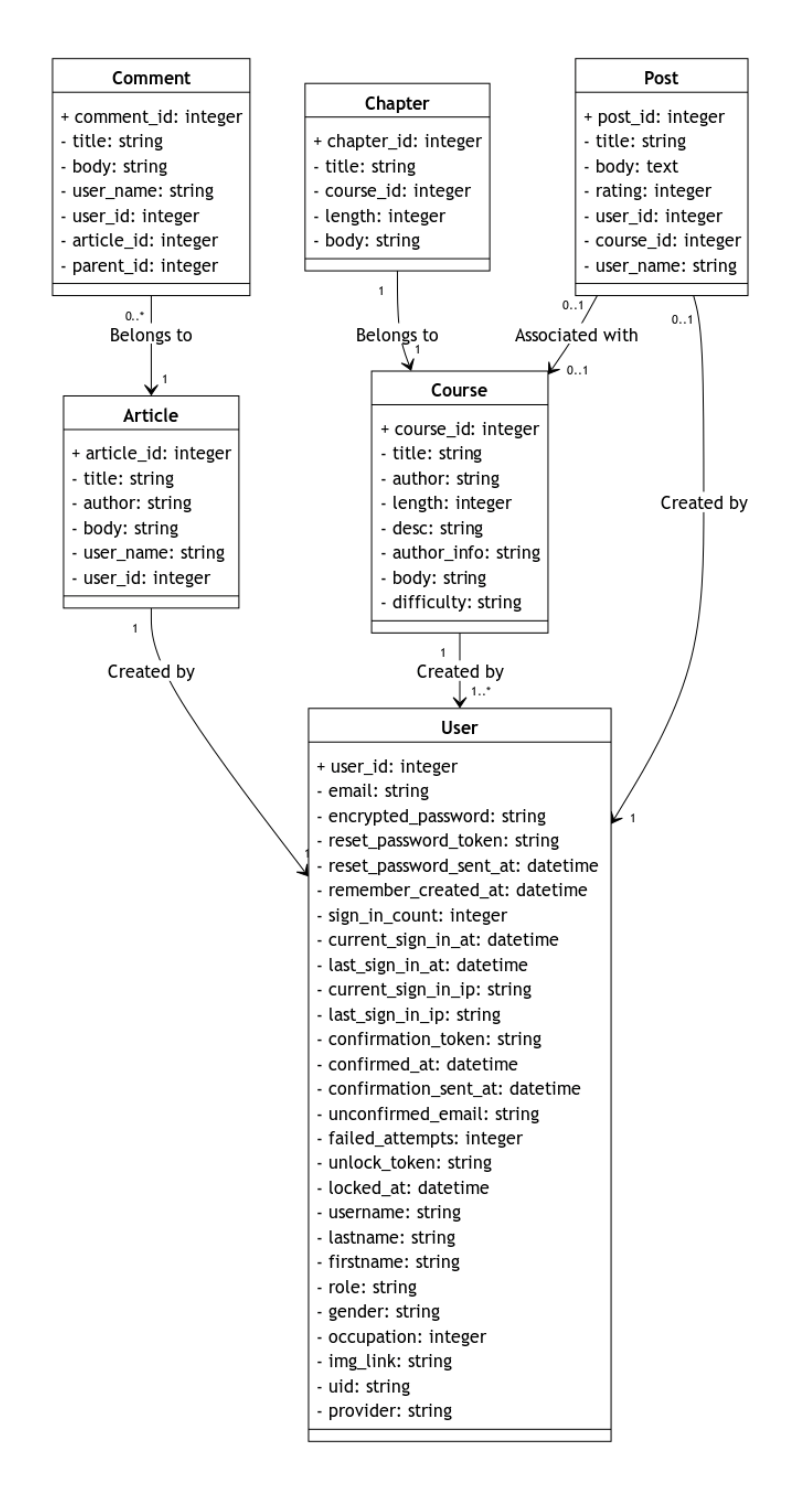
The diagram below shows the contents and relationships between all models used in this application.
To create a new table in your database, follow these steps:
-
Generate a migration file using the following command:
rails generate migration CreateTableNameReplace
TableNamewith the desired name for your table. -
Open the generated migration file located in
db/migrate/. -
Use the Rails migration methods to define the table schema, such as
create_tableand column definitions. -
Run the migration to apply the changes to the database:
rails db:migrate
To add a new column to an existing table, proceed as follows:
-
Generate a migration file using the following command:
rails generate migration AddColumnNameToTableName column_name:data_typeReplace
ColumnNamewith the name of the new column,TableNamewith the name of the table, anddata_typewith the desired data type for the column. -
Open the generated migration file located in
db/migrate/. -
Use the
add_columnmethod within the migration to add the new column to the table. -
Run the migration to apply the changes to the database:
rails db:migrate
To remove a column from an existing table:
-
Generate a migration file using the following command:
rails generate migration RemoveColumnNameFromTableName column_name:data_typeReplace
ColumnNamewith the name of the column to be removed, andTableNamewith the name of the table. -
Open the generated migration file located in
db/migrate/. -
Use the
remove_columnmethod within the migration to remove the specified column from the table. -
Run the migration to apply the changes to the database:
rails db:migrate
If you need to revert a migration, you can use the following command:
rails db:rollback
This command will revert the last migration applied to the database.
For more detailed information on database migrations and ActiveRecord in Rails, refer to the Rails documentation.
Contributions are welcome! If you want to contribute to ByteHub, please fork the repository and create a pull request with your changes.
ByteHub is licensed under the MIT License. Feel free to use, modify, and distribute it according to the terms of the license.

