- A Git repository is a data structure that stores a collection of files, along with the history of changes made to those files over time.
- It is commonly used for version control, allowing multiple people to collaborate on a project, track changes, and manage different versions of the files.
- It can contain folders, files, images, videos, spreadsheets, datasets- anything a project needs!
- Types: 1.Local 2.Remote
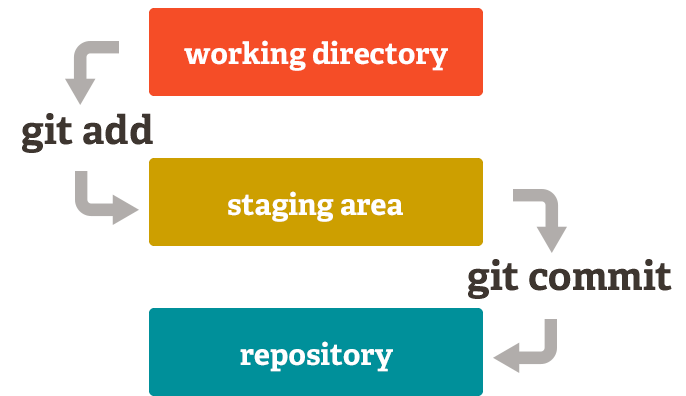
The local repository has three virtual zones or areas viz. working area, staging area and commit area
- Working area: This is where you make changes to your files, like creating new files, modifying existing ones, or deleting them
- Staging area (Index): After making changes in the working area, you add them to the staging area. It acts as a holding area where you select specific changes or files to be included in the next commit.
- Commit area (Repository): When you're ready to permanently save your changes, you create a commit. A commit captures a snapshot of your project with the changes from the staging area. It becomes part of the commit history in the repository.
-
First and foremost, there is no Git repository. To start working with Git, you need to create a Git repository using the command
git init. This sets up the foundation for version control in your project. -
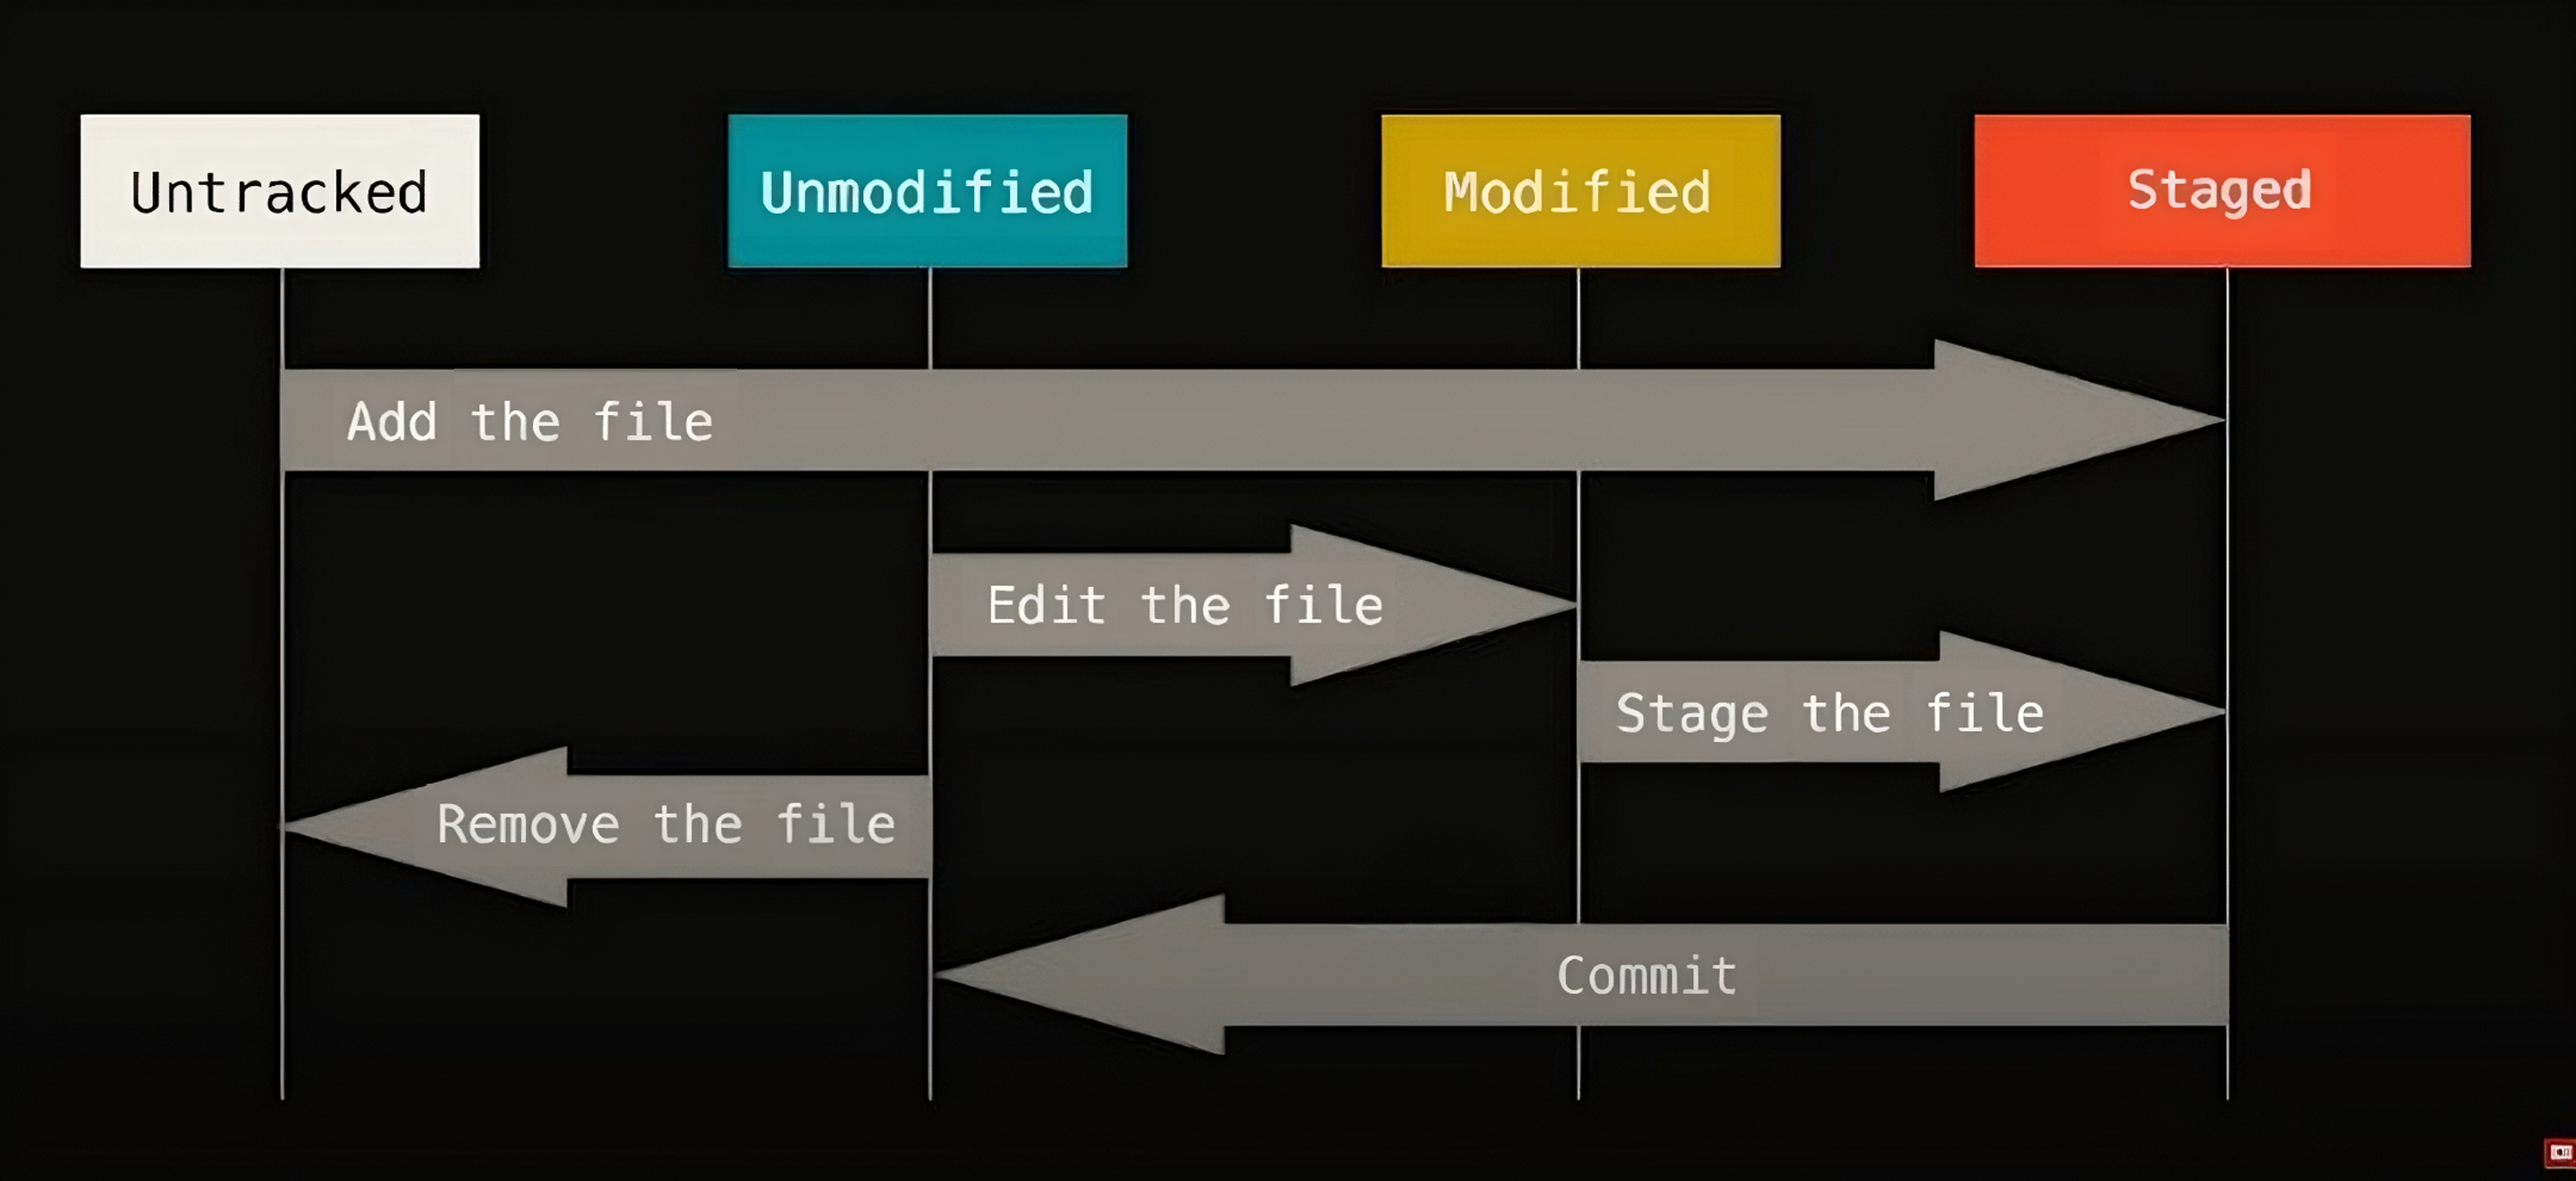
Once the Git repository is initialized, you enter the working directory where you can freely make changes to your project. This includes creating new files, modifying existing ones, or deleting them. The files in this area are considered "untracked" by Git.
-
Once you are done, you can add all these changes or only the required ones to the staging area using the command
git add <filename>orgit add .. This will start tracking the changes, and the files will be "staged". -
When you are satisfied with the changes in the staging area, you can create a commit to permanently save them with the command
git commit -m "Commit message". The files will then move to the commit area and be in the "unmodified" state. -
If you want to make changes to a committed file, the files will be moved back to the working area and will be in the "modified" state. You can repeat the same procedure by adding and committing the changes to create different versions of the code.
-
Additionally, you can stop tracking files by using the
git rm <filename>command. This removes the file from the working directory and stages its removal for the next commit.
-
Initialize a Repository: Create a new Git repository for your project using the command
git init. -
Add Files: Start by adding the necessary files to the repository using
git add <file>orgit add .to add all files. -
Review Changes: Use
git statusto see the status of your files and the changes you've made. -
Commit Changes: Once you're satisfied with your changes, create a commit with a descriptive message using
git commit -m "Commit message". -
Repeat Steps 2-4: Continue modifying files, adding changes to the staging area, and committing as needed.
-
View Commit History: Use
git logto see a history of commits, including their messages and unique identifiers. -
Create Branches: Use branches to create separate lines of development. Start a new branch with
git branch <branch-name>and switch to it usinggit checkout <branch-name>. -
Merge Branches: Incorporate changes from one branch into another using
git merge <branch-name>. -
Handle Conflicts: If conflicts occur during a merge, resolve them manually by editing the conflicting files, then add and commit the changes.
-
Connect to Remote Repository: Connect your local repository to a remote repository using
git remote add origin <remote-url>. -
Push to Remote Repository: Upload your local commits to the remote repository using
git push origin <branch-name>. -
Pull from Remote Repository: Download the latest changes from the remote repository using
git pull origin <branch-name>. -
Clone a Repository: Create a local copy of a remote repository with
git clone <remote-url>.