To get the website running locally, you will need to do the following:
- Install
git-restore-mtime, which provides some git utilities. On Ubuntu, you can run:
For Ubuntu
sudo apt install git-restore-mtime
For Mac OS (Homebrew)
brew install git-tools
- Use nvm (node version manager) to install node v18.14.2 (latest stable)
For Ubuntu
curl -o- https://raw.githubusercontent.com/nvm-sh/nvm/v0.39.3/install.sh | bash     //install nvm
nvm install v18.14.2
nvm alias default v18.14.2
which node  //checks current node version
For Mac OS
brew install nvm
source $(brew --prefix nvm)/nvm.sh     // Add nvm to your shell profile (restart terminal after running)
which node  //checks current node version
- Activate corepack to install pnpm
For Ubuntu
corepack enable
corepack prepare pnpm@latest --activate
For MacOS
brew install corepack
corepack prepare pnpm@latest --activate
If both do not work and you have a node version beyond 18.04 you can try manually installing pnpm via npm (Ubuntu/MacOS)
npm install -g pnpm
If it still doesn't work for macOS, try manually installing pnpm through homebrew
brew install pnpm
- Fork the project and install project dependencies
git clone [email protected]:thinkingmachines/unicef-ai4d-research-bank.git
cd unicef-ai4d-research-bank
pnpm install
- Create
.env.localbased from the.env.samplefile. Update theVITE_HOME_PATHto use the new project name
// env.local for a forked project with the name "unicef-ai4d-research-bank-external"

VITE_HOME_PATH=/unicef-ai4d-research-bank-external
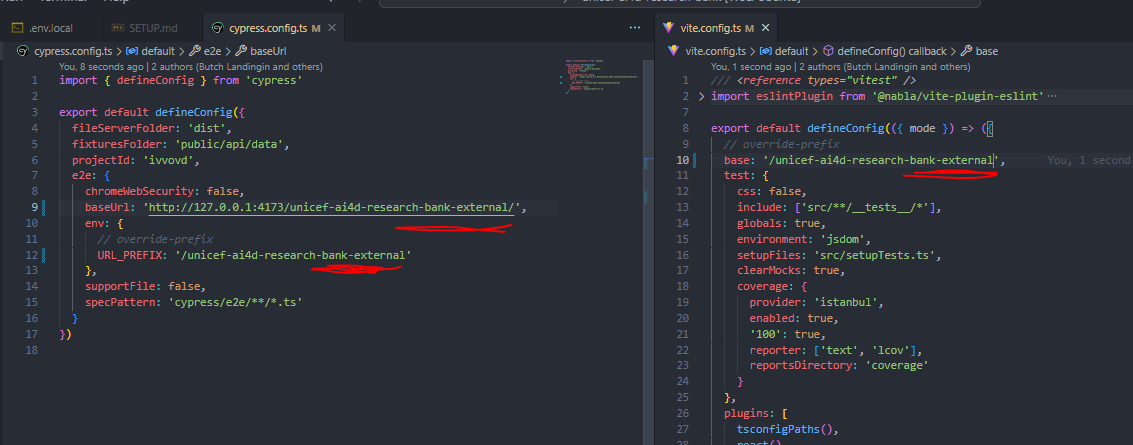
- Update all instances of the original project name
unicef-ai4d-research-bankinvite.config.ts,cypress.config.ts,.env.github, andpackage.jsonto your newly forked project name. Image below shows an example for a new project with the nameunicef-ai4d-research-bank-external
-
Install a python virtual environment. You can use virtualenv for this.
-
In your virtual environment, run the following command to install the required python libraries
pip install -r requirements.txtMake sure to set your virtual environment before running the next steps
- Generate a
catalog.jsonfile. This file will be based on theyamlfiles in thecatalogdirectory
pnpm merge-catalog
- Run the web app using
pnpm dev
- Build the web app for production using
pnpm build:test-env. This required since Cypress tests against the production build using a fixtures catalog database. - [Optional for WSL users] You may need to install some extra dependencies in your linux system as show in the cypress docs. In case you get weird issues like
gpu_memory_buffer_support_x11.cc(44)], you may need to reset your wsl instance by typingwsl --shutdownin powershell or by restarting your device. - Run
pnpm test:e2e:headlessto run all the current tests orpnpm test:e2eto run the GUI which allows you to run tests on a per file basis and visualize how your tests run.
Forking the project will copy all the build and deploy scripts, but you will need to manually update some other settings for the project to properly deploy
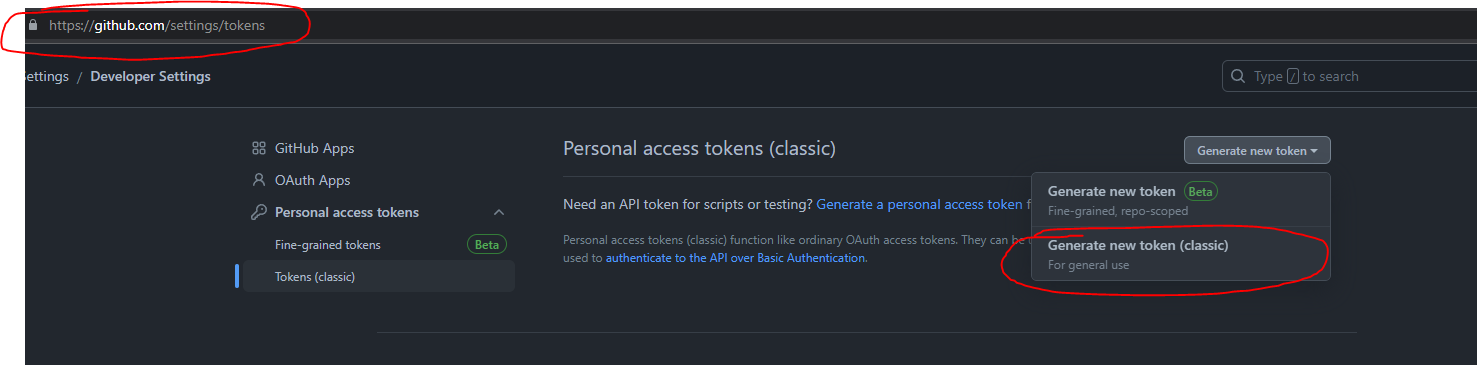
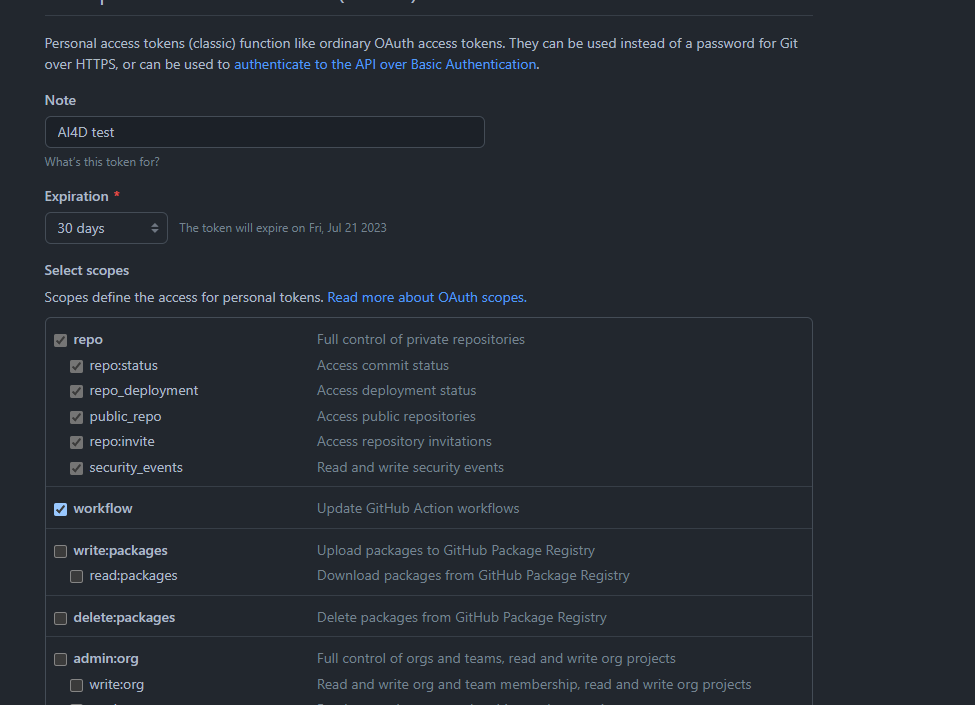
- Create a
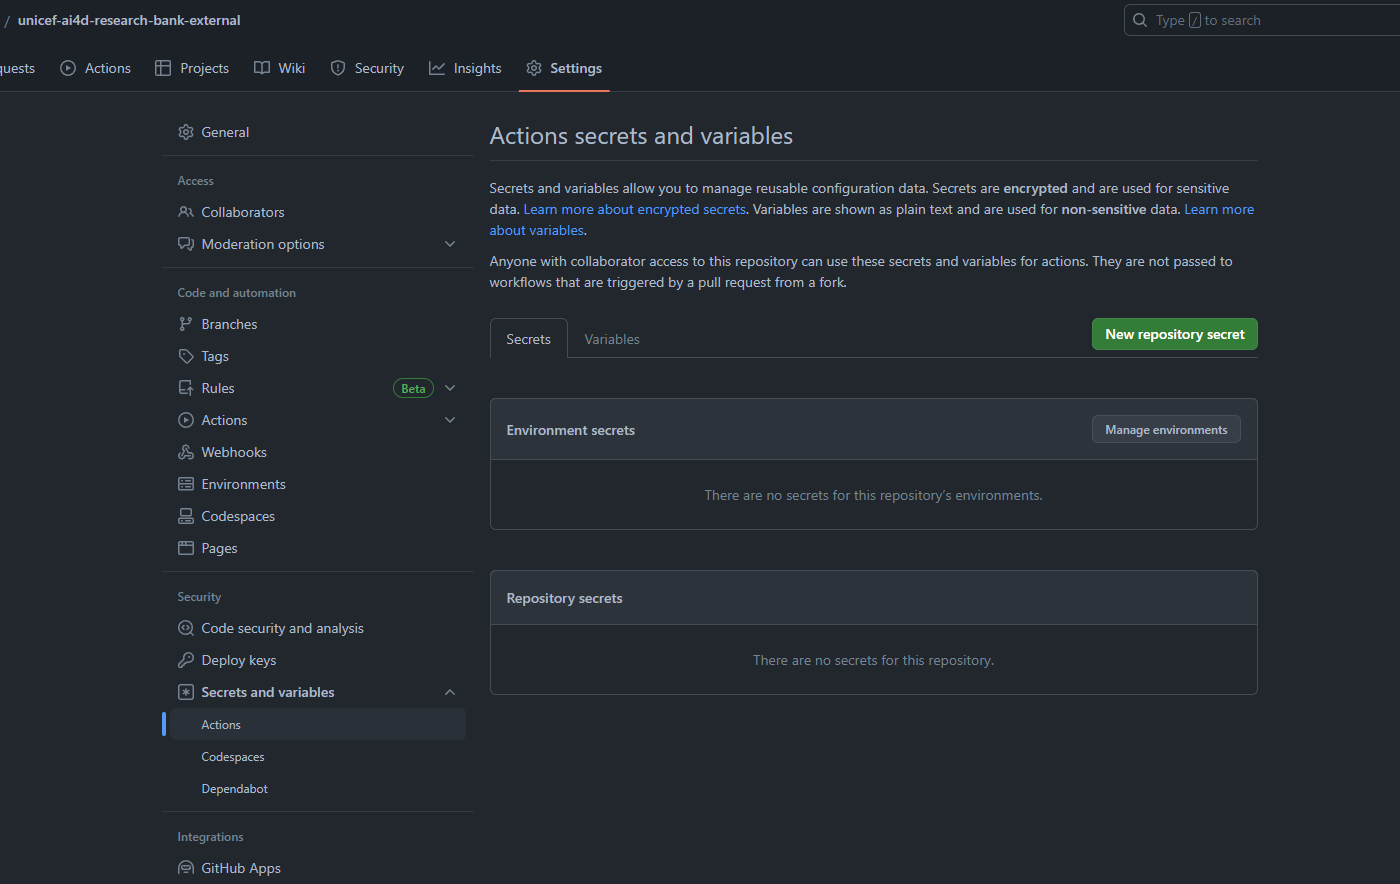
DEPLOY_PATsecret viahttps://github.com/settings/tokenswith repo and workflow permissions and place it inyour_forked_repo->settings->Secrets and Variables->Actions

- This will allow the github actions runner to run some of the build actions which normally require authentication
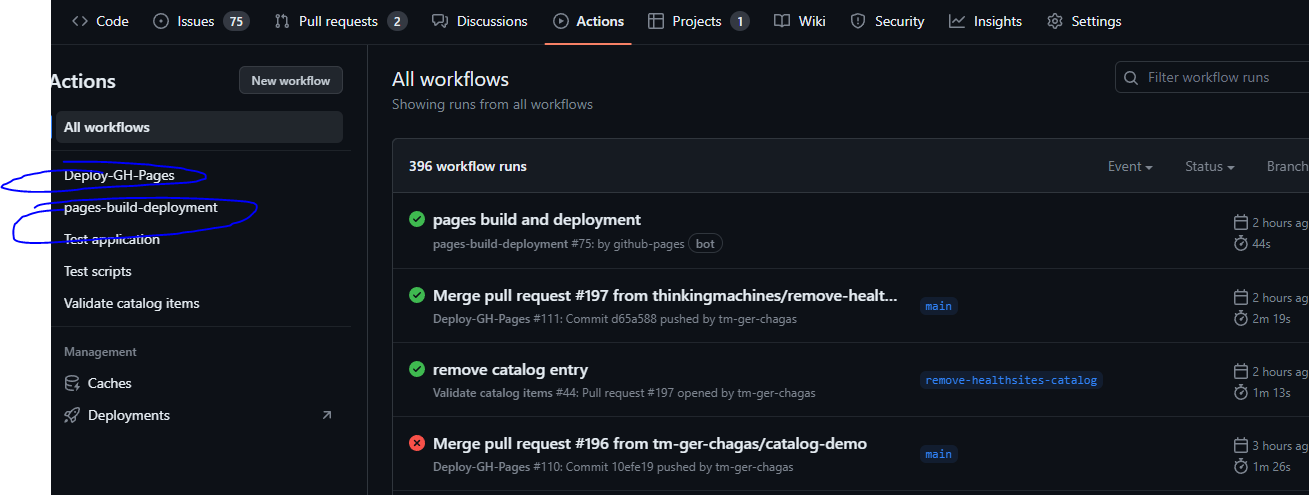
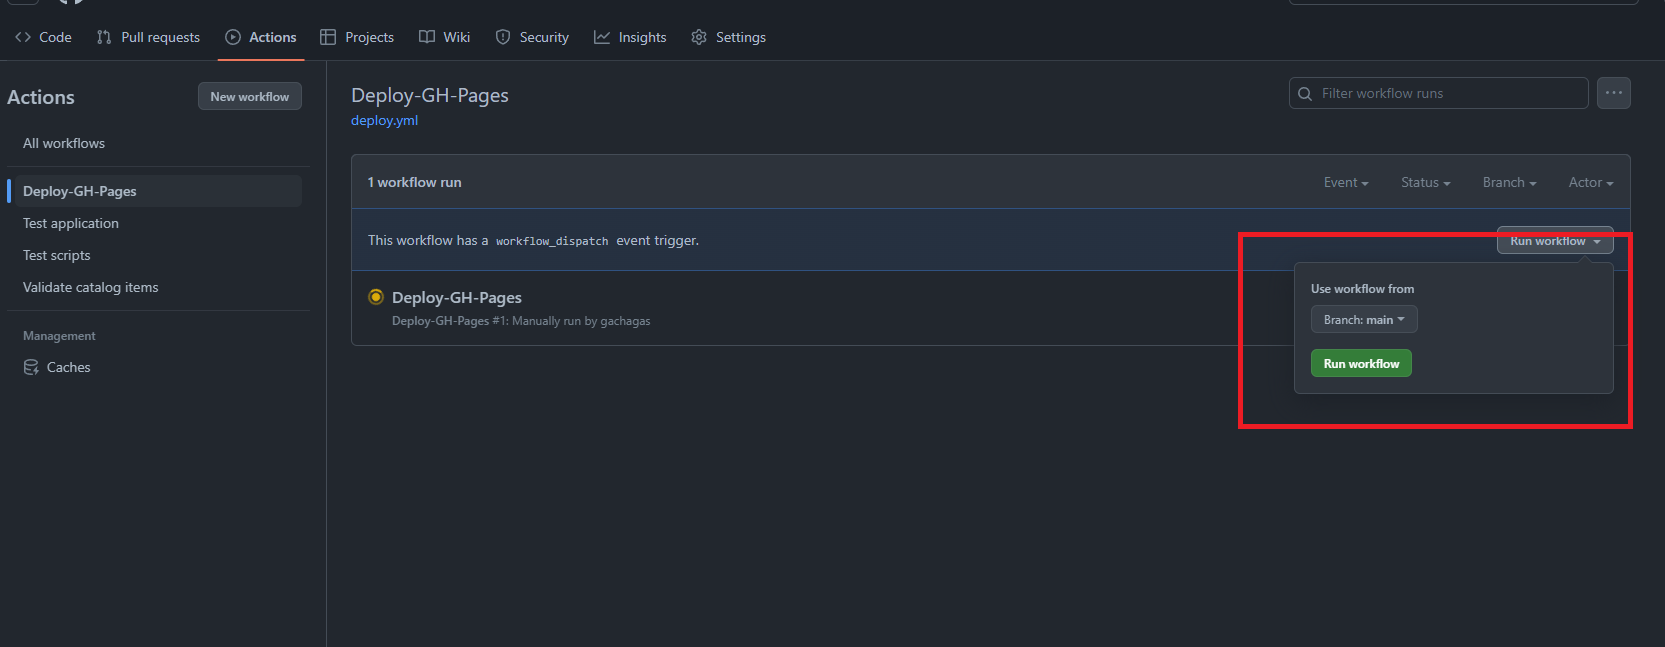
- Go to
your_repo->actionsand runDeploy-GH-Pages. This will create a new branch calledgh-pageswhere the compiled website will reside.
-
Go to
repo->settings->code and automation->pagesand update the following settings:a. Change
Build and Deploymentsource todeploy from a branch. Note that you can also find the actual link to the deployed website here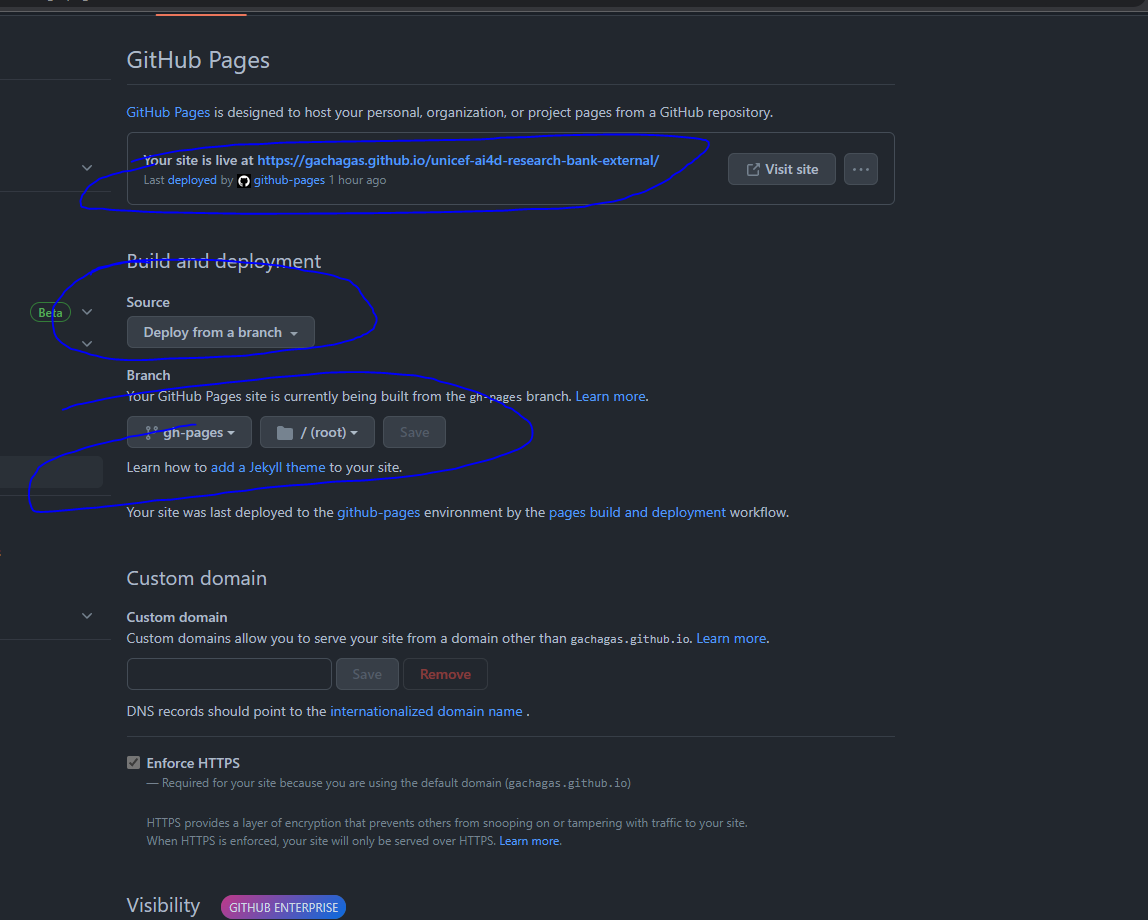
b. Set the deploy branch to be
gh-pagesbranch/(root)directory c. Run thepages-build-deploymentworkflow in order for github to deploy the site -
The after all workflows have been run, the deployed site should show up in the link in step 3
IMPORTANT: If you plan to host, add or update catalog items with datasets stored on Google Drive, you will need to setup a GCP Project and create a Google Storage API Key within that project with access to the Google Drive API.
Note: This is due to a work around done in order to allow Google Drive URLs to be downloaded without triggering an download screen for large files as documented here
Don't worry, as of the time of this writing, the Google Drive API is free and is used only for rate-limiting access to your Google Drive datasets.
This is a requirement in order for the validation (i.e. pnpm validate-catalog) process to automatically check if your google drive URLs for your datasets are accessible to the public.
-
An overview of the process to setup your GCP Project and API key is discussed here.
-
To setup a GCP Project here are some useful links
-
To create a Google Drive API Key, you will need to enable the Google Drive API in your project and create a Google Drive API Key for it.
-
Next, add an environment variable
GSTORAGE_API_KEYwith the value of the Google Drive API Key in your local environment. -
You will also need to add this
GSTORAGE_API_KEYas a secret to your Github Deploy Actions environment. Place theGSTORAGE_API_KEYsecret inyour_forked_repo->settings->Secrets and Variables->Actions
- Deploy to github pages instead of vercel (see deploy workflow)
- Using vite with the Vitamin template - an opinionated community template (see demo site)
- uses pnpm vs npm
- uses vitest vs Jest
- uses husky vs pre-commit
uses commitizen for git-commits- uses cypress for e2e (end-to-end) tests
- note: disabled recording because it requires cypress cloud during CI
uses codecov for code coverage reporting