The IoT Smart Garden Monitor is basic on Wio Terminal Chassis-LoRa-E5 and GNSS to developed as an IoT device. The operating principle of the IoT Smart Garden Monitor basically sends a frame on-demand to the gateway on a regular basis, then transfers it to the server(Uplink), in the meantime, the frame can bunch other data to upload, such as GPS, temperature and humidity, etc. After the ACK obtain the response(Downlink) back to the LoRa device, the connection status will shift to connected and display on the Wio terminal, which means the message is passed to the backend service and then you can view the data on the TheThingsNetwork platform, you also can use other platforms, but the premise is that platform can support the Wio Terminal Chassis-LoRa-E5 and GNSS.
- The LoRa device can display the DevEui, APPEui and Appkey on the first page.
- it can display the current temperature, humidity and current time.
- Display longitude, latitude and satellites number.
- Display the device and TTN connection status.
This demo you will need the device list as below:
This project is based on the Arduino platform which means we’ll be using the Arduino IDE and various Arduino libraries. If this is your first time using the Wio terminal, here is a guide to quickly Get Started with Wio Terminal.
requite library:
In this project, I test the LoRa tester on TheThingsNetwork platform, the instuction as below:
Step 1: Load into TTN website and create your account, then go to gateways start to set up your device.
Step 2: Add the gateway device:
- Owner
- Gteway ID
- Gateway EUI
- Gateway name
Step 3: Add Application:
- Owner
- Application ID
- Application name
Step 4:Add the LoRa node:
- Brand (Select Sense CAP)
- Model (Select LoRa-E5)
- Hardware Ver (Defult)
- Firmware Ver (Defult)
- Profile (The Region is according to your location)
- Frequency plan
- AppEUI
- DEVEUI
- AppKey
- End Device ID
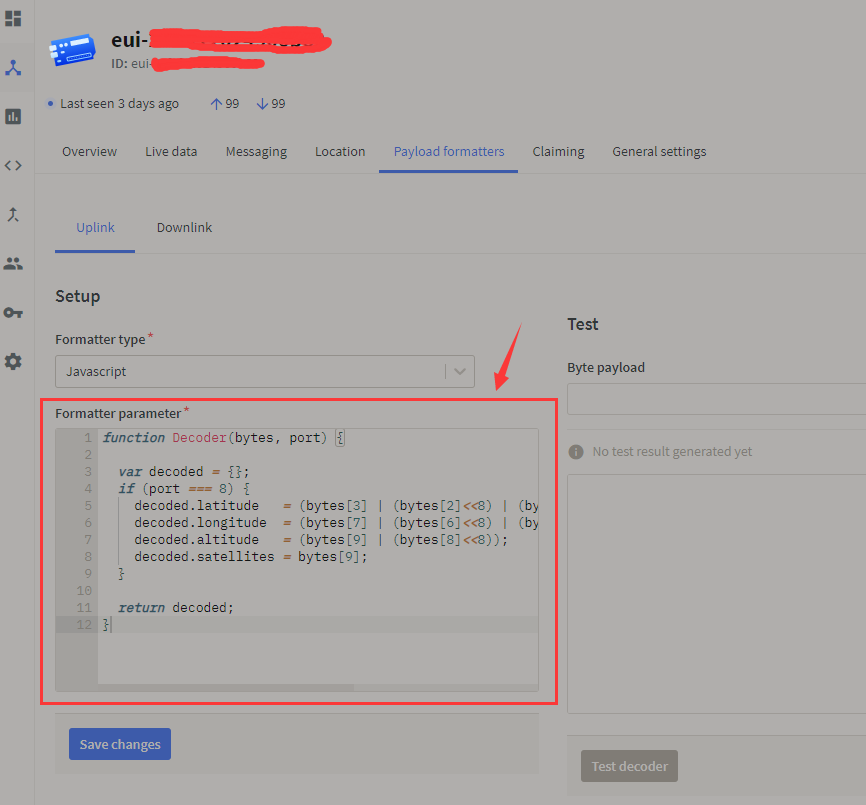
Step 5: Add the code for decode the data:
function Decoder(bytes, port) {

  var decoded = {};
  if (port === 8) {
    decoded.temp = bytes[0] <<8 | bytes[1];
    decoded.humi = bytes[2] <<8 | bytes[3];
    decoded.latitude   = (bytes[7] | (bytes[6]<<8) | (bytes[5]<<16)  | (bytes[4]<<24)) /1000000;
    decoded.longitude  = (bytes[11] | (bytes[10]<<8) | (bytes[9]<<16)  | (bytes[8]<<24)) /1000000;
    decoded.altitude   = (bytes[15] | (bytes[14]<<8) | (bytes[13]<<16) | (bytes[12]<<24))/100;
    decoded.satellites = bytes[16];
  }

  return decoded;
}
Step 5: Cheack the result on TheThingsNetwork
Go to the geteway, then click "Live data".
Each LoRa device has a unique serial number, after you connect the LoRa device to the Wio terminal then there will display the deveui, appeui and appkey on the first page, you need to fill the LoRa ID and gateway ID in server.
On the second page, there will display temperature, humidity, current time, longitude, latitude and satellites number.


