element-ui :Element,一套为开发者、设计师和产品经理准备的基于 Vue 2.0 的桌面端组件库。
iview :iView 是一套基于 Vue.js 的开源 UI 组件库,主要服务于 PC 界面的中后台产品。
ant-design-vue :ant-design-vue 是 Ant Design 的Vue实现,组件的风格与Ant Design保持同步,组件的html结构和css样式也保持一致,真正做到了样式0修改,组件API也尽量保持了一致。
| stars | forks | issues | updated | created | |
|---|---|---|---|---|---|
| element-ui | 35923 | 7185 | 671 | Mar 19, 2019 | Sep 3, 2016 |
| iview | 20302 | 3502 | 675 | Mar 20, 2019 | Jul 28, 2016 |
| ant-design-vue | 5665 | 528 | 54 | Mar 19, 2019 | Sep 20, 2017 |
统计的数据有时效性,如需了解最新的数据点我
| element-ui | iview | ant-design-vue | |
|---|---|---|---|
| 开发团队 | 饿了么 | TalkingData | 蚂蚁金服 |
| 协议 | MIT | MIT | MIT |
| 对比 | element-ui | iview | ant-design-vue |
|---|---|---|---|
| 按需加载 | 支持 | 支持 | 支持 |
| 样式自定义 | SCSS | Less | Less |
| 国际化 | 兼容[email protected] | vue-i18n | 支持 |
| 插件 | Element | iview | ant-design-vue |
任何框架都不会十全十美:ant-design-vue 非常臃肿。gzip 文件大小为 432.8kB,而 Element 为 139.9kB,iview 为 127.2kB。
| UI | iview | ant-design-vue | element |
|---|---|---|---|
| 版本号 | 3.3.1 | 1.3.7 | 2.6.1 |
| Color 色彩 | √ | × | √ |
| Font 字体 | √ | × | √ |
| Button 按钮 | √ | √ | √ |
| Border 边框 | × | × | √ |
| Icon 图标 | √(多) | √ | √(少) |
| Grid 栅格 | √ | √ | √ |
| Layout 布局 | √ | √ | √ |
| Card 卡片 | √ | √ | √ |
| Collapse 折叠面板 | √ | √ | √ |
| Split 面板分割 | √ | × | × |
| Divider 分割线 | √ | √ | × |
| Cell 单元格 | √ | × | × |
| Menu 导航菜单 | √ | √ | √ |
| Tabs 标签页 | √ | √ | √ |
| Dropdown 下拉菜单 | √ | √ | √ |
| Page 分页 | √ | √ | √ |
| Breadcrumb 面包屑 | √ | √ | √ |
| Badge 徽标数 | √ | √ | √ |
| Anchor 锚点 | √ | √ | √ |
| Steps 步骤条 | √ | √ | √ |
| LoadingBar 加载进度条 | √ | √ | √ |
| Input 输入框 | √ | √ | √ |
| Checkbox 多选框 | √ | √ | √ |
| Switch 开关 | √ | √ | √ |
| Table 表格 | √ | √ | √ |
| Select 选择器 | √ | √ | √ |
| AutoComplete 自动完成 | √ | √ | √ |
| Slider 滑块 | √ | √ | √ |
| DatePicker 日期选择器 | √ | √ | √ |
| TimePicker 时间选择器 | √ | √ | √ |
| Calendar 日历 | × | √ | × |
| Comment 评论 | × | √ | × |
| List 列表 | × | √ | × |
| Skeleton 骨架屏 | × | √ | × |
| Cascader 级联选择 | √ | √ | √ |
| Transfer 穿梭框 | √ | √ | √ |
| InputNumber 数字输入框 | √ | √ | √ |
| Rate 评分 | √ | √ | √ |
| Upload 上传 | √ | √ | √ |
| ColorPicker 颜色选择器 | √ | × | √ |
| Form 表单 | √ | √ | √ |
| Alert 警告提示 | √ | √ | √ |
| Message 全局提示 | √ | √ | √ |
| Notice 通知提醒 | √ | √ | √ |
| Modal 对话框 | √ | √ | √ |
| Drawer 抽屉 | √ | √ | × |
| Tree 树形控件 | √ | √ | √ |
| Tooltip 文字提示 | √ | √ | √ |
| Poptip 气泡提示 | √ | √ | √ |
| Progress 进度条 | √ | √ | √ |
| Avatar 头像 | √ | √ | × |
| Tag 标签 | √ | √ | √ |
| Carousel 走马灯 | √ | √ | √ |
| TimeLine 时间轴 | √ | √ | √ |
| Time 相对时间 | √ | × | × |
| Circle 进度环 | √ | × | × |
| Affix 图钉 | √ | √ | √ |
| BackTop 返回顶部 | √ | √ | × |
| Spin 加载中 | √ | √ | √ |
| Scroll 无限滚动 | √ | × | × |
三大UI框架基本涵盖了日常开发中的各类基础组件,一些小众组件上各有所长 整体iview 更丰富。
Element和antd用的是 短横线分隔式命名,例:el-table
iview用的是 驼峰式命名,例:Table
- API风格
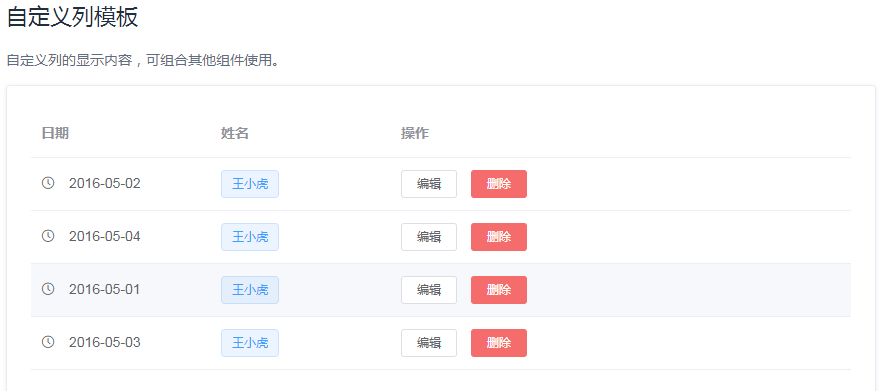
下面以日常使用较为广泛的Table来做对比
Table
  <template>
    <el-table
      :data="tableData"
      style="width: 100%">
      <el-table-column
        label="日期"
        width="180">
        <template slot-scope="scope">
          <i class="el-icon-time"></i>
          <span style="margin-left: 10px">{{ scope.row.date }}</span>
        </template>
      </el-table-column>
      <el-table-column
        label="姓名"
        width="180">
        <template slot-scope="scope">
          <el-popover trigger="hover" placement="top">
            <p>姓名: {{ scope.row.name }}</p>
            <p>住址: {{ scope.row.address }}</p>
            <div slot="reference" class="name-wrapper">
              <el-tag size="medium">{{ scope.row.name }}</el-tag>
            </div>
          </el-popover>
        </template>
      </el-table-column>
      <el-table-column label="操作">
        <template slot-scope="scope">
          <el-button
            size="mini"
            @click="handleEdit(scope.$index, scope.row)">编辑</el-button>
          <el-button
            size="mini"
            type="danger"
            @click="handleDelete(scope.$index, scope.row)">删除</el-button>
        </template>
      </el-table-column>
    </el-table>
  </template>

  <script>
    export default {
      data() {
        return {
          tableData: [{
            date: '2016-05-02',
            name: '王小虎',
            address: '上海市普陀区金沙江路 1518 弄'
          }, {
            date: '2016-05-04',
            name: '王小虎',
            address: '上海市普陀区金沙江路 1517 弄'
          }, {
            date: '2016-05-01',
            name: '王小虎',
            address: '上海市普陀区金沙江路 1519 弄'
          }, {
            date: '2016-05-03',
            name: '王小虎',
            address: '上海市普陀区金沙江路 1516 弄'
          }]
        }
      },
      methods: {
        handleEdit(index, row) {
          console.log(index, row);
        },
        handleDelete(index, row) {
          console.log(index, row);
        }
      }
    }
  </script>
  <template>
      <Table border :columns="columns7" :data="data6"></Table>
  </template>
  <script>
      export default {
          data () {
              return {
                  columns7: [
                      {
                          title: 'Name',
                          key: 'name',
                          render: (h, params) => {
                              return h('div', [
                                  h('Icon', {
                                      props: {
                                          type: 'person'
                                      }
                                  }),
                                  h('strong', params.row.name)
                              ]);
                          }
                      },
                      {
                          title: 'Age',
                          key: 'age'
                      },
                      {
                          title: 'Address',
                          key: 'address'
                      },
                      {
                          title: 'Action',
                          key: 'action',
                          width: 150,
                          align: 'center',
                          render: (h, params) => {
                              return h('div', [
                                  h('Button', {
                                      props: {
                                          type: 'primary',
                                          size: 'small'
                                      },
                                      style: {
                                          marginRight: '5px'
                                      },
                                      on: {
                                          click: () => {
                                              this.show(params.index)
                                          }
                                      }
                                  }, 'View'),
                                  h('Button', {
                                      props: {
                                          type: 'error',
                                          size: 'small'
                                      },
                                      on: {
                                          click: () => {
                                              this.remove(params.index)
                                          }
                                      }
                                  }, 'Delete')
                              ]);
                          }
                      }
                  ],
                  data6: [
                      {
                          name: 'John Brown',
                          age: 18,
                          address: 'New York No. 1 Lake Park'
                      },
                      {
                          name: 'Jim Green',
                          age: 24,
                          address: 'London No. 1 Lake Park'
                      },
                      {
                          name: 'Joe Black',
                          age: 30,
                          address: 'Sydney No. 1 Lake Park'
                      },
                      {
                          name: 'Jon Snow',
                          age: 26,
                          address: 'Ottawa No. 2 Lake Park'
                      }
                  ]
              }
          },
          methods: {
              show (index) {
                  this.$Modal.info({
                      title: 'User Info',
                      content: `Name:${this.data6[index].name}<br>Age:${this.data6[index].age}<br>Address:${this.data6[index].address}`
                  })
              },
              remove (index) {
                  this.data6.splice(index, 1);
              }
          }
      }
  </script>
slot-scope
  <template>
    <Table border :columns="columns12" :data="data6">
        <template slot-scope="{ row }" slot="name">
            <strong>{{ row.name }}</strong>
        </template>
        <template slot-scope="{ row, index }" slot="action">
            <Button type="primary" size="small" style="margin-right: 5px" @click="show(index)">View</Button>
            <Button type="error" size="small" @click="remove(index)">Delete</Button>
        </template>
    </Table>
</template>
<script>
    export default {
        data () {
            return {
                columns12: [
                    {
                        title: 'Name',
                        slot: 'name'
                    },
                    {
                        title: 'Age',
                        key: 'age'
                    },
                    {
                        title: 'Address',
                        key: 'address'
                    },
                    {
                        title: 'Action',
                        slot: 'action',
                        width: 150,
                        align: 'center'
                    }
                ],
                data6: [
                    {
                        name: 'John Brown',
                        age: 18,
                        address: 'New York No. 1 Lake Park'
                    },
                    {
                        name: 'Jim Green',
                        age: 24,
                        address: 'London No. 1 Lake Park'
                    },
                    {
                        name: 'Joe Black',
                        age: 30,
                        address: 'Sydney No. 1 Lake Park'
                    },
                    {
                        name: 'Jon Snow',
                        age: 26,
                        address: 'Ottawa No. 2 Lake Park'
                    }
                ]
            }
        },
        methods: {
            show (index) {
                this.$Modal.info({
                    title: 'User Info',
                    content: `Name:${this.data6[index].name}<br>Age:${this.data6[index].age}<br>Address:${this.data6[index].address}`
                })
            },
            remove (index) {
                this.data6.splice(index, 1);
            }
        }
    }
</script>
  <template>
    <a-table :columns="columns" :dataSource="data">
      <a slot="name" slot-scope="text" href="javascript:;">{{text}}</a>
      <span slot="customTitle"><a-icon type="smile-o" /> Name</span>
      <span slot="tags" slot-scope="tags">
        <a-tag v-for="tag in tags" color="blue" :key="tag">{{tag}}</a-tag>
      </span>
      <span slot="action" slot-scope="text, record">
        <a href="javascript:;">Invite 一 {{record.name}}</a>
        <a-divider type="vertical" />
        <a href="javascript:;">Delete</a>
        <a-divider type="vertical" />
        <a href="javascript:;" class="ant-dropdown-link">
          More actions <a-icon type="down" />
        </a>
      </span>
    </a-table>
  </template>
  <script>
  const columns = [{
    dataIndex: 'name',
    key: 'name',
    slots: { title: 'customTitle' },
    scopedSlots: { customRender: 'name' },
  }, {
    title: 'Age',
    dataIndex: 'age',
    key: 'age',
  }, {
    title: 'Address',
    dataIndex: 'address',
    key: 'address',
  }, {
    title: 'Tags',
    key: 'tags',
    dataIndex: 'tags',
    scopedSlots: { customRender: 'tags' },
  }, {
    title: 'Action',
    key: 'action',
    scopedSlots: { customRender: 'action' },
  }];

  const data = [{
    key: '1',
    name: 'John Brown',
    age: 32,
    address: 'New York No. 1 Lake Park',
    tags: ['nice', 'developer'],
  }, {
    key: '2',
    name: 'Jim Green',
    age: 42,
    address: 'London No. 1 Lake Park',
    tags: ['loser'],
  }, {
    key: '3',
    name: 'Joe Black',
    age: 32,
    address: 'Sidney No. 1 Lake Park',
    tags: ['cool', 'teacher'],
  }];

  export default {
    data() {
      return {
        data,
        columns,
      }
    }
  }
  </script>
iview和antd在生成类似表格这些较复杂的组件时,使用的是Vue的render函数, Element直接在template中插入对应模板
iview在3.2.x之后的版本,也支持了和Element类似的
slot-scope语法渲染
各种属性、配置、方法,Element有85项之多,iview则有56项,antd是69项。因为篇幅的原因,这里就不展开描述了。
总体比较 ,在使用上,iview相对于Element要简单,但Element的在某些功能的拓展上更丰富
- Element
借助 babel-plugin-component,我们可以只引入需要的组件,以达到减小项目体积的目的。
首先,安装 babel-plugin-component:
npm install babel-plugin-component -D
然后,将 .babelrc 修改为:
  {
    "presets": [["es2015", { "modules": false }]],
    "plugins": [
      [
        "component",
        {
          "libraryName": "element-ui",
          "styleLibraryName": "theme-chalk"
        }
      ]
    ]
  }
接下来,如果你只希望引入部分组件,比如 Button 和 Select,那么需要在 main.js 中写入以下内容:
  import Vue from 'vue';
  import { Button, Select } from 'element-ui';
  import App from './App.vue';

  Vue.component(Button.name, Button);
  Vue.component(Select.name, Select);
  /* 或写为
  * Vue.use(Button)
  * Vue.use(Select)
  */

  new Vue({
    el: '#app',
    render: h => h(App)
  });
- iview
借助插件 babel-plugin-import可以实现按需加载组件,减少文件体积。首先安装,并在文件 .babelrc 中配置:
npm install babel-plugin-import --save-dev
  // .babelrc
  {
    "plugins": [["import", {
      "libraryName": "iview",
      "libraryDirectory": "src/components"
    }]]
  }
然后这样按需引入组件,就可以减小体积了:
  import { Button, Table } from 'iview';
  Vue.component('Button', Button);
  Vue.component('Table', Table);
特别提醒
按需引用仍然需要导入样式,即在 main.js 或根组件执行 import 'iview/dist/styles/iview.css';
- antd
如果你在开发环境的控制台看到下面的提示,那么你可能使用了 import { Button } from 'ant-design-vue'; 的写法引入了 antd 下所有的模块,这会影响应用的网络性能。
You are using a whole package of antd, please use https://www.npmjs.com/package/babel-plugin-import to reduce app bundle size.
可以通过以下的写法来按需加载组件。
  import Button from 'ant-design-vue/lib/button';
  import 'ant-design-vue/lib/button/style'; // 或者 ant-design-vue/lib/button/style/css 加载 css 文件
如果你使用了 babel,那么可以使用 babel-plugin-import 来进行按需加载,加入这个插件后。你可以仍然这么写:
import { Button } from 'ant-design-vue'; 插件会帮你转换成 ant-design-vue/lib/xxx 的写法。另外此插件配合 style 属性可以做到模块样式的按需自动加载。
注意,babel-plugin-import 的 style 属性除了引入对应组件的样式,也会引入一些必要的全局样式。如果你不需要它们,建议不要使用此属性。你可以 import 'ant-design-vue/dist/antd.css 手动引入,并覆盖全局样式。
- ELement Element 默认提供一套主题,CSS 命名采用 BEM 的风格,方便使用者覆盖样式。我们提供了三种方法,可以进行不同程度的样式自定义。
仅替换主题色
如果仅希望更换 Element 的主题色,推荐使用在线主题生成工具。Element 默认的主题色是鲜艳、友好的蓝色。通过替换主题色,能够让 Element 的视觉更加符合具体项目的定位。
在项目中改变 SCSS 变量
Element 的 theme-chalk 使用 SCSS 编写,如果你的项目也使用了 SCSS,那么可以直接在项目中改变 Element 的样式变量。新建一个样式文件,例如 element-variables.scss,写入以下内容:
  /* 改变主题色变量 */
  $--color-primary: teal;

  /* 改变 icon 字体路径变量,必需 */
  $--font-path: '~element-ui/lib/theme-chalk/fonts';

  @import "~element-ui/packages/theme-chalk/src/index";
之后,在项目的入口文件中,直接引入以上样式文件即可(无需引入 Element 编译好的 CSS 文件):
  import Vue from 'vue'
  import Element from 'element-ui'
  import './element-variables.scss'

  Vue.use(Element)
需要注意的是,覆盖字体路径变量是必需的,将其赋值为 Element 中 icon 图标所在的相对路径即可。
命令行主题工具
如果你的项目没有使用 SCSS,那么可以使用命令行主题工具进行深层次的主题定制:
安装工具
首先安装「主题生成工具」,可以全局安装或者安装在当前项目下,推荐安装在项目里,方便别人 clone 项目时能直接安装依赖并启动,这里以全局安装做演示。
npm i element-theme -g
安装白垩主题,可以从 npm 安装或者从 GitHub 拉取最新代码。
  # 从 npm
  npm i element-theme-chalk -D

  # 从 GitHub
  npm i https://github.com/ElementUI/theme-chalk -D
初始化变量文件
主题生成工具安装成功后,如果全局安装可以在命令行里通过 et 调用工具,如果安装在当前目录下,需要通过 node_modules/.bin/et 访问到命令。执行 -i 初始化变量文件。默认输出到 element-variables.scss,当然你可以传参数指定文件输出目录。
  et -i [可以自定义变量文件]

  > ✔ Generator variables file
如果使用默认配置,执行后当前目录会有一个 element-variables.scss 文件。内部包含了主题所用到的所有变量,它们使用 SCSS 的格式定义。大致结构如下:
  $--color-primary: #409EFF !default;
  $--color-primary-light-1: mix($--color-white, $--color-primary, 10%) !default; /* 53a8ff */
  $--color-primary-light-2: mix($--color-white, $--color-primary, 20%) !default; /* 66b1ff */
  $--color-primary-light-3: mix($--color-white, $--color-primary, 30%) !default; /* 79bbff */
  $--color-primary-light-4: mix($--color-white, $--color-primary, 40%) !default; /* 8cc5ff */
  $--color-primary-light-5: mix($--color-white, $--color-primary, 50%) !default; /* a0cfff */
  $--color-primary-light-6: mix($--color-white, $--color-primary, 60%) !default; /* b3d8ff */
  $--color-primary-light-7: mix($--color-white, $--color-primary, 70%) !default; /* c6e2ff */
  $--color-primary-light-8: mix($--color-white, $--color-primary, 80%) !default; /* d9ecff */
  $--color-primary-light-9: mix($--color-white, $--color-primary, 90%) !default; /* ecf5ff */

  $--color-success: #67c23a !default;
  $--color-warning: #e6a23c !default;
  $--color-danger: #f56c6c !default;
  $--color-info: #909399 !default;

  ...
修改变量
直接编辑 element-variables.scss 文件,例如修改主题色为红色。
$--color-primary: red;
编译主题
保存文件后,到命令行里执行 et 编译主题,如果你想启用 watch 模式,实时编译主题,增加 -w 参数;如果你在初始化时指定了自定义变量文件,则需要增加 -c 参数,并带上你的变量文件名
  et

  > ✔ build theme font
  > ✔ build element theme
引入自定义主题
默认情况下编译的主题目录是放在 ./theme 下,你可以通过 -o 参数指定打包目录。像引入默认主题一样,在代码里直接引用 theme/index.css 文件即可。
  import '../theme/index.css'
  import ElementUI from 'element-ui'
  import Vue from 'vue'

  Vue.use(ElementUI)
搭配插件按需引入组件主题
如果是搭配 babel-plugin-component 一起使用,只需要修改 .babelrc 的配置,指定 styleLibraryName 路径为自定义主题相对于 .babelrc 的路径,注意要加 ~。
  {
    "plugins": [
      [
        "component",
        {
          "libraryName": "element-ui",
          "styleLibraryName": "~theme"
        }
      ]
    ]
  }
- iview
变量覆盖(推荐)
如果你的项目使用了 webpack 工程,可以通过变量覆盖的方式来实现主题定制。
首先在项目中先建一个目录,比如 my-theme,然后在 my-theme 下建立一个 less 文件 index.less,并写入下面内容:
  @import '~iview/src/styles/index.less';

  // Here are the variables to cover, such as:
  @primary-color: #8c0776;
完整的变量列表可以查看 默认样式变量。
然后在入口文件 main.js 内导入这个 less 文件即可:
  import Vue from 'vue';
  import iView from 'iview';
  import '../my-theme/index.less';

  Vue.use(iView);
通过安装工具修改 # 如果没有使用 webpack,可以用我们提供的工具 iview-theme 来编译。
首先需要安装主题生成工具,从 npm 全局或在项目中局部安装,以全局安装为例:
npm install iview-theme -g
然后在业务工程里新建一个目录,用来存放主题文件,使用下面的命令初始化主题,这时会从 iView 仓库拉取最新的样式文件:
iview-theme init my-theme
如需拉取指定版本号的 iView,使用下面的命令。(实际运行下面命令时,需将 xxx 替换成项目所使用的 iView 版本,如 “ v2.14.3 ”)
iview-theme init my-theme xxx
最后编辑 my-theme/custom.less 文件,用命令编译即可:
  cd my-theme
  iview-theme build -o dist/
最终会在指定的目录下编译为 iview.css 的文件,只需在入口处引用它就可以了,比如在 main.js 文件:
  import Vue from 'vue';
  import iView from 'iview';
  import '../my-theme/dist/iview.css';

  Vue.use(iView);
注意:在更新 iView 后,应该重新拉取。
- antd
antd 的样式使用了 Less 作为开发语言,并定义了一系列全局/组件的样式变量,你可以根据需求进行相应调整。
以下是一些最常用的通用变量,所有样式变量可以在 这里 找到。
  @primary-color: #1890ff;                         // 全局主色
  @link-color: #1890ff;                            // 链接色
  @success-color: #52c41a;                         // 成功色
  @warning-color: #faad14;                         // 警告色
  @error-color: #f5222d;                           // 错误色
  @font-size-base: 14px;                           // 主字号
  @heading-color: rgba(0, 0, 0, .85);              // 标题色
  @text-color: rgba(0, 0, 0, .65);                 // 主文本色
  @text-color-secondary : rgba(0, 0, 0, .45);      // 次文本色
  @disabled-color : rgba(0, 0, 0, .25);            // 失效色
  @border-radius-base: 4px;                        // 组件/浮层圆角
  @border-color-base: #d9d9d9;                     // 边框色
  @box-shadow-base: 0 2px 8px rgba(0, 0, 0, .15);  // 浮层阴影
定制方式 我们使用 modifyVars 的方式来进行覆盖变量。 下面将针对不同的场景提供一些常用的定制方式。
在 webpack 中定制主题
我们以 webpack@4 为例进行说明,以下是一个 webpack.config.js 的典型例子,对 less-loader 的 options 属性进行相应配置。
  // webpack.config.js
  module.exports = {
    rules: [{
      test: /\.less$/,
      use: [{
        loader: 'style-loader',
      }, {
        loader: 'css-loader', // translates CSS into CommonJS
      }, {
        loader: 'less-loader', // compiles Less to CSS
  +     options: {
  +       modifyVars: {
  +         'primary-color': '#1DA57A',
  +         'link-color': '#1DA57A',
  +         'border-radius-base': '2px',
  +       },
  +       javascriptEnabled: true,
  +     },
      }],
      // ...other rules
    }],
    // ...other config
  }
注意 less-loader 的处理范围不要过滤掉 node_modules 下的 antd 包。
在 vue cli 2中定制主题
修改build/utils.js文件
  // build/utils.js
  - less: generateLoaders('less'),
  + less: generateLoaders('less', {
  +   modifyVars: {
  +     'primary-color': '#1DA57A',
  +     'link-color': '#1DA57A',
  +     'border-radius-base': '2px',
  +   },
  +   javascriptEnabled: true,
  + }),
在 vue cli 3中定制主题
项目更目录下新建文件vue.config.js
  // vue.config.js
  module.exports = {
    css: {
      loaderOptions: {
        less: {
          modifyVars: {
            'primary-color': '#1DA57A',
            'link-color': '#1DA57A',
            'border-radius-base': '2px',
          },
          javascriptEnabled: true
        }
      }
    }
  }
配置 less 变量文件
另外一种方式是建立一个单独的 less 变量文件,引入这个文件覆盖 antd.less 里的变量。
  __at__import "~ant-design-vue/dist/antd.less";   // 引入官方提供的 less 样式入口文件
  __at__import "your-theme-file.less";   // 用于覆盖上面定义的变量
注意,这种方式已经载入了所有组件的样式,不需要也无法和按需加载插件 babel-plugin-import 的 style 属性一起使用。
没有生效?
注意样式必须加载 less 格式,一个常见的问题就是引入了多份样式,less 的样式被 css 的样式覆盖了。
如果你在使用 babel-plugin-import 的 style 配置来引入样式,需要将配置值从 'css' 改为 true,这样会引入 less 文件。
如果你是通过 'ant-design-vue/dist/antd.css' 引入样式的,改为 ant-design-vue/dist/antd.less。
-
Antd
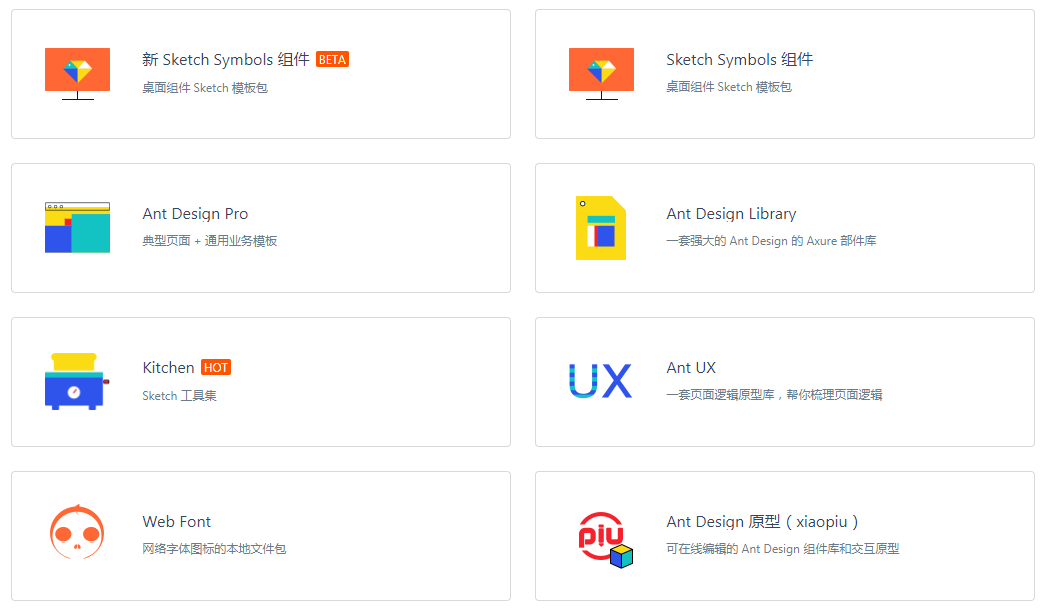
Ant Design Vue相关设计资源和设计工具的下载以下设计资源由Ant Design官方开发并维护
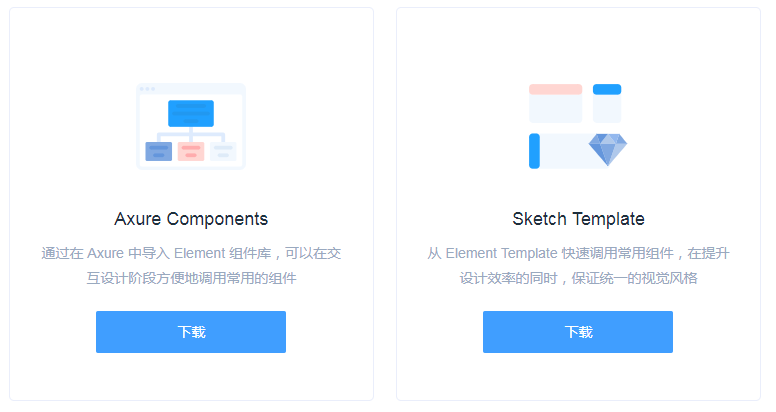
- Element
- iview 暂无
vue-antd早在Vue1.x的时候曾经活跃过,但后期却停止维护了,Ant Design Vue是Ant Design 的Vue实现 ;
iview 的UI 源自 AntDesign,得益于近些年Vue发展的势头迅猛,iview的社区生态目前也比较庞大,对大部分的项目都能够提供较为完善的解决方案;
Element 的开发团队和用户群体在目前都是三者之中最庞大的,发展也是稳步前进。
Element更倾向于给开发者提供各种各样的原材料,你可以更加自由地创造,但过程可能略微繁琐;
iview则把材料进行了二次加工,更加方便大部分人的使用,但是在某种程度上,它的自由度可能没有Element那么高;
Ant Design是React社区中最受欢迎的UI框架(彩蛋事件之前),如果你是一名React开发者,可以多点关注,如果你只是喜欢Ant Design的UI风格,那也许可以留意下iview看看。


