Liquid Galaxy
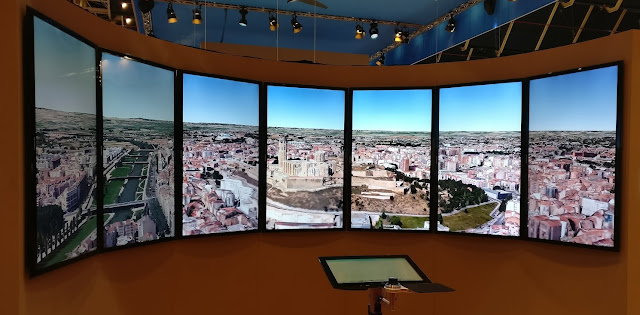
The Liquid Galaxy is an open source project founded by Google and created by Google employee Jason Holt in 2008. Liquid Galaxy started out as a panoramic multi-display Google Earth viewer, but has evolved to become a general data visualization tool for operations, marketing and research. It gives a unique experience to allow users to fly around Google Earth, view photos, screen layouts, balloons, placemarks and develop interactive tours.
Liquid Galaxy consists of 3 or more computers for multiple displays, and each computer manages a display. It depends on a master/slave architecture where the master is responsible for receiving all information and replicating it to the other nodes using SSH message passing, allowing the screens to behave in a synchronized manner. You can find more about Liquid Galaxy from here
Step 1: install ubuntu image from the drive link
Step 2: Install Virtual Box
- In the Virtual box we go to NAT Network, right click and create
- Enable IPV6
- In prefix: 21da:d3:0:2f3b::/64
-
We begin with the master: Add
-
Fill in info: Name(lg1) Image(ubuntu image)
-
check unattended installation
-
Ram: 1800
-
Choose 1 CPU **however if crashed, we can increase the cores more
-
Memory: 18GB
-
We do the same for LG2 and LG3 with respective names
- Always start with Master (Lg1)
- From settings -> Network -> adaptor1 -> Nat Network
- Do the same for LG2 and LG3
power up all 3 machines and do the following (always starting with master):
- Select install ubuntu
- check all
- choose something else
- New partition
- Click on plus button then swap area with size 1024
- Then plus again and choose /
- Install now
- Do the same for all LGs
- Name: lg computer name: lg1 lg2 lg3 respectively, username: lg, password: ***
Note that username and password has to be the same on all 3 machines
- Ctrl alt t to open terminal in all 3
- On all 3 machines install and update everything by:
sudo apt update && sudo apt upgrade -f- Press Yes or Y
- On all 3 machines install curl:
sudo apt install curl lsb lsb-core- Open Firefox on all 3 and search for liquid galaxy github
- copy the script and paste it on Master first:
bash <(curl -s https://raw.githubusercontent.com/LiquidGalaxyLAB/liquid-galaxy/master/install.sh)- Machine ID:1
- Save the IP for later (very important)
- total machine count:3
- unique number: 69 or (42)
- no extra drivers
- continue and when ask for ssh just ignore press enter and enter
After LG1 finish, don’t press enter to reboot, just from options shut down urself and reboot. Bec rebooting using script sometimes have bugs and cause problems sometiemes
This will open google earth after reboot for LG1. This means installation was successful. If not, you have to redo the installation and make sure you have a good internet connection
- Go to Lg2 and do the exact same
- Machine ID:2 for LG2 ad Machine ID:3 for LG3
- Master Machine IP: The saved one from the previous step
- Unique number: 69
- No drivers
- Now we reboot 2 then 3 using the same way
- On Master type the following command:
lg-relaunch- View scaled mode.
- Now you will see all 3 machines synched together successfully!
- If you have any errors, please redo the installation with good internet connection.
- Shutdown after sending power off signal for the 3 machines
- Go to tools of VBox, network tab and host-only networks
- Right-click to create a new one
- Go to MASTER and then settings network adapter 2 and choose host-only adapter
It connects the network with the master, and slaves will follow along
For more information please check up the Liquid Galaxy Installation Guide and The Training Provided
You can implement a “for loop” for the amount of screen number you have (i.e: 3) then execute:
"'/home/$user/bin/lg-relaunch' > /home/$user/log.txt"Then execute :
"""RELAUNCH_CMD="\\
if [ -f /etc/init/lxdm.conf ]; then
  export SERVICE=lxdm
elif [ -f /etc/init/lightdm.conf ]; then
  export SERVICE=lightdm
else
  exit 1
fi
if  [[ \\\$(service \\\$SERVICE status) =~ 'stop' ]]; then
  echo $pw | sudo -S service \\\${SERVICE} start
else
  echo $pw | sudo -S service \\\${SERVICE} restart
fi
" && sshpass -p $pw ssh -x -t lg@lg$i "\$RELAUNCH_CMD\"""
Where you can change $user with the username of the LG machine, and $pw is the password of the LG machine, while $i represents the lg machine which is specified in the for loop.
You can implement a “for loop” for the amount of screen number you have (i.e: 3) then execute:
'sshpass -p $pw ssh -t lg$i "echo $pw | sudo -S reboot"'Where you can change $pw with the password of the LG machine, while $i represents the lg machine you specified in the for loop
Example of the function with the for loop:
Future<void> reboot() async {
    final pw = _sshData.passwordOrKey;
    final user = _sshData.username;

    final result = await getScreenAmount();
    if (result != null) {
      screenAmount = int.parse(result);
    }

    for (var i = screenAmount; i >= 1; i--) {
      try {
        await _sshData
            .execute('sshpass -p $pw ssh -t lg$i "echo $pw | sudo -S reboot"');
      } catch (e) {
        // ignore: avoid_print
        print(e);
      }
    }
  }
You can implement a “for loop” for the amount of screen number you have (i.e: 3) then execute:
'sshpass -p $pw ssh -t lg$i "echo $pw | sudo -S poweroff"'Where you can change $pw with the password of the LG machine, while $i represents the lg machine you specified in the for loop
'echo "$content" > /tmp/query.txt'Where you can change $content with the content you want to execute in /tmp/query.txt
"echo '$content' > /var/www/html/kml/slave_$screen.kml"Where you can change $content with the content you want to execute in on slave machine, and $screen with the slave screen number