-
Notifications
You must be signed in to change notification settings - Fork 289
Hardware
ODROIDs are single-board computers that can run Android and Linux distributions. For the BARC project, the ODROID is used as the central computer for each BARC car, and runs a Linux-based OS through the eMMC (see next section). In other words, to control the car, you will need to communicate and modify the ODROID on each car.

You can connect to the odroid one of two ways.
As you did in the section on flashing, you can directly connect the odroid to a monitor using an HDMI cable. Plug in additional peripherals, such as a keyboard and mouse, to program the odroid.
To connect wirelessly to the odroid, the router needs to be connected (via ethernet) to the odroid.
Make sure you use the LAN port from the router.
We recommend connecting using either a secure shell (ssh) protocol or an NX protocol.
The NX protocol by NoMachine provides a GUI interface, essentially allowing your laptop to act as a monitor.
With the ssh protocol, you interact with the remote device (i.e. odroid) only through a terminal.
Beginners should use NoMachine (free download here ).
For those who prefer the terminal, use the Putty utility (Windows, download here) directly use the ssh command (Mac, Linux)
After downloading the software, turn on the odroid and identify the router's network from your laptop. In general, the bottom face of the router has labels for the default wifi SSID and PWD. Connect to the network and supply the correct credentials.
To connect using NoMachine, launch the application, click on the identified linux host.
Write odroid for name and 192.168.100.100 for host, then connect to the host.
Afterward, you should see the a familiar Ubuntu desktop.
To connect via an ssh protocol, open a terminal and run the following, or use Putty
ssh [email protected]
Use an SCP client as needed to transfer files between the local and remote computer. You will need to learn some unix commands such as cd, pwd, ls, to navigate through the filesystem.
For the OS to run on the ODROID, a memory disk must be flashed with the OS, and attached to the ODROID. The ODROID gives two options: eMMC and microSD. The BARC uses the eMMC.
We provide an image file of the odroid which you can flash onto your odroid using the steps described below. By downloading and flashing this image file onto the odroid's eMMC chip, you will have an exact copy of the entire operating system, including installed software, packages, and tools (e.g. ROS, openCV, Julia, etc) necessary to run experiments. The image file is available here. The image file is large (~14GB), so it is recommended to download it overnight with a stable connection. To verify a successful download, check the MD5 hash value (for Windows refer to here, for Mac/Linux use the md5 / md5sum command). You should see the exact MD5 value below; if not, something probably got corrupted during the download, try re-downloading
014a8d3030e348660493b17575b43759
Before flashing the eMMC, you will need to use a laptop, a microSD-to-eMMC adaptor, and a microSD card reader (if your laptop doesn't have an SD port). The main steps for flashing are as follows
- Remove eMMC from odroid (refer to odroid diagram bottom view, below)
- Connect eMMC to microSD-to-eMMC adapter (refer to adapter diagram below)
- Attach eMMC adapter (with eMMC) to laptop (using the microSD-to-USB adapter if necessary)
- Flash the image
- Win32DiskImager (Windows)
- Disk Utility (Mac)
- dd command (Mac/Linux, instructions here )
- Re-attached eMMC the odroid
Before turning on the odroid, attach real-time clock battery to the corresponding port on the odroid (at mid-top edge, see odroid diagram in above section). Next, use a HDMI-to-DVI cable to connect your odroid to a monitor. Use the outlet adapter to power the odroid via the 5V4A DC Input port (mid-left). If everything goes smoothly, you should see a desktop background similar to the one below.


After the image is flashed, the usable space of the eMMC will be about the size of the image file (~14GB), so we want to expand the size of the eMMC to its full capacity (~58GB).
you will need to use a laptop with Linux or Ubuntu, Gparted (Linux partition manager), a microSD-to-eMMC adaptor, and a microSD card reader (if your laptop doesn't have an SD port). The main steps are as follows:
-
Install Gparted by typing the command below in terminal if it has not been installed. Gparted is not installed by default.
$ sudo apt-get install gparted
-
Remove eMMC from odroid, connect eMMC to microSD-to-eMMC adapter, and attach eMMC adapter (with eMMC) to laptop. (See first three steps in the previous section of "Flasing the odroid").
-
Select a USB drive to read by going to Devices(top left taps)> USB> "your USB name". (See the image of selecting USB below).
-
Open Gparted and be sure to select the correct drive to resize at the top right corner (the one with 58GB). (See image of selecting a drive in Gparted below).
-
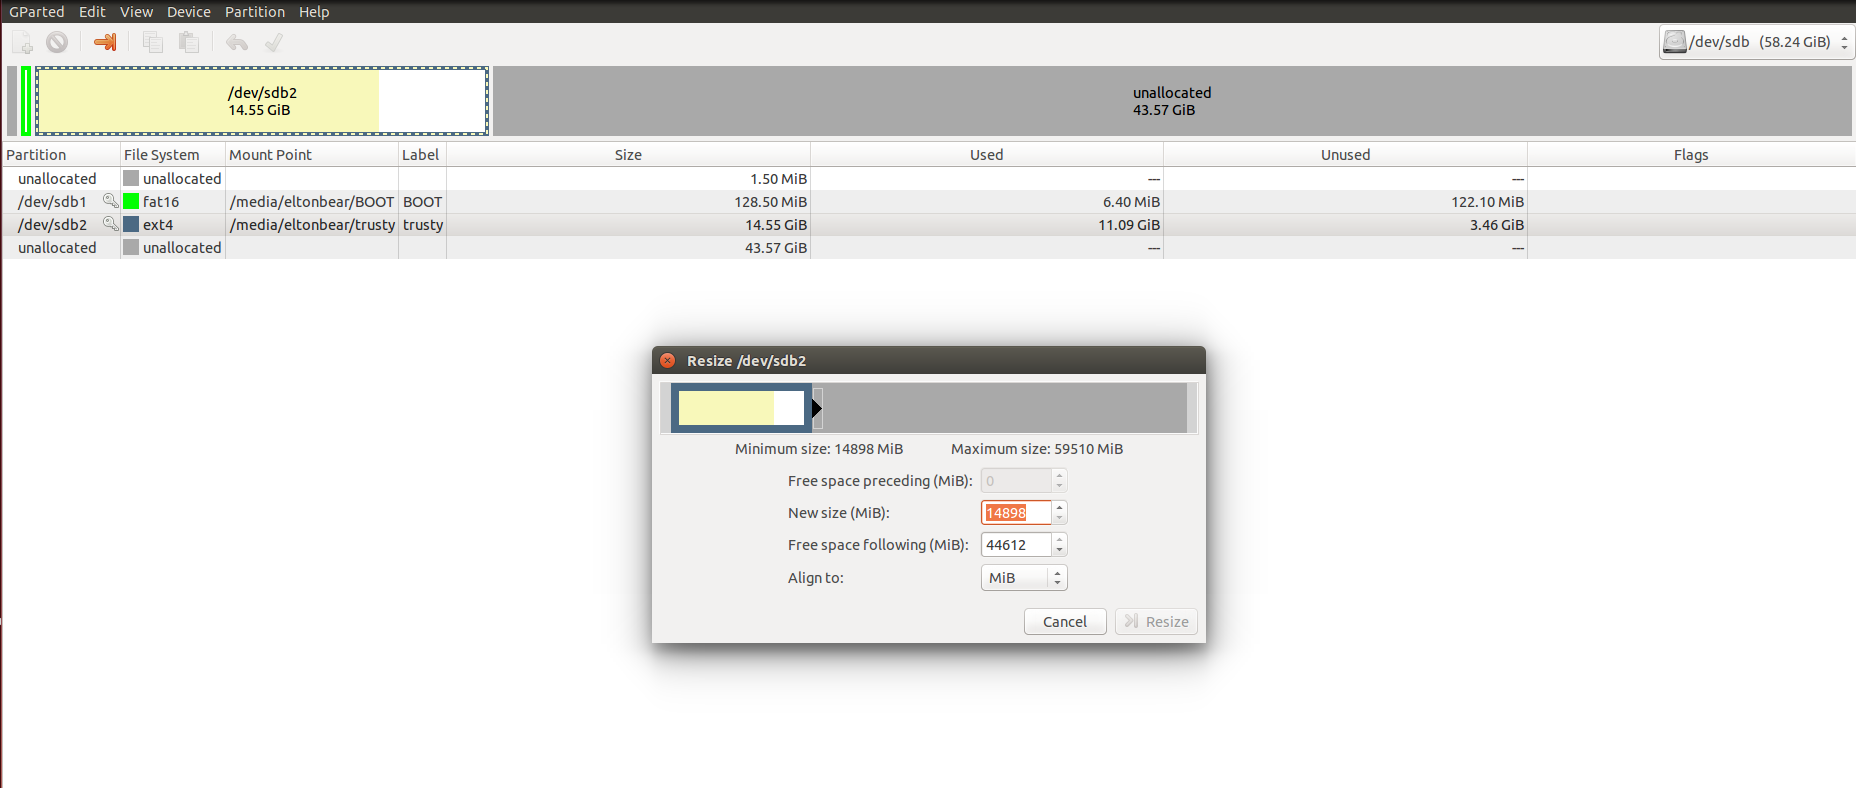
Select the correct partition with a file system of "ext4" and a size of about 14.55GB and click the orange arrow to resize. (See image below).
-
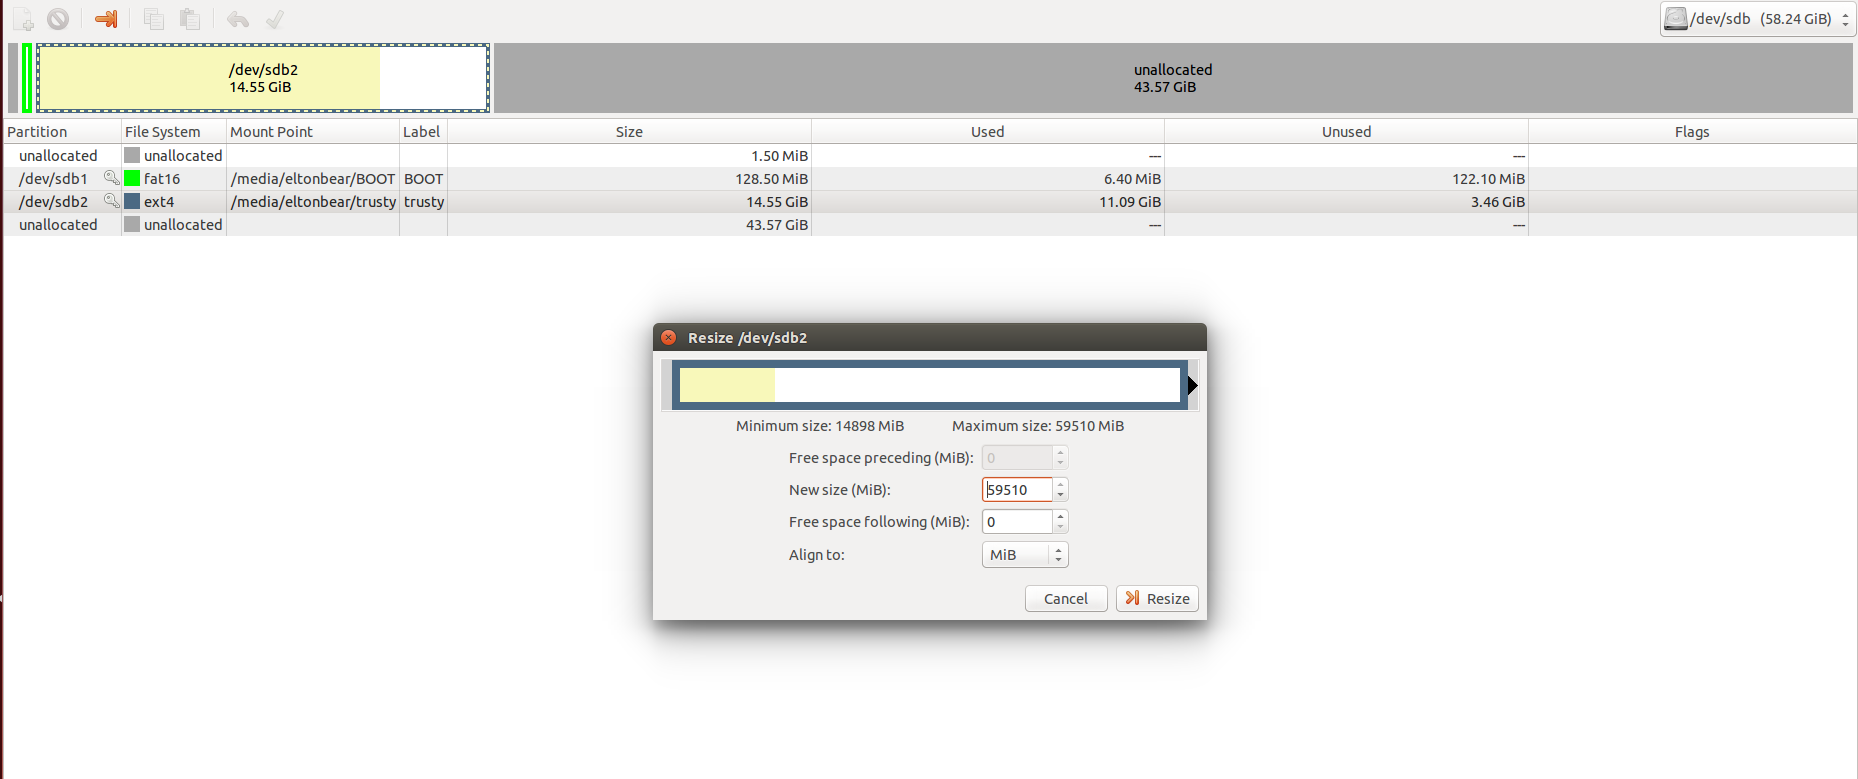
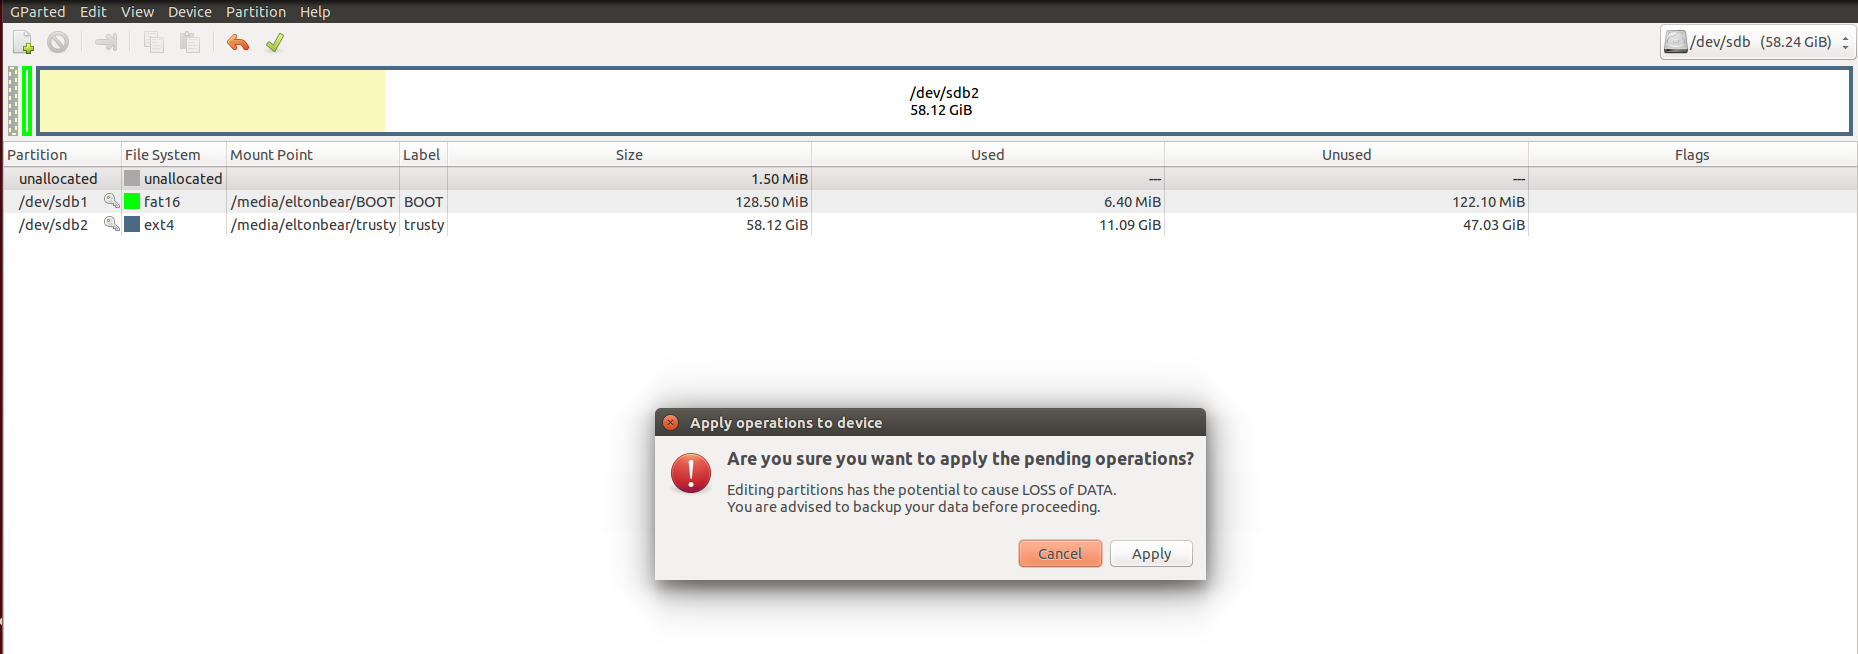
Move the bar all the way to the right so that the new size matches the maximum size and click the resize button. And click the apply button to apply operations to the device. (Refer to images below).


Arduino connections


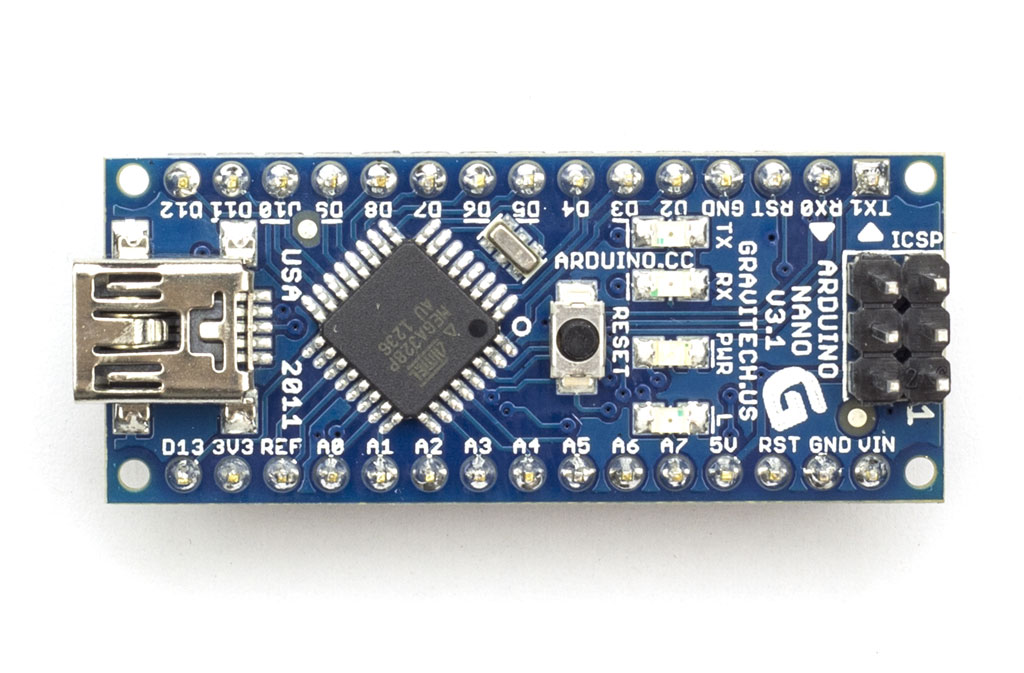
Image from arduino.cc and blog.huntgang
| Component | Pin |
|---|---|
| Front Left Encoder | D2 |
| Front Right Encoder | D3 |
| Back Left Encoder | D5 |
| Back Right Encoder | D6 |
| Throttle (from RC receiver channel 2) | D7 |
| Steering (from RC receiver channel 1) | D8 |
| Electronic Speed Control (for 3-phase Motor) | D10 |
| Servo | D11 |
| Front Ultrasound | D14 = A0 |
| Back Ultrasound | D15 = A1 |
| Right Ultrasound | D16 = A2 |
| Left Ultrasound | D17 = A3 |
To ensure that ROS master can communicate with the arduino node, run the following commands in separate terminal windows
roscore
rosrun rosserial_python serial_node.py
Your terminal should output connection information similar to the following. If you see any error messages, then something is wrong with the connection, try reflashing the arduino
 (barc)odroid@odroid:~$ rosrun rosserial_python serial_node.py

 [INFO]  [WallTime: 1469676336.827668] ROS Serial Python Node

 [INFO]  [WallTime: 1469676336.843514] Connecting to /dev/ttyUSB0 at 57600 baud

 [INFO]  [WallTime: 1469676339.335939] Note: publish buffer size is 280 bytes

 [INFO]  [WallTime: 1469676339.338132] Setup publisher on encoder [barc/Encoder]

 [INFO]  [WallTime: 1469676339.346496] Setup publisher on rc_inputs [barc/ECU]

 [INFO]  [WallTime: 1469676339.358420] Setup publisher on ultrasound [barc/Ultrasound]

 [INFO]  [WallTime: 1469676339.374436] Note: subscribe buffer size is 280 bytes

 [INFO]  [WallTime: 1469676339.376341] Setup subscriber on ecu_pwm [barc/ECU]
- The ultrasound sensor code is commented out. Uncomment it when the sensors have been connected, otherwise serial communication may not work properly
- Encoders now use software interrupts (formerly hardware interrupts. Install the necessary library by running
source ~/barc/scripts/install_enable_interrupt.sh - The arduino sends commands to the servo and motor using pulse width modulation. These commands are sent using the
write(pwm_angle)andwritemicroSeconds(us)member functions of aServoobject. Refer to this article for more clarification on these functions
We use a 2 Cell 7.4 V Turnigy LiPo Battery to power the RC car.
Be careful with the battery. For your safety:
- Never leave the battery charging while unattended.
- Never let the voltage drop below 6.0V
- Never charge the battery to over 8.4V (the charger should automatically stop charging at 8.4 V).
- Never charge the battery at higher than 5.0Amps
- When the car is not in use, don’t leave the battery connected to the ESC or the buck converter.
- If the battery starts smoking or gets on fire, treat it as a chemical fire
The video below provides a basic overview of how to charge the battery.
When charging, note the following
- Use the three-pin balance port
- Use aligator clips to clip onto the battery terminals
- Set up the charging mode settings as 2S, 7.4V, 5.0A. (note, 2S means 2 cell)
We recommend using a battery cell checker to monitor the voltage of the battery. Letting it drain too low could permanently damage the battery. These checkers have a simple display to show the current voltage, and an alarm to sound when the voltage is too low. There are many vendors that sell these checkers, here is one that we use.
Below is a video about how to use one


