-
Notifications
You must be signed in to change notification settings - Fork 3
Simple Device Tutorial
This page will walk you through creating and passing data through your first device using the OpenChirp web portal. In this example, we create a coffee machine that has a temperature sensor, a temperature set point and a pump for water. You will see how to create a sensor with associated MQTT end-point, define transducers, define and execute commands and visualize the output. It is important to remember that everything the web portal is doing is using the REST API that is easily accessible to programs and scripts.
- Log into OpenChirp using your Google ID (step 1)
- Create a Device (steps 2-6)
- Add Transducers (steps 7-9)
- Add Commands (steps 10-13)
- Linking Services (steps 13-15)
- Execute Commands (step 16)
- Visualize Stored Data (steps 17-18)
- Generate a Device Token (step 19)
-
Log into OpenChirp using your Google ID

-
Click on your user name in the upper right corner

-
Click on "My Devices"

-
Click on "New Device" to create a new device instance

-
Type in a name ("coffee machine") for your device and click "Add Device"

-
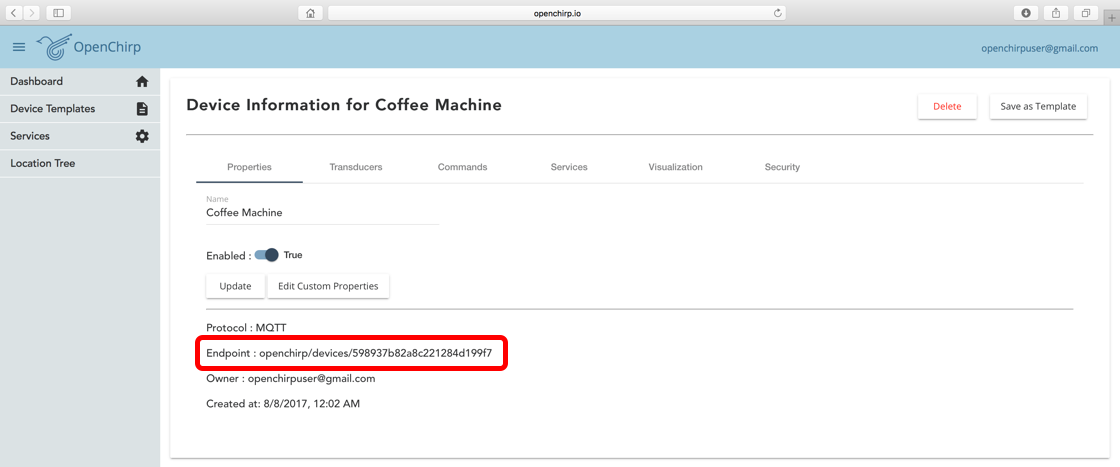
The OpenChirp Portal create a device with the following MQTT End-Point.
-
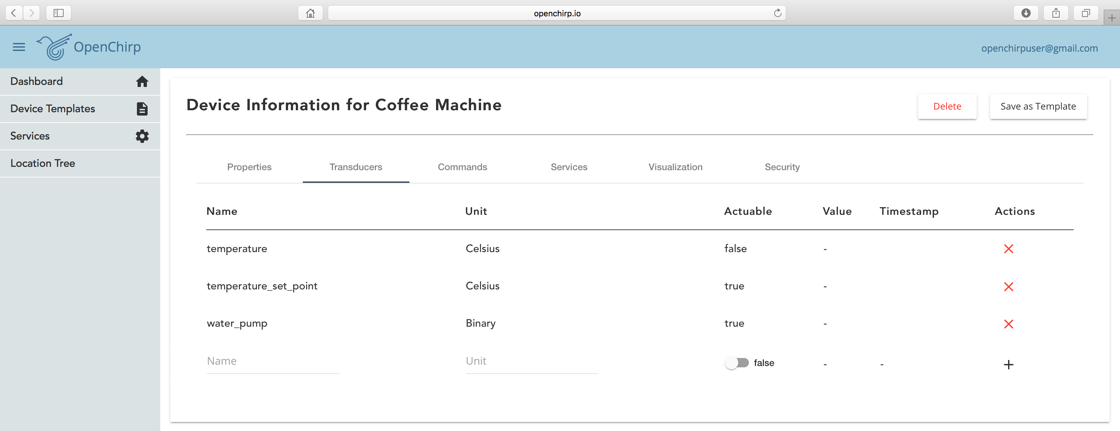
Click over to the "Transducer" tab to add a sensor to your device. Enter a name ("temperature") and units ("Celsius") followed by the "+" symbol to add the transducer.

-
Next add an actuator ("temperature set point") by enabling the actuation tab followed by the "+".

-
Add multiple sensors and actuators that define your device.
-
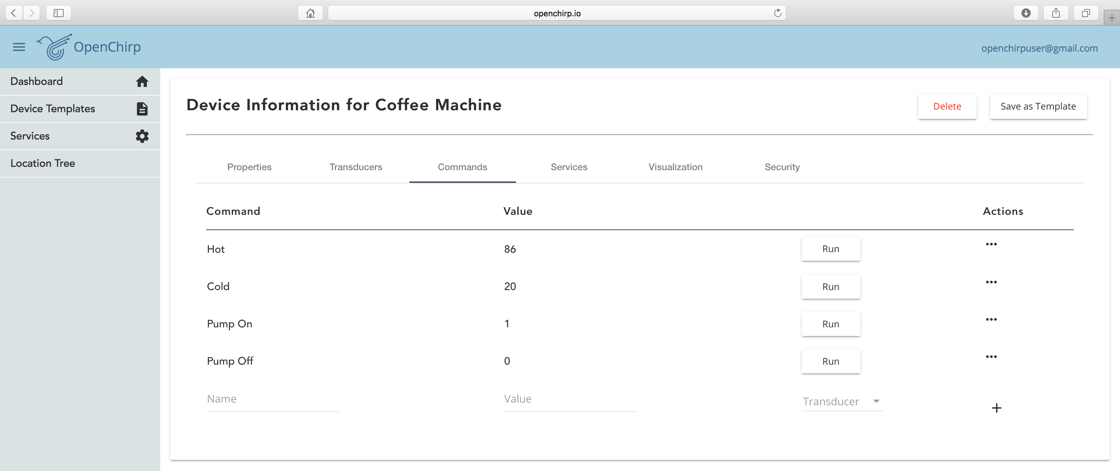
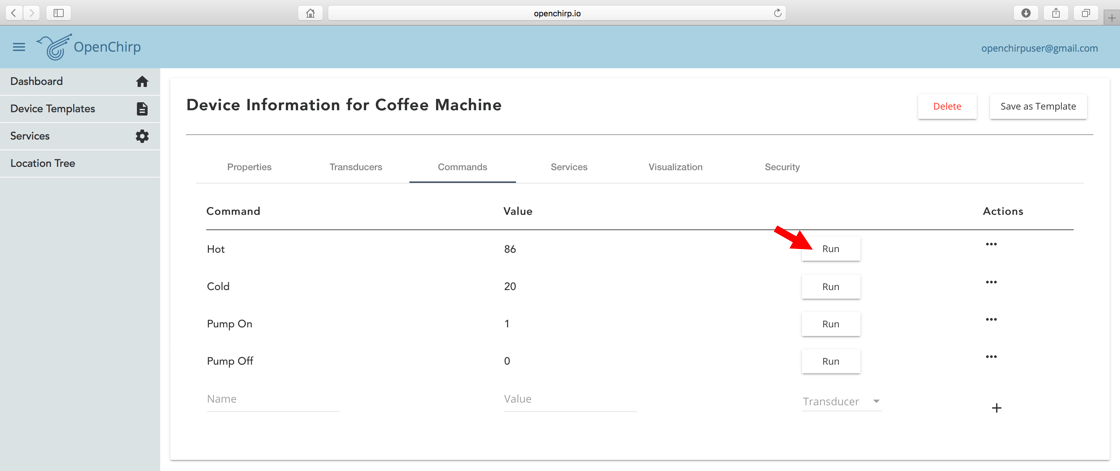
Next click on the "Commands" tab to add commands to your device. These are short cuts that can be used to launch common actuations.

-
Enter a name ("Hot") for the command along with a value ("86") and actuator followed by the "+"

-
Enter a number of other commands as needed. You will want at least two different values for one actuator (name="Cold",value="22") to see the value change for this demonstration.
-
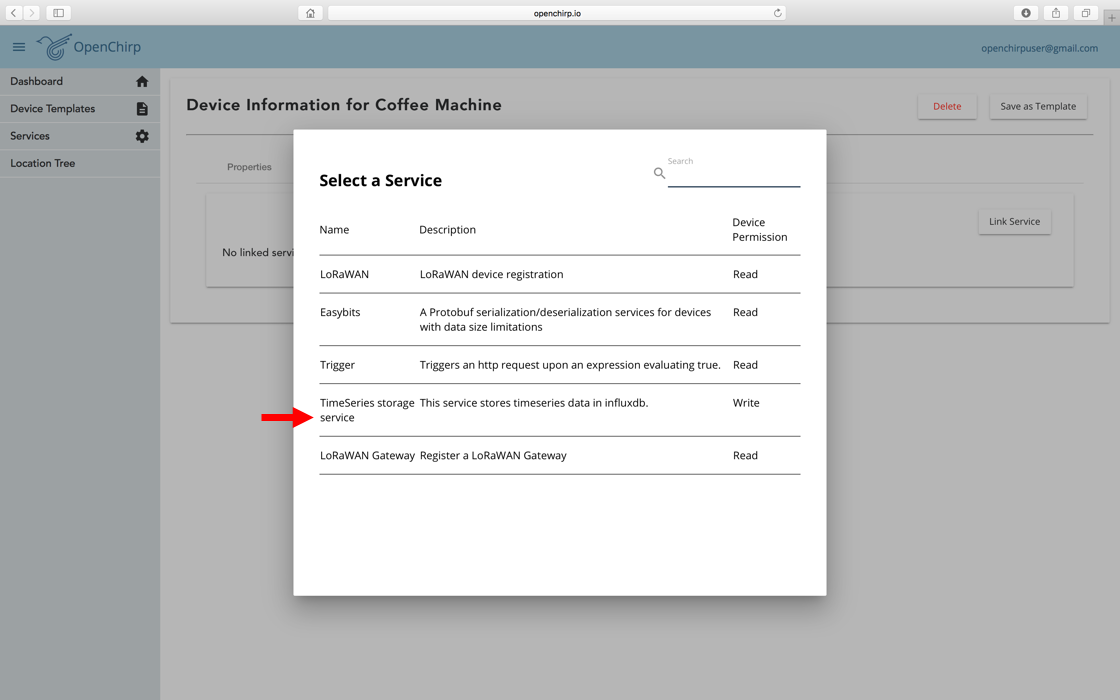
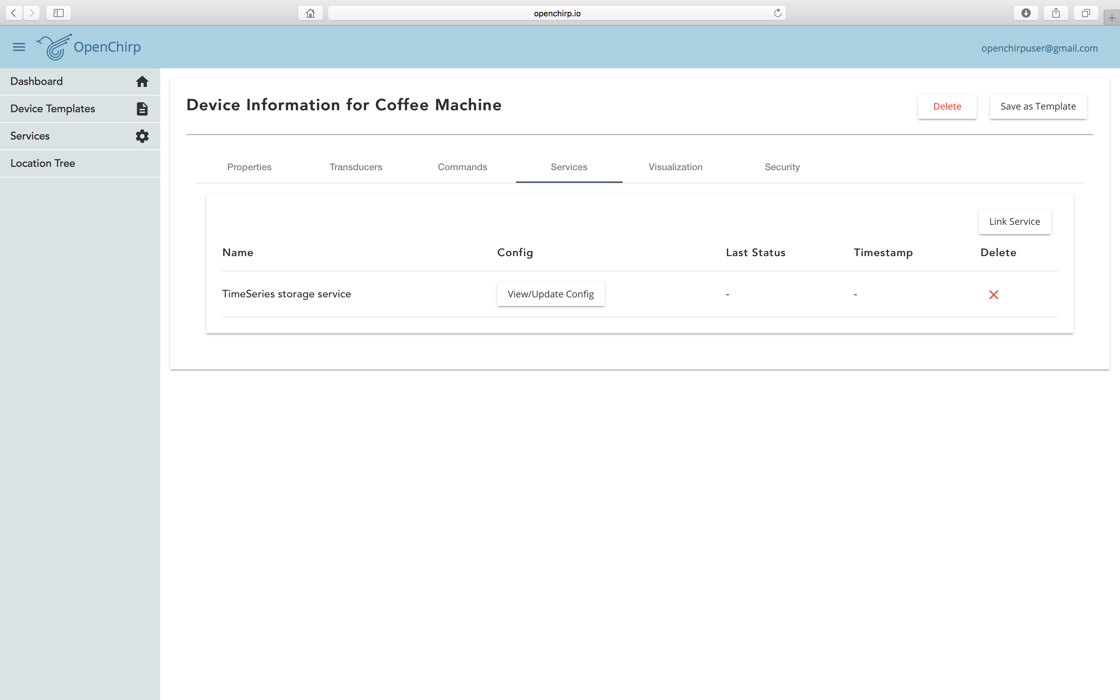
Next we need to add a service to store the data. Services can also do things like link your device or gateway to a LoRa Network. Click on the "Service" tab and then the "Link Service" button

-
Select the Time Series Database and note that each service shows the permissions needed for your device.
-
You will see the service linked like below
-
Next, go back to the "Commands" tab and run a few commands. Make sure to wait a few seconds between each click since the events are timestamped at a 1 second granularity by default. Make sure to run at least one actuator across a variety of levels so that you make a visible change that can be view on a graph. When running these commands, you can also see the values getting published over MQTT (described in more detail below).
-
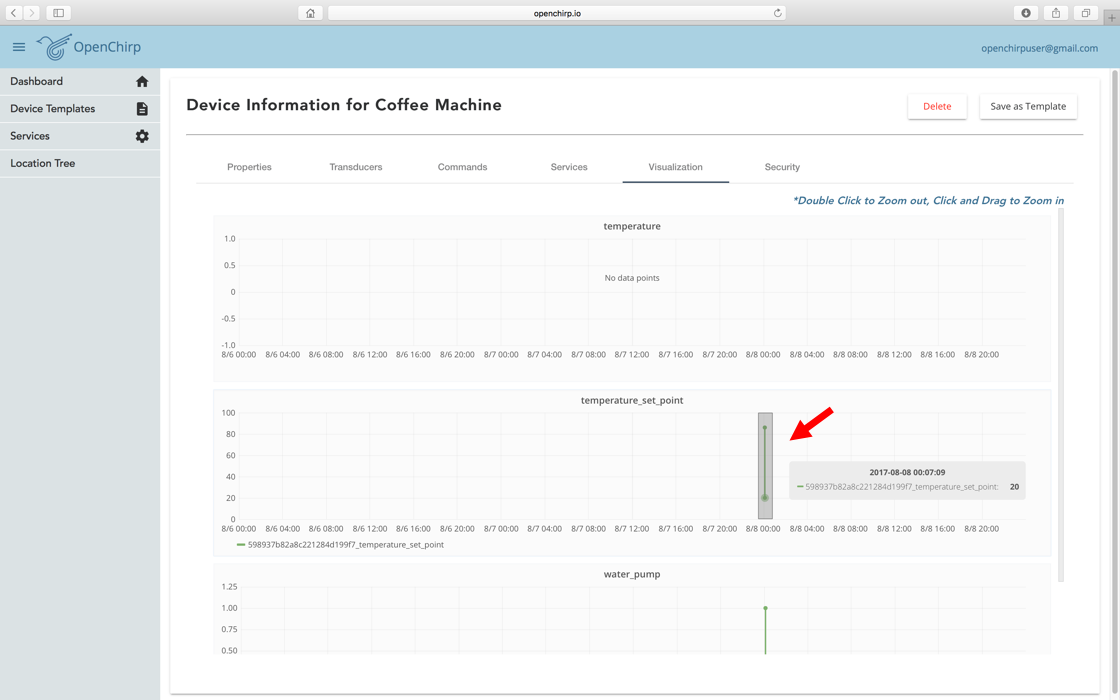
Click on the "Visualize" tab and then click and drag around any small part of data. By default the graph loads the last 24 hours of data. You can double click on a graph to zoom out.
-
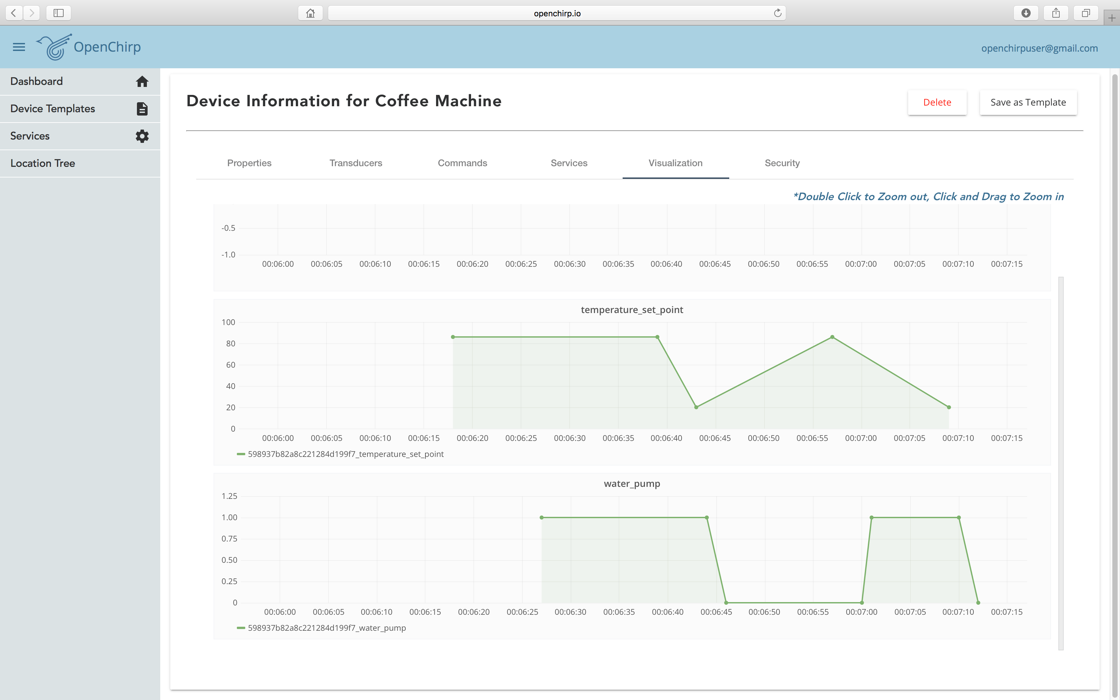
Once zoomed in, you should see a time series of the actuations.
-
The "Security" tab has a variety of properties that can be used to control who or what has access to the device. The "Generate Token" tab will create a Device Token that you can use to access this device end-point (only) over MQTT. You can also generate a User Token that can access all of your devices over MQTT.
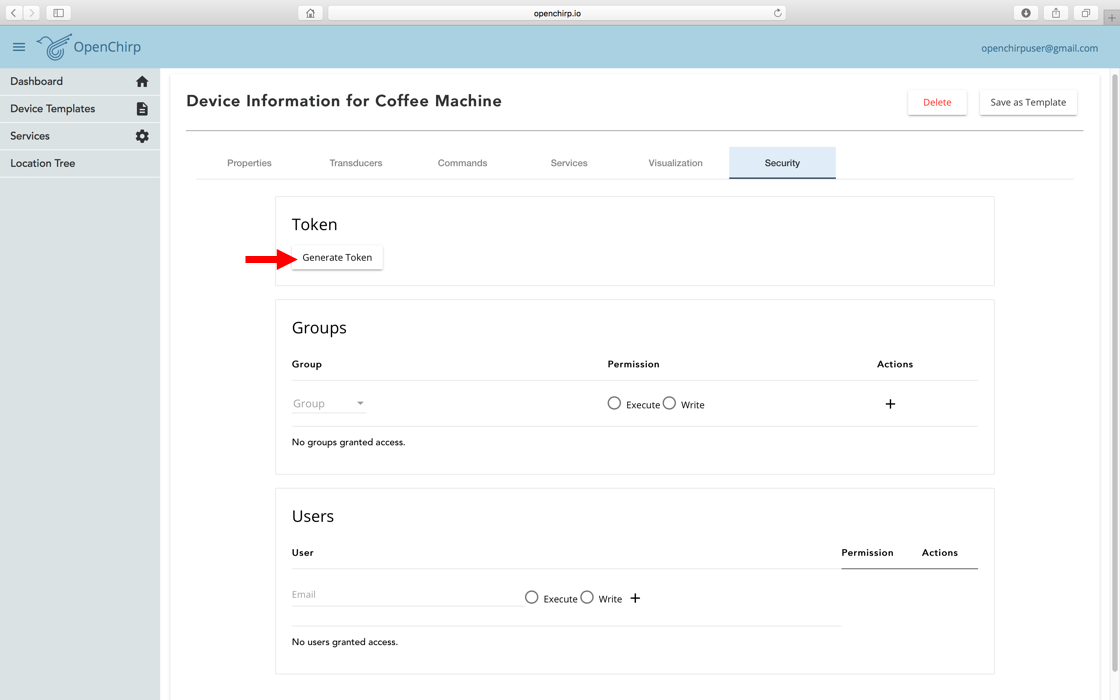
- Generate Device Token
- Access MQTT Feed
- Publish/Subscribe from the command line
For more information on how to do these, please refer to the PubSub Overview page.
You can use the REST interface to request time series data from transducers. Below is an example for exporting all time series data from a transducer using the command line curl tool:
curl -u ID:TOKEN -H "Content-Type: text/csv" https://api.openchirp.io/apiv1/device/DEVICE_ID/transducer/TRANSDUCER_NAME
where ID is either a user ID (someone@gmail.com), device or service ID and TOKEN is the associated token. User tokens can be generated from the profile page and device tokens from the device's security tab. DEVICE_ID / TRANSDUCER_NAME are the ID/name of the target device and transducer.
Checkout https://github.com/OpenChirp/docs/wiki/time-series-database for more detail.
OpenChirp is a research project started by the WiseLab at Carnegie Mellon University.
- Simple Device Tutorial
- PubSub Overview
- Time Series Data
- Device Tutorial
- Generate User Token Tutorial
- LoRaWAN Specific
-
Services
- Byte Translator
- Easybits
- Time Series Storage
- Event Trigger
- LoRaWAN Gateway
- GPS Mapper
- Custom Service
- Openchirp Packages
- REST API
