-
Notifications
You must be signed in to change notification settings - Fork 1
Blend_OTA
Device Firmware Update for Blend and Blend Micro Over The Air.
Last updated: 2014/12/03
-
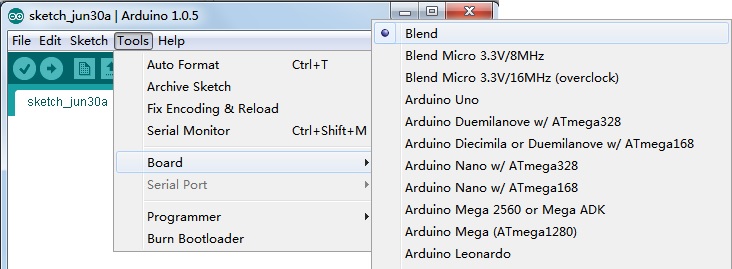
Download our Blend / Blend Micro add-on pakage for Arduino 1.0.5 and follow the README to add it to Arduino.
-
Copy the hex file we have generated for Blend / Blend Micro bootloader that under the "Release" folder, to under the folder:
"Documents\Arduino\hardware\blend\bootloaders\caterina"
and Then rename it with "Caterina-Blend.hex" (which is for Blend) or "Caterina-BlendMicro.hex" (which is for Blend Micro). You'd better backup the previous hex file for Blend \ Blend Micro.
If you want to generate the bootloader for Blend / Blend Micro yourself, please follow the belowing steps:
- Navigate to the "**Source**" folder, copy the sub-folder "ble-caterina" to the folder "Documents\Arduino\hardware\blend\bootloaders", which under where the Blend / Blend Micro add-on package installed. Backup the previous folder of "caterina" fisrt and rename the "ble-caterina" folder with "caterina".

- Choose the platform for which you are going to develop the DFU-OTA bootloader, e.i. copy the file and the folder that under the folder "Platform/Blend" or "Platform/BlendMicro", to under the folder "caterina".

- Open your command line terminal and change the work directory to where the makefile located. Run "make all" command to generate the hex file, which is the DFU-OTA bootloader for the platform you have choosed just now. If the command line prompt that it can not find the "avr-gcc" command, you need to add the path where the "avr-gcc" locate to your system PATH. The "avr-gcc" is usually under "Arduino/hardware/tools/avr/bin".

- Rename the generated hex file with "Caterina-Blend.hex" (which is for Blend) or "Caterina-BlendMicro.hex" (which is for Blend Micro).
-
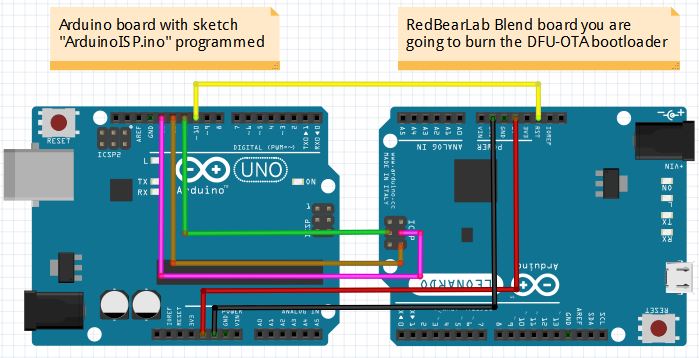
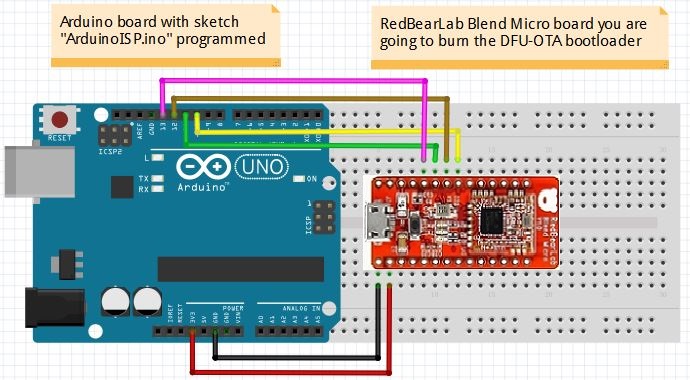
You need an Arduino board with Arduino ISP sketch programmed. Connect Blend / Blend Micro with the Arduino board.
- Burn bootloader for Blend. Since the Blend's form factor and the MCU are similar with Leonardo, the connection to burn bootloader is the same as Leonardo
- Burn Blend Micro
- Burn bootloader for Blend. Since the Blend's form factor and the MCU are similar with Leonardo, the connection to burn bootloader is the same as Leonardo
-
(Blend only, go to step 5 if using Blend Micro) Regarding to Blend, you must move the jumpers to make the REQN connect to D9 and make the RDYN connect to D8, otherwise, the DFU-OTA bootloader will run incorrectly. Since the DFU-OTA bootloader for Blend uses this setting by default.
-
Open Arduino IDE, select the target board:Tools->Board->Blend if you are going to deploy the DFU-OTA bootloader for Blend, or select the target board:Tools->Board->Blend Micro 3.3v/8MHz if you are going to deploy the DFU-OTA bootloader for Blend Micro. Burn the bootloader:Tools->Burn Bootloader. After burning the bootloader, the on-board led will blink breathely. Now you can upload firmware to Blend / Blend Micro Over-The-Air.
NOTE: The DFU-OTA bootloader disables the serial ability, so you can not upload sketch through Arduino IDE. To enable uploding through Arduino IDE, you have to burn the typical serial bootloader for Blend / Blend Micro.
You may not find the hex or bin file after Arduino IDE compiling the sketch, since the hex and bin file are temporary files and are deleted after compilation finished. Please follow the steps to obtain the hex or bin file after you compiling the sketch.
-
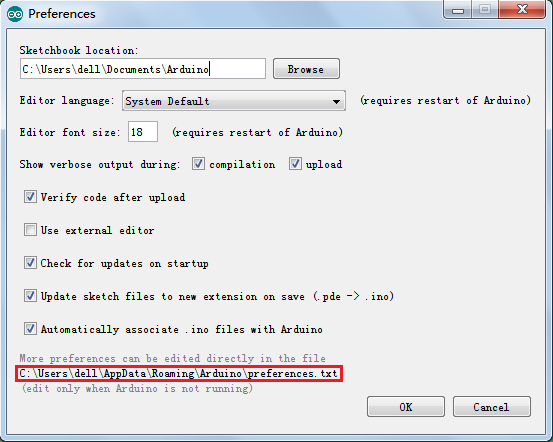
Open Arduino IDE. Click on "File->Preferences".

-
On the pop up window, click on the string below "More preferences can be edited directly in the file" and it will pop up the file browser to show where the preferences.txt located.
-
Close the Arduino IDE! It is important to close the Arduino IDE before editing the preferences.txt, otherwise, the modification of the file will make no effect.
-
Open the preferences.txt with text editor. Add a variable "build.path". The value of the variable is the path that you want to place the hex and bin files after compiling a corresponding sketch. E.g.,
build.path=C:\Users\dell\Documents\Arduino\Hex
Then the hex file and the other object files will be placed under the "C:\Users\dell\Documents\Arduino\Hex" folder when compiling a sketch.
-
Open your sketch with Arduino IDE. Select the board: "Tools > Board > Blend" or "Tools > Board > Blend Micro 3.3v/8MHz".
-
Click on the "Compile" button at the IDE toolbar to begin compiling. When compilation complete, the hex and bin file should have been placed at the path: "C:\Users\dell\Documents\Arduino\Hex".
-
You should have seen that there are lots of object files when you navigate to the path you have specified. The hex or the bin file you need is "<your sketch name>.cpp.hex" or "<your sketch name>.cpp.bin". You can delete other files without any concern.
Note: If you want to write the sketch for Blend / Blend Micro with BLE utility implemented, you should follow this instruction to set up the nRF8001 libraries for arduino first. And in the sketch, you should add the function ble_reset(uint8_t reset_pin) before ble_begin() is called. Otherwise, when uploaded the sketch, it will still advertise the DFU service, unless you re-power on the Blend / Blend Micro. In addition, regarding to Blend, you should connect the reset pin to D4 or D5 on the board.
-
Download nRF Toolbox on App Store or Google play.
-
Download and install Dropbox, Mail, QQ or any other Apps that can synchronize the firmware from PC to your iOS or Android device.
-
Synchronize the firmware (e.i. the hex file generated after compiling the sketch), to your iOS or Android device. Navigate to the firmware you have synchronized and open it with nRF Toolbox.
-
Power on Blend / Blend Micro. If there is no sketch running on it, it will run the DFU-OTA bootloader forever. If you have burnt a sketch to it, just reset it to run DFU-OTA bootloader and it will last running the bootloader for about 16 seconds, and then jump to the sketch. You should ensure that it is running the DFU-OTA bootloader when performing the DFU OTA using nRF Toolbox.
-
Touch the "SELECT DEVICE" button on nRF Toolbox. It will show the device list around you and select the "DFU" device as the target.
-
Touch the "Upload" button to begin uploading the firmware to Blend / Blend Micro Over-The-Air. When upload completed, the sketch begins running if it is valid.
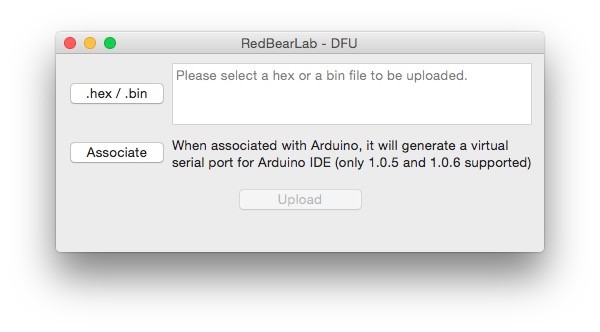
In the "Tools\Mac OS X" folder, you will find the DFU_OTA.zip. After unzip the package, it is the App that implement you uploading firmware to Blend / Blend Micro.
-
Please follow the "Firmware preparation" section to set up the path where the firmware will be placed after compiling the sketch.
-
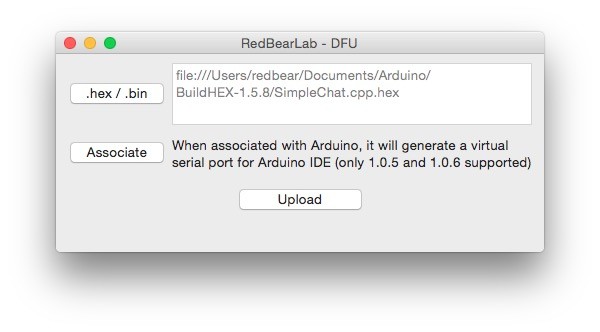
Run the App and click on the ".hex / .bin" button. It will pop up the file browser to let you select the firmware (either be a hex or a bin file) for Blend / Blend Micro.
-
Navigate to where the firmware is located and select it to be uploaded.
-
Power on Blend / Blend Micro. If there is no sketch running on it, it will run the DFU-OTA bootloader forever. If you have burnt a sketch to it, just reset it to run DFU-OTA bootloader and it will last running the bootloader for about 16 seconds, and then jump to the sketch. You should ensure that it is running the DFU-OTA bootloader when performing the DFU OTA using the App.
-
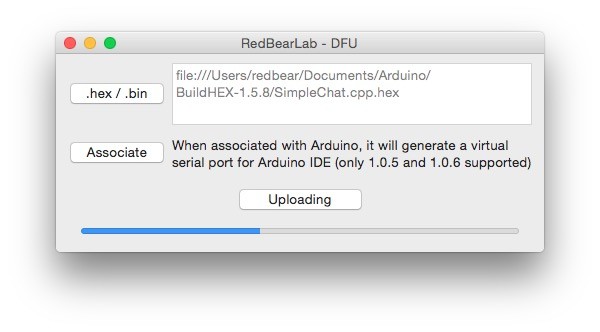
Click on "Upload" to begin uploading the firmware to Blend / Blend Micro Over-The-Air. When upload completed, the sketch begins running if it is valid.
-
Copy the folder "Contents" that under "Tools\Mac OS X\Arduino1.0.5" (or "Arduino1.0.6" if you have installed Arduino version 1.0.6) to cover the Arduino contents folder. The files will be added or replaced are:
- Info.plist
- RXTXcomm.jar
- gnu.io.rxtx.properties
So you'd better backup these previous files if you want to restore these files in the future.
-
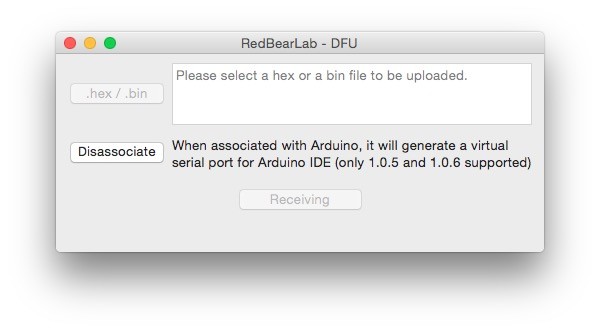
Run the App and click on the "Associate" button.
-
Open your sketch with Arduino IDE 1.0.5.
- Select the board: "Tools > Board > Blend" or "Tools > Board > Blend Micro 3.3v/8MHz".
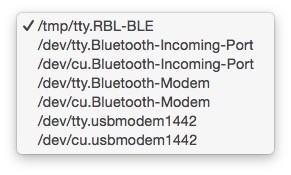
- Select the serial port: "Tools > Serial Port > /tmp/tty.RBL-BLE"
-
Power on Blend / Blend Micro. If there is no sketch running on it, it will run the DFU-OTA bootloader forever. If you have burnt a sketch to it, just reset it to run DFU-OTA bootloader and it will last running the bootloader for about 16 seconds, and then jump to the sketch. You should ensure that it is running the DFU-OTA bootloader when performing the DFU OTA using the App.
-
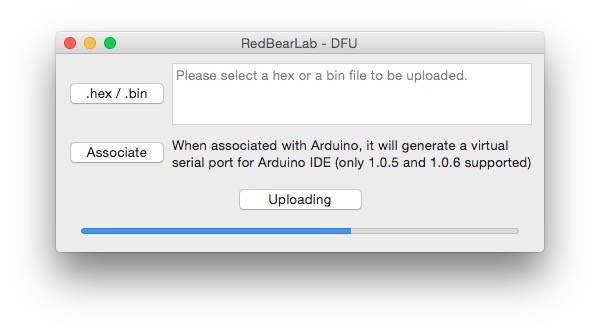
Click on the Right Arrow button at the IDE toolbar to begin upload (it will compile first). When upload complete, the App will scan the device with DFU service automatically. If there is a device running DFU-OTA bootloader, it will connect to it and begin uploading. If there is no device found, it will enable the "Upload" button to let you upload the firmware manually. Then you can reset the Blend / Blend Micro to run the DFU-OTA bootloader and click on the "Upload" button to begin uploading.
In the "Jump2DFU" folder, there is a prepared firmware for Blend / Blend Micro and a sketch to generate the firmware. Here we demonstrate how to upload the firmware to Blend / Blend Micro Over-The-Air using nRF Toolbox on iPod Touch and what the firmware is designed for.
-
Send the firmware, e.i. the hex file in the "Jump2DFU" folder, to ipod Touch through Gmail (or other Apps as mentioned above).
-
Power on Blend / Blend Micro and make it run the DFU-OTA bootloader.
-
Open the received hex file with nRF Toolbox. Click on the "SELECT DEVICE" button to select the device "DFU". Then click "Upload".
-
After upload complete, the on-board led starts blinking. Use our BLE Controller > Simple Chat App to send the "DFU" string to Blend / Blend Micro, it will jump to the DFU-OTA bootloader.