Getting Started
Before a ROM colorization can begin you need frame dumps of the ROM. This is normally done using the ball scroller and manually playing a game in VPX. Typically you will want to block the ball through's in the VPX game so it does not drain.
The dump files are just huge text files with, for each frame, a timecode followed by hexadecimal numbers representing the number of the color of the pixel in the orange shade.
- In the directory "VPinMame", to create a directory "dmddump"
- Ingame, press F1 and check both "Show DMD Window" and "Use external DMD (dll)". Click "OK" to confirm. You may have to restart the table to make it work and then everything that is displayed on the DMD is then dumped in a file called "name_of_the_rom.txt" placed in this "dmddump" directory.
What is difficult for a complete colorization is that you must get ALL the frames possible for ALL the situations. If you restart a table that already has a dump in the "dmddump" directory the new frames will be appened at the end of the file, so the previous content won't be deleted.
But you may cheat: in Visual Pinball, there is a debug mode that you can trigger pressing Esc ingame and clicking on "Debugger/Intera.Ed". Then you check "Ball Control". Now play normally... except that you may control the ball with your mouse and then bring it wherever you want to trigger any event that will be recorded in your dump file!
VPUniverse has some ROM dumps available here: VPUniverse ROM Dumps
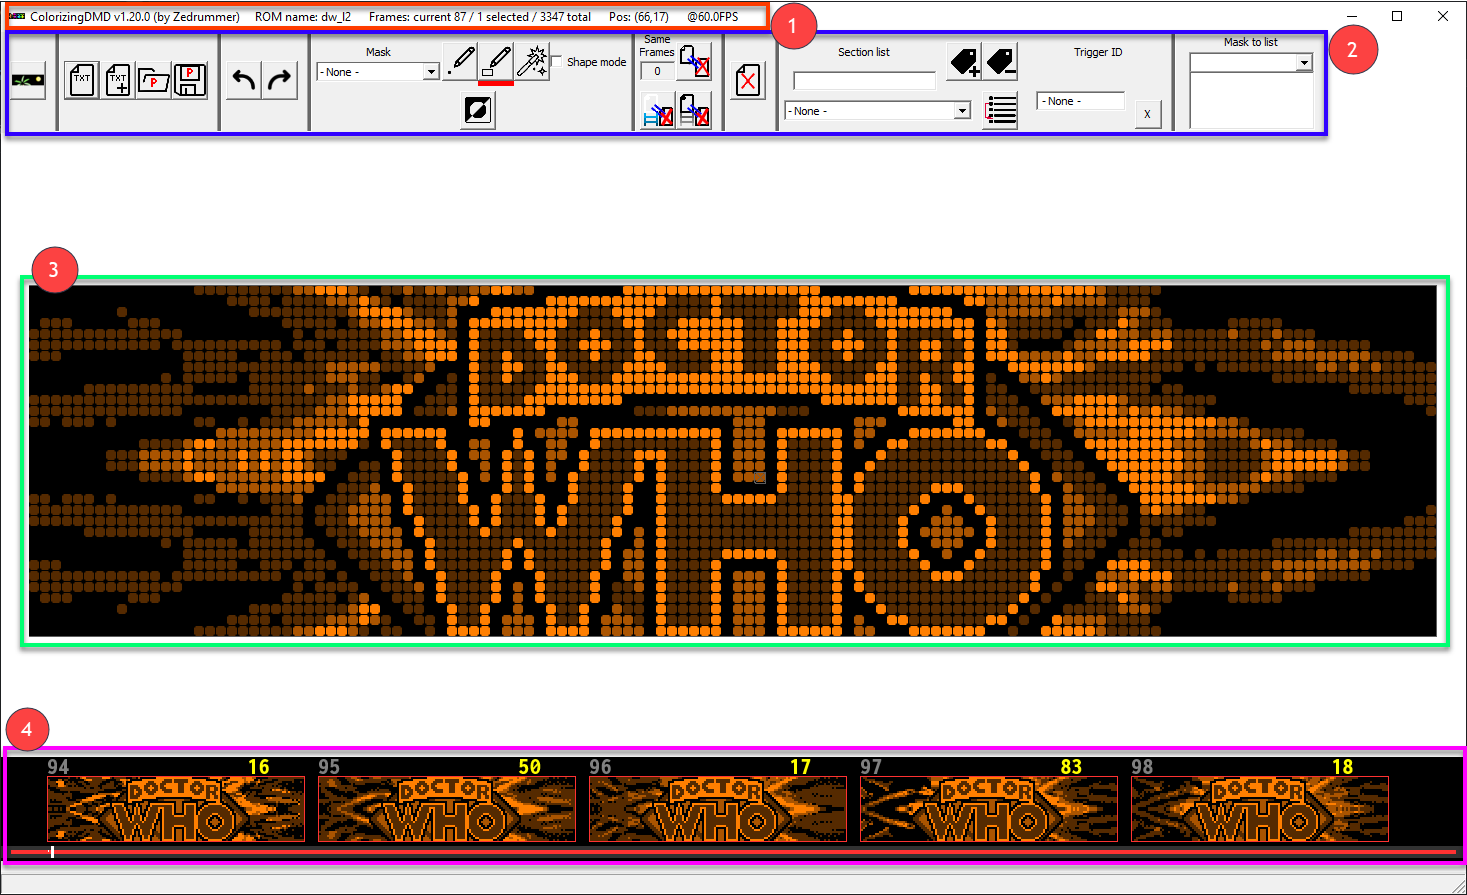
- In the title bar (in red), you can read the name of the ROM loaded, the current displayed frame number and the total number of frames. The FPS was displayed for checks all along the development.
The main window is separated into 3 elements:
-
In the toolbar (in blue), you have all the tools you need to edit the ROM. To be used within Visual Pinball the cRom (serum) file format generated by ColorizeDMD separates data processing in 2 steps. Each step has its own toolbar and these are 2 different modes for ColorizeDMD: “Comparison mode” and “Colorization mode”
-
The current or center frame we are working on is displayed in the green part. We will draw and design masks on this frame. Its number is written in the title bar.
-
The frame strip is displayed at the bottom in the purple part. You can scroll through all the frames using the little slider below the frames. You can select multiple frames to perform the following actions on all of them using the standard Shift and Ctrl:
- click with none of these buttons will only select one frame
- hold Shift will select all the frames between the previously selected and the last clicked
- hold Ctrl will add the new selected to all the previous selected. If you Ctrl+click on an already selected frame, it will be unselected.
If you click on 1 frame among the selected frames:
- if it was already the one displayed in the center frame, all the other selected frames will be unselected.
- if not, the selection will remain the same, but it will become the new frame displayed in the center frame.
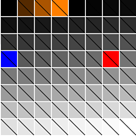
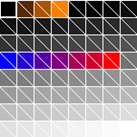
The red line of the slider will reflect 2 things:
- in the upper part, where the line is white, the frame/s at this position is/are selected
- in the lower part, where the line is green, the frame/s at this position is/are found as similar to the current displayed (see Shape Mode)
If a frame’s frame (…) is blue, it is selected, else it is red. If it is white, it is the displayed frame.
If a frame’s number is green, it is similar to the current displayed frame. The purple numbers showed are the section numbers. All the frames with no section number are considered in the same section as the one to their right. We’ll see the use of sections in Section Control Buttons

- The first button
 is a switch between the 2 different modes (when you are in comparison mode, it switches to colorization mode and vice-versa).
 - Next are the 4 file buttons: To know the different frames that the ROM may generates, we load TXT files (compressed files will be added later as requested colorization authors) that contents all the frames generated by a specific table gameplay. See #1 for explanations on how to generate the TXT files.
To create the project, we load the first TXT file with the
 button.
 - You may add any other TXT files containing some more frames not available in the first file using
 .
. -
 will be used to load a previously saved project.
 -
 will save the project.
 -
 are the standard undo/redo buttons that can be used for any action except the deletion of similar frames (see Shape Mode). It memorizes up to 16 actions.
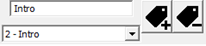
The above buttons are to control sections. Sections are used as labels to quickly jump to the beginning of a group of frames that represents the same animation.
To create a new section, select the first frame of the section, enter a name in the upper left edit box then click
 . The section will then appear in the lower left list box with a section number before. This number correspond to the one displayed in purple in the frame strip. All the frames following this selected frame until a new section is starting are considered in this section.
To delete a section, select any frame owned by this section and click
. The section will then appear in the lower left list box with a section number before. This number correspond to the one displayed in purple in the frame strip. All the frames following this selected frame until a new section is starting are considered in this section.
To delete a section, select any frame owned by this section and click  .
To quickly jump to the first frame of a section, select it in the lower left listbox/drop down list.
.
To quickly jump to the first frame of a section, select it in the lower left listbox/drop down list.

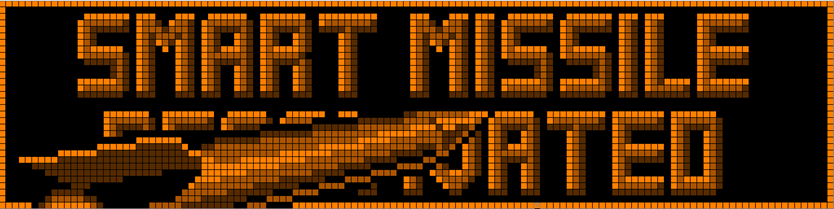
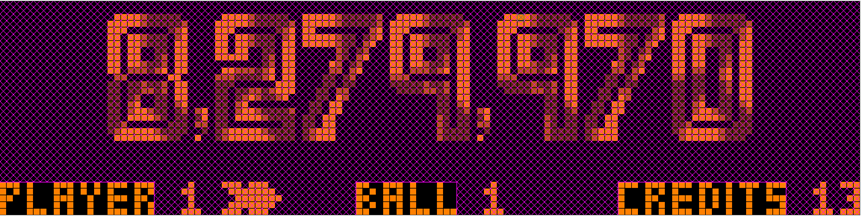
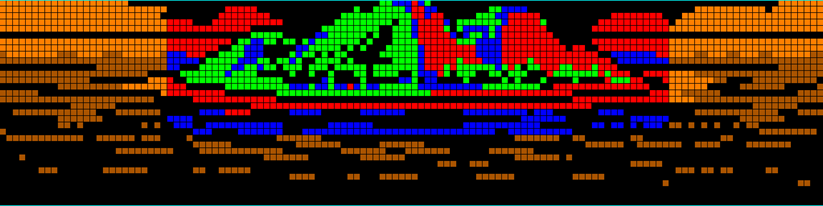
First, our emulator must recognize the frame sent by Visual PinMAME. For that, it tries to match this frame with one of the frames contents in the TXT file(s) loaded. I call this matching step the “Comparison step” and ColorizeDMD has the corresponding “Comparison Mode”. For this mode, let’s explain the interest of masks. Watch this frame:
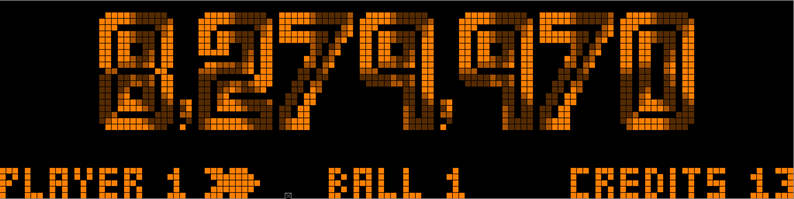
As you can see, the numbers for the score, the player number, the ball number and the number of credits are displayed. All these data are dynamic content that changes every time so you can’t have a frame to compare with for every score of every player of every ball of every credit… We are going to mask this dynamic content and perform the comparison only between the non-dynamic content of the frames, for this frame, the words “PLAYER”, “BALL” and “CREDITS” will never change (same shape, same colors and same place). So, we are going to perform the comparison only with these parts of the frame and “hide” the remaining changing part changing.
You may use up to 64 masks. Just be aware that the higher the number of masks you use, the longer the comparison step will be, reducing the performance of the DMD display.
Now this “Comparison Mode” of ColorizingDMD is specifically aimed at drawing the mask. For that we have these specific controls:
- The dropdown list
 let us select which comparison mask the currently displayed frame (and all the other selected frames at the same time) will be using. If the frame has no dynamic content like:
keep the value to “- None -“. If you need a mask, choose one available. The ones with a box checked are already in use, the others are available to create a new mask. Keep in mind that to reduce the number of masks, the same masks may be use for different frames.
Look at these 2 frames:
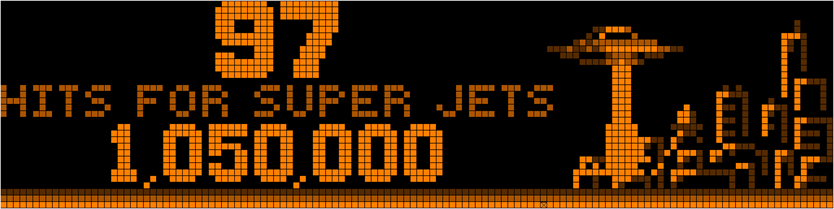
and
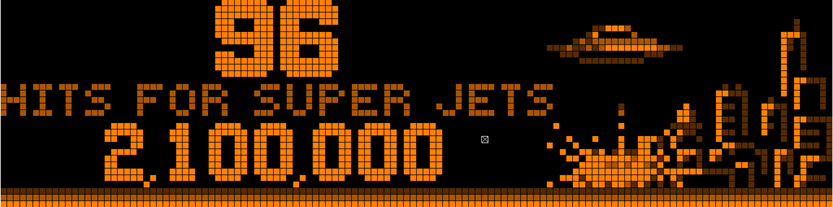
Even if they are different, there is dynamic content (the numbers “97”, “1,050,000”, “96” and “2,100,000”) and it is at the same place in both frames, so you can use a common mask for both.
OK, now let’s draw our mask:
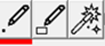
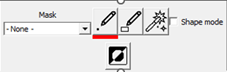
These 3 buttons let you select the drawing tool used, the one currently selected is underlined with a red line.
The “Point tool” adds pixels to the mask, you press the left button of the mouse and move the mouse, it draws pixel IN EVERY SELECTED FRAME all along the path of the mouse until the button is released.
The “Rectangle tool” adds a filled rectangle to the mask IN EVERY SELECTED FRAME, you select one corner at left button press time and select the opposite corner at release time. You may cancel the action before releasing pressing the “Esc” key. Anyway, the “Undo” button will work after releasing the button.
The “Magic Wand tool” adds a continuous area of the same colour to the mask IN EVERY SELECTED FRAME, press the button, move the cursor until the required area is displayed and release the button. Once again, you may cancel the action pressing “Esc” before releasing the button.
If, while pressing the mouse button, you press the Shift key, the drawings you are doing will be deleted from the mask and not added.
If the word “PLAYER” would be the same (color, shape and position) only for this frame, you may even select “BALL” and “CREDITS” in the mask to reduce calculations a little bit more, it would be enough for the comparison process. But that’s really unnecessary, it was just for the example.
The button  let’s you invert the comparison mask: every part of the frame selected will be unselected and vice versa.
The  box is useful for a specific type of frames. Watch this one:
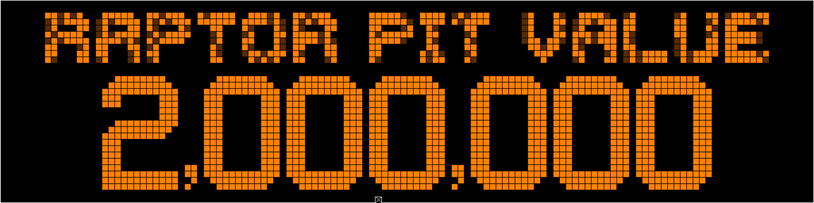
“2,000,000” is dynamic content, it changes along the gameplay, we are going to mask it. So, the only way to compare the frame is using “RAPTOR PIT VALUE”. The problem is that the clear orange and dark orange pixels seem to be randomly chosen to display this text.
For that we will use the “Shape mode”, it will reduce the NON-MASKED PART (so the one we are performing the comparison with) of the frame to 2 colours:
- the always black color 1
- all colors 2, 3 and 4 will be changed during comparison calculations to color 2
With the “Shape mode” box checked, the comparison will be made with the upper part of this frame:
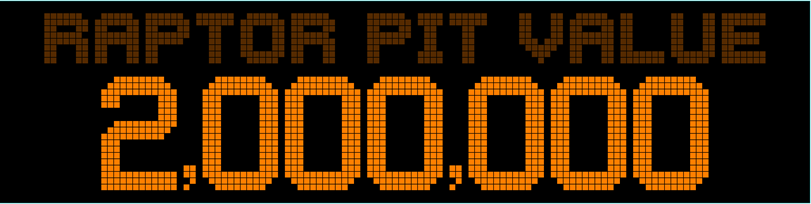
and will be easily recognized by its colour 2 “RAPTOR PIT VALUE” shape.
Another example, for this frame:

where the “PLEASE WAIT” pixel colours seem to be randomly chosen too, you can use no mask with only “Shape mode” checked to make the frame comparison.
Let’s end this mode with  . This is a simple tool helping to discard unnecessary frames. When you load or add a TXT file to the project, there is a raw data comparison made with the frames to discard duplicates and reduce the number of frames to work on (it may take a few seconds). But later, there is this little tool that check in real time if the current frame (with its optional mask and/or the “shape mode” on or off) matches with other frames.
If I set the “Shape mode” on for the last showed frame with no mask:

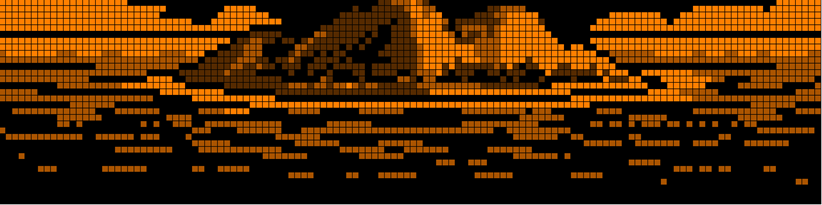
in my files, I have 369 identical frames  , because the Jurassic Park ROM generates a lot of frames similar with the pixel colours of “PLEASE WAIT” generated randomly. With the “Shape mode” on, they all seem identical for the program. The frame strip then looks like this:

the lower line of the slider reflects the detected same frames with green parts. The number of these frames is written in green too, so you can check if all these frames are unnecessary (and adjust the mask accordingly). Eventually, you may click on  to delete the unneeded similar frames.

Once our frame is recognized, it’s time to display it colorized. ColorizeDMD can be use in “Colorization mode” to draw the colorized frame.
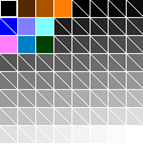
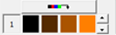
Left  (the case of a 4-colour rom is shown, for 16-colour roms, 16 colours will be shown here): These are the current editing colours; you can change them among the 64 colours available by left-clicking on them. It will then display the 64-colour grid:
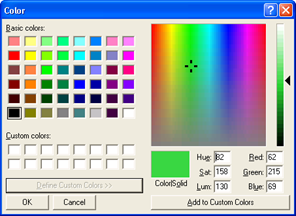
The colours with a diagonal line are not used in the current frame, so they are free to use without changing the already colorized part. If you want to edit one of these colours (choose between the 2^24 available), right-click on it to bring the Windows standard color picking dialog :
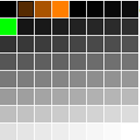
Confirm clicking on « OK » and then the 64-colour grid will be changed:
You can then left-click on the new colour to change the one initially selected
You can create a gradient between 2 colours in the 64 palette easily. Press Shift, press the left mouse button on the first colour and release on the second colour. The gradient will be done.
 ->
->
If you hold Ctrl while clicking a range of consecutive colours, it will select these colours as gradient for « Gradient draw » (see Monochrome / Color Set / Gradient Drawing Modes)
If you hold Alt while clicking one colour in the palette, the next colour you will click will be exchanged with the first in the palette. It is just aimed at organising the colour in the palette.
 lets you save the 4-or-16-colour sets that works well for your colorization (you’ll see in the Monochrome / Color Set / Gradient Drawing Modes why 4 colours sets are useful). By clicking on it, you bring this menu:

where you can click on “Set” to save your current 4-or-16-colour set to reuse later. Afterwards, you can give a name to your set to remind to which use it is aimed at.
To reuse the set later, just click on the 4 colors in the list. You can save up to 64 sets.
 lets you switch between “monochrome” where you draw using the last left-clicked color among the 4 or 16 displayed (the one underlined in red), “Color set replace” where you draw by transforming the corresponding original 4-or-16-colour frame contained in the TXT file by the 4 or 16 selected and “Gradient” where you use the colors you selected with Ctrl while clicking in the palette to fill the Copy mask as a gradient in any direction you like.
For example, with this set  , if I draw a rectangle in “Color set replace” mode on this frame:
I get this:
While in “Gradient draw”, you can’t select any other drawing tool than the line (see Point / Line / Rectangle / Circle / Magic Wand Tools) as the drawn line will be used to determine the direction of the gradient. In this mode, the tool will fill the mask drawn for copy (see Copy Frame Tool) with the gradient in the direction of the line. So, you must have drawn a copy mask (using Ctrl while drawing on the main frame) to see anything.
The pipette  lets you replace the red-underlined color (the one selected) by any that you click on the frame. When you click on it, the mouse cursor becomes pipette shaped and no other action can be performed before the picking is done. Anyway, you can cancel the picking by clicking again on the pipette button or by pressing the “Esc” key.
 These controls will determine how you draw on the frame.
The “Point tool” adds pixels, you press the left button of the mouse and move the mouse, it draws pixel IN EVERY SELECTED FRAME all along the path of the mouse until the button is released.
The “Line tool” draws a line IN EVERY SELECTED FRAME, click on the first end and release when you reach the other end of the line. You may cancel the action before releasing pressing the “Esc” key.
The “Rectangle tool” draws an empty rectangle IN EVERY SELECTED FRAME, you select one corner at left button press time and select the opposite corner at release time. You may cancel the action before releasing pressing the “Esc” key.
The ”Circle tool” draws an empty circle IN EVERY SELECTED FRAME, select the center by clicking, released when the right radius is reached. You may cancel the action before releasing pressing the “Esc” key.
The “Magic Wand tool” draws to a continuous area of the same colour IN EVERY SELECTED FRAME, press the button, move the cursor until the required area is displayed and release the button. Once again, you may cancel the action pressing “Esc” before releasing the button.
The ”Filled” box lets you draw filled rectangle or circle.
If, while pressing the mouse button, you press the Shift key, the drawings you are doing will be deleted from the mask and not added.
The 2 buttons  copy colour palette of the current displayed frame to all the other selected frames. As you draw on all the selected frames at the same time, if the colour RGB components are different, the result will be different, so these buttons will save your time copying colours.
The upper button copies the 4 active colours to the other selected frames.
The Lower button copies then entire palette (64 colours) to the other selected frames and it copies the 8 dynamic colour sets too (see Color Sets - Dynamic Masks Tool just below).
 These 4-or-16-colour sets are used to colorize dynamic masks. There are 8 4-or-16-colour sets per frame. As we seen, before, the dynamic content can’t be previously drawn as there are billions of combinations between score values, ball number, etc… So, the software will calculate the colorization at runtime replacing the dynamic part generated in 4 or 16 colours by the 4 or 16 chosen here. Once again, to change a colour, left-click on it and choose another one in the 64-colour grid. By clicking on the up/down colour, you change between the 8 sets available for each frame. The number of the sets is shown on the left box.
The upper button copies the 4-or-16-colour set used for colorization to the active 4-colour set used for dynamic content.
These 4-or-16-colour sets are used to colorize dynamic masks. There are 8 4-or-16-colour sets per frame. As we seen, before, the dynamic content can’t be previously drawn as there are billions of combinations between score values, ball number, etc… So, the software will calculate the colorization at runtime replacing the dynamic part generated in 4 or 16 colours by the 4 or 16 chosen here. Once again, to change a colour, left-click on it and choose another one in the 64-colour grid. By clicking on the up/down colour, you change between the 8 sets available for each frame. The number of the sets is shown on the left box.
The upper button copies the 4-or-16-colour set used for colorization to the active 4-colour set used for dynamic content.
 Finally, we can copy part of the current frame to other frames. When you have selected the shape, you want to copy with Ctrl key pressed (see below), click on the “Copy” button. Select in the frame strip the different frames you want to copy to, then click on “Paste” and position the selected shape in the destination frame/s using the mouse and left clicking.
Using  you will invert the copy selection, what is selected will be unselected and vice versa.
Now let’s see all the things we draw on the frames:
- We will draw the new colorized frame by left-clicking. If Shift is pressed while starting to draw, the drawing will be reset to the original frame.
- We will draw the dynamic mask by right-clicking, so the current selected dynamic 4-colour set (see Color Sets - Dynamic Masks Tool) will be used for this drawn area. If Shift is pressed while starting to draw, the drawn shape will be deleted from the dynamic mask.
- We will draw the selection area for Copy/Paste by holding Ctrl when left-clicking (the area will be displayed in clear blue). If Shift is pressed while starting to draw, the drawn shape will be deleted from the copy mask.
- Ctrl+S: Save project
- Ctrl+Z: Undo
- Ctrl+Y: Redo
- Ctrl+M: Switch between the modes (Comparison <-> Colorization)
- Ctrl+F: Set the current displayed frame as the first frame in the frame strip
- Ctrl+C: Copy
- Ctrl+V: Paste
- Ctrl+A: Select all the frame for comparison mask (in Comparison mode) or for copy (in Colorisation mode)
- Left/Right/Up/Down: Move in the frame strip (like mouse wheel with/out Shift key)
- Del: Delete selected frame/s (No toolbar button is available for this action)
These are the different mouse actions: Common for both mode:
- Mouse wheel with/out Shift key will move in the frame strip (like Left/Right/Up/Down keys) Comparison mode:
- Left button for drawing the comparison mask Colorization mode:
- Left button for colorization task
- Right button for drawing the dynamic mask
- Ctrl+Left button for drawing the copy mask
In the frame strip:
- Left button: Select the only clicked frame
- Ctrl+Left button: Add the clicked frame to the current selection
- Shift+Left button: Select the range between the previously selected frame and the one clicked
- Shift+Ctrl+Left button: Add the range described above to the current selection
- Alt+[Shift]+[Ctrl]+Left button: Do the same but DELETE to the current selection
| Keyboard | Mouse | Action |
|---|---|---|
| Left Button | Paint with fixed Colors | |
| Right Button | Paint with dynamic colors | |
| SHIFT | Left Button | Paint with fixed colors |
| SHIFT | Right Button | Paint with dynamic colors |
| CTRL+SHIFT | Left Button | Select content |
| ALT | Left Button | With Magic Wand: Color all matching pixels |
| CTRL+ALT | Left Button | With Magic Wand: Select all matching pixels |
| Keyboard | Mouse | Action |
|---|---|---|
| Left Button | Choose a color | |
| Right Button | Change a color | |
| SHIFT | Left Button | Create a gradient between 2 colors |
| CTRL | Left Button | Initialize gradient tool with selected colors |
| ALT | Left Button | Swap 2 colors |
| Keyboard | Mouse | Action |
|---|---|---|
| Left Button | Select a frame | |
| SHIFT | Left Button | Select consecutive frames between two |
| CTRL | Left Button | De/Select an additional frame |
- Introduction to DMD colorization with SERUM
- 1 - Create dump file & import it in ColorizingDMD
- 2 - EXTRA - Fixed and dynamic content + comparison masks
- 3 - Tools to draw masks & to colorize
- 4 - filtering frames & shape mode
- 5 - color management, palette & sets
- 6 - fixed and dynamic colorization
- 7 - gradiant & color rotation
- 8 - let's colorize a dynamic frame!
- 9 - Advanced - Sprite detection
- 10 - Advanced - Multi frame colorization & advanced copy/paste
- 11 - Advanced - SortingCDump
- 12 - Importing images & video