A library to simplify development of printing in apps on Android, as well as providing an improved user experience. This library serves as an interface to Google Cloud Print and various other Print Plugins and services.
Note: Print functionality only exists starting in Android API versions 19 and beyond. Devices with OS older than KitKat will not be able to print using our library workflow. Please see instructions if you want to compile the SDK with older version app, but only call Print functionality from Kitkat and above.
By using the HP Mobile Print SDK, you agree to HP's terms & conditions.
The purpose of this quick start is to get you up and running with a sample app that uses the SDK. Once you have this app running, you will have an example for comparison as you integrate the SDK into your own apps.
Note: If you are behind a proxy, please make sure Android Studio is capable of downloading build tools from the SDK Manager. Depending on your configuration, additional downloads may be required.
-
Clone the repo (for this tutorial, we'll clone to our home folder)
git clone [email protected]:mobileprint/android-print-sdk-sample ~/android-print-sdk-sample -
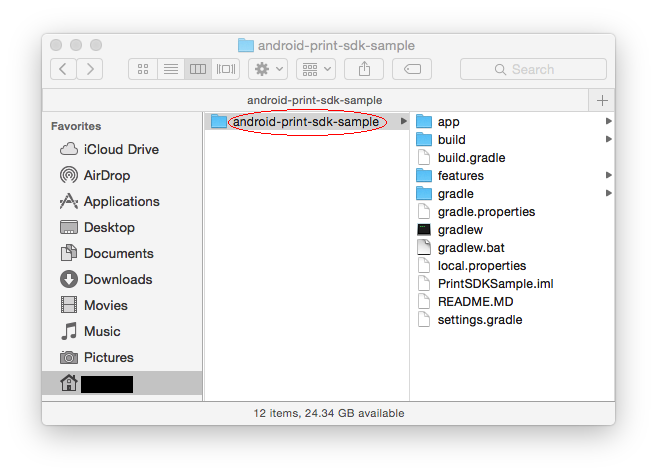
Select the
android-print-sdk-sampledirectory. Then click theChoosebutton. -
Android Studio will alert you regarding any missing dependencies. Click the appropriate link(s) to fix them.
-
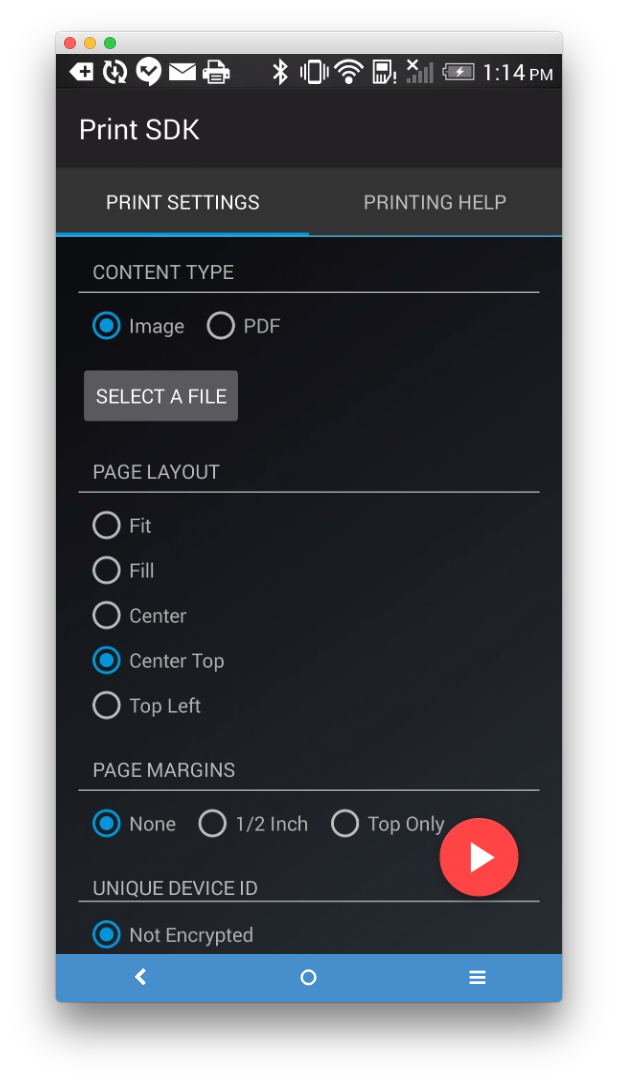
At this point, you should have a working example for reference. To learn more, please check out the full README below.
- JavaDocs
- Installation
- Basic Usage
- Advanced
- KitKat Print Preview
- Layout Options
- Troubleshooting
- Terms & Conditions
The Mobile Print SDK provides an interface that simplifies developer interaction with Android Print functionality. It also provides the following features currently not offered by Android:
- Kitkat print preview (Lollipop has its own print preview functionality)
- Dialogs for assisting users in installing print plugins
- More advanced layouting features than google's
PrintHelper
The JavaDocs for this project are located can be found at http://ipgptp.github.io/DroidPrint/javadocs/. This includes complete documentation for all classes, methods, constants, you may need.
In order to use the SDK and run the PrintSDKSample app, you need the following SDK Platforms and Build-tools installed. Note: Android Studio should prompt you to install any missing tools and assist with installation.
- Android Studio
- Android SDK Platform-tools Version "22"
- Android SDK Build-tools Version "22"
- Android SDK Build-tools Version "21.1.2"
- Android Support Repository Version "16"
- Android Support Library Version "22.2.1"
- SDK Platform "22" (Lolipop)
- SDK Platform "21" (Lolipop)
- SDK Platform "19" (Kitkat)
The Mobile Print SDK library is now available publicly via jcenter! Simply add the following line to your build.gradle file:
compile 'com.hp.mss:mobileprintsdk:v2.02.466'
In order to use the Mobile Print SDK library, you need to first obtain the URI to the bitmap you want to print. Once you have that, you are ready to invoke our print workflow.
One of the first objects you need to create in order to use our print workflow is the ImageAsset object. It tells the print sdk what you want to print.
You will need at least one but you can create as many as needed (Multiple Assets). You can use one of the following 3 methods to create the imageAsset.
To load an ImageAsset from resources:
ImageAsset imageAsset4x6 = new ImageAsset(this, R.drawable.template4x6, ImageAsset.MeasurementUnits.INCHES, 4, 6);To load an image from storage:
ImageAsset assetdirectory = new ImageAsset(this, "oceanwave.jpeg", ImageAsset.MeasurementUnits.INCHES, 4, 6);To load an ImageAsset from an existing Bitmap object:
ImageAsset bitmapAsset = new ImageAsset(this, bitmap, ImageAsset.MeasurementUnits.INCHES, 4,5);Or, if you already saved the bitmap into the internal storage location for your app:
ImageAsset imageAsset4x6 = new ImageAsset(fileUriString, ImageAsset.MeasurementUnits.INCHES, 4, 6);You can also create a PDFAsset object. It behaves much the same as an ImageAsset, and can be substituted for an ImageAsset when creating PrintItems, etc. There are a couple of key differences between PDFAsset and ImageAsset types.
- ImageAssets print in photo mode.
- PDFAssets print in document mode.
- For PDFAssets, the layout is "Fit to Page", and the margins are controlled by the printer. This can lead to some undesirable scaling, and cause some documents to look smaller when printed than intended.
You can use one of the following 2 methods to create the PDFAsset.
To load a PDFAsset from the assets folder:
PDFAsset pdfAsset4x6 = new PDFAsset("4x6.pdf", true);Note: the second parameter, true, indicates that the file is part of the assets built into the app.
If you already saved the PDF into a folder on the device:
PDFAsset pdfAsset4x6 = new PDFAsset(fileUriString);Once you create an image asset, you need to associate it with a PrintItem object. This object provides a scaletype (layout) for the imageAsset and allows you to define what media size you want to associate with the ImageAsset. You will need to provide a ScaleType and the ImageAsset itself.
PrintItem printItemDefault = new ImagePrintItem(PrintItem.ScaleType.CENTER, imageAsset4x6);For more information, take a look in the Sample App or the JavaDocs.
After creating the PrintItem, you are ready to create the PrintJobData object which contains all the relevant info needed
to build the print.
PrintJobData printJobData = new PrintJobData(activity, printItemDefault);
printJobData.setJobName("Example");
PrintUtil.setPrintJobData(printJobData);Once you have created the PrintJobData object, you are ready to print.
PrintUtil.print(activity);If you would like more customization on what gets printed when users select certain print settings in the Android Print Dialog,
we optionally provide a way to give the PrintJobData multiple PrintItems that will be selected based on your user's media size selection as
well as orientation.
Android's system print dialog gives the user the ability to select from an array of
paper sizes to print on. In order to accomodate for that, we give you the ability to print different assets on different paper sizes. By default, the PrintItem you pass into the constructor of PrintJobData will be used for any paper size the user selects. This library gives you the ability to create multiple PrintItem's to override how your print looks when the user selects different paper sizes.
So to clarify, let's say you created PrintJobData with a 'PrintItem' that contained a '4x6' asset. If you hadn't added any other PrintItem's to the PrintJobData, then no matter what paper size the user selects in the print dialog, the '4x6 ' asset will be used. However, if you want the user to print a different asset when they select a paper size of '8.5x11' then, you can create a separate PrintItem that will be able to handle prints to that paper size.
When creating an PrintItem, you can provide the constructor a MediaSize object that lets the Print Library know that you
would like the PrintItem to be used for a particular paper size selection. For example, if you did:
PrintItem printItemLetter = new ImagePrintItem(PrintAttributes.MediaSize.NA_LETTER, scaleType, imageAsset4x5);It would tell the Print Library that you want to use the imageAsset4x5 whenever the user selects the letter size media in
the Android Print Dialog.
You must then add the printItem to the PrintJobData by invoking:
printJobData.addPrintItem(printItemLetter);printJobData takes in an Android standard PrintAttributes object which is used to set print dialog options.
PrintAttributes printAttributes = new PrintAttributes.Builder()
        .setMediaSize(printItemLetter.getMediaSize())
        .build();
printJobData.setPrintDialogOptions(printAttributes);Printing related metrics will be sent to HP server. HP is collecting information like: wireless setup, printer id, number of pages, black and white filter, and print job status. See PrintMetricsData for details.
Above printing information is also available to your app. In order to allow us to post printing metrics data to your app, please implement PrintUtil.PrintMetricsListener in your calling activity.
class YourCallingActivity extends ActionBarActivity implements PrintUtil.PrintMetricsListener {
	...
	@Override
    	public void onPrintMetricsDataPosted(PrintMetricsData printMetricsData) {
   			// Do what you want to do with available printMetricsData
    	}
	...
}Currently, the Android Framework requires customers to install a print service plugin for their printer on their device. Without the right plugin, the device will be unable to discover or use their printer.
In order to improve the users' print experience, we have created a helper that guides users to the print plugin play store page. The helper works by dectecting the top five plugins. They are HP Print Sevice Plugin, Mopria Print Service, Canon Print Service, Epson Print Service, and Brother Print Service Plugin for Lollipop and above or Samsung Print Service Plugin for Kitkat. See below:

The plugin check will happen when PrintUtil.print() is called. If none of above plugins is installed and enabled, the Print Service Manager will display, and guide users through the plugin install and enable process.
Your program can also invoke Print Service Manager by adding:
Intent pluginIntent = new Intent(context, PrintPluginManagerActivity.class);
startActivity(pluginIntent);Whereas Lollipop offers print preview functionality, KitKat did not offer this feature. The Mobile Print SDK implements print preview on KitKat. You can customize the KitKat print preview to your liking by applying overrides to the library styles. Besides the font colors, the preview activity will match the theme you have set up for the rest of your application.
In your strings resource file:
<string name="lib_font">fonts/HPSimplified_BdIt.ttf</string>In your styles resource file:
<style name="pagePreviewView">
    <item name="sizeFontColor">@android:color/white</item>
</style>
<style name="previewPrintInstructionsBG">
    <item name="android:background">@android:color/white</item>
</style>
<style name="previewPrintInstructionsText">
    <item name="android:textColor">@color/HPFontColorBlue</item>
</style>
<style name="previewSpinnerBG">
    <item name="android:background">@android:color/white</item>
</style>
<style name="previewPaperSizeSpinnerText">
    <item name="android:textColor">@color/HPFontColorBlue</item>
</style>
<style name="previewSupportText">
    <item name="android:textColor">@color/HPFontColorGrey</item>
</style>The following images demonstrate the effect of each of the Layout Options.
Here is the image we will use for the examples:
If your application supports minSdkVersion < 19, to compile with this Print SDK, add 'overrideLibrary' property to AndroidManufest.xml as following:
<application
....
    <activity
       .....
    </activity>
    <uses-sdk tools:overrideLibrary="com.hp.mss.hpprint" />
</application>
In your app, dynamically check users' OS version, only call print SDK when OS version is Kitkat and above (Android API >= 19) as following:
if(Build.VERSION.SDK_INT >= 19) {
    PrintUtil.print()
}
In your app, dynamically check users' OS version, only call Print Plugin Helper when OS version is Kitkat and above (Android API > 19) as following:
if(Build.VERSION.SDK_INT >= 19) {
    Intent intent = new Intent(getActivity(), PrintPluginManagerActivity.class);
    startActivity(intent);
}Please see our Wiki Troubleshooting page.


