A Stack component for React Router v4 on React Native.
This library is in an alpha state. I am still experimenting with the transitions and animations, and the API will likely evolve and change. I'd love for you to try it out and give feedback so that we can get to a production ready state!
React Router v4 supports react native, but doesn't include any animated transitions out of the box. I created this component to support card stack style screen transitions.
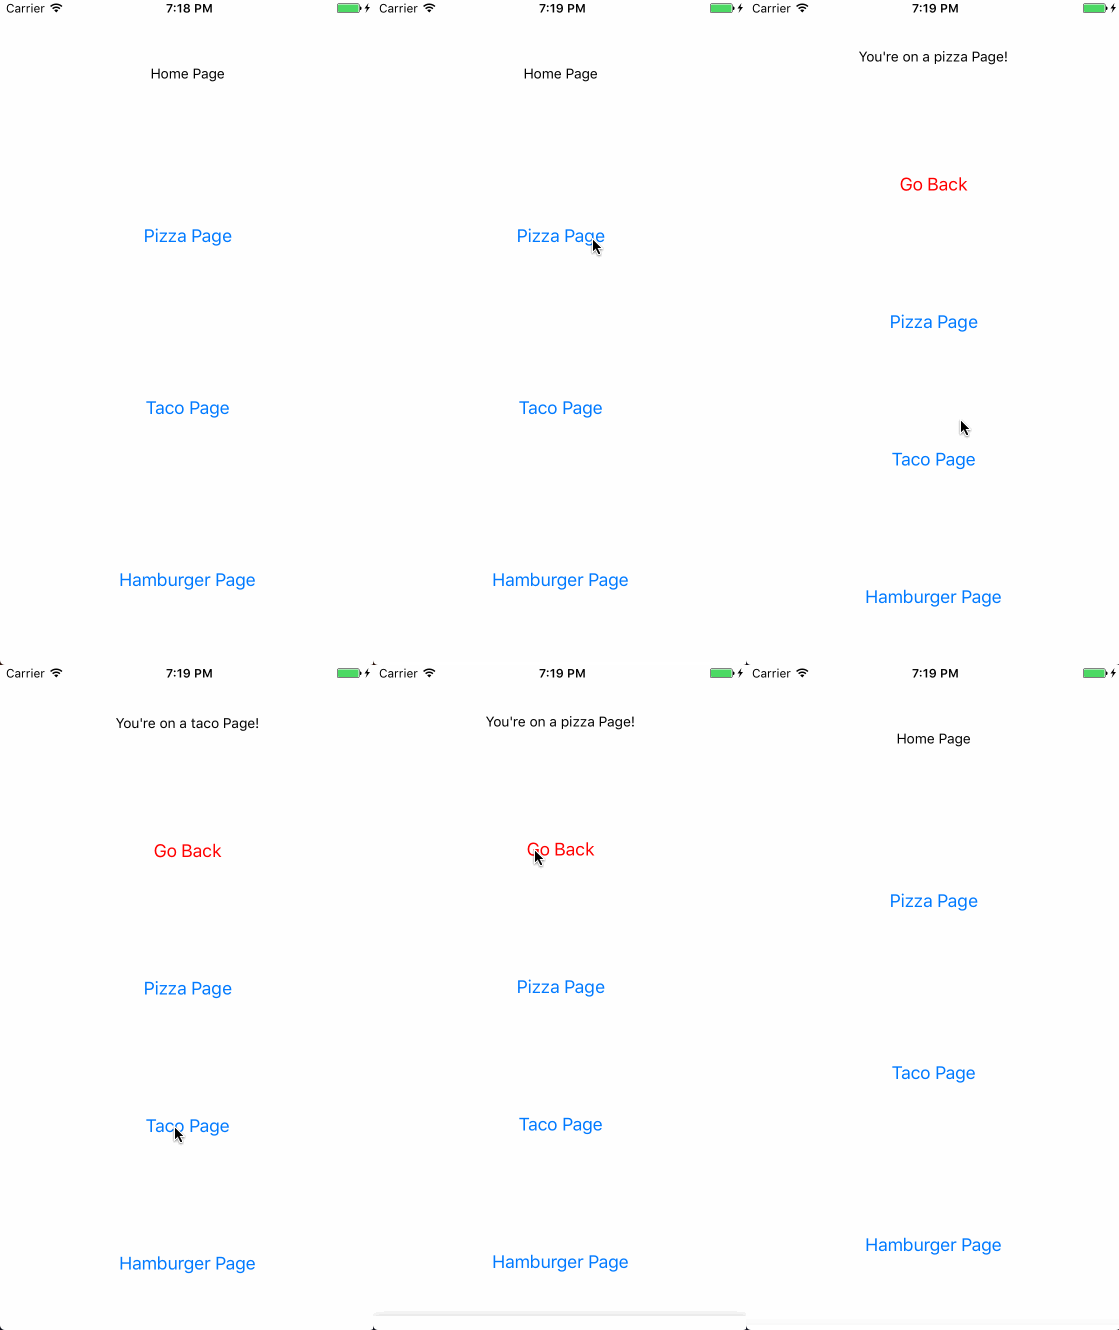
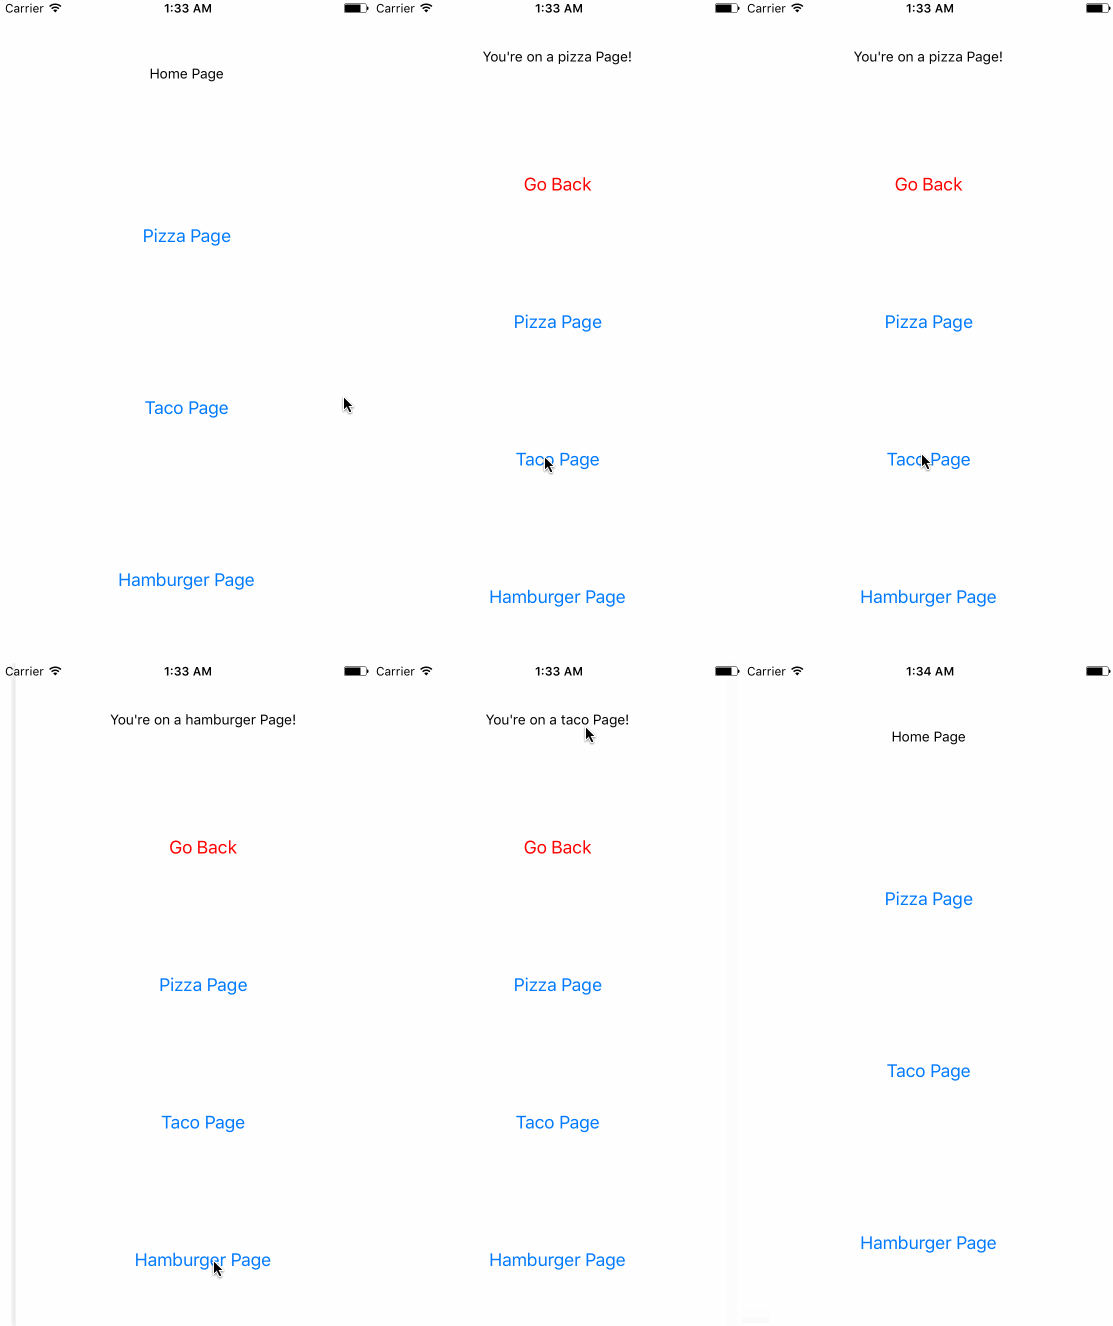
Here's a basic demo:
You can run the above demo on Expo with this link: https://exp.host/@traviskn/simplestack
Install react-router-native and this package:
npm install react-router-native react-router-native-stack --save
Here's a simple working example of using the stack.
import React, { Component } from 'react';
import { Button, StyleSheet, Text, View } from 'react-native';
import { NativeRouter, Route } from 'react-router-native';
import Stack from 'react-router-native-stack';

function Home({ history }) {
  return (
    <View style={styles.screen}>
      <Text>Home Page</Text>

      <Button title="Pizza Page" onPress={() => history.push('/page/pizza')} />

      <Button title="Taco Page" onPress={() => history.push('/page/taco')} />

      <Button title="Hamburger Page" onPress={() => history.push('/page/hamburger')} />
    </View>
  );
}

function Page({ history, match }) {
  return (
    <View style={styles.screen}>
      <Text>You are on a {match.params.name} Page!</Text>

      <Button title="Go Back" color="red" onPress={() => history.goBack()} />

      <Button title="Pizza Page" onPress={() => history.push('/page/pizza')} />

      <Button title="Taco Page" onPress={() => history.push('/page/taco')} />

      <Button title="Hamburger Page" onPress={() => history.push('/page/hamburger')} />
    </View>
  );
}

export default class App extends Component {
  render() {
    return (
      <NativeRouter>
        <Stack>
          <Route exact path="/" component={Home} />
          <Route path="/page/:name" component={Page} />
        </Stack>
      </NativeRouter>
    );
  }
}

const styles = StyleSheet.create({
  screen: {
    flex: 1,
    flexDirection: 'column',
    alignItems: 'center',
    justifyContent: 'space-around',
  },
});
This is what the above code looks like running on iOS:
The stack component uses a Switch
internally to match the current route. It listens for 'PUSH' and 'POP' actions
on history to determine whether to transition forward or backwards. It manages a
PanResponder to allow swiping back through the route stack. It keeps track of the
history index when it mounts so that it knows to stop allowing the swipe back transition
when you reach the beginning index.
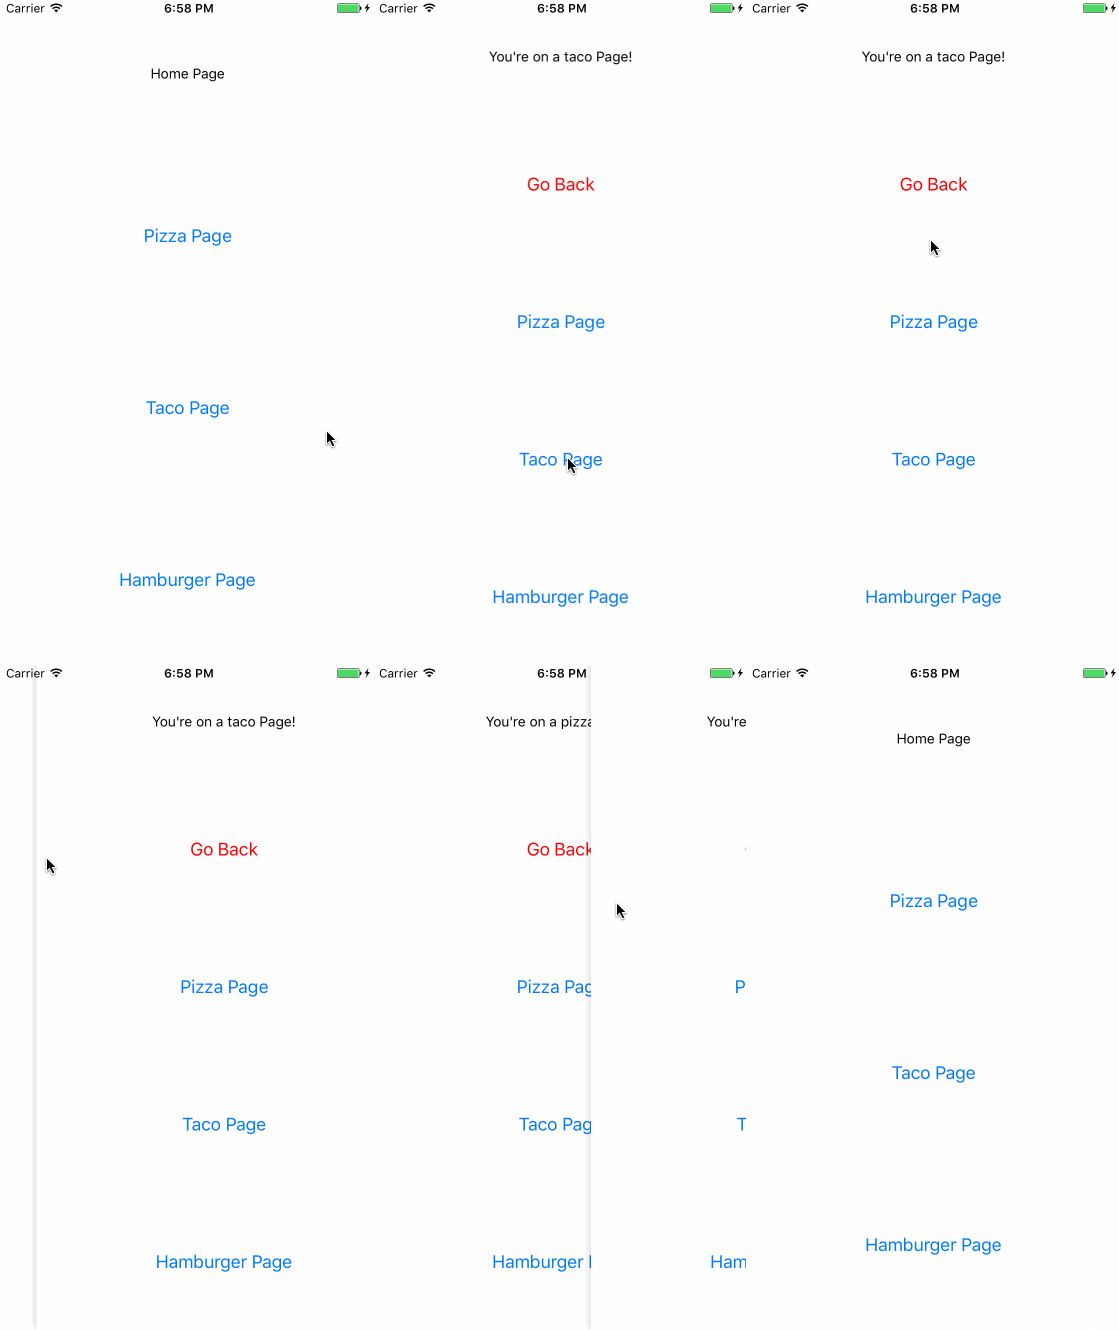
In the examples so far you have seen the default iOS transition animation,
'slide-horizontal'. In addition to that the stack also supports 'slide-vertical',
'fade-vertical', and 'cube'.
if you add an animationType="slide-vertical" prop to the stack in the previous
example, this is the result:
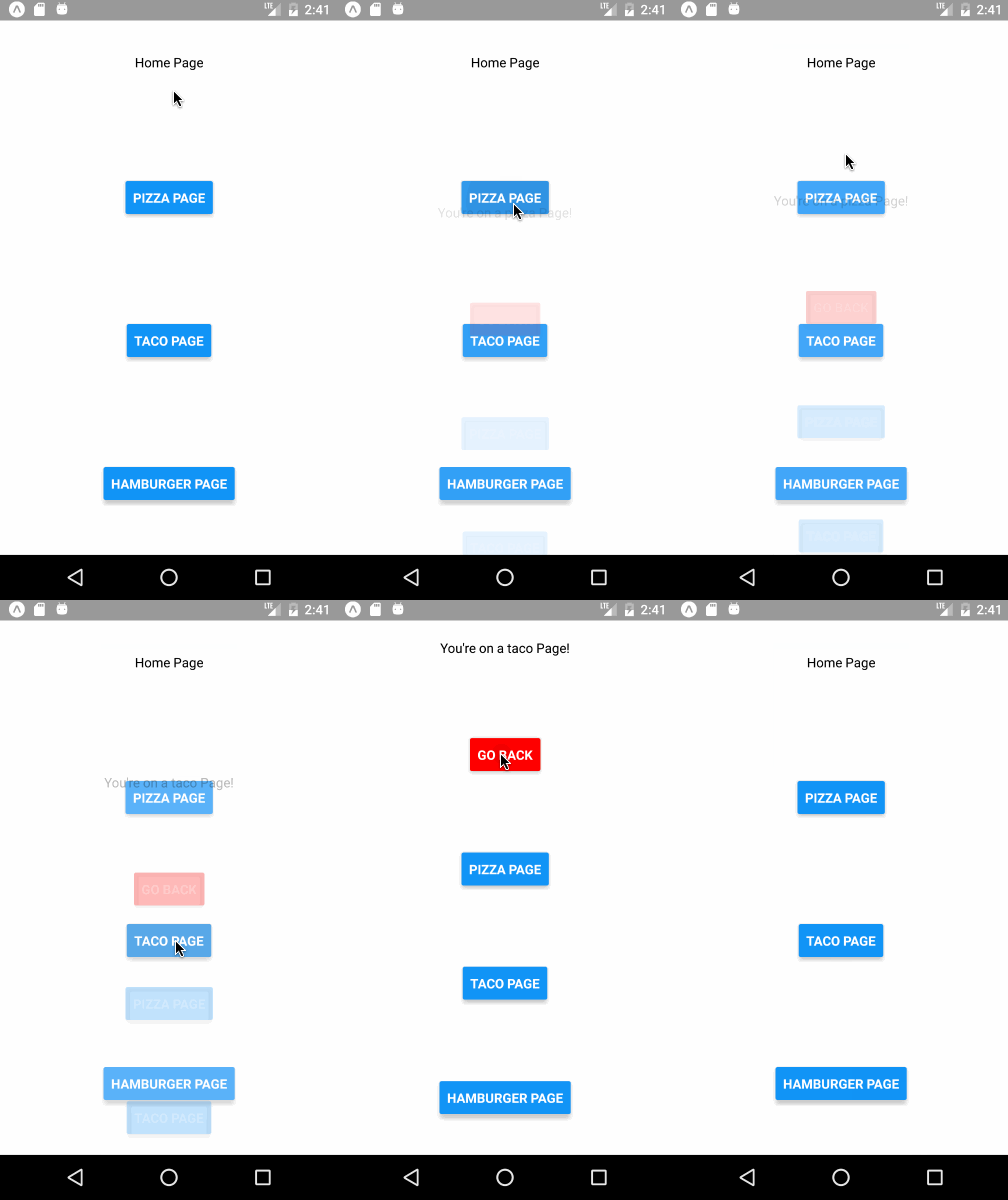
'fade-vertical' is the default for Android, and looks like this:
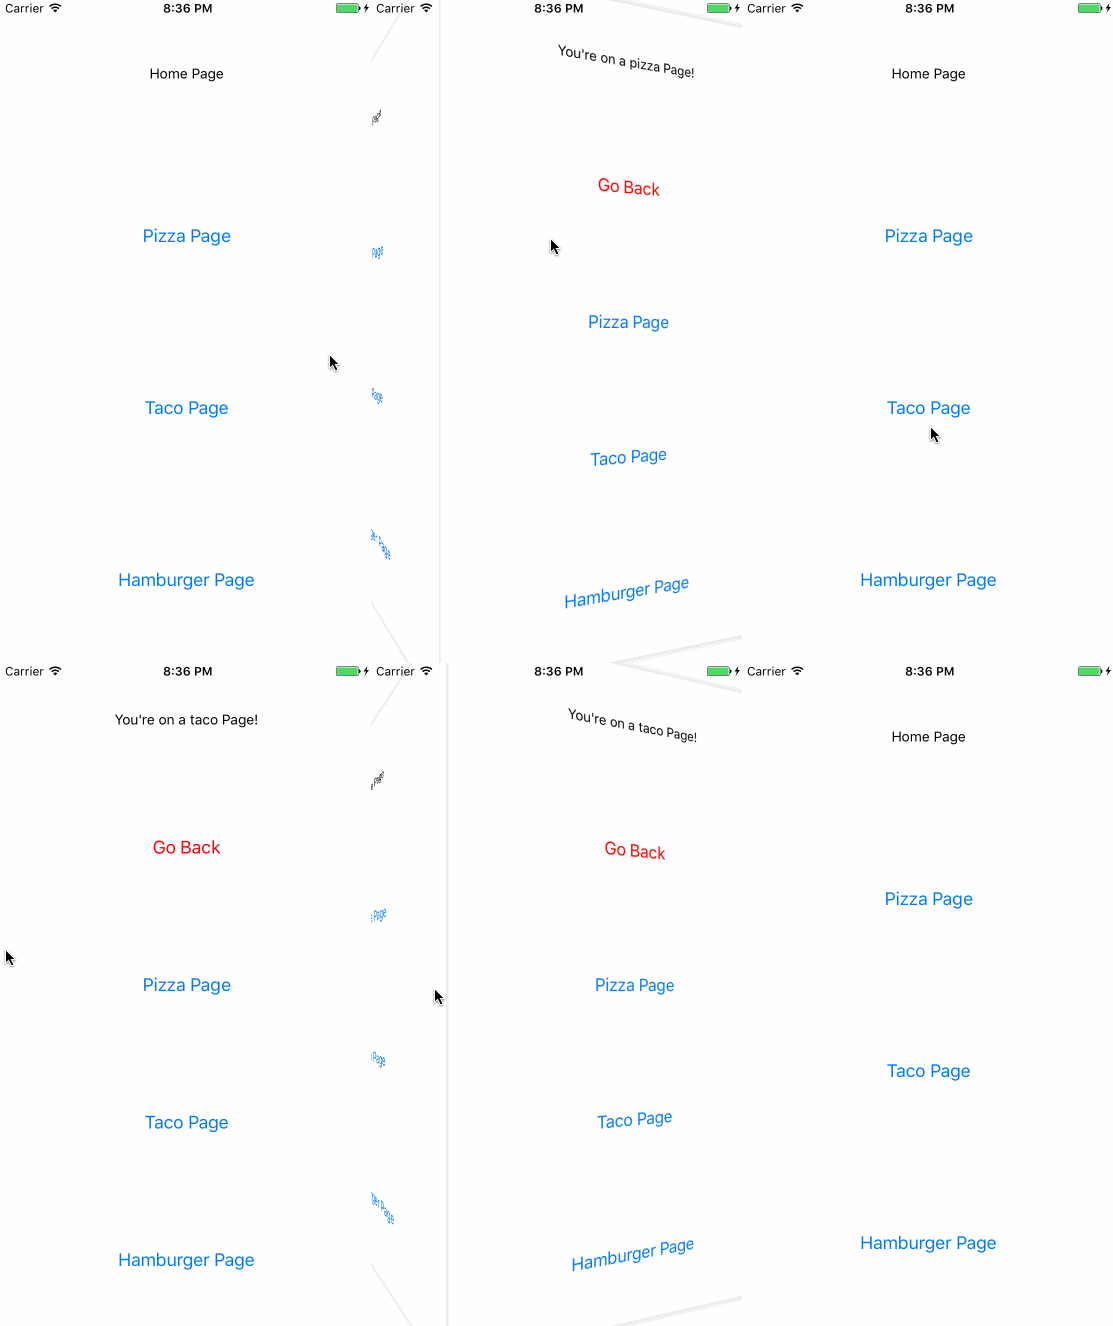
And finally, here's a demo of animationType="cube":
There is also an animation type of 'none' if you need to disable animations.
Sometimes it is desirable to animate a route replace, i.e to animate back to a specific route (without using history.go(-n)).
Use replaceTransitionType as a prop, with either POP or PUSH to animate the REPLACE event.
<Stack replaceTransitionType="POP" /> // A call to `history.replace(routePath)` will now transition using the `POP` animation type.By default the stack component allows swiping back for the slide-horizontal and cube animation types. If you want to
disable this, you can pass in a gestureEnabled prop set to false.
// This stack will not respond to the swipe back gesture
<Stack gestureEnabled={false}>
  {/* Your routes here */}
</Stack>If you need, you can configure the animation type on a per-route basis by adding
an animationType prop to a specific route. As an example, consider that we took
our previous example and had a separate route for each page:
import React, { Component } from 'react';
import { Button, StyleSheet, Text, View } from 'react-native';
import { NativeRouter, Route } from 'react-router-native';
import Stack from 'react-router-native-stack';

function Home({ history }) {
  return (
    <View style={styles.screen}>
      <Text>Home Page</Text>

      <Button title="Pizza Page" onPress={() => history.push('/page/pizza')} />

      <Button title="Taco Page" onPress={() => history.push('/page/taco')} />

      <Button title="Hamburger Page" onPress={() => history.push('/page/hamburger')} />
    </View>
  );
}

function Page({ history, match }) {
  return (
    <View style={styles.screen}>
      <Text>You are on a {match.url.replace('/page/', '')} Page!</Text>

      <Button title="Go Back" color="red" onPress={() => history.goBack()} />

      <Button title="Pizza Page" onPress={() => history.push('/page/pizza')} />

      <Button title="Taco Page" onPress={() => history.push('/page/taco')} />

      <Button title="Hamburger Page" onPress={() => history.push('/page/hamburger')} />
    </View>
  );
}

export default class App extends Component {
  render() {
    return (
      <NativeRouter>
        <Stack>
          <Route exact path="/" component={Home} />
          <Route path="/page/pizza" component={Page} />
          <Route path="/page/taco" animationType="slide-vertical" component={Page} />
          <Route path="/page/hamburger" component={Page} />
        </Stack>
      </NativeRouter>
    );
  }
}

const styles = StyleSheet.create({
  screen: {
    flex: 1,
    flexDirection: 'column',
    alignItems: 'center',
    justifyContent: 'space-around',
  },
});
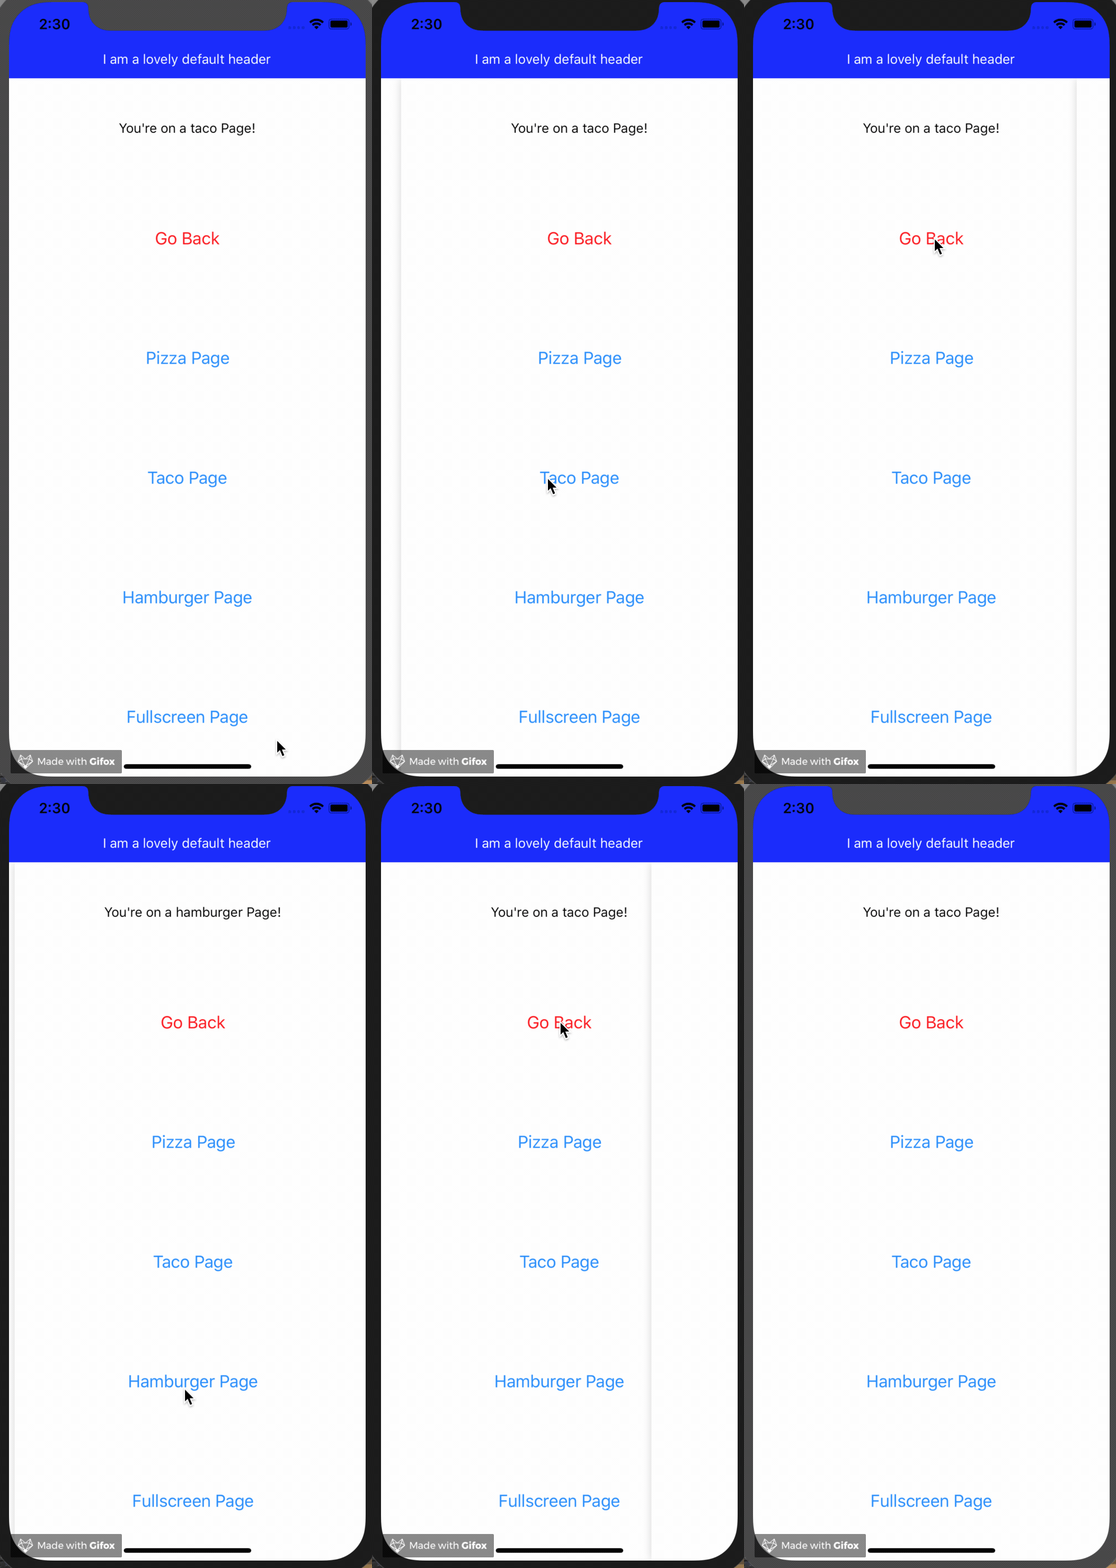
With this updated code we have configured the taco page to use a slide-vertical
animation, but all the other pages will use the default slide-horizontal animation.
The taco page will control the animation type when it pushes onto the stack, and
when it pops off of the stack. Here's how it looks:
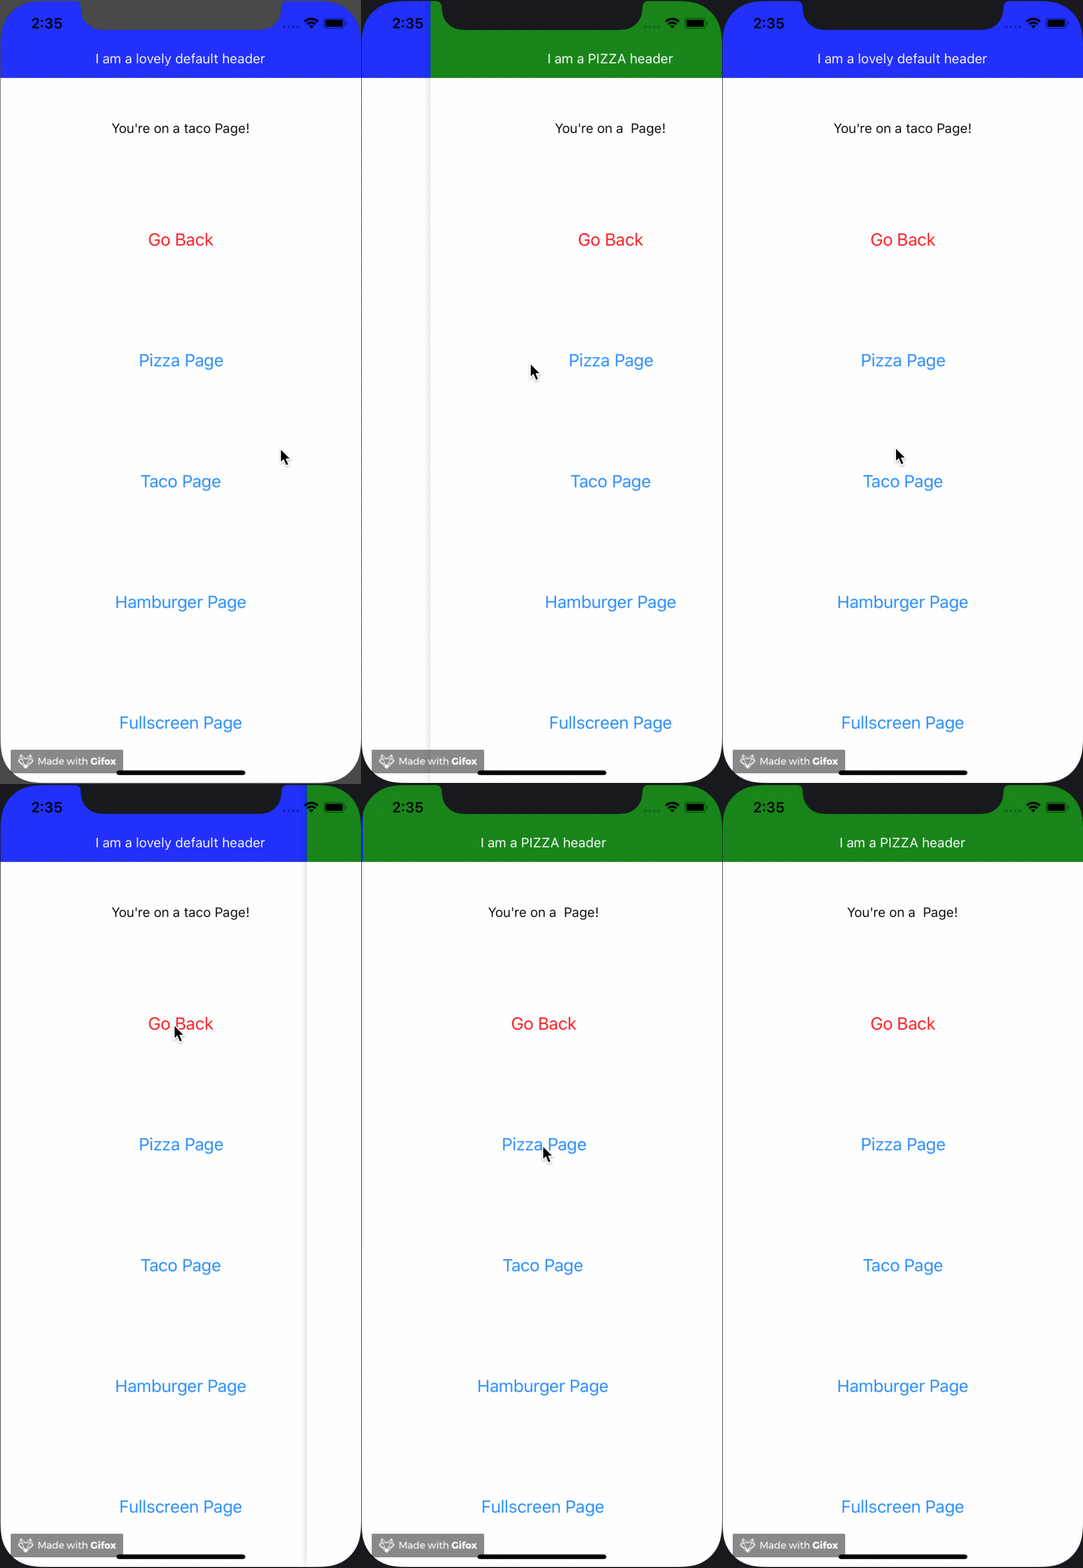
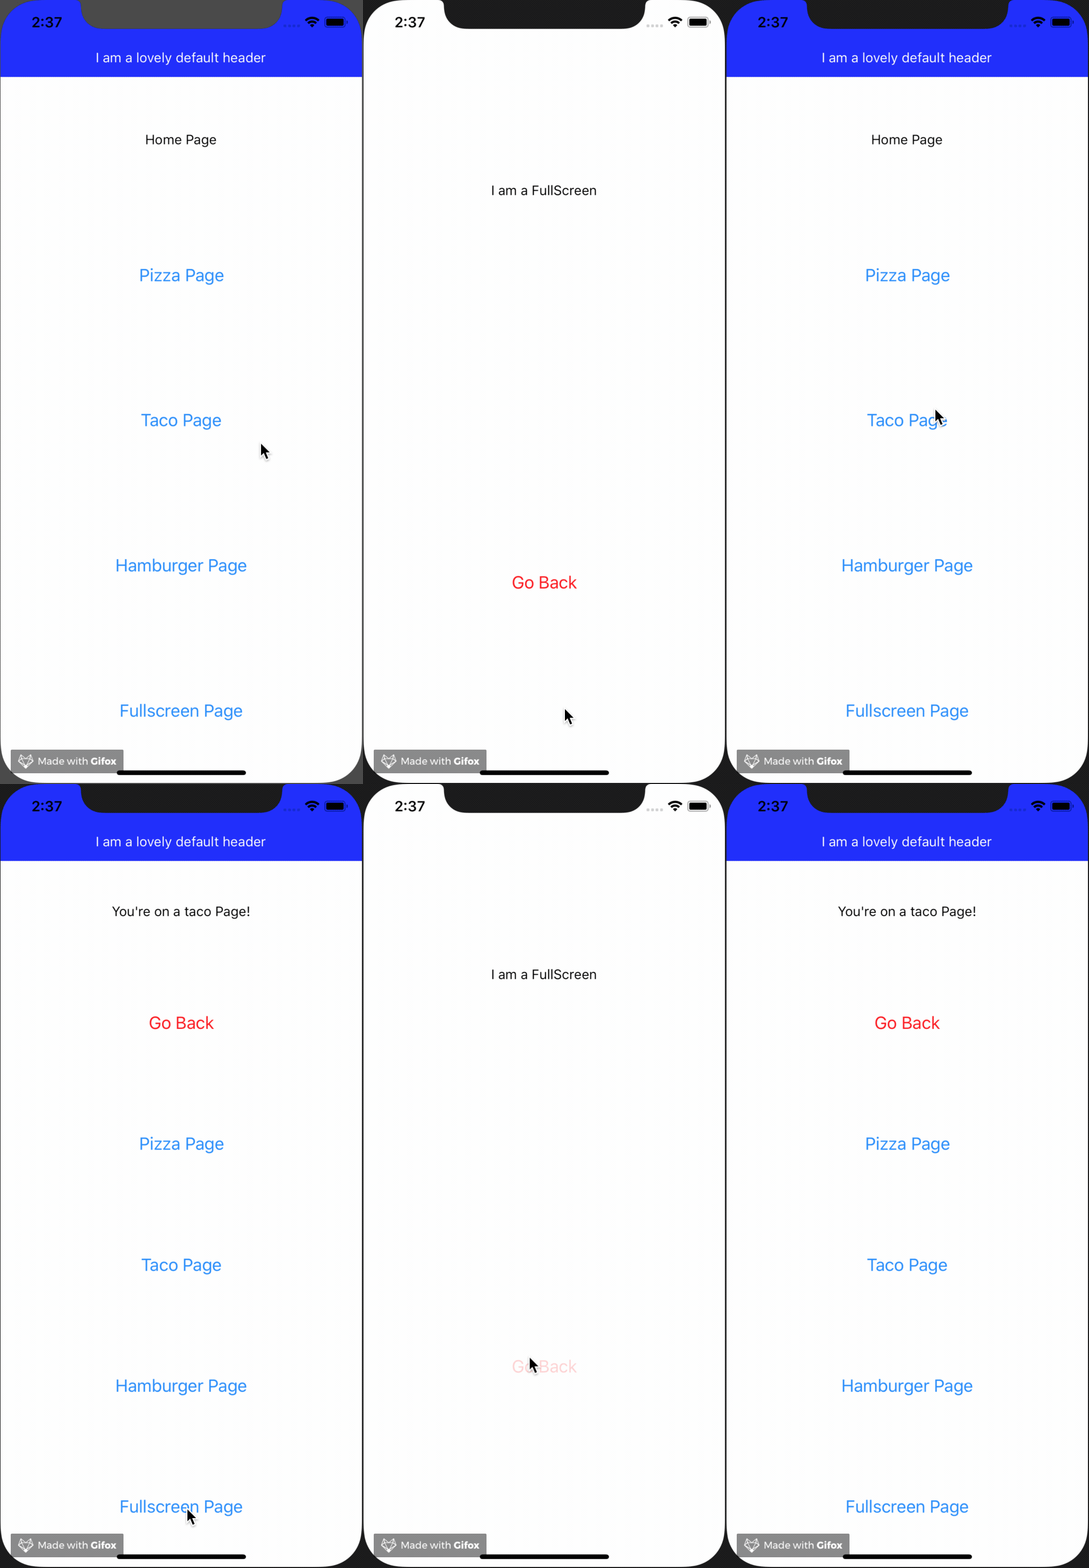
Scenario 1: Sometimes you'll want a fixed header/footer that doesn't animate between routes. Scenario 2: At other times you'll want to transition between routes that have different headers/footers. Scenario 3: And finally, you may want to transition to a route that has no fixed header or footer.
All this is possible by specifying a headerComponent and/or footerComponent prop on your routes:
export default class App extends Component {
  render() {
    return (
      <NativeRouter>
        <Stack>
          <Route exact path="/" component={Home} headerComponent={Header} />
          <Route exact path="/fullscreen" component={FullScreen} />
          <Route exact path="/page/pizza" component={Page} headerComponent={PizzaHeader} />
          <Route path="/page/:name" component={Page} headerComponent={Header} />
        </Stack>
      </NativeRouter>
    );
  }
}
Go to examples/App to see the full setup for the above.
Scenario 1: If your Header and/or Footer matches that of the route you're transitioning to, then that component will be considered "fixed" and will not be included in the transition animation.
Scenario 2: If the route you're transitioning to contains a different Header/Footer than the previous route, then the Header/Footer for both routes will be contained within the transition area, and will be included in the transition animation.
Scenario 3: If you're transitioning to/from a route that contains no Header/Footer, then that's treated the
same as Scenario 2, and any Headers/Footers will be contained within the transition area. The route that
contains no Header/Footer will obviously have none rendered, and therefore the main component will
occupy the full area available.
IMPORTANT NOTE: The above approach makes no assumption as to the look/feel of the Header/Footer
component, including internal animation. As the React Native world moves towards iOS and Android
apps being built simultaneously, using custom header/footer/navigation components that make sense
within the design system of the given app, it follows that we should give the developer full power
over how to animate the mounting/unmounting of the Header and Footer components themselves (as well
as the elements within them). We do pass the Stack component's internal animated value into the Header
and/or Footer component you provide as an animatedValue prop that you can use to build your own
animations that run in sync with the Stack's animations.
Using the headerComponent and footerComponent props is a simple way to either include or exclude
components from the route transition animation.
Where one of the Routes in the Stack have nested Routes the default behaviour is to animate between pages as if you were changing to completely different route.
Sometimes this behaviour is not what you want (for example when creating a page to show items, where items can be deep linked to, but only form part of the page). In this case you can add a key to the Route, and "self"-transitions are then ignored.
  <Stack>
    <Route exact path="/" component={Home} />
    { /* animates moving to /items, but not when changing itemId */ }
    <Route path="/items/:itemId?" component={Items} key="items"/>
  </Stack>

  const Items = ({match}) =>
    <View>
       <Text>Items finder</Text>
       <Text>Looking at item {match.params.itemId}</Text>
</View>Sometimes you'll want your app to respond a certain way while a route transition animation
is occurring. For example you may want to prevent custom <Link>'s and <Button>'s from
performing their usual behaviour (manipulating the history) should a route transition be
occurring at that very moment. This helps prevent bugs around users pressing the "back" button
before the current route has finished animating in. To this end, you can pass the Stack an
isAnimating function which will be called with a boolean value based on the current
state of the route transition.
<Stack
  animationType='slide-horizontal'
  isAnimating={(value) => {
    reduxStore.dispatch(myActionHere(value));
  }}
>
  <Route exact= path='/' component={Home} />
  <Route path='/page/:name' component={Page} />
</Stack>
One way of handling the above scenario would be to use a redux dispatcher as my isAnimating
handler and subsequently have all my <Button>'s and <Link>'s subscribe to the necessary bit
of global state to determine whether to disable themselves or not. But ultimately, what your
isAnimating function looks like, and how you leverage it, is up to you!
Currently the stack has no built-in animations for headers or footers, but that feature is a work in progress! We do pass down the Stack component's internal animated value as a prop to the header and/or footer components you add as props to your routes, so you can potentialy build your own custom animation. We hope to get more options working soon.
Many stack navigators keep all screens in the stack mounted when you push new screens onto the stack. This library is different, in that it unmounts the previous route's screen when a new one is pushed on. If you have state that needs to be maintained even after a screen unmounts, you will need to store that state in a parent component that contains the stack or possibly use another state management solution such as AsyncStorage, Redux, or MobX.
A common use case for a cube transition is to swipe forward to the next route, but currently it only supports swiping back to the previous route. An API to enable swiping forward to a new route is something I hope to work on soon.
The cube animation doesn't work quite as well on Android as it does on iOS. I hope to be able to adjust the animation configuration a bit to make it look more consistent.
I have made several assumptions about the history route stack while using this library. I assume in particular that history never mutates, and that you always navigate forward by pushing and backward by popping routes. It could be that in cases where you need to deep link or redirect to a specific location in the app that you haven't built up the expected route stack, and this component won't allow swiping back when you need it to.
As I research more use cases I hope to be able to create a more flexible API to support them.
I drew a lot of inspiration from other libraries and code samples.
Obviously this library wouldn't exist without the fantastic React Router!
React Navigation has become one of the leading navigation solutions for react native, I have used it in many personal and work projects and I referenced it as a guide for implementing many of the transition animations in this library.
For the cube animation I used this example by @underscopeio as a reference.
Many thanks to the authors and maintainers of these open source libraries!
You may be asking, "What about tab and drawer navigation?". As it turns out, there are already many great open source components to enable drawer and tab navigation, and you can already use React Router to drive the state of those components. I hope to add more examples to this repository soon demonstrating this. For now know that the Stack is just one of several components that you can combine with React Router to enable just about any navigation pattern you need!
Check out the examples/ folder in this repository for more usage examples.


