Based on Node.js suitable for personal servers and NAS Firewalld (firewall) interface, no need to remember operation commands, no Firewalld area concept, and iptables complex table chain structure. Clicking to create some rules on the interface can achieve the purpose of automatically blocking and allowing IPs.
Keywords: small personal micro firewall installation interface graphical graphical prevent attacks block access records block list
The demo environment is not deployed on linux, so many functions are invalid
Please read the documentation carefully...
- Linux system
- Firewalld firewall
- pm2 process manager
- Node.js (preferred 16.18.1, recommended >= 14.0.0)
The script will detect and install all environments except the Firewalld firewall, one-click deployment and startup
CentOS7 comes with Firewalld
- Deployment and startup are extremely simple, one-click startup.sh script for easy deployment
- Frontend based on Vue (element UI), backend based on nodejs (eggjs)
- Modified element source code, table component adds defer delay loading function
- vuex and data persistence, pm2 management and deployment projects, pkg package frontend static resources
- express deploys frontend https static resources, using limiter to protect against xss and other attacks
- Use jwt and browser fingerprint to maintain frontend login status
- Frontend and backend IP rate limiting measures
- Database storage based on sqlite3, interface uses transaction processing data
- Use of Linux firewall Firewalld
- Automatic detection of environment and download of required dependencies
- Automatic IP blocking, can block intentional access based on IP location traffic and location keyword rules
- Use rsa to encrypt token and fingerprint information
- Automatically saved table can drag width configuration, all cell content is ellipsis processed and tooltip prompt
- Multiple component sizes can be manually adjusted, compatible with multiple size devices
- [shell]: Automation script directory
- [secretKey]: Store rsa keys, used to encrypt token and fingerprint
- [shell/shell.log]: Record the log of the automation script
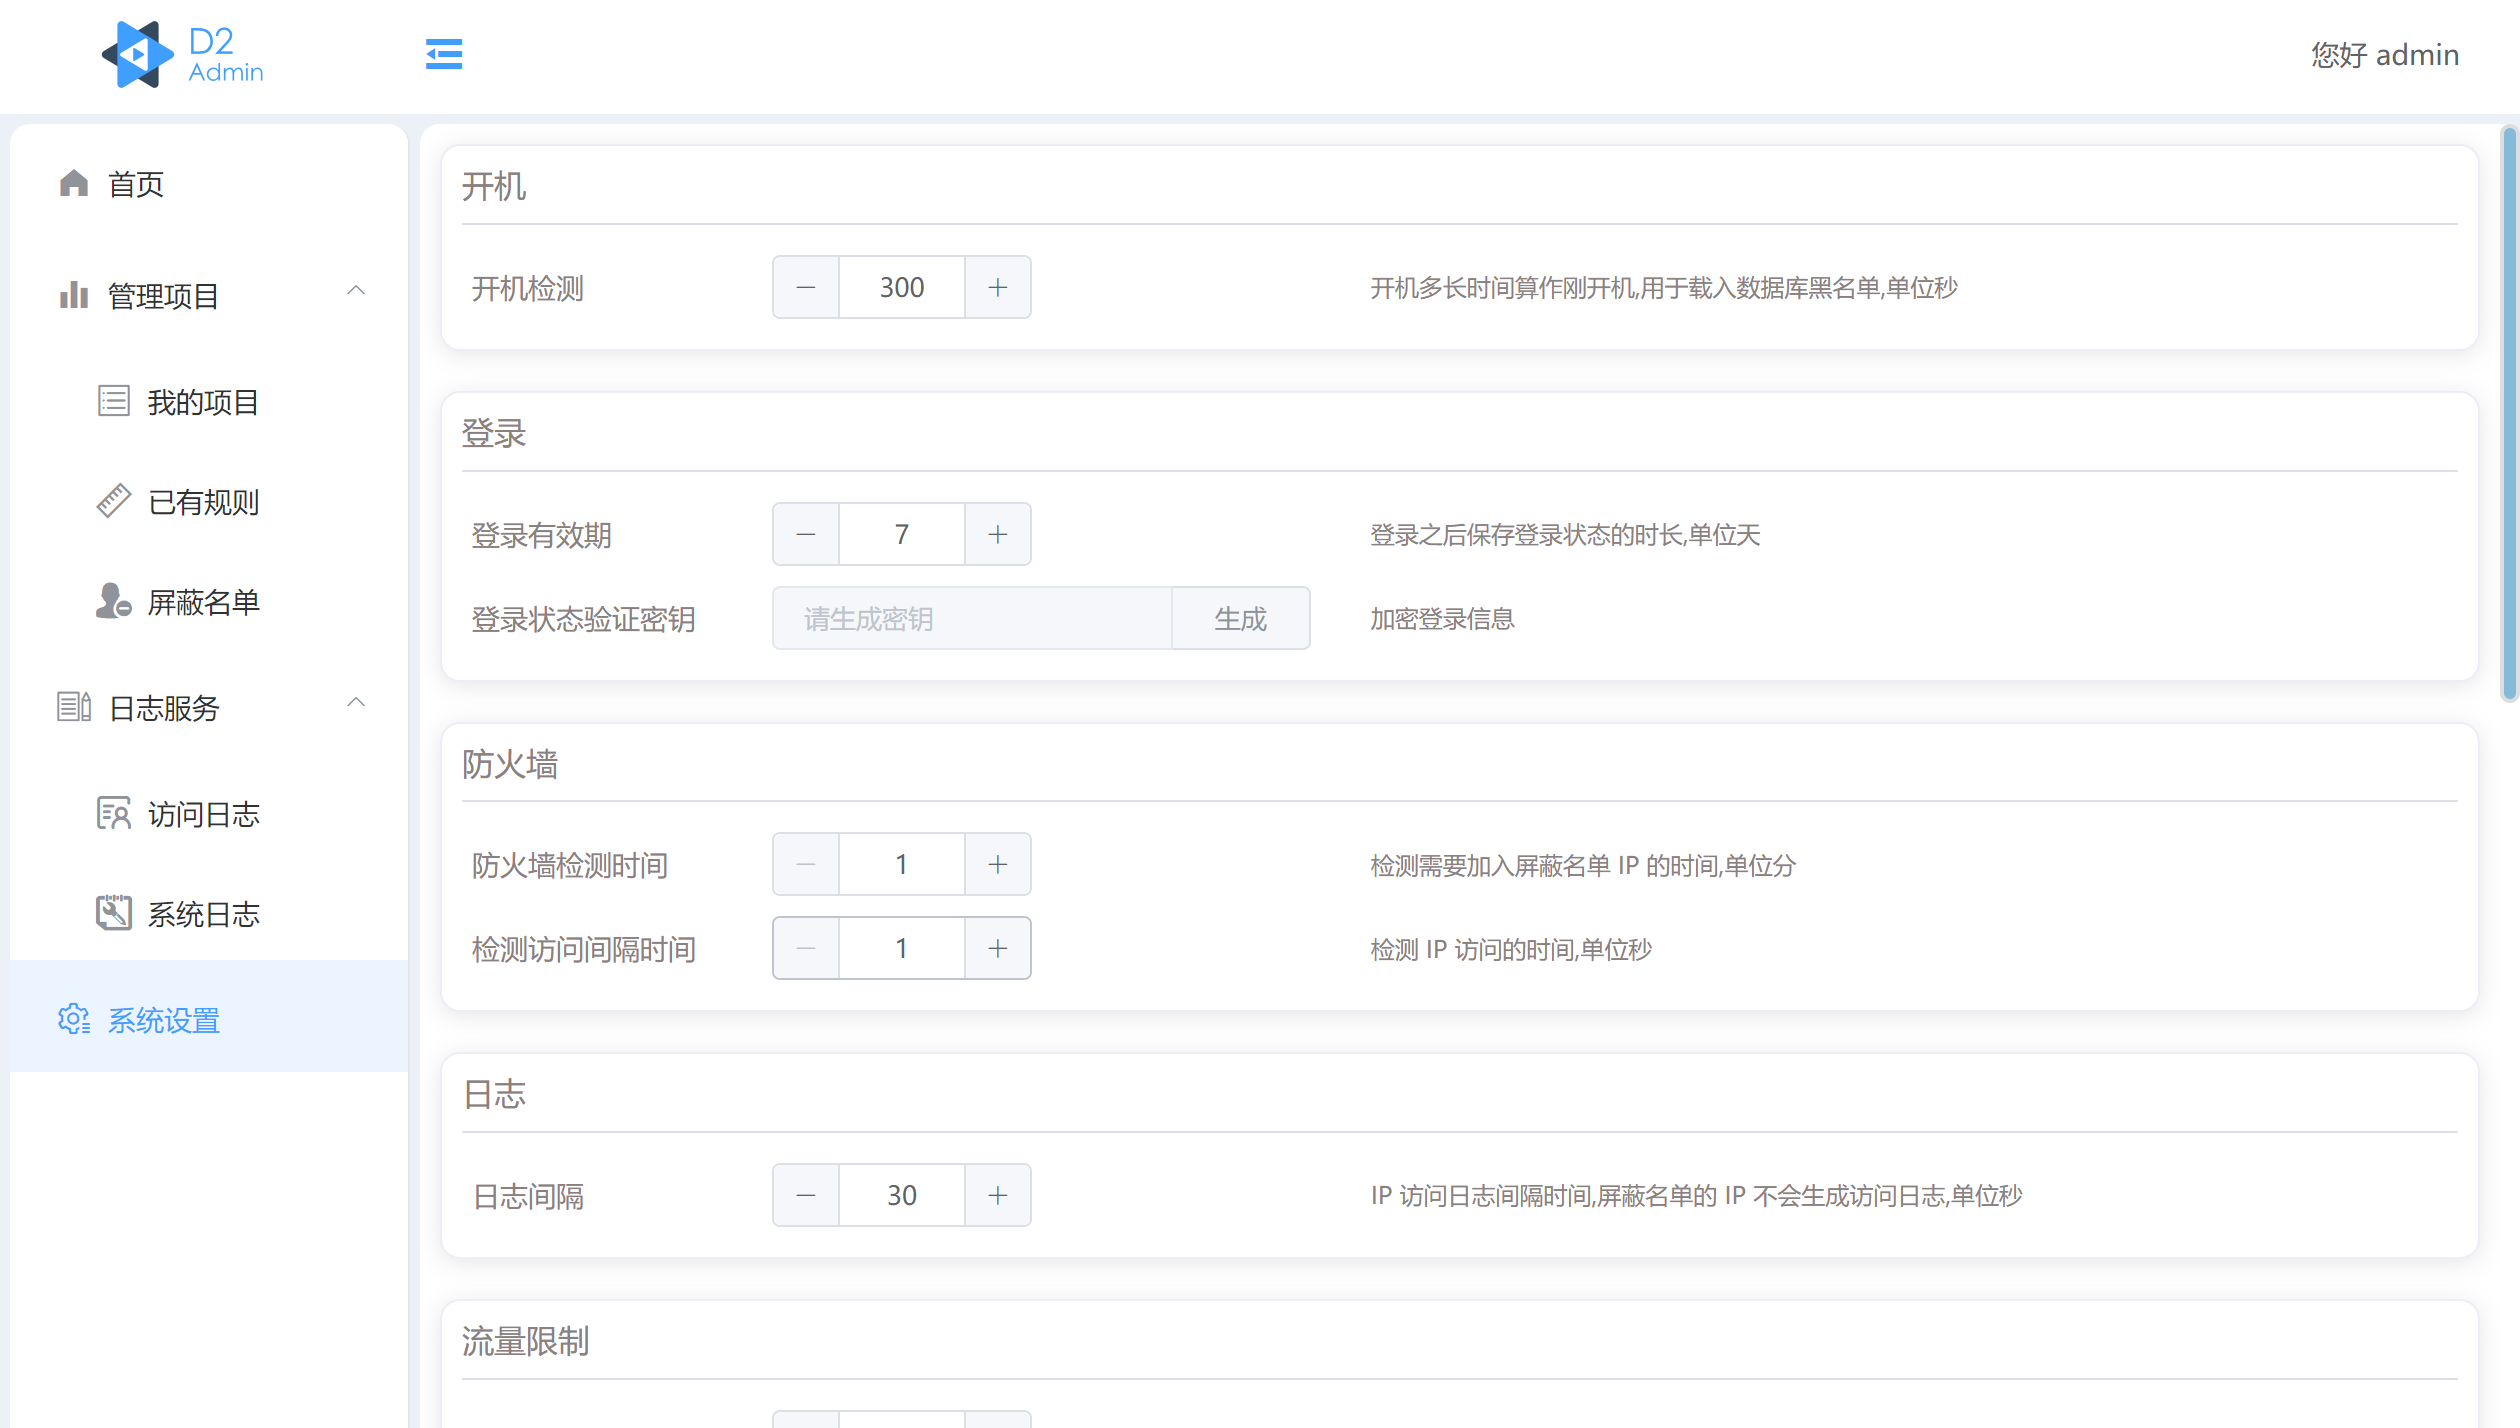
- [config.json]: System settings, same as the interface System Settings page
- [express]: Frontend root directory
- [express/ssl]: Store https certificates
- [express/dist]: Frontend static resources
- [express/config.js]: Frontend configuration file
- [express/config.js.httpPort]: http port
- [express/config.js.httpsPort]: https port (cannot be accessed without deploying https certificate)
- [express/config.js.limiter]: Frontend traffic limit configuration
- [express/config.js.proxy.target]: Proxy backend path
[▶ Deploy https ◀](#Deploy https)
If port 7001 is occupied, modify the root directory/config/config.prod.js.cluster.listen.port and synchronize modify express/config.js.proxy.target the last port, restart to take effect
Warm-hearted automation script, achieved those functions
- Detect environment node pm2 Firewalld
- Automatically download node pm2, automatically create node pm2 soft link
- Detect dependencies and automatically download (node_modules)
- Detect secretKey keys and automatically generate keys
- Automatically detect ports and automatically open project ports in the firewall
- Detect startup, automatically add startup script (/etc/rc.d/rc.local)
- Automatically start frontend and backend services after detecting the environment, default port http:5000, https:5001
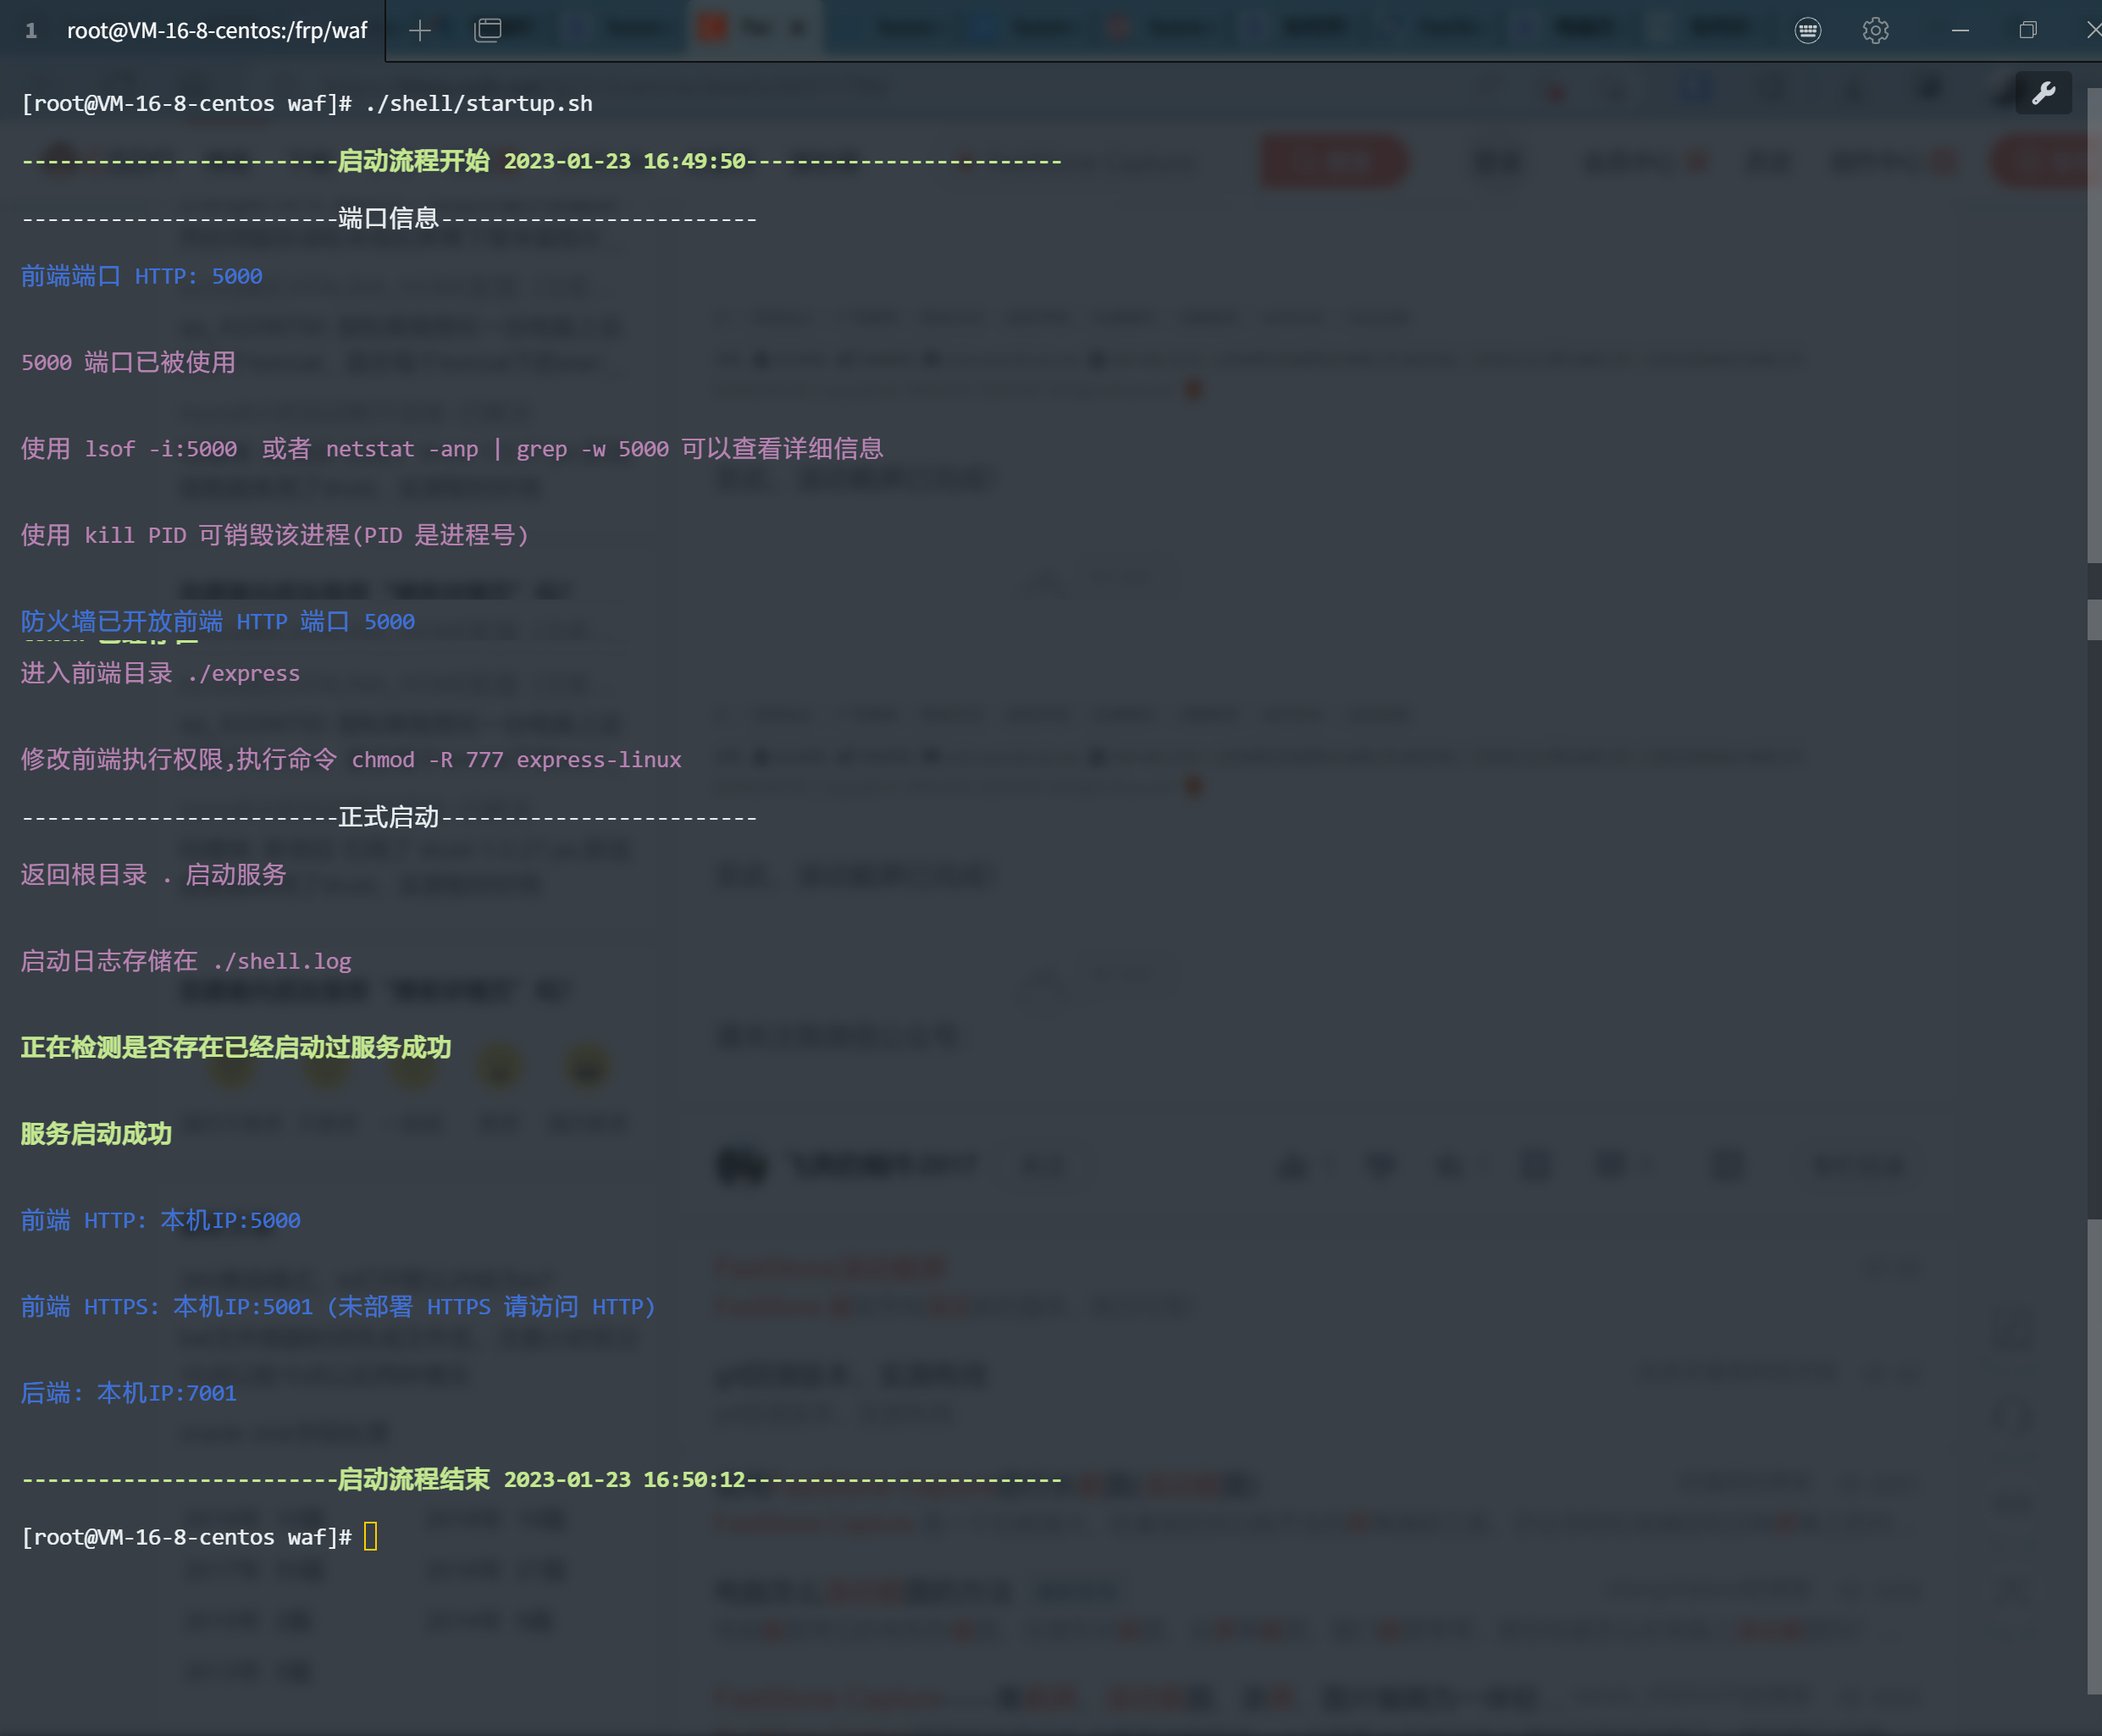
Run in the root directory of the project
./shell/startup.shor
Without execution permission
chmod -R 777 ./shell/startup.sh && ./shell/startup.shProject has no permission
chmod -R 777 project root directory- Frontend: After startup, open the browser and visit local IP:5000 (5001)
- Backend: After startup, open the browser and visit local IP:5000 (5001)/api/getPublicKeyFingerprint
- Default port http:5000, https:5001
- Clone the project or download releases
- Copy and extract to any directory on the Linux server
- Run the startup.sh script in the root directory of the project to deploy successfully
See the startup.sh script title for operation
Note: After successful deployment, be sure to
- Delete and regenerate the key files under the root directory/secretKey/fingerprint (token)
- System settings regenerate jwt key and captcha key
- After regenerating the JWT key, you need to change the password to log in
[▶ Change Password ◀](#Merge Example)
Ensure that the dependencies of the root directory and express have been downloaded (node_modules)
- Execute in the root directory
npm run start
- Execute in the express directory
node index.js
or install pm2
pm2 start index.js --name=HttpServer --exp-backoff-restart-delay=1000
If there is no default user, manually register on the login page
Default username
admin
Default password
Admin123456@
Steps
- Enter the login page and click Change Password
- Fill in the username, new password, registration key, JWT key
Open the terminal in the root directory of the project and execute,
Execute in the Linux environment, if there is no built-in sqlite3 environment, you need to download it yourself
Replace your username (five Chinese characters) with your registered username, copy the complete command without losing any part
echo -e "Registration Key:" $(sqlite3 ./database/sqlite-prod.db 'SELECT secret FROM users WHERE username = "your username";')Open the Linux terminal in the root directory of the project and execute, copy the complete command without losing any part
echo -e "JWT Key:" $(grep secret ./config.json | head -n 1 | awk '{ print $2 }' | sed 's/\"//g')Note: The registration key and JWT key are used to change the password, etc., please keep them properly and do not disclose them
Replace admin (five letters) with your registered username, copy the complete command without losing any part
echo -e "Registration Key:" $(sqlite3 ./database/sqlite-prod.db 'SELECT secret FROM users WHERE username = "admin";') && echo -e "JWT Key:" $(grep secret ./config.json | head -n 1 | awk '{ print $2 }' | sed 's/\"//g')- Store the certificate in express/ssl
- Modify ssl.key ssl.crt in express/config.js
- Restart to take effect
ssl.key ssl.crt fill in the file name, no need for the path, empty (表示空 == "") means https is not enabled
The backend may not be deployed successfully, solve the exceptions during the startup process.
As shown in the figure
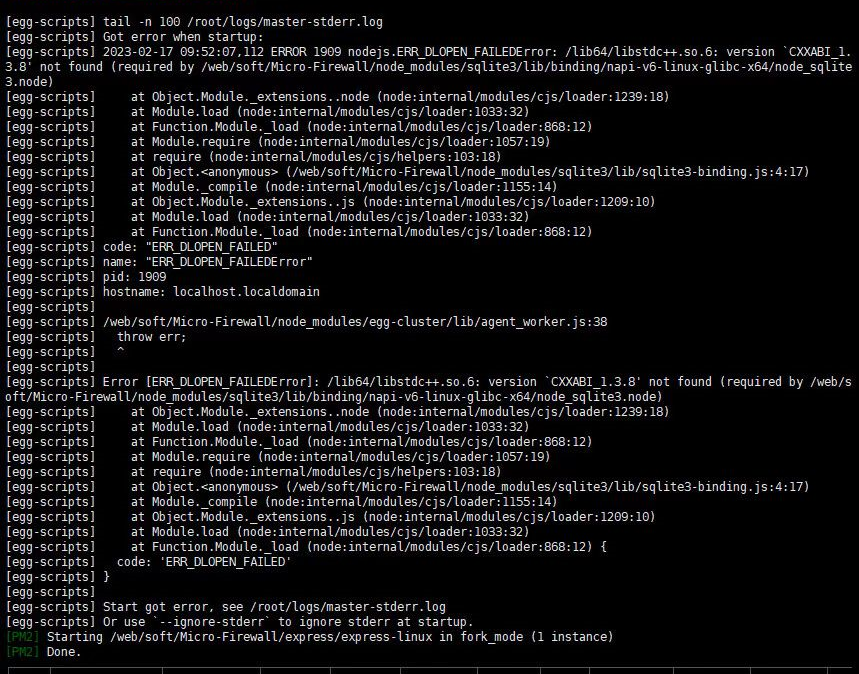
ERROR 24956 nodejs,ER DLOPEN FAILEDError: /lib64/libstdc++.50.6: version "CXXABL 1.3.8' not found
Upgrading the system should also solve the problem...
Lowering the node version should also work, recommended node version >=14
Installing libstdc++ has risks, it is recommended to back up before trying
Manual installation of libstdc
-
Delete the root directory node_modules
-
Use cnpm to download
npm install -g cnpm -registry=https://registry.npm.taobao.org
- Create a soft link
ln -s node directory/bin/cnpm /usr/local/bin/cnpm
If the node installed by the startup.sh script, the node directory is generally in ./shell/node/node version number
- Modify cnpm mirror
cnpm config set registry https://registry.npm.taobao.org
- Check if cnpm is installed successfully
cnpm -v
- Download dependencies
cnpm install -registry=https://registry.npm.taobao.org
Replace all occurrences of node-v16.18.1-linux-x64 in ./shell/node.sh and ./shell/pm2.sh with the name of the manually downloaded node
It may have been added to the blacklist (whitelist) through the terminal
You can check all rich rules of the firewall to confirm
Execute in any directory, terminal
firewall-cmd --list-rich-rules
This port may be a range port, currently does not support switching the status of range ports
You can check all open ports of the firewall to confirm
Execute in any directory, terminal
firewall-cmd --list-ports
- Increase the log interval time (this will affect the frequency detection in the blocking rules)
- Add commonly used trusted IPs to the All Trust list in the Trust Configuration
Note: If local addresses or loopback addresses appear in the access logs, please manually add them to the All Trust list
- Method 1: Install ssh-keygen and openssl commands
- Method 2: Manually generate rsa keys
Method 2 requires the key file name and directory
Try to generate rsa keys with 2048 bits or more
Root directory/secretKey/token PRIVATE-KEY.txt PUBLIC-KEY.txt
Root directory/secretKey/fingerprint PRIVATE-KEY.txt PUBLIC-KEY.txt
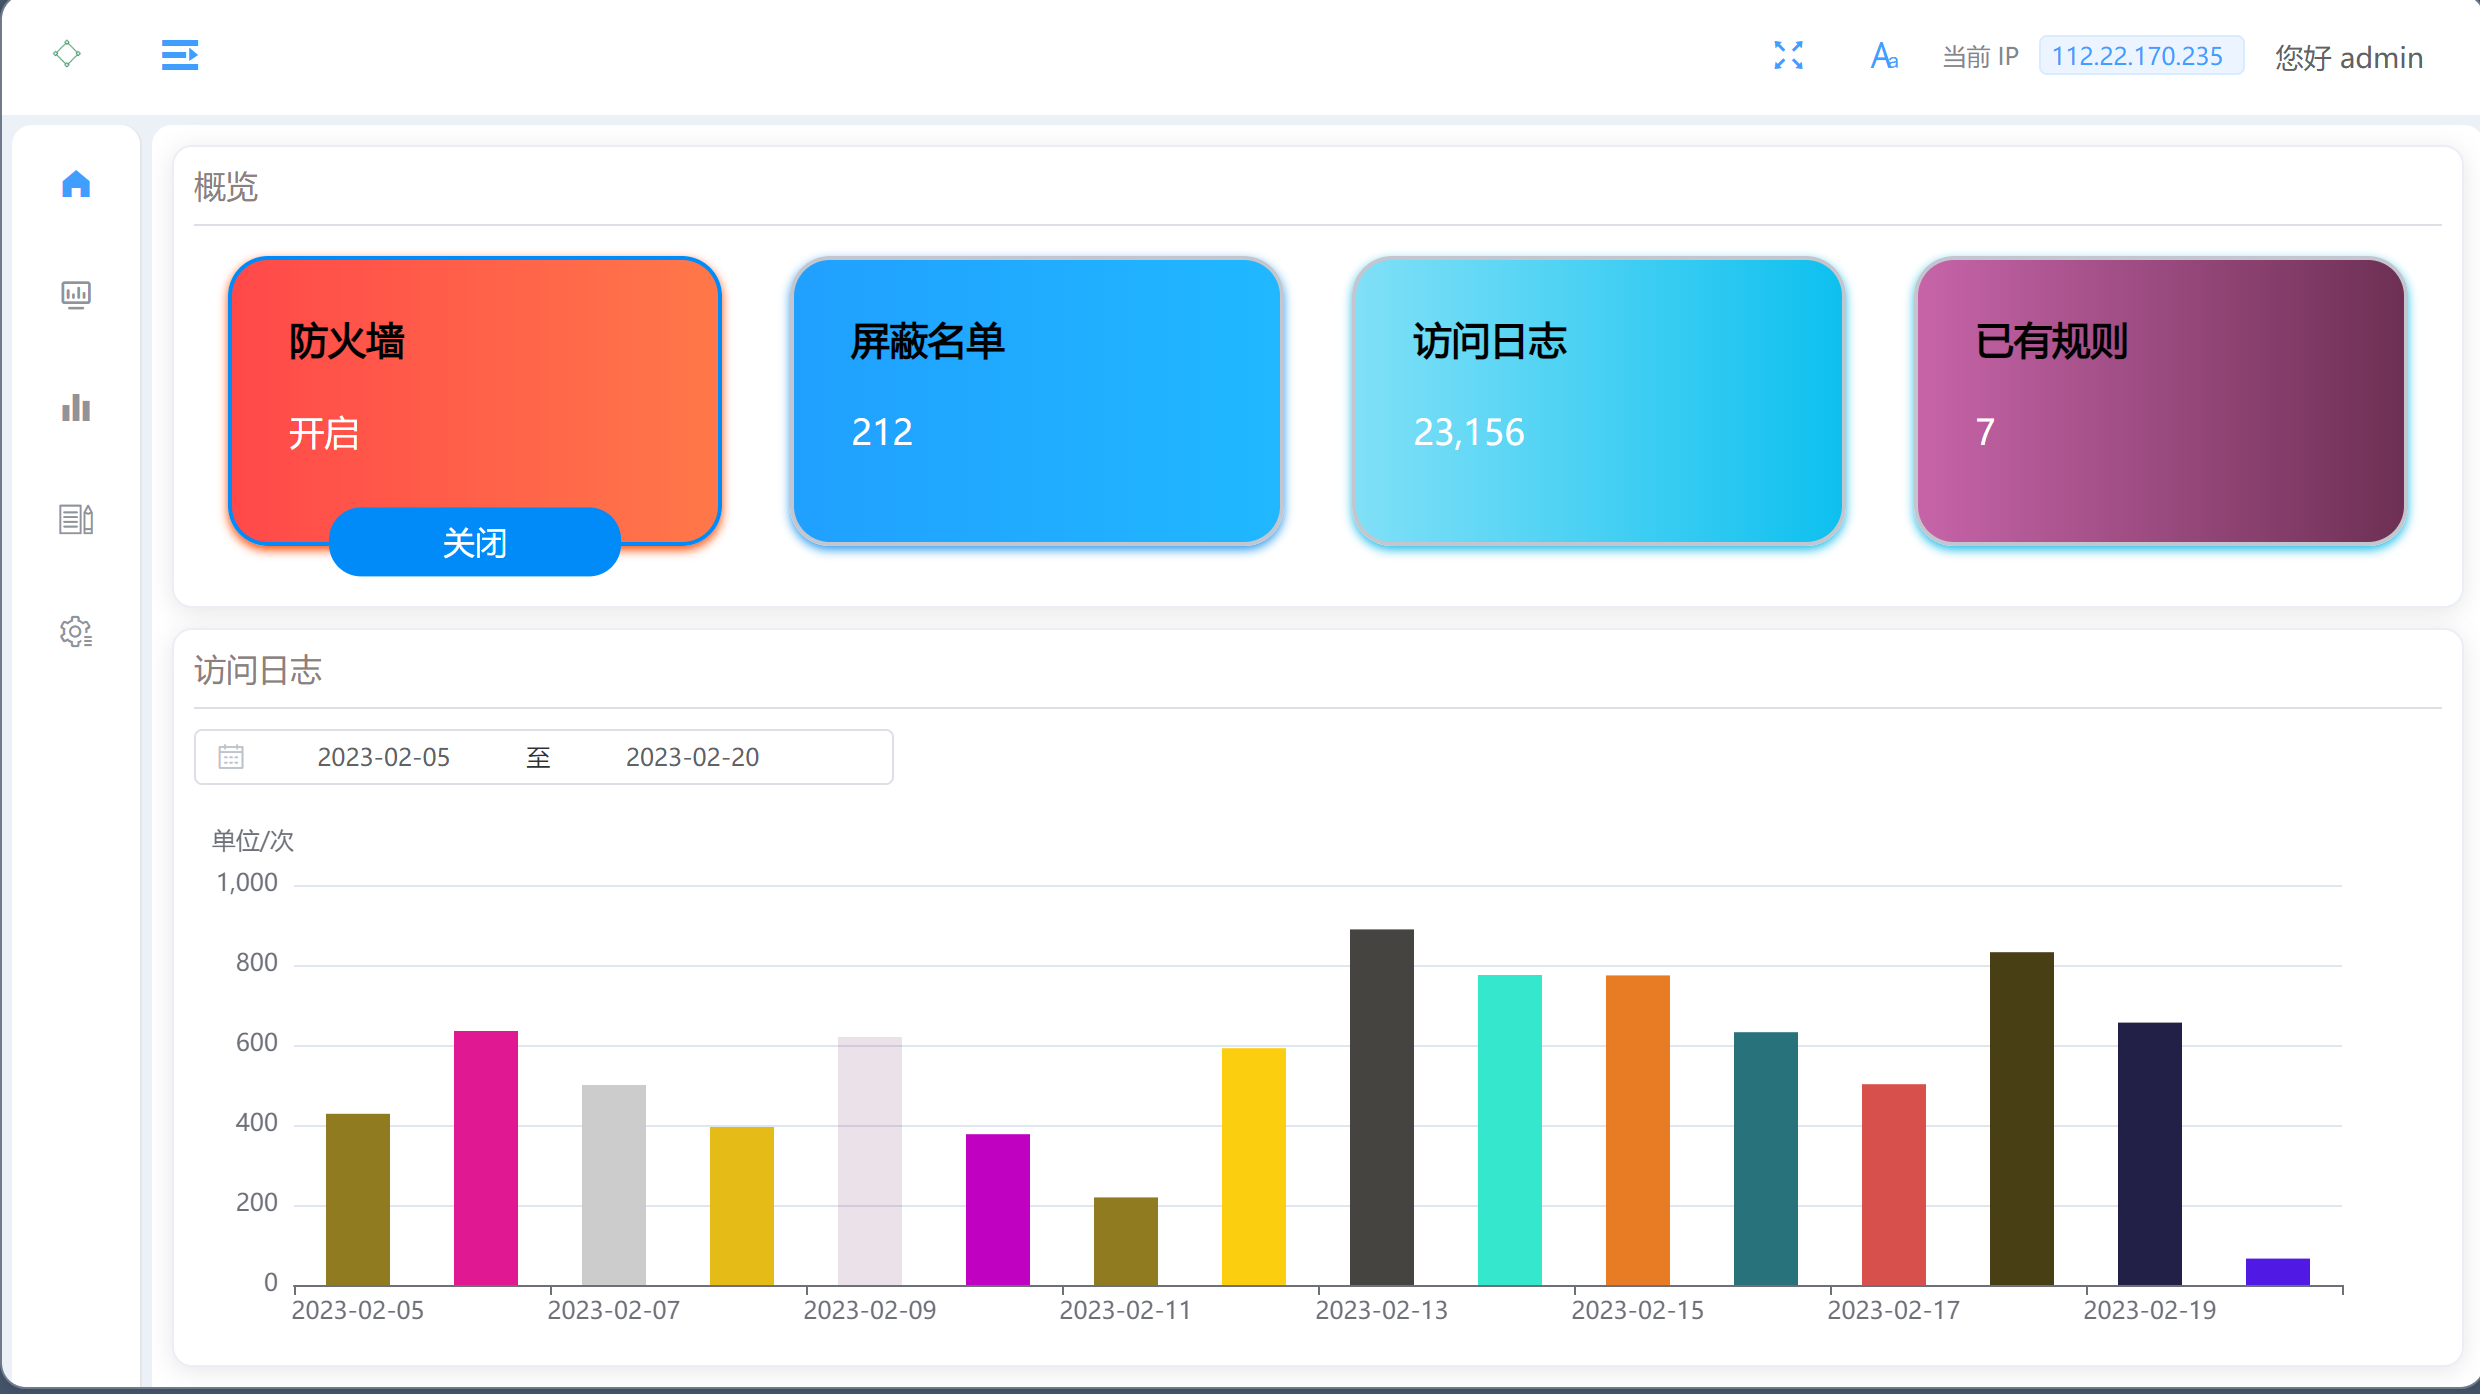
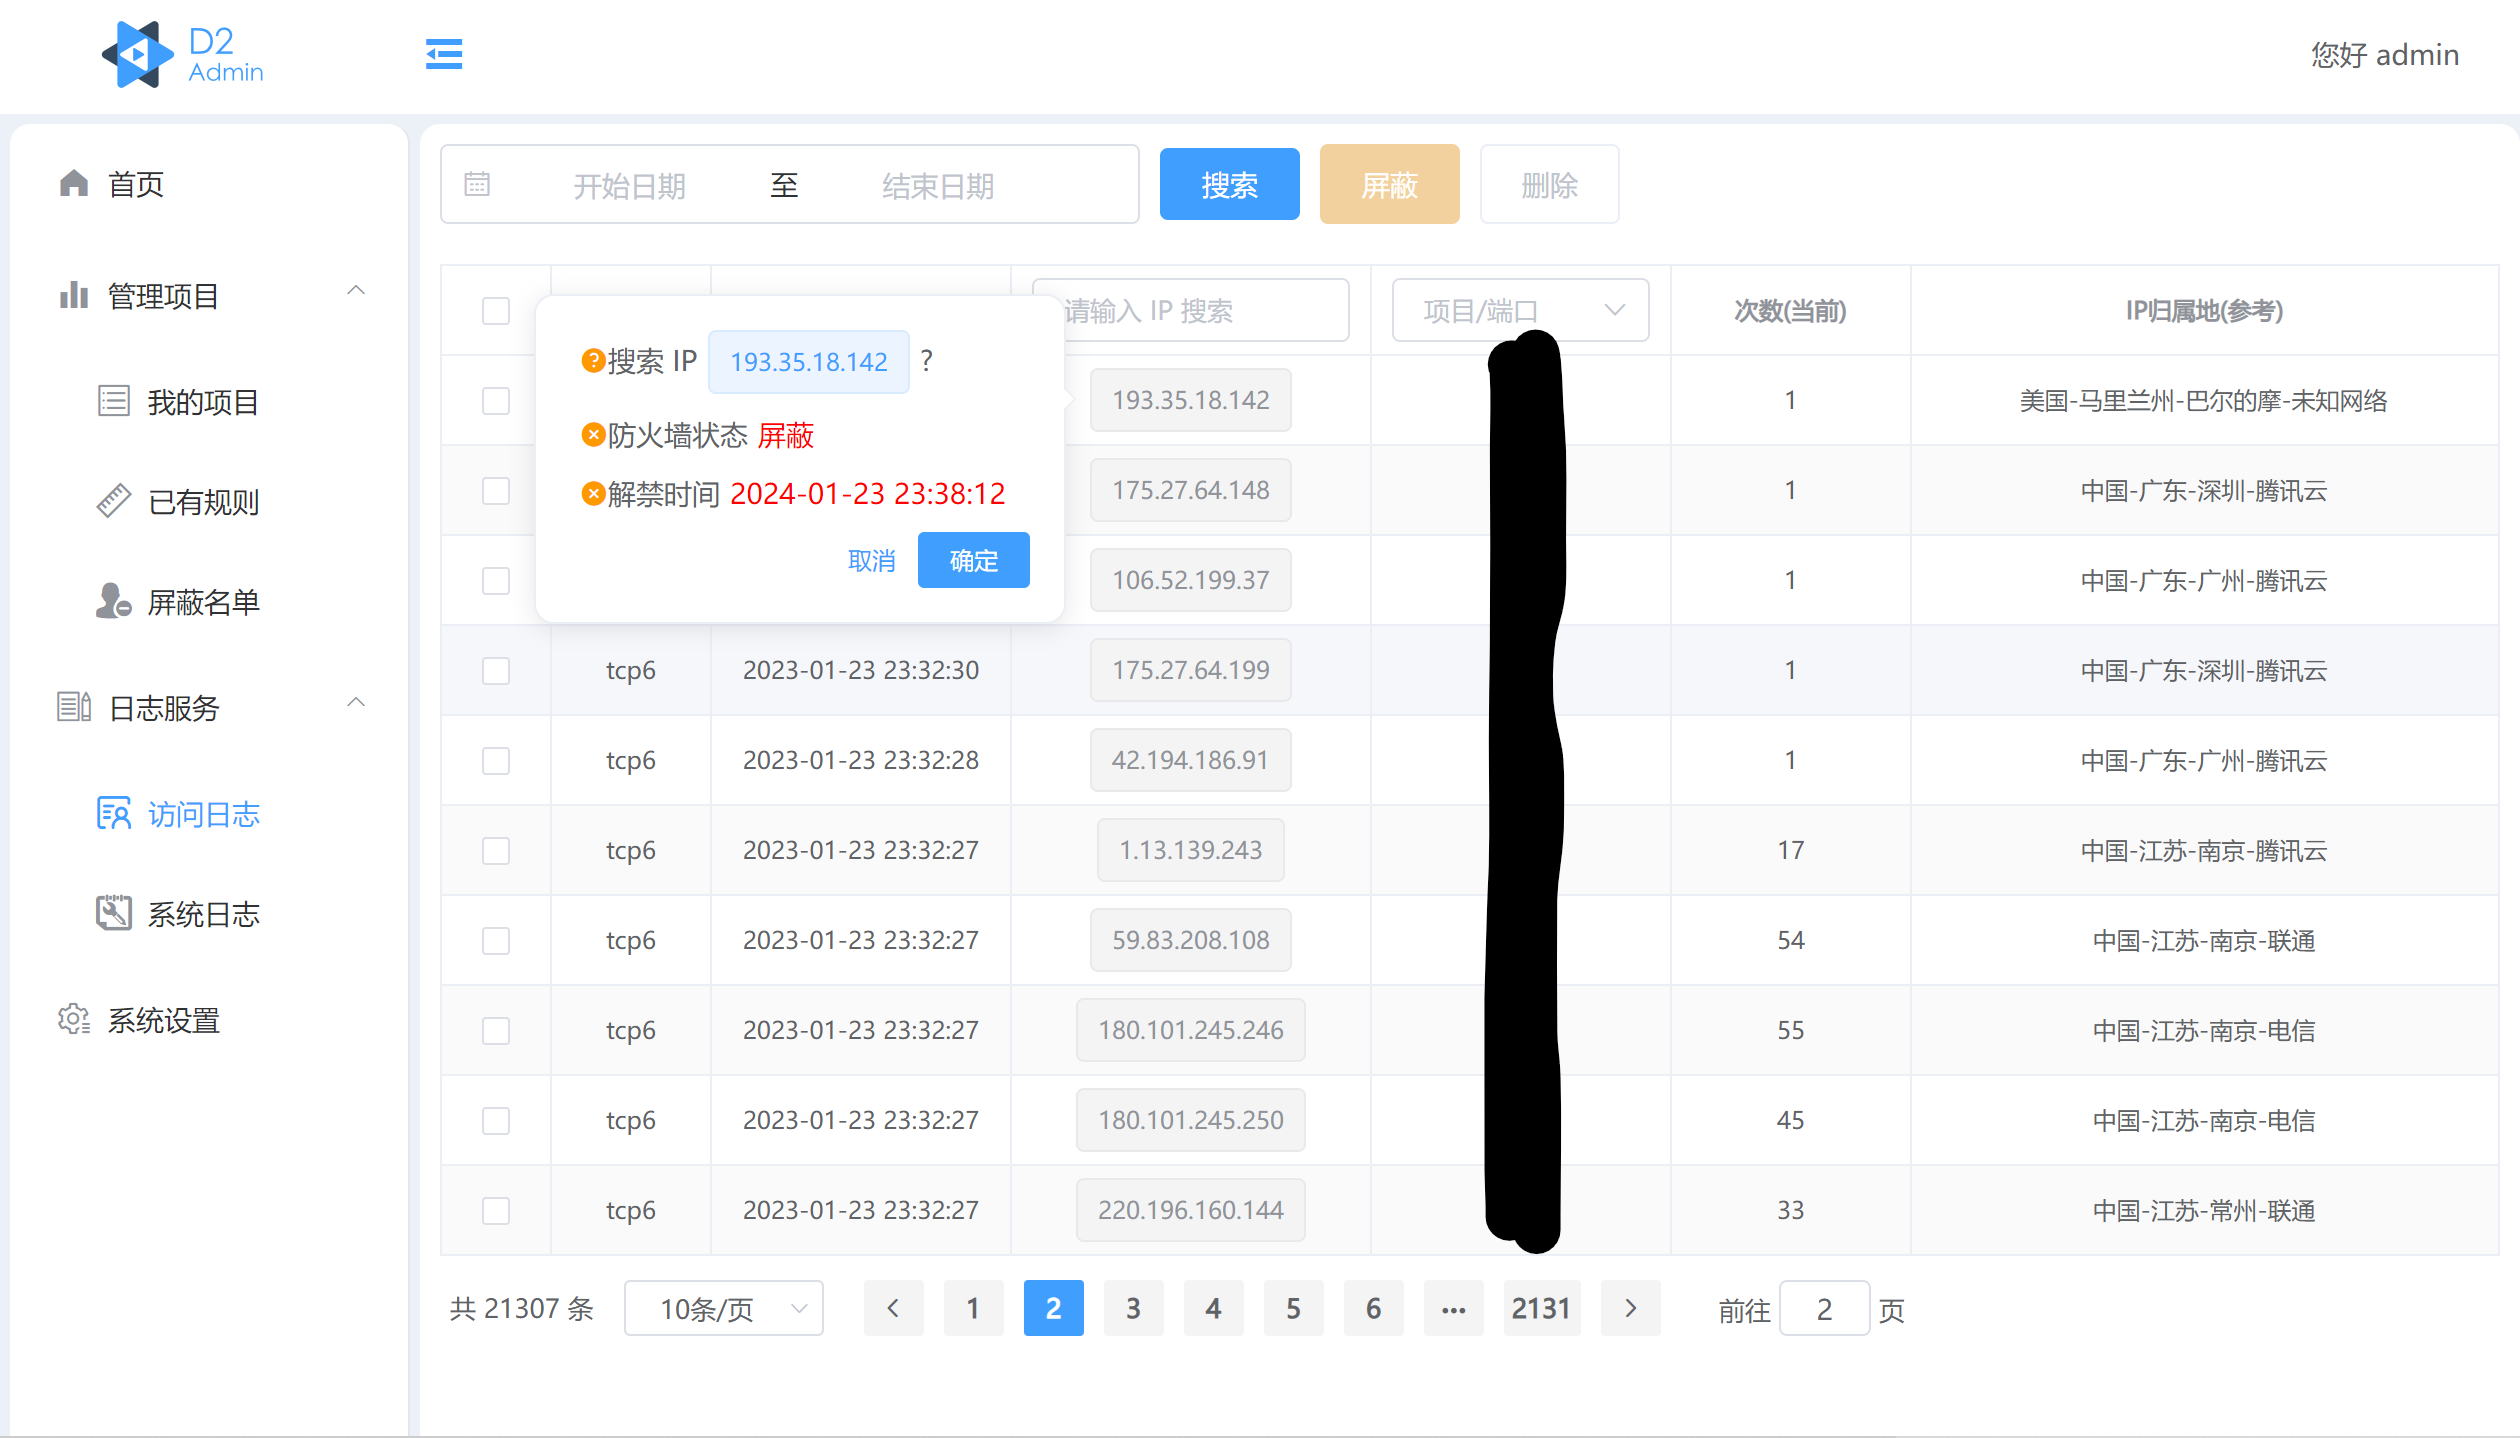
The unblocking time is the time when the blocked IP can access. When the current time is greater than the unblocking time, the current IP will be unblocked and can access. The status in the block list will change from Blocked to Allowed.
System firewall status refers to whether the rich rules about this IP drop can be queried through the firewall-cmd --list-rich-rules command, including prefix="Micro-Firewall" which is the blocking rule flag written by this service.
Block list status refers to whether the current IP can be queried in the block list.
Note: In some special cases, the block list status and system firewall status may not be synchronized. In this case, the system firewall status shall prevail. Only when the system firewall status is Blocked, the purpose of blocking this IP is truly achieved.
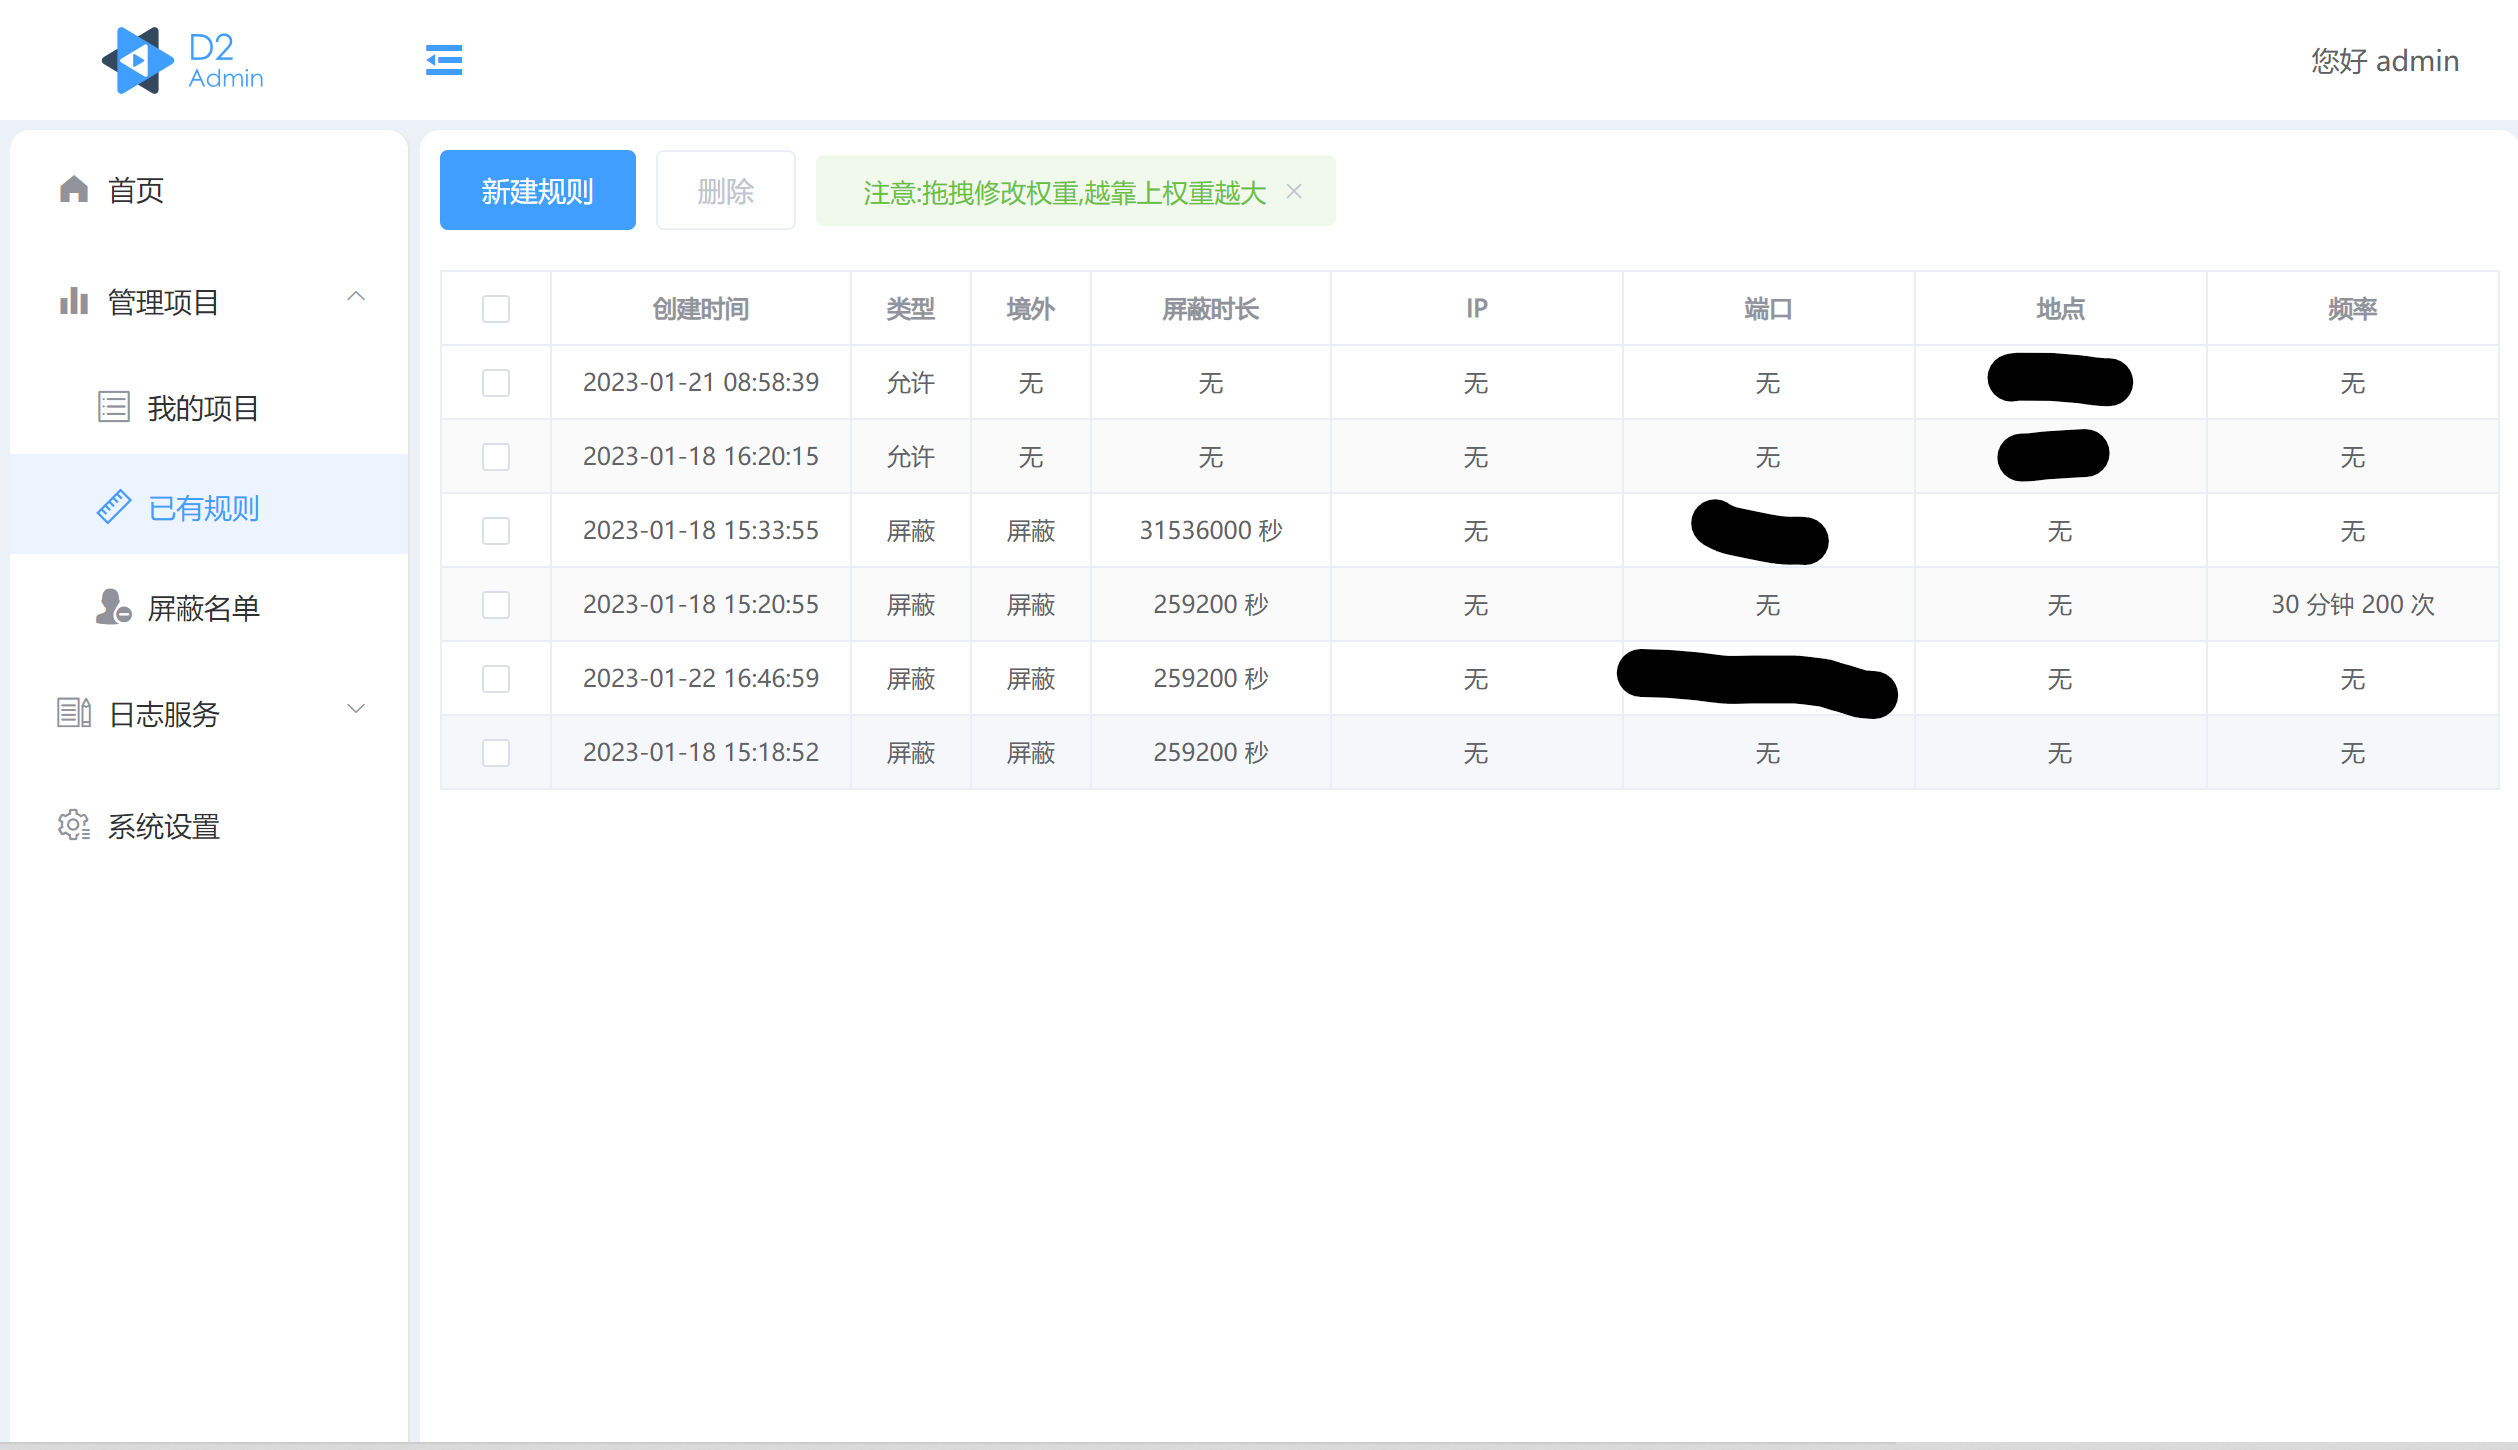
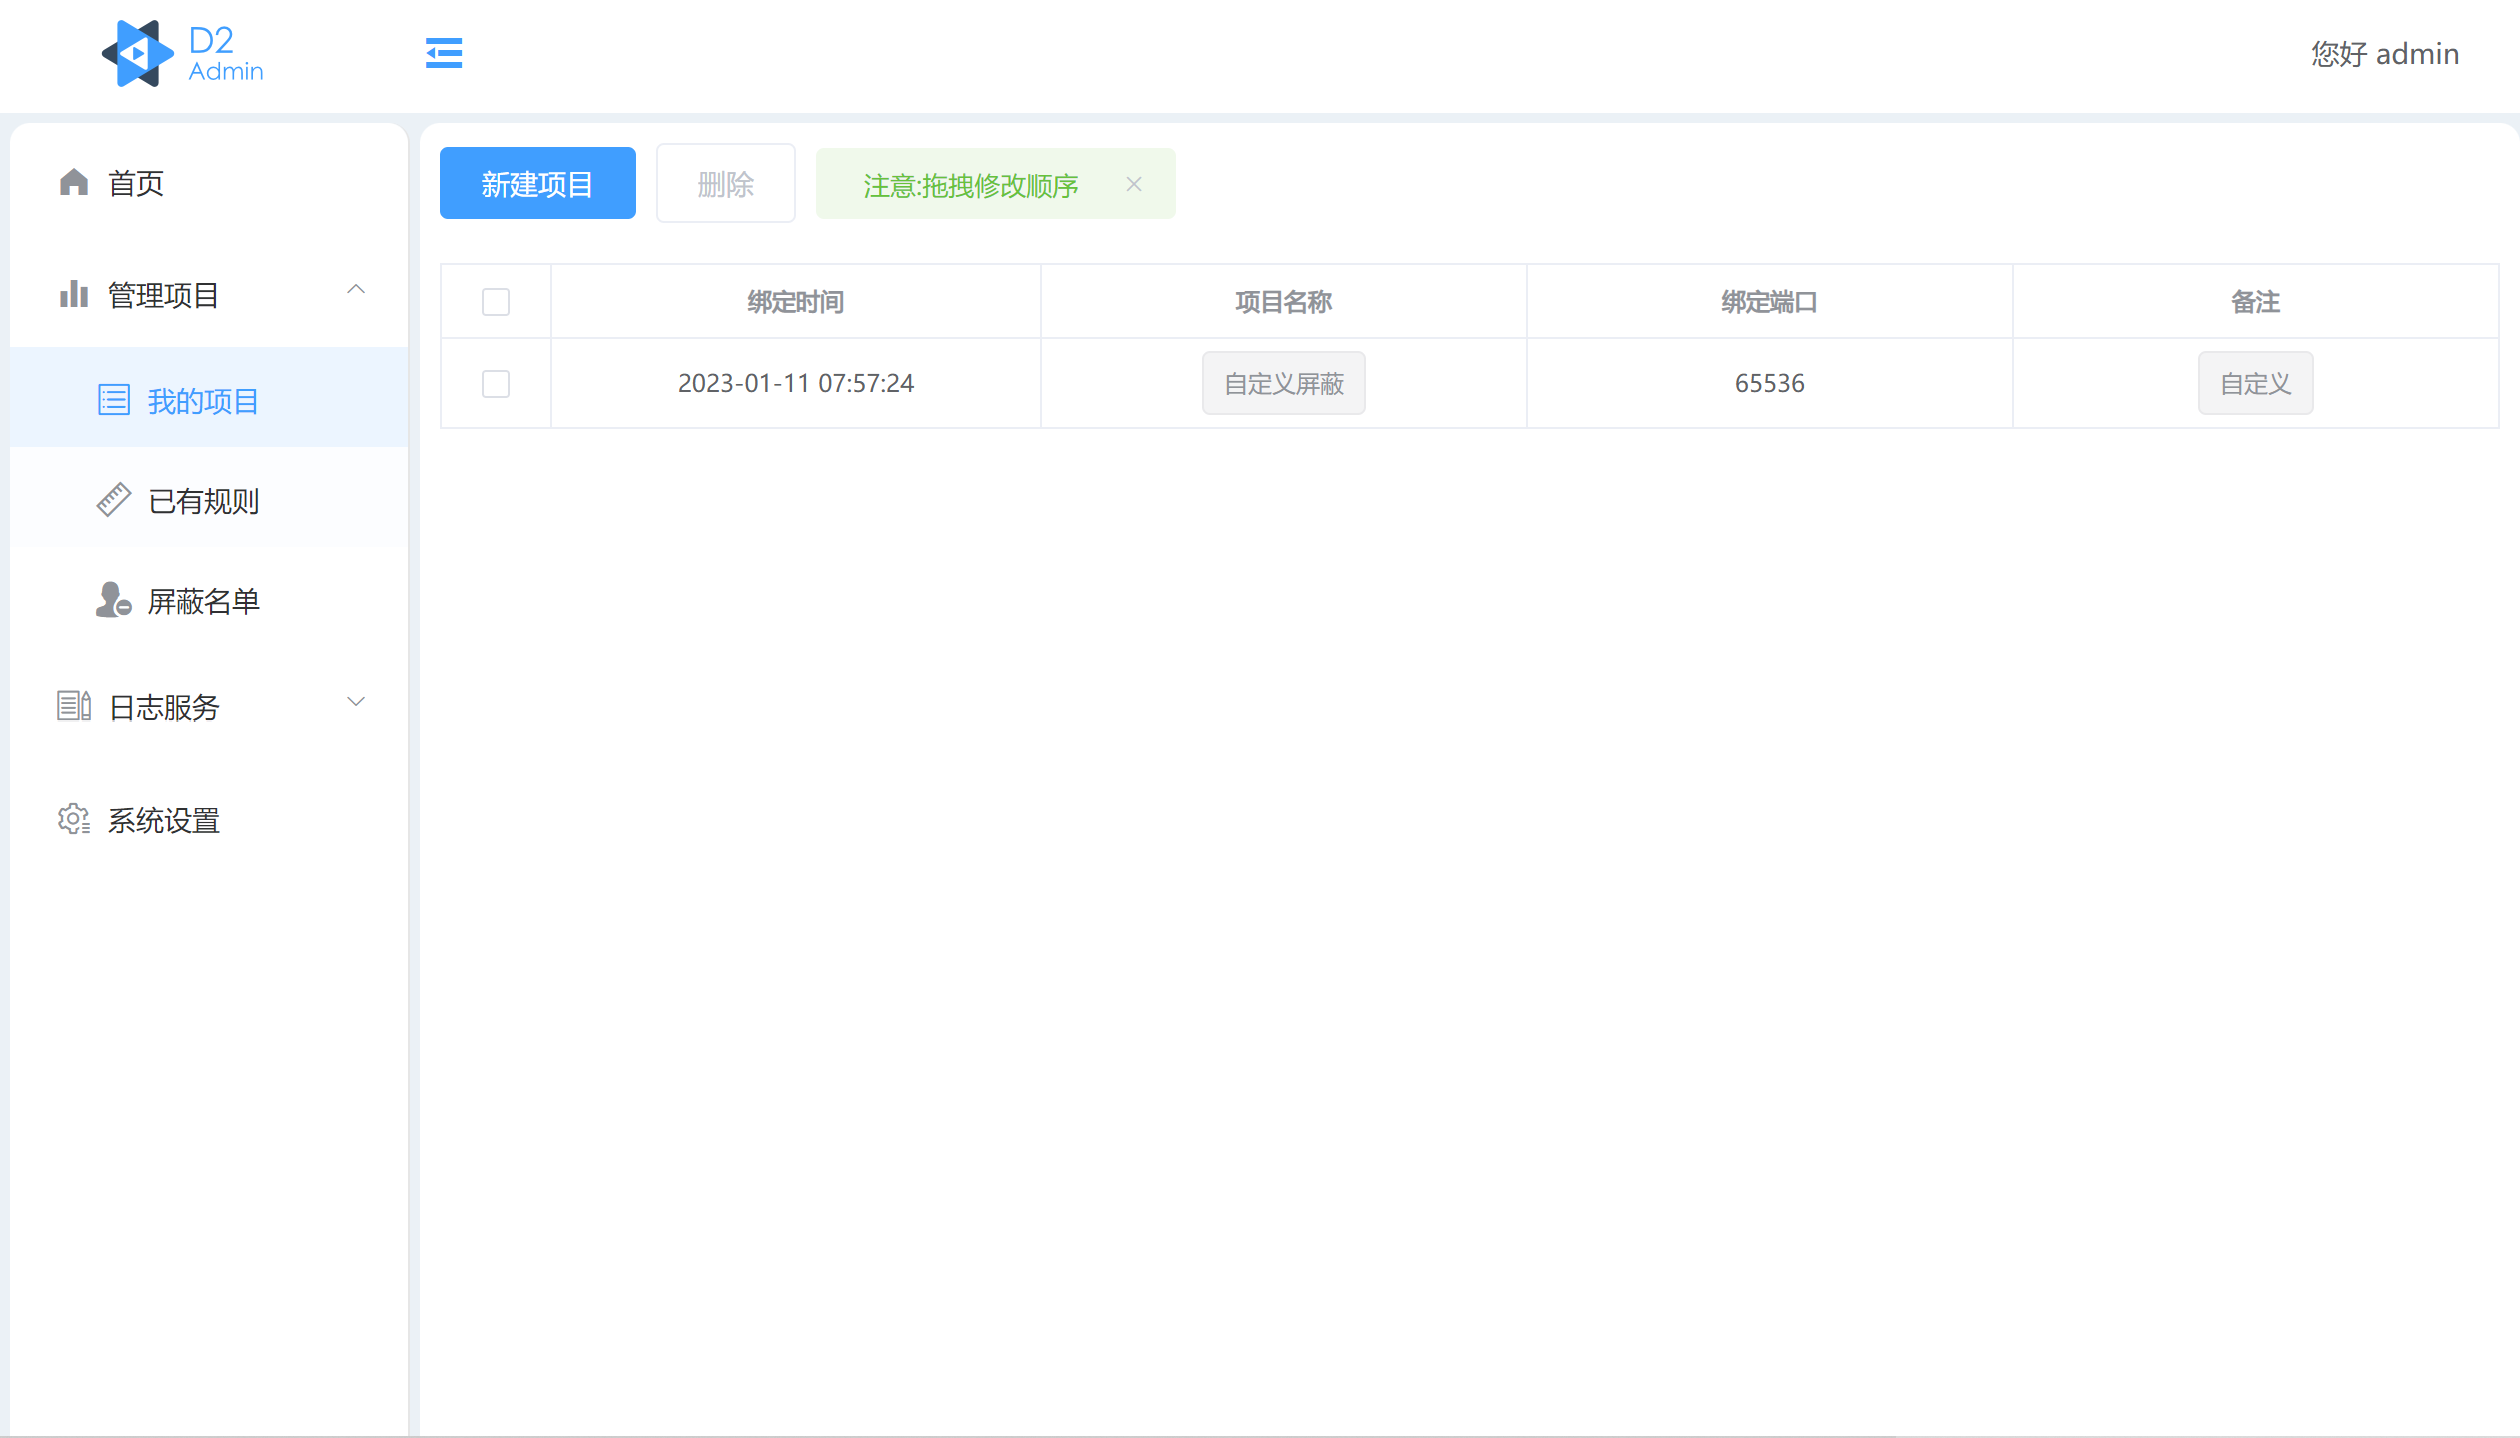
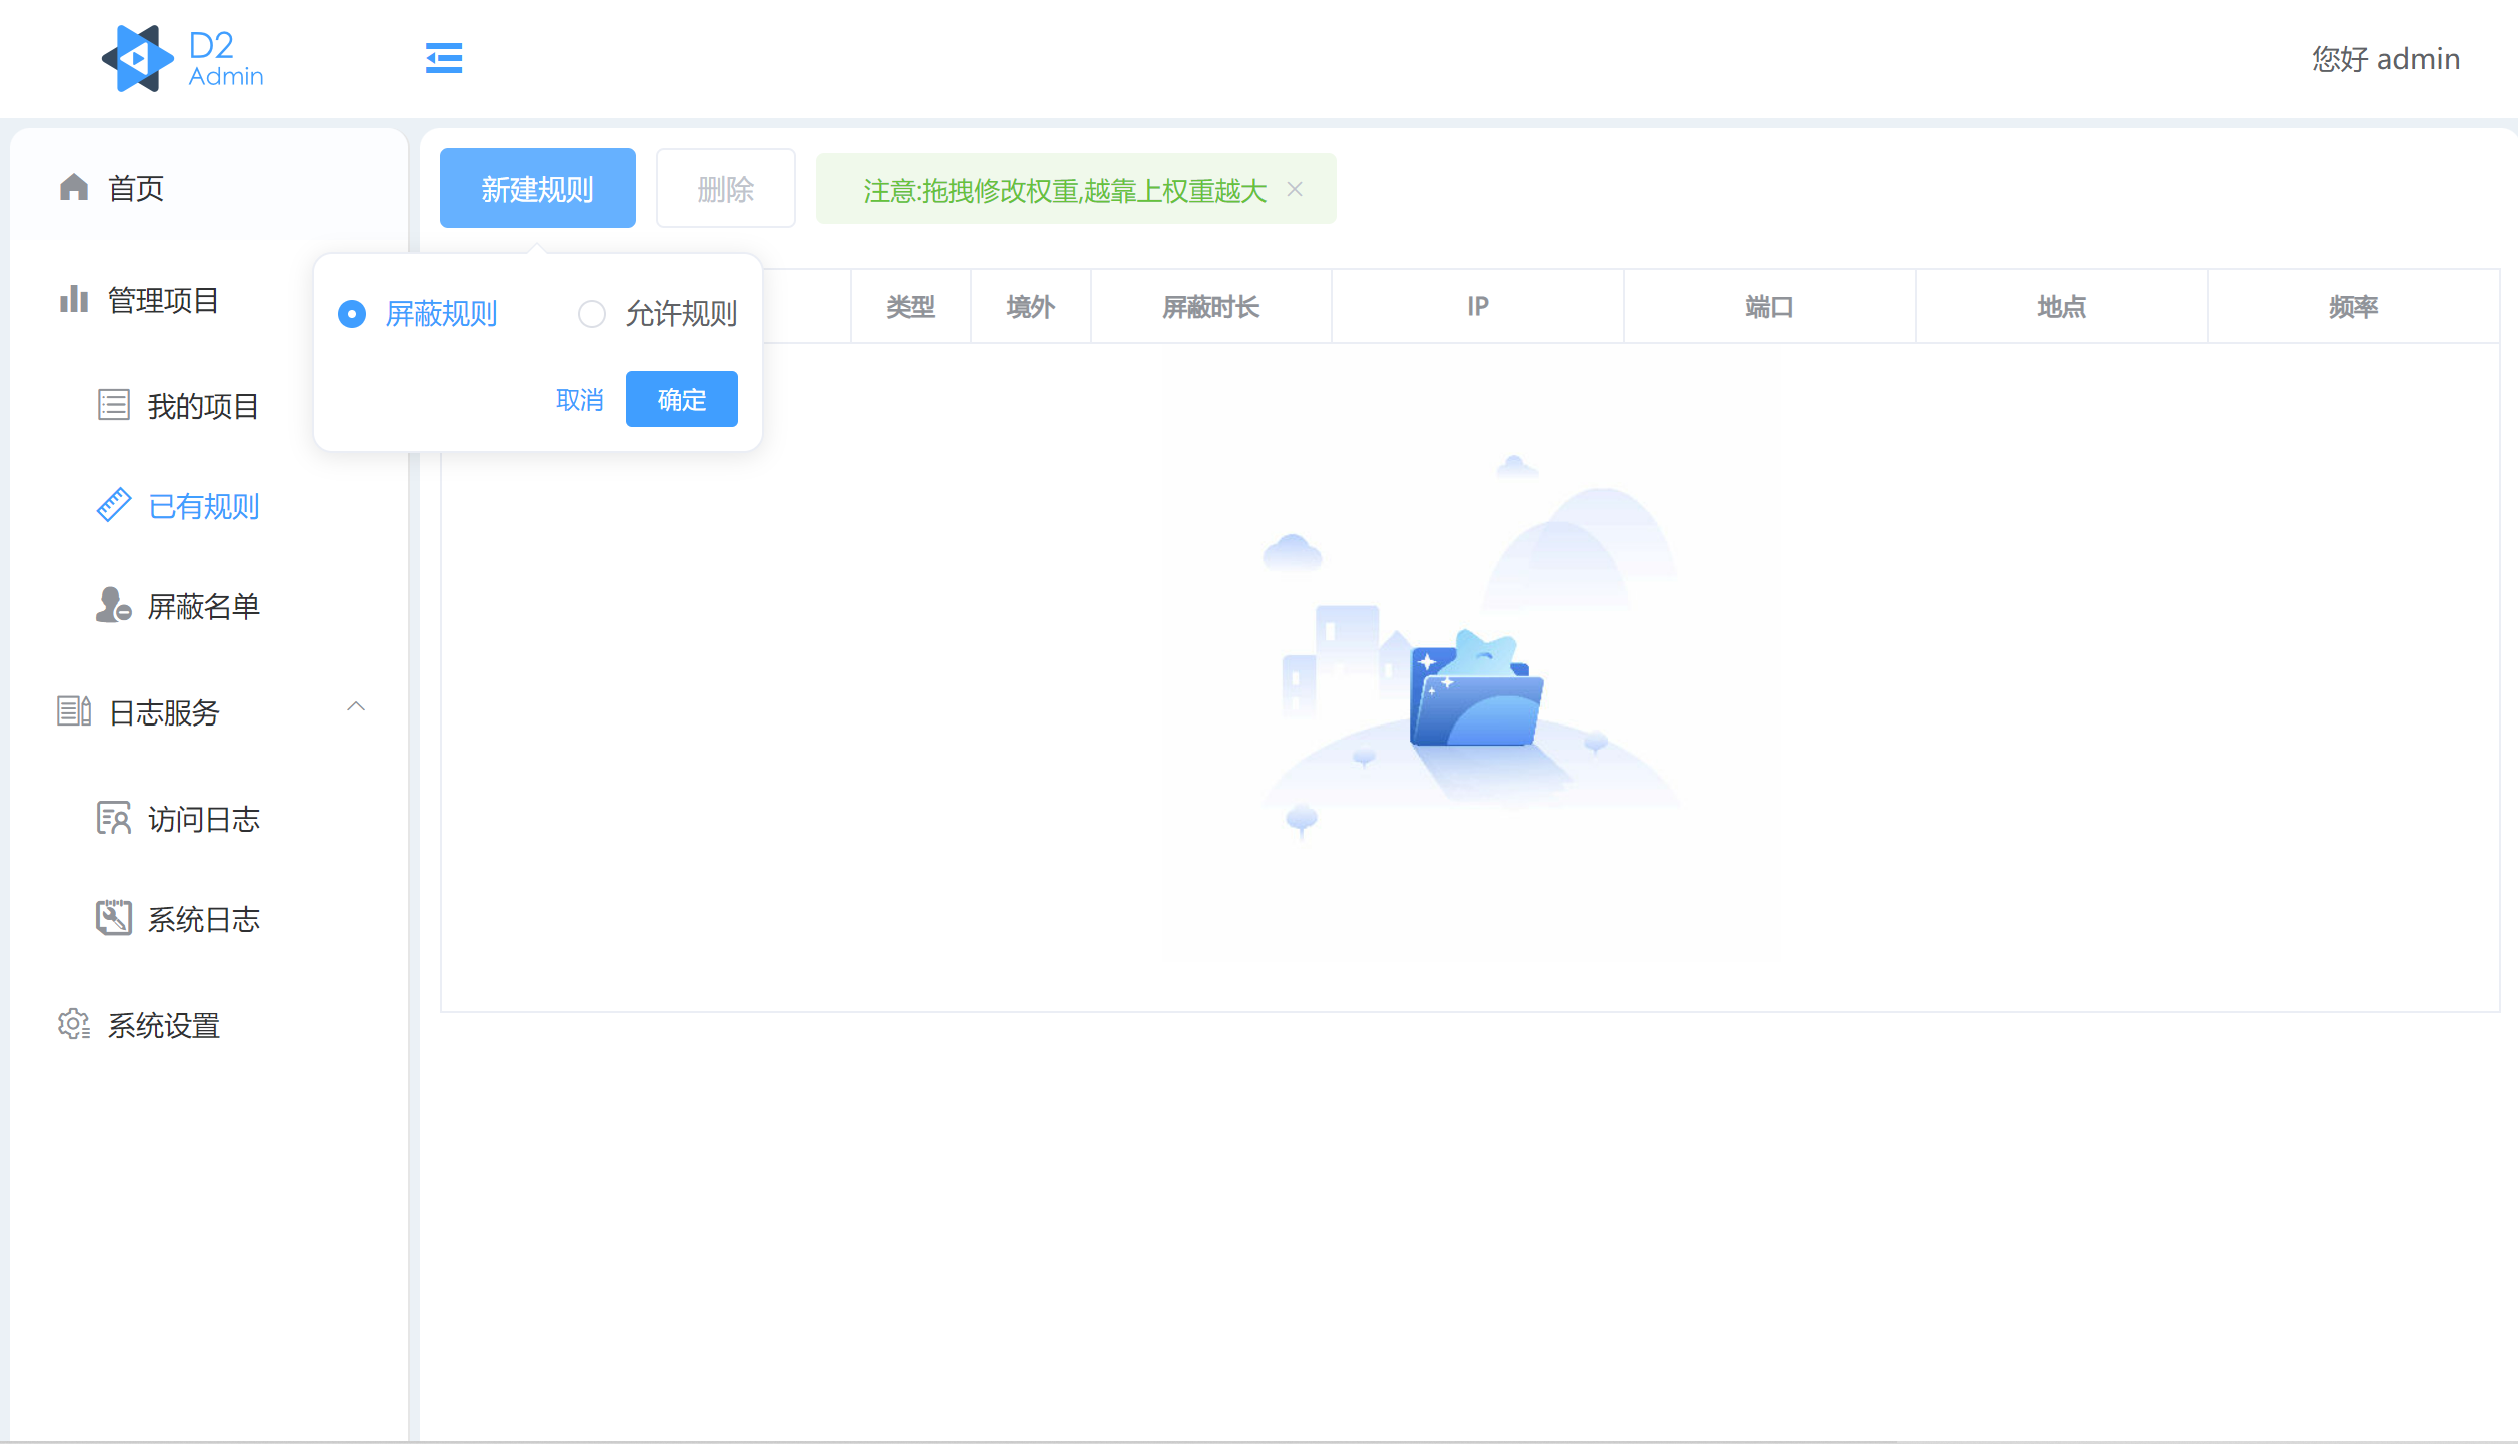
Blocking rules refer to blocking the IP if any one of the conditions in the rules is met. Allowing rules refer to allowing the IP if all the conditions in the rules are met.
Note: The weight of blocking rules and allowing rules, when the higher weight rule is met, the subsequent rules will not be executed. The higher the weight, the higher the priority.
The time in frequency detection, such as 30 minutes and 100 times, refers to the same IP being written to the access log 100 times within 30 minutes (only concerned with IP and times, not concerned with which port is accessed). The number of times the access log is written is closely related to the log interval configuration in the system settings.
For example, if the log interval configuration in the system settings is 30, it means that the same IP accessing the same port will only be recorded once in 30 seconds (unlimited refresh access is also recorded once). If accessed again after 30 seconds, it will be recorded again.
If machine A only accesses port 80, then the access record of machine A accessing port 80 will only be recorded once in 30 seconds. If accessed again after 30 seconds, it will be recorded again.
If machine A accesses both port 80 and port 443 at the same time, the access records of port 80 and port 443 will be written at the same time. If accessed again after 30 seconds, it will be recorded again.
IP location query uses the offline location query library ip2region. Therefore, some information may not be updated in time, and there may be rare cases of inaccuracy.
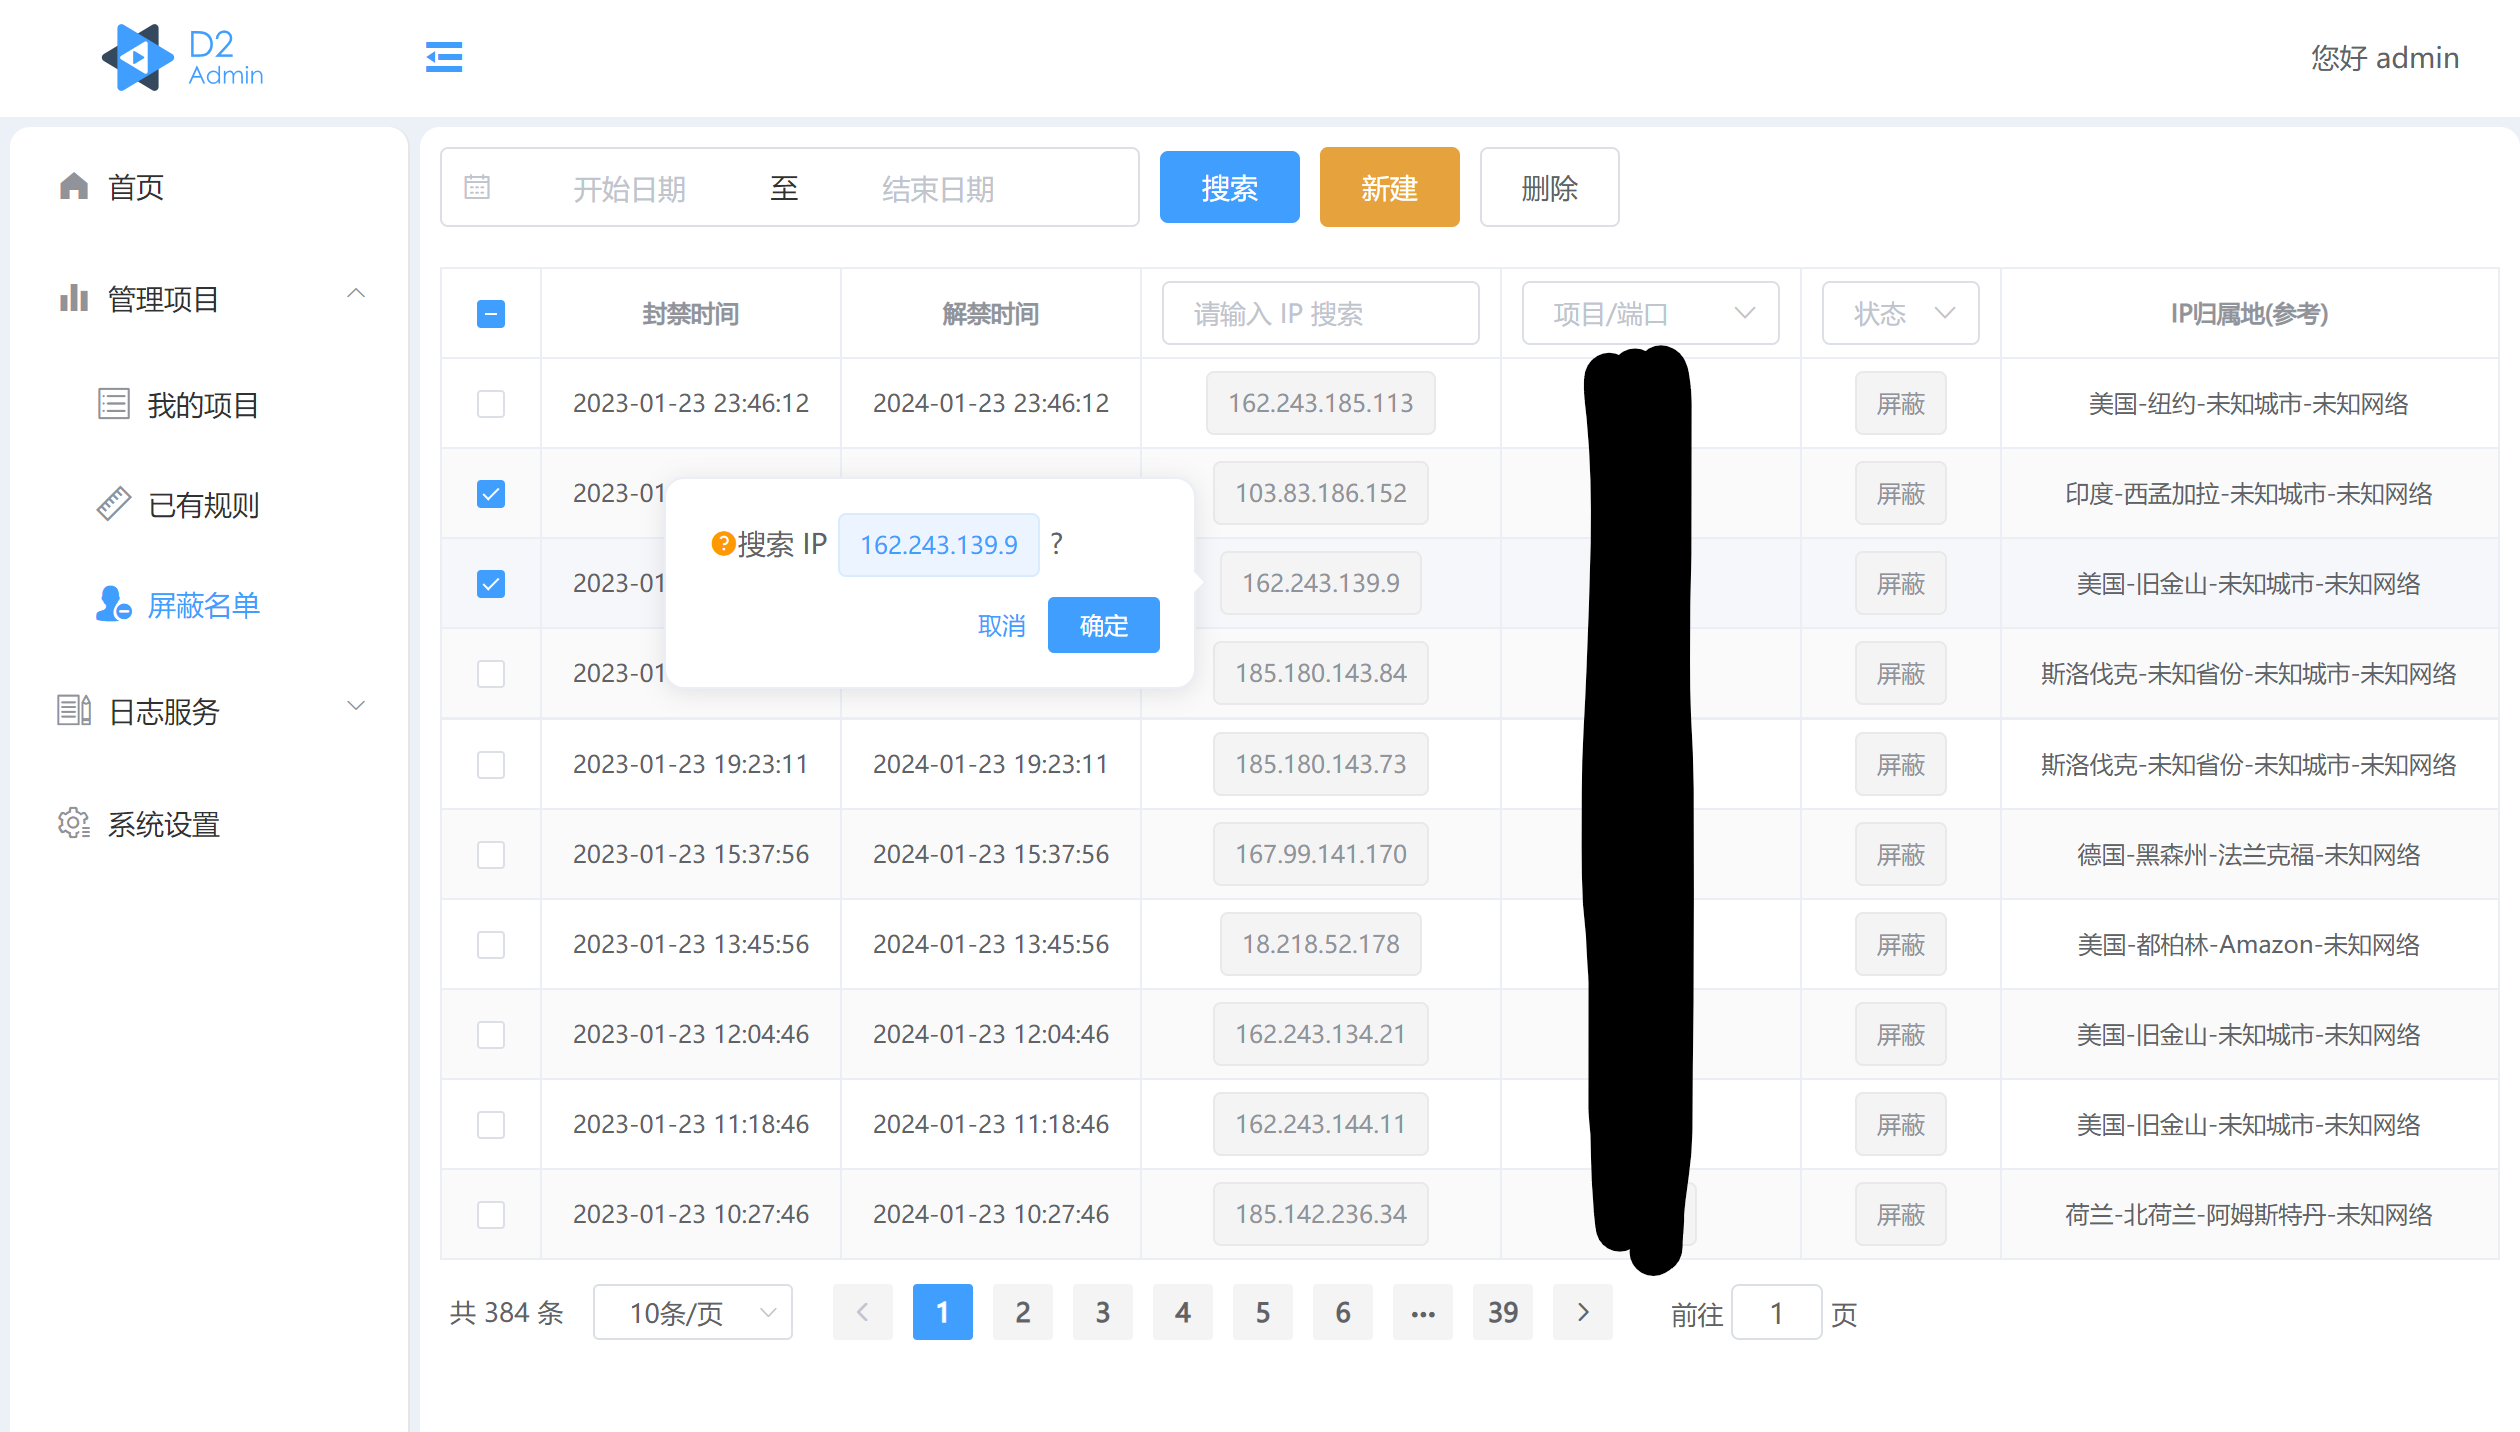
Location search is not sensitive to order, such as Anhui and Hui'an will both search for access logs with the location of Anhui. However, it is sensitive to typos or symbols, so be careful. Entering some wrong characters may lead to unsatisfactory search results.
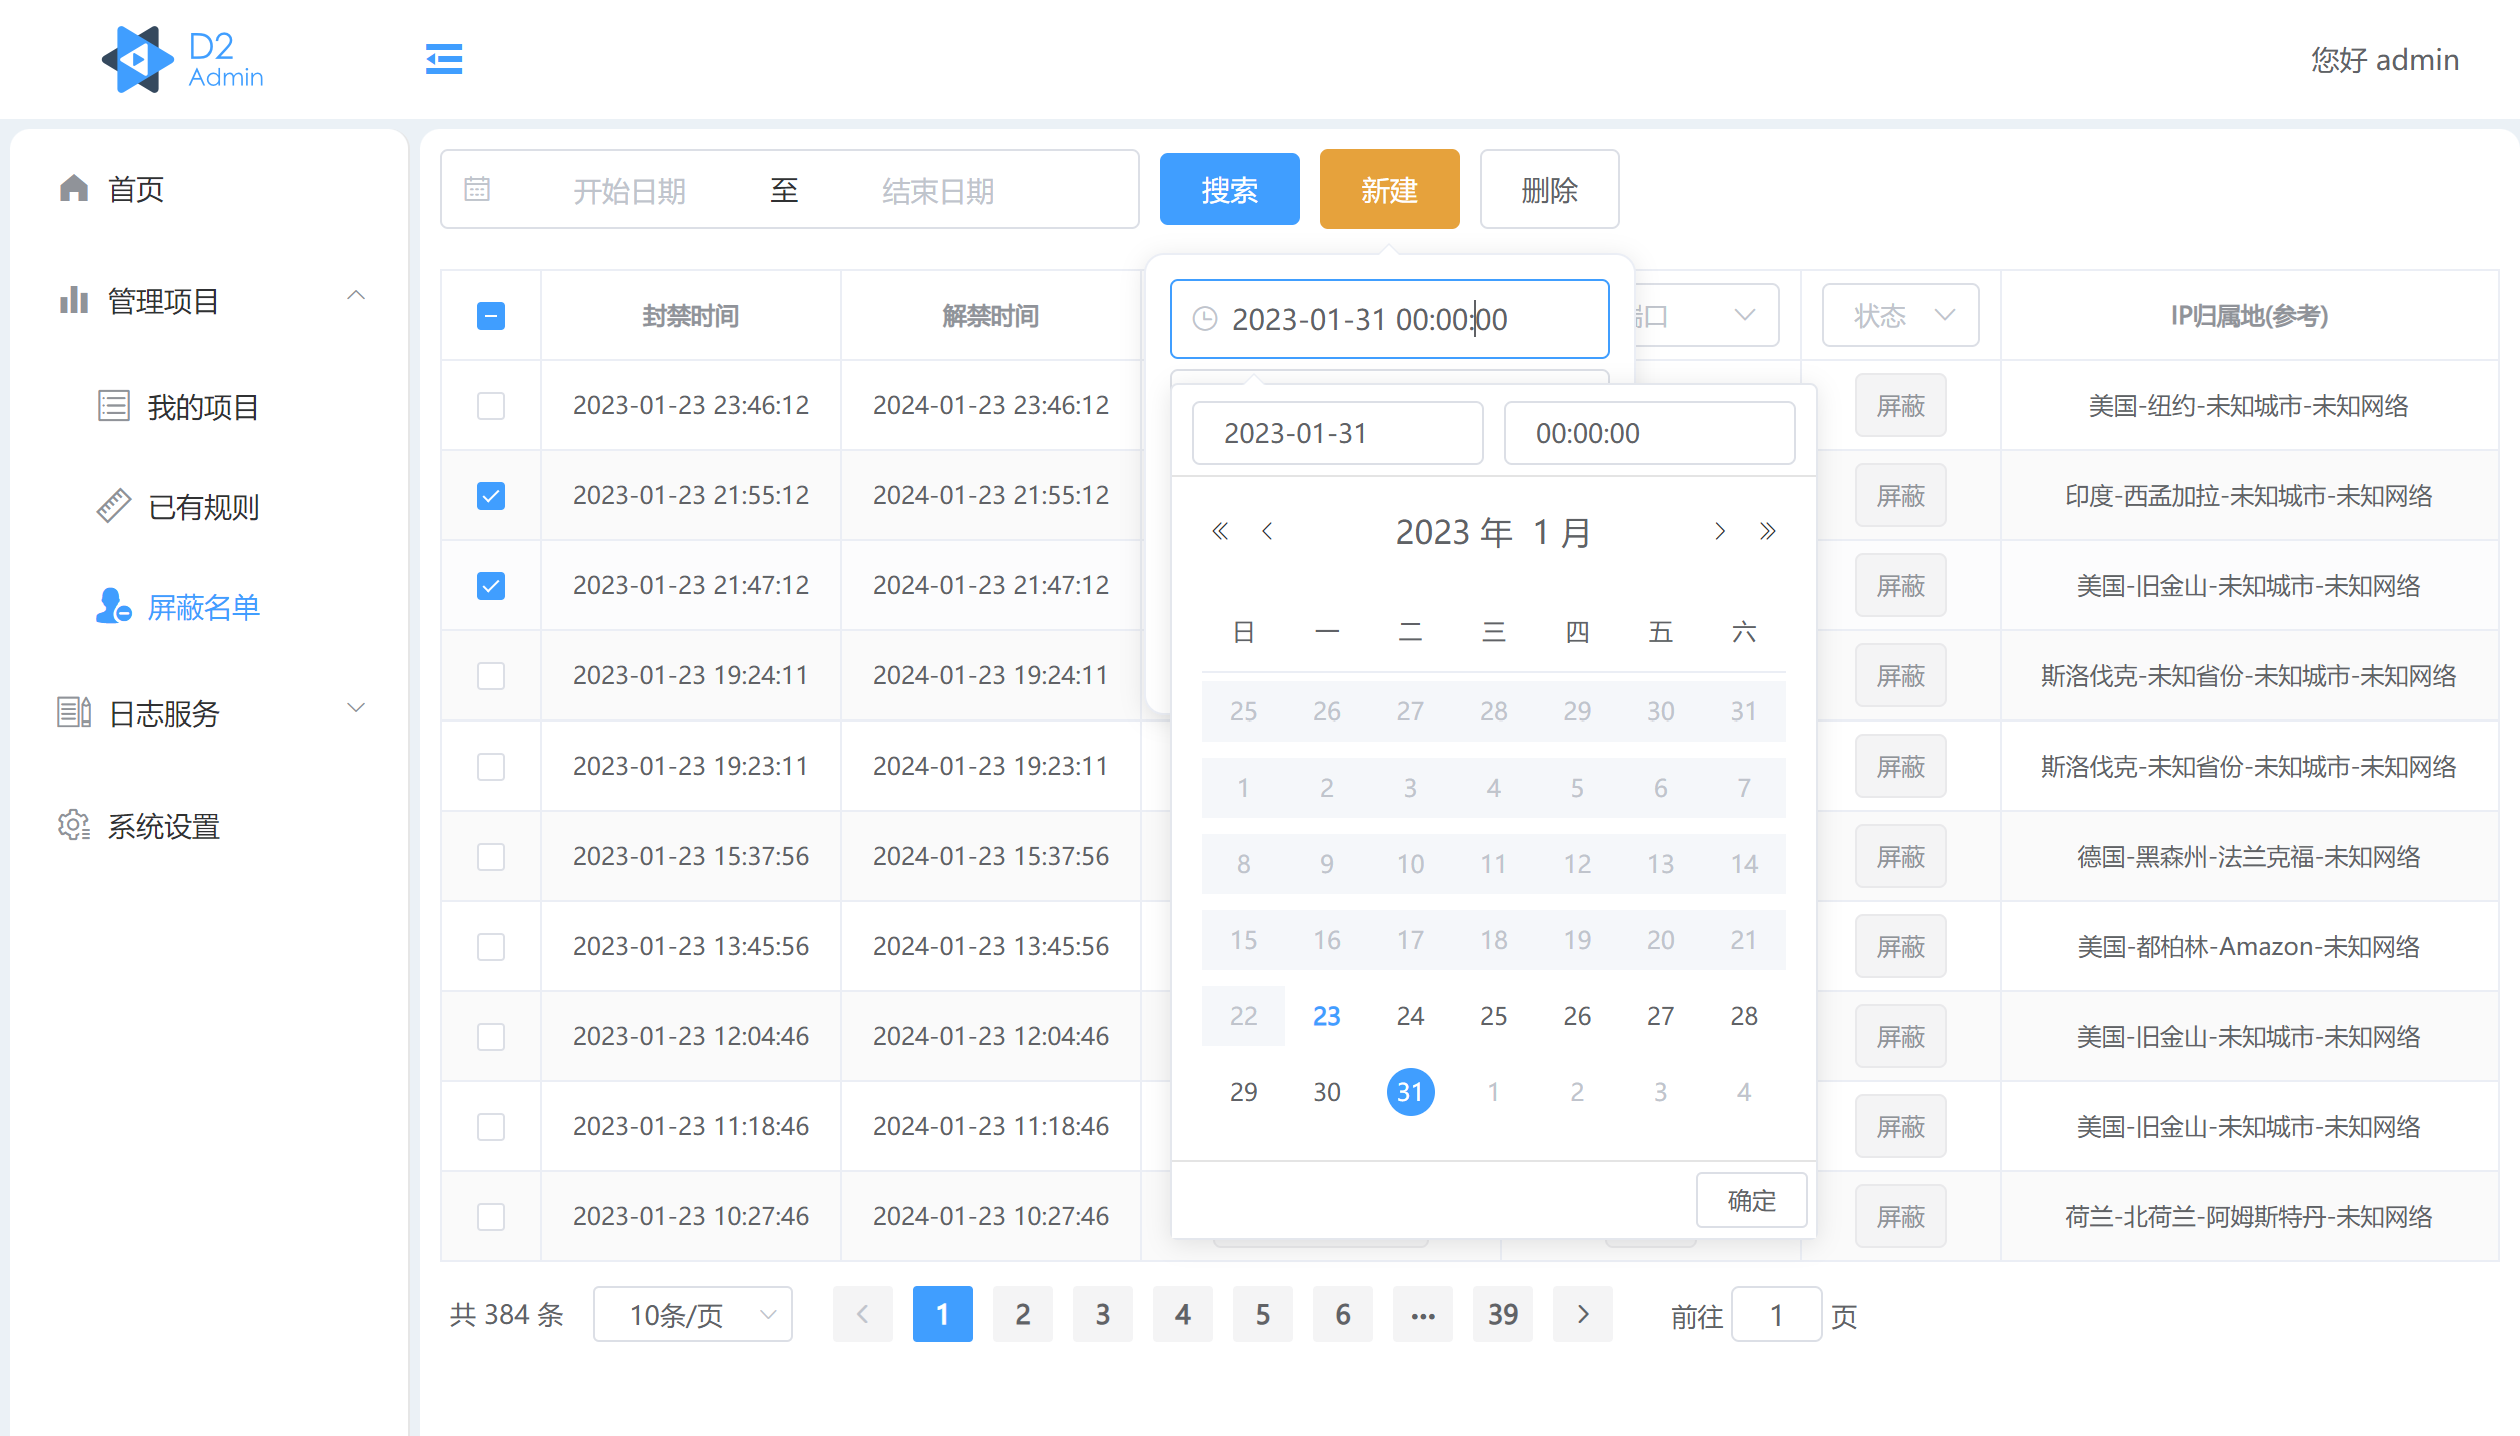
The date selection used in the project is disabled, typically for blocking time hours, minutes, and seconds. When selecting the blocking time to the current day, the minimum selection is greater than the current time by 3 minutes or 5 minutes, because selecting to block an IP to a past time is meaningless, so it is disabled.
Both frontend and backend have their own traffic limit rules. Check express/config.js.limiter (frontend traffic limit) and System Settings>Traffic Limit (backend traffic limit) for details.
Restarting can reset this time.
Note the issue