-
Notifications
You must be signed in to change notification settings - Fork 15
Developing on the edX Developer Stack
This page describes everything you need to know to begin development on the edX Developer Stack (also known as devstack).
The edX devstack is a Vagrant instance designed for local development. Before beginning development, read edX Developer Stack which describes how to install and run the edX software.
Debugging with devstack is a little convoluted, as the source code lives on your local machine but the code is executing within the Vagrant image. One solution is to use PyCharm from JetBrains. It is able to debug devstack using its concept of remote Python interpreters. This only works for the Professional edition.
- If you want to experiment with PyCharm, you can download a trial of the professional edition. This is different than the open-source edition which doesn't support the vagrant functionality.
See Setting up PyCharm for edX development.
See the Test Engineering FAQ for all your questions about testing the edX platform.
You can setup your development environment such that you can visually interact with browsers and other GUIs in the vagrant machine from the host machine. To do this, you will need to install XQuartz. For further information, see Test Engineering FAQ.
There are currently two ways to theme the platform:
-
"Stanford Theming" -- This is a set of conditions in the code that key off a settings (
settings.FEATURES.USE_CUSTOM_THEMEandsettings.THEME_NAME) to look aside to custom styling (assets) and templates. It's a bit of a hack due to pipeline complexity (sass/ruby dependencies) and how Mako templates are named and loaded. -
"Microsites" -- These are separate conditions that change site appearance dynamicaly keyed off the hostname of the request. foo.edx.org can appear one way, and bar.edx.org can appear another.
This section describes how to use the former with devstack, written by Sef ([email protected]).
-
Configure. Change two settings in
/edx/app/edxapp/lms.envs.json"FEATURES": { ... "USE_CUSTOM_THEME": true ... },and
... "THEME_NAME": "default", ... -
Mount. Make sure Vagrant mounts the "theme" directory from the host. This should be the case with Johnnycake or later Vagrant installations. If you have an older Vagrantfile, see PR #884.
-
Check out. The rest of the devstack code checks out repos as part of the provision step, but that tooling doesn't happen for themes. You need to check out a theme yourself. I recommend you start with the "null theme" that we've made here at Stanford:
cd themes git clone [email protected]:Stanford-Online/edx-default-theme.git default -
Gather assets. The rest of the devstack methods seems to imply the service variant (lms or cms) automatically, but this doesn't work with the theme pipeline. So to make this work I have to gather assets this way:
vagrant ssh sudo su edxapp paver update_assets lms --settings=devstack -
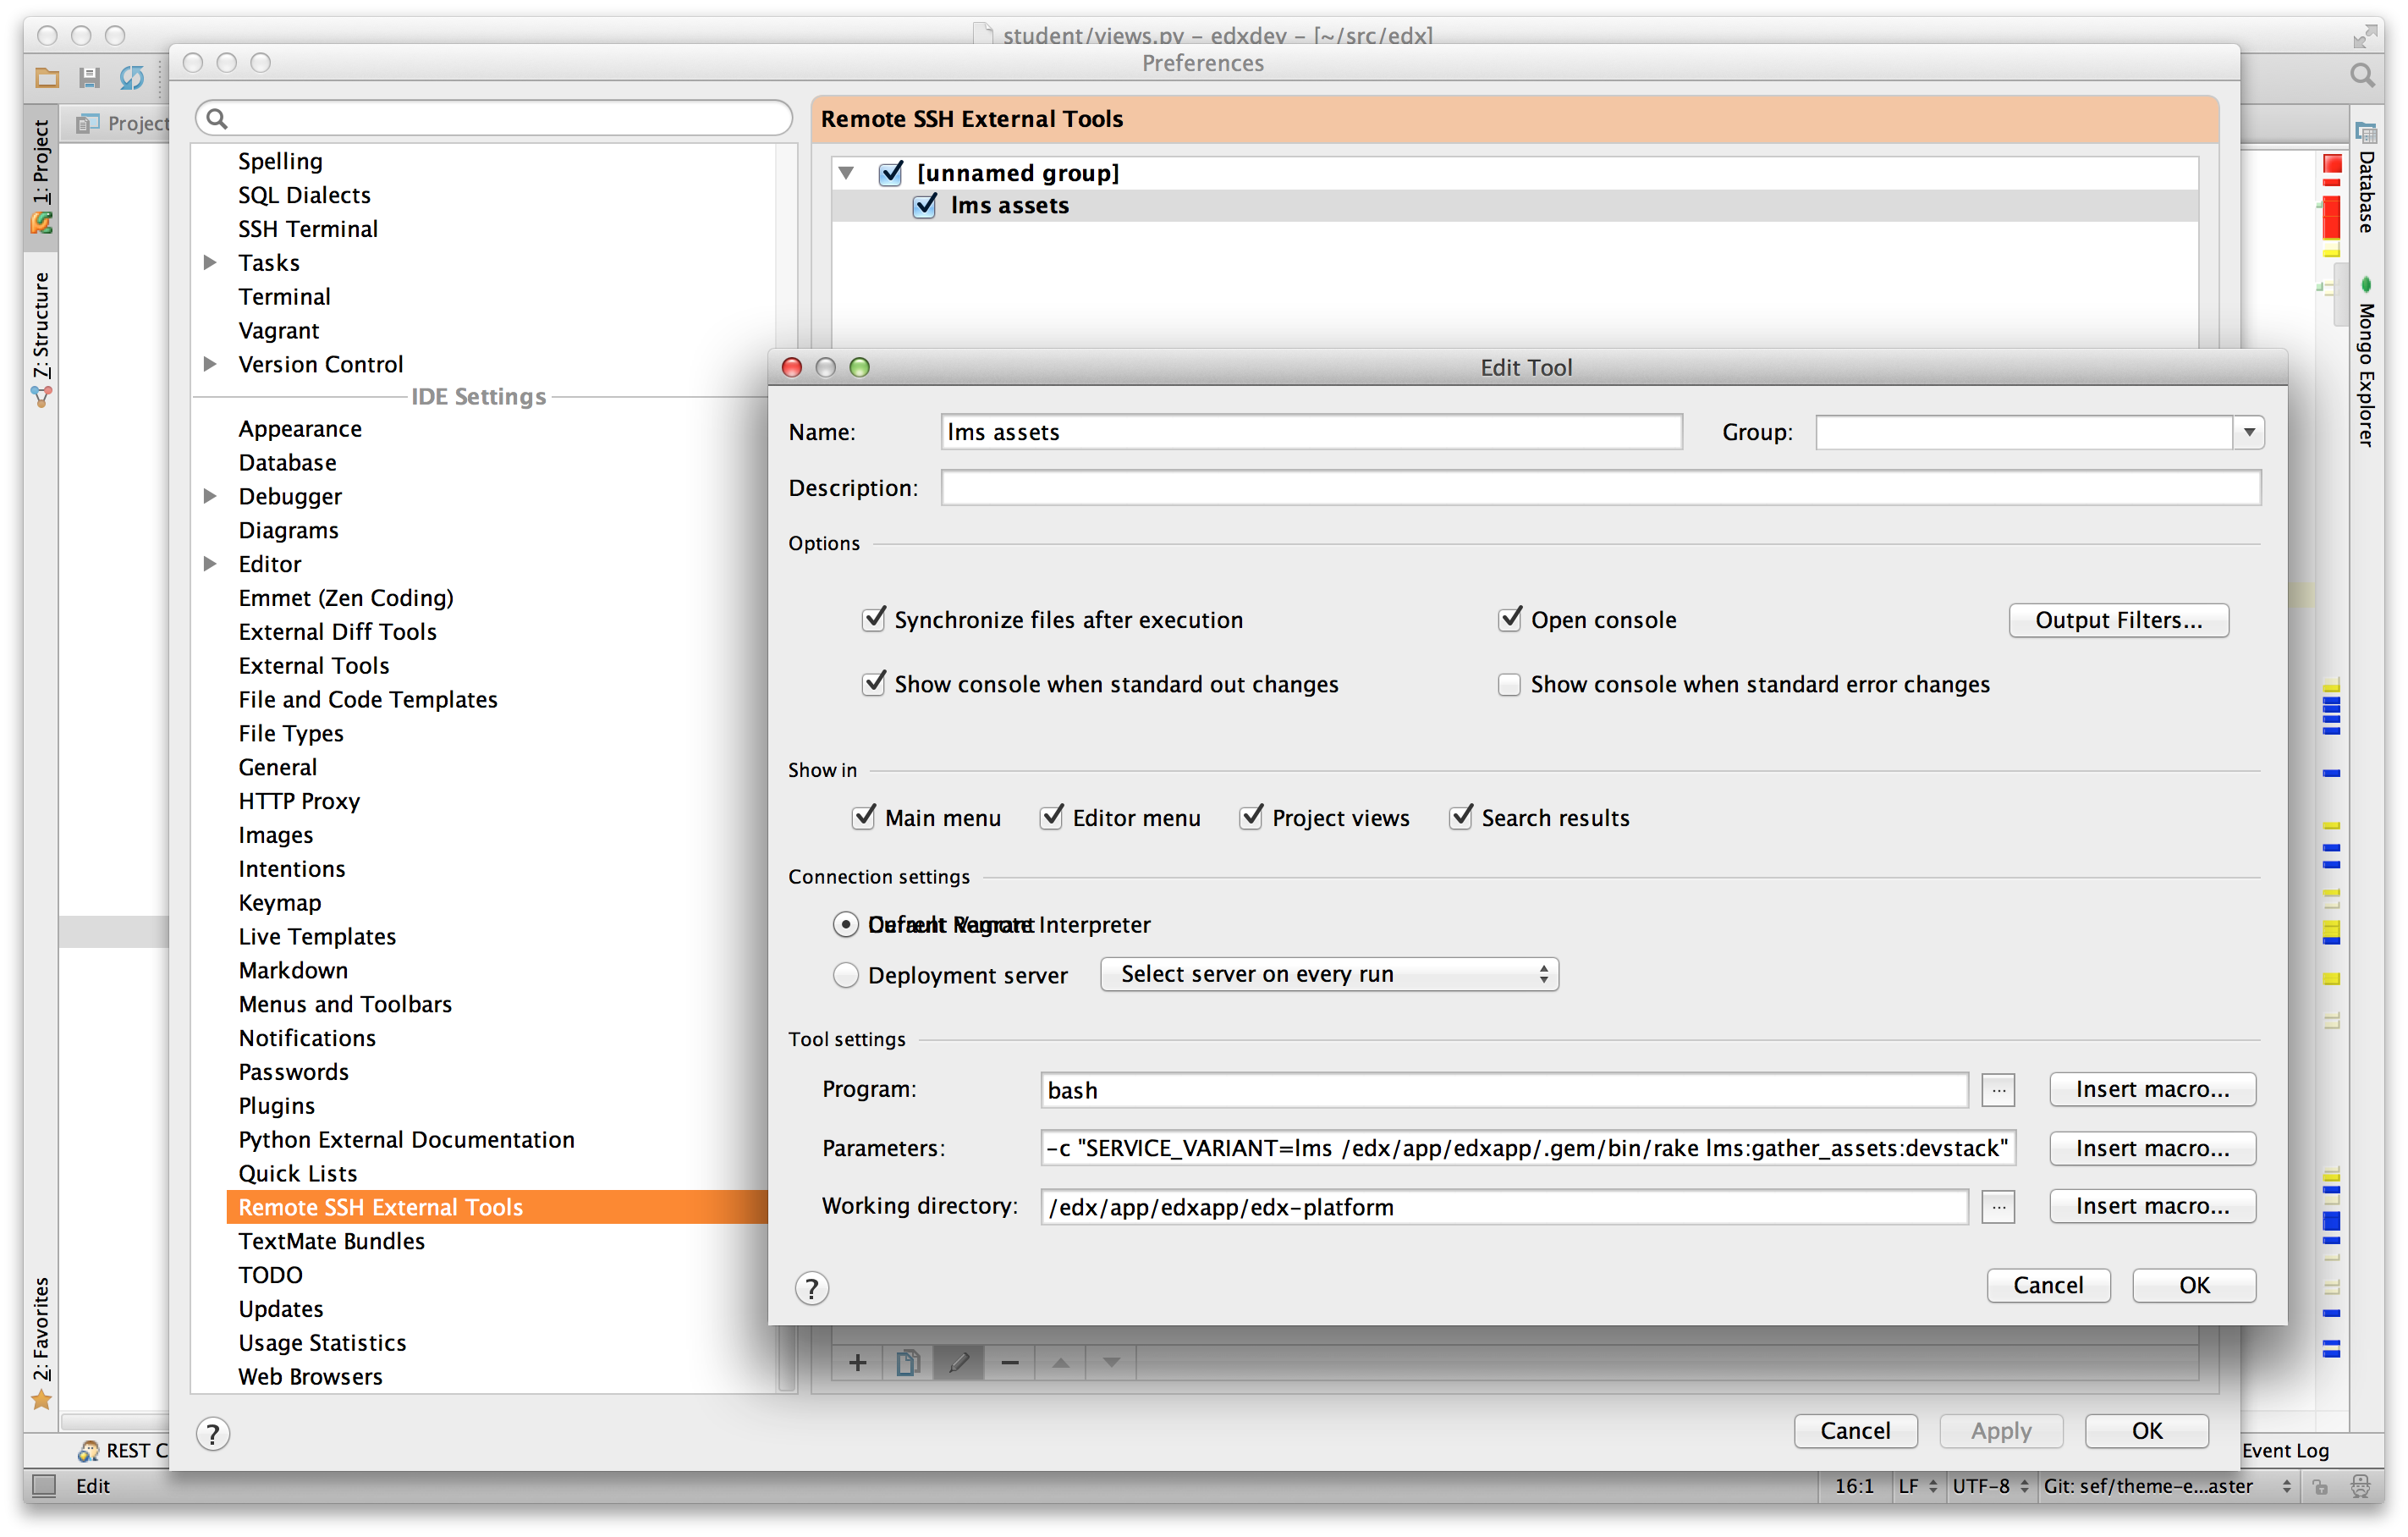
From PyCharm. I created an external command to do this from PyCharm.
- Open up "Remote SSH External Tools"
- Name = "lms assets"
- Connection settings = Default interpreter. This assumes that you've setup up pycharm with the default interpreter to ssh into the edxapp user.
- Program =
bash - Parameters =
-c "SERVICE_VARIANT=lms /edx/app/edxapp/.gem/bin/rake lms:gather_assets:devstack" - Working directory =
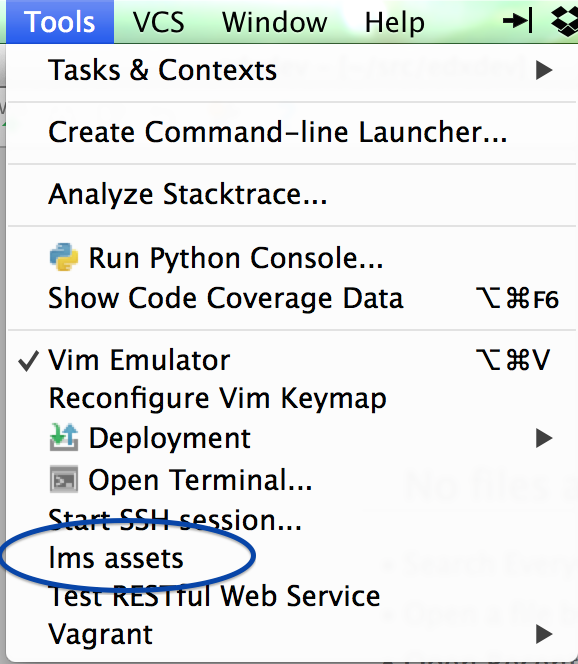
/edx/app/edxapp/edx-platform - Screenshots: configuring and resulting menu item.
There is nothing special about the name "default" in steps 1 and 3 above. They just have to match up: the configuration file should have the same name as the directory in themes. For example, I have both "stanford" and "default" subdirectories there and switching between them is just a matter of changing lms.envs.json, re-gathering assets, and restarting LMS.
To syncdb and migrate from the shell as the edxapp user:
./manage.py lms --settings=devstack syncdb
./manage.py lms --settings=devstack migrate
If there are errors, you might be able to resolve them with
./manage.py lms --settings=devstack migrate --merge
followed by syncdb'ing
Devstack uses mySQL as the DB engine for the edx-platform app. You can tell this by starting up the Django shell with:
./manage.py lms shell --settings=devstack
Then in the Django shell:
from django.conf import settings
settings.DATABASES
You can manipulate the database with the mysql command line interface from within your vagrant terminal session:
mysql --user=root --port=3306 edxapp
If you want to use a GUI tool from your host system, that is also possible. E.g. for MySQL Workbench, you would set up a new Server connection with these settings:
- Connection Method: Standard TCP/IP over SSH
- SSH Hostname: 192.168.33.10:22
- SSH Username: vagrant (the password is 'vagrant')
- MySQL Hostname: 127.0.0.1
- MySQL Server Port: 3306
- Username: root (no password)
- Default Schema: edxapp
Note: You may also need to specify the SSH Key File, which should be located at "~/.vagrant.d/insecure_private_key"
There are a number of other useful documents on the edX platform wiki: