-
Notifications
You must be signed in to change notification settings - Fork 12
Measuring Frequency Response
In the first two tutorials, we discussed the Tsunami's basic signal generation and measurement capabilities. Today, we'll demonstrate how to combine these building blocks to do something more sophisticated: measure frequency response.
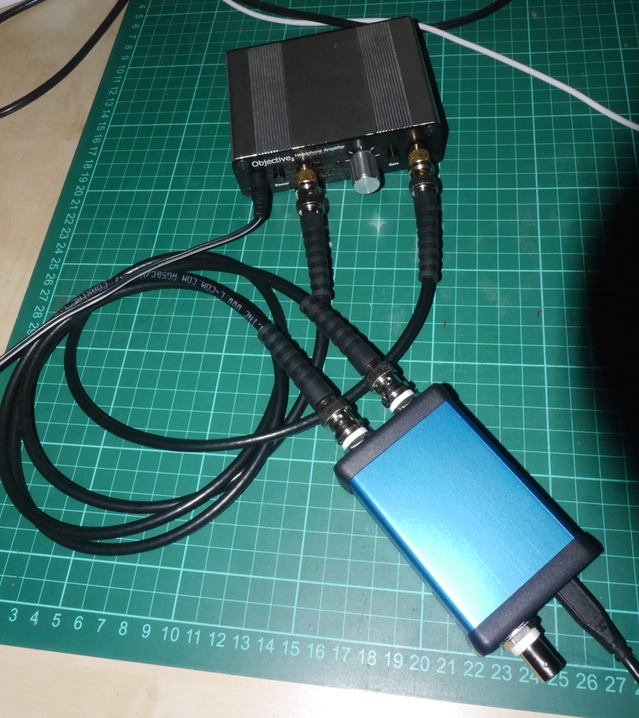
As a test subject, we'll be using my Objective2 headphone amplifier. We simply connect the Tsunami's signal generation output to the amplifier's input, and the amplifier's output to the signal generator's input.

After tweaking the volume knob a bit for a useful output voltage, we can load a simple sketch onto the Tsunami:
void setup() {
    Serial.begin(115200);
    Tsunami.begin();
    Tsunami.setAmplitude(3.0);
}

void loop() {
    for(float freq = 55.0; freq < 2000000.0; freq *= 1.02930224) {
        Tsunami.setFrequency(freq);
        delay(200);
        Serial.print(freq);
        Serial.print(" ");
        Serial.println(Tsunami.measurePeakVoltage());
    }
}
After initializing the Tsunami, and configuring it with a useful output voltage for the application, we sweep through the frequency range from 55Hz to 200KHz. At each step, it pauses for 200 milliseconds, then reads the input voltage from the Tsunami's input and prints it out along with the current frequency.
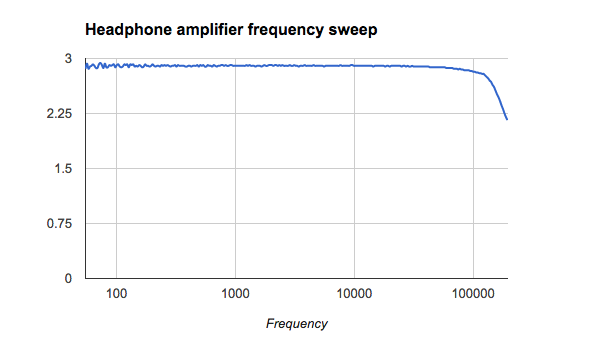
Plotting this gives us a quick visual look at the amplifier's frequency response:

As you can see, it's pretty good - the frequency response is almost perfectly flat all the way from 55Hz up to well beyond audio frequencies. My purchase of this headphone amplifier was clearly a good one - almost as good as your decision to back the Tsunami.