This ROS2 setup with VSCode is based on this template. See its README for a more in-depth look on how to use this workspace.
If you are not using a computer with Nvidia graphic card, switch to branch foxy-no-nvidia
You should already have Docker and VSCode with the remote containers plugin installed on your system.
distribution=$(. /etc/os-release;echo $ID$VERSION_ID) \
&& curl -s -L https://nvidia.github.io/nvidia-docker/gpgkey | sudo apt-key add - \
&& curl -s -L https://nvidia.github.io/nvidia-docker/$distribution/nvidia-docker.list | sudo tee /etc/apt/sources.list.d/nvidia-docker.list

sudo apt-get update

sudo apt-get install -y nvidia-docker2
Clone this repository in your computer and open it in VSCode (File->Open Folder).
When you open it for the first time, you should see a little popup that asks you if you would like to open it in a container. Say yes!
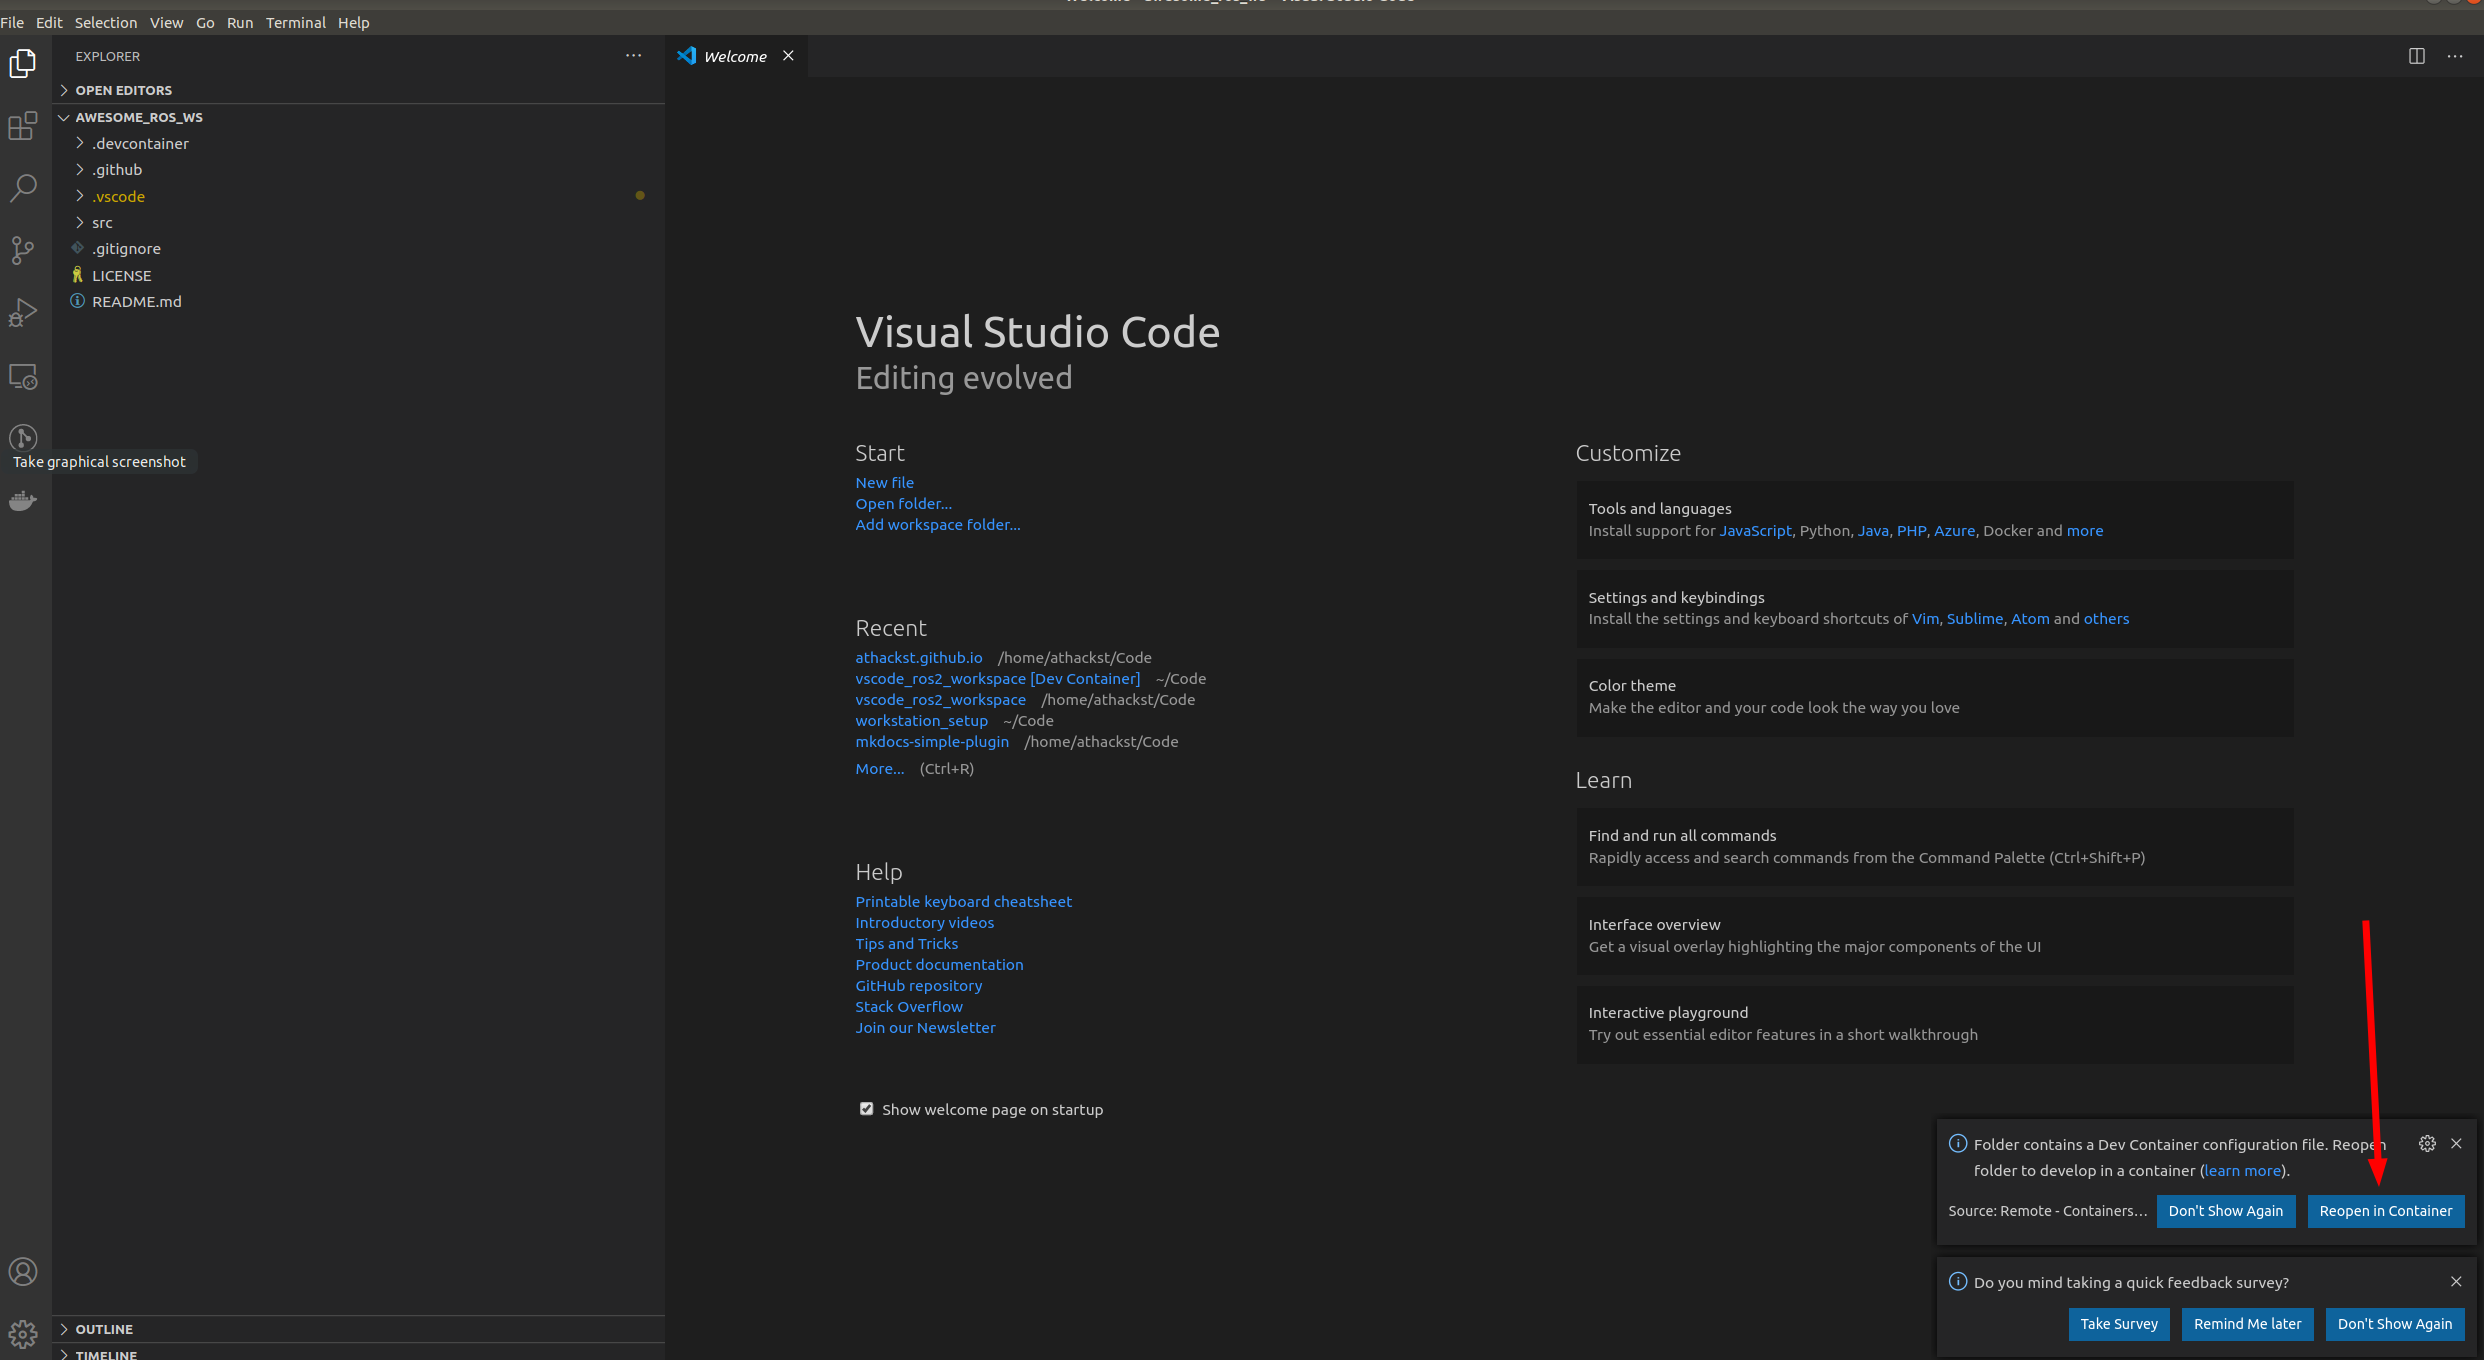
If you don't see the pop-up, click on the little green square in the bottom left corner, which should bring up the container dialog

In the dialog, select "Remote Containers: Reopen in container"
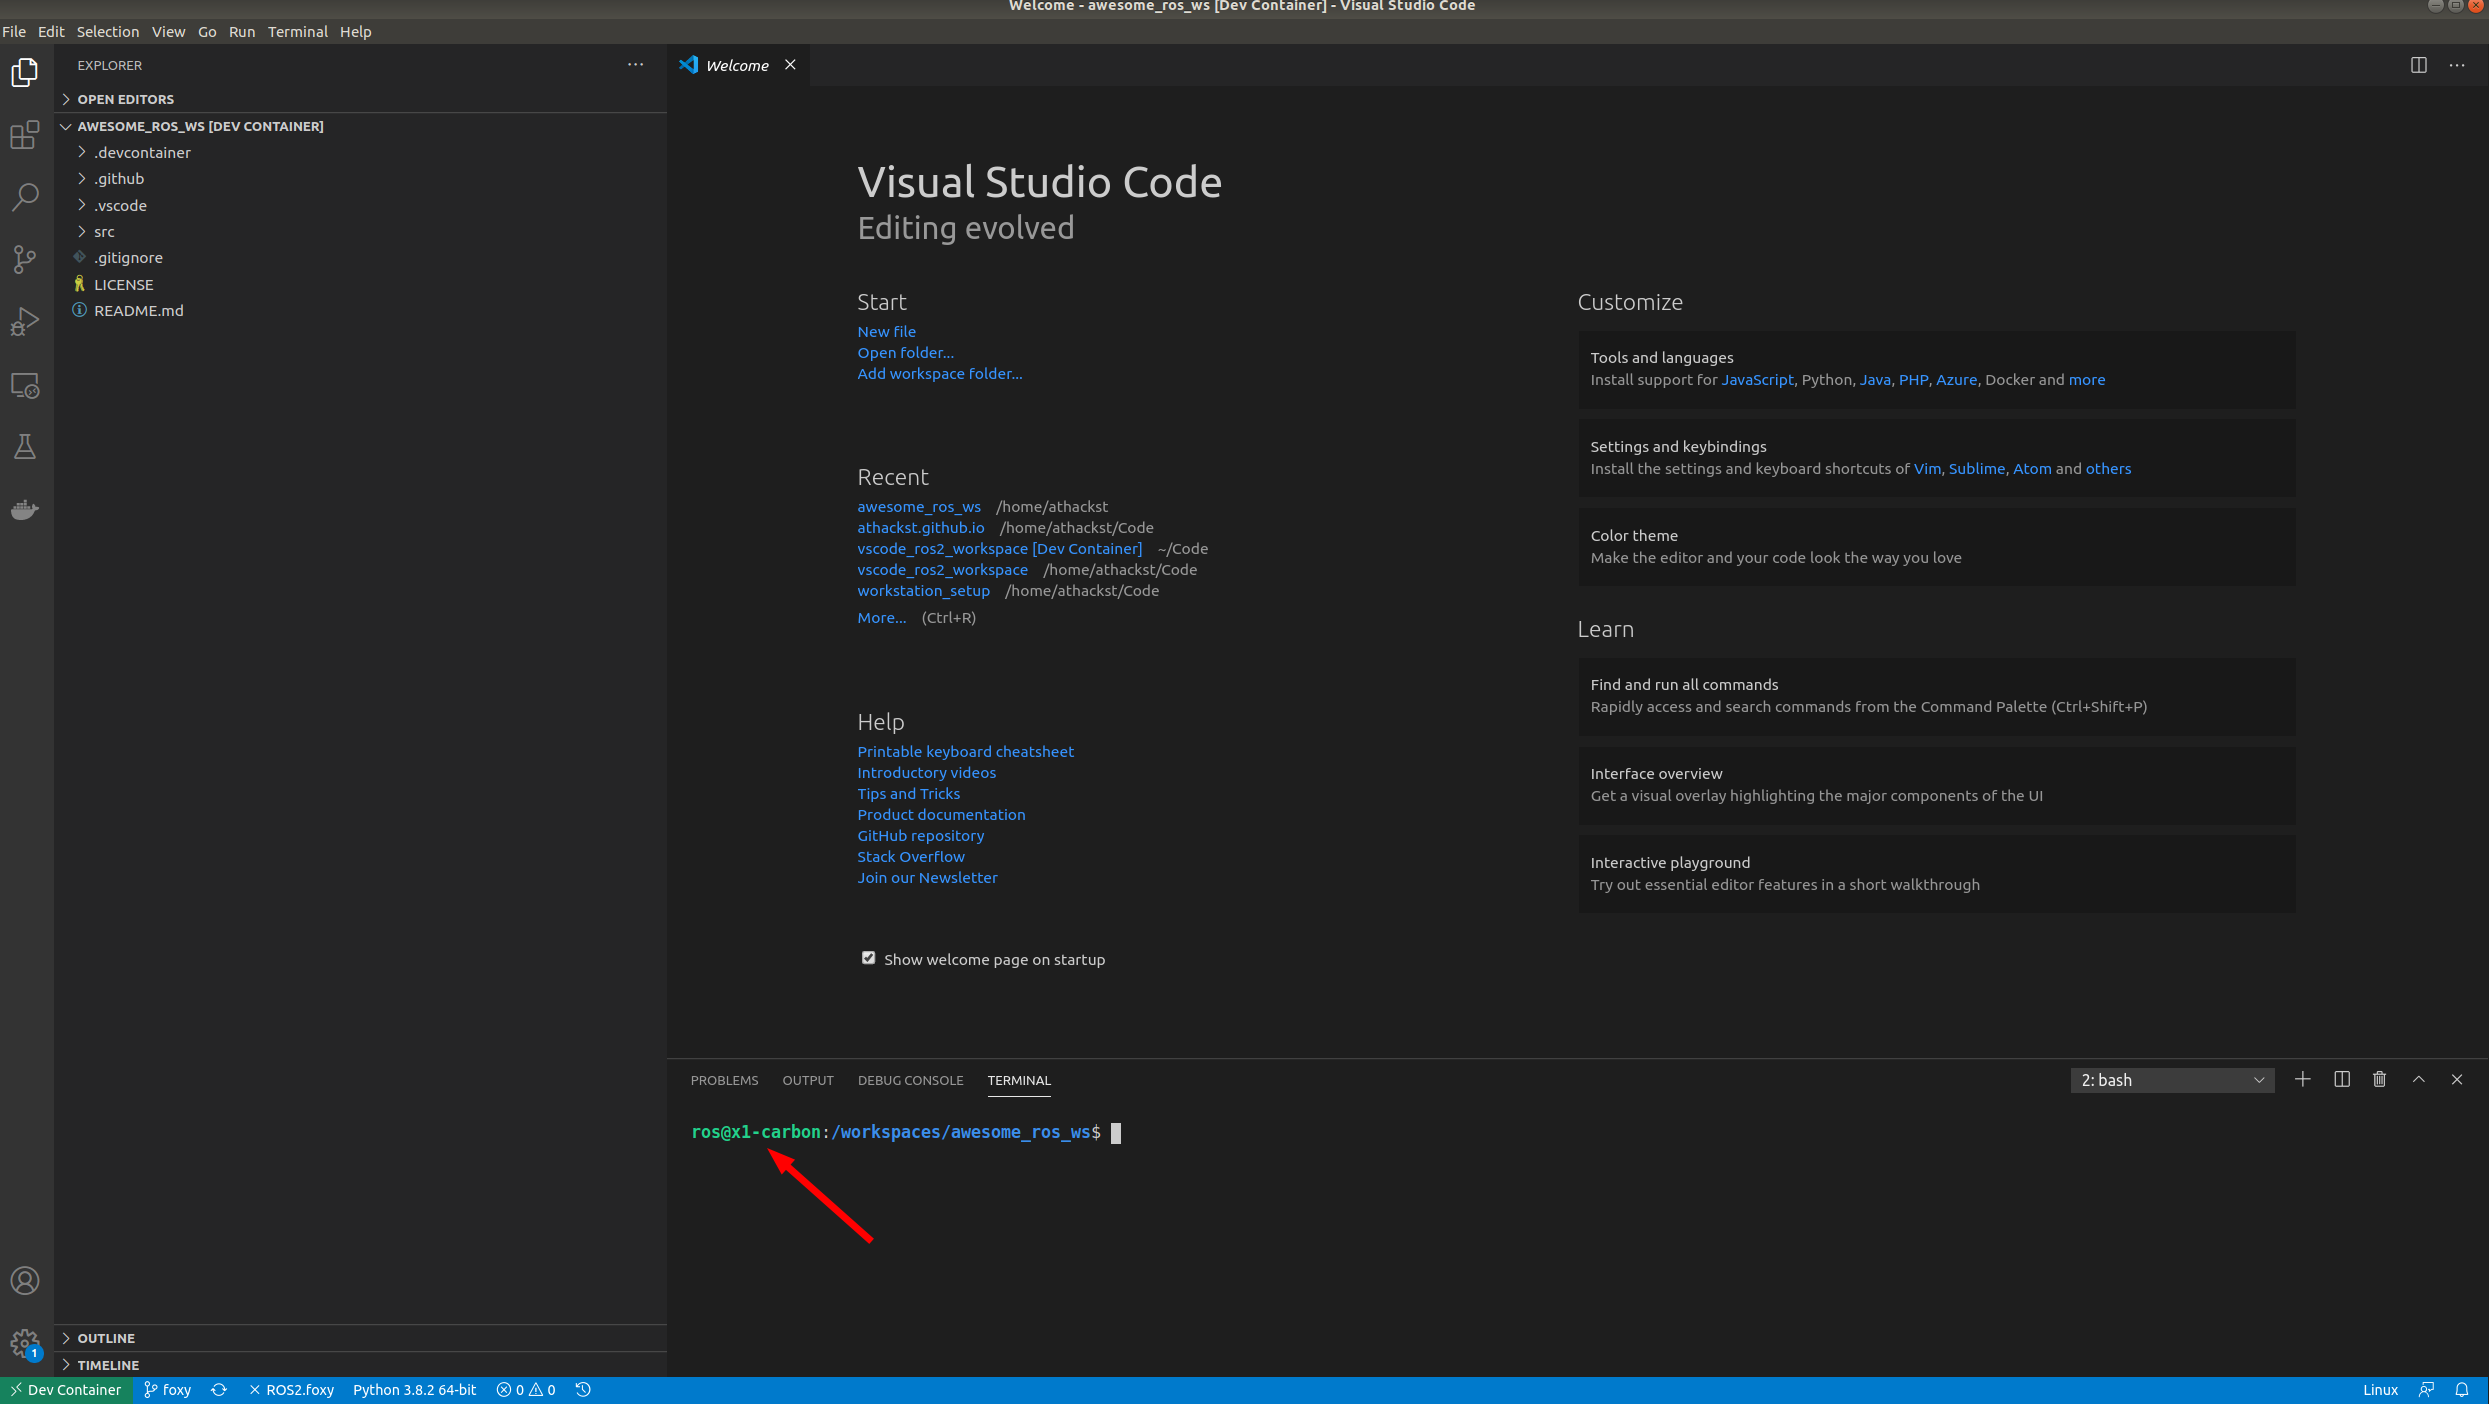
VSCode will build the dockerfile inside of .devcontainer for you. If you open a terminal inside VSCode (Terminal->New Terminal), you should see that your username has been changed to ros, and the bottom left green corner should say "Dev Container"
- Specify the repositories you want to include in your workspace: Use a file named "ros2.repos", make sure to put this file in the root folder (/ros2_docker).
- If you are using a
ros2.reposfile: Import the contentsTerminal->Run Task..->import from workspace file - Install dependencies
Terminal->Run Task..->install dependencies - Develop!