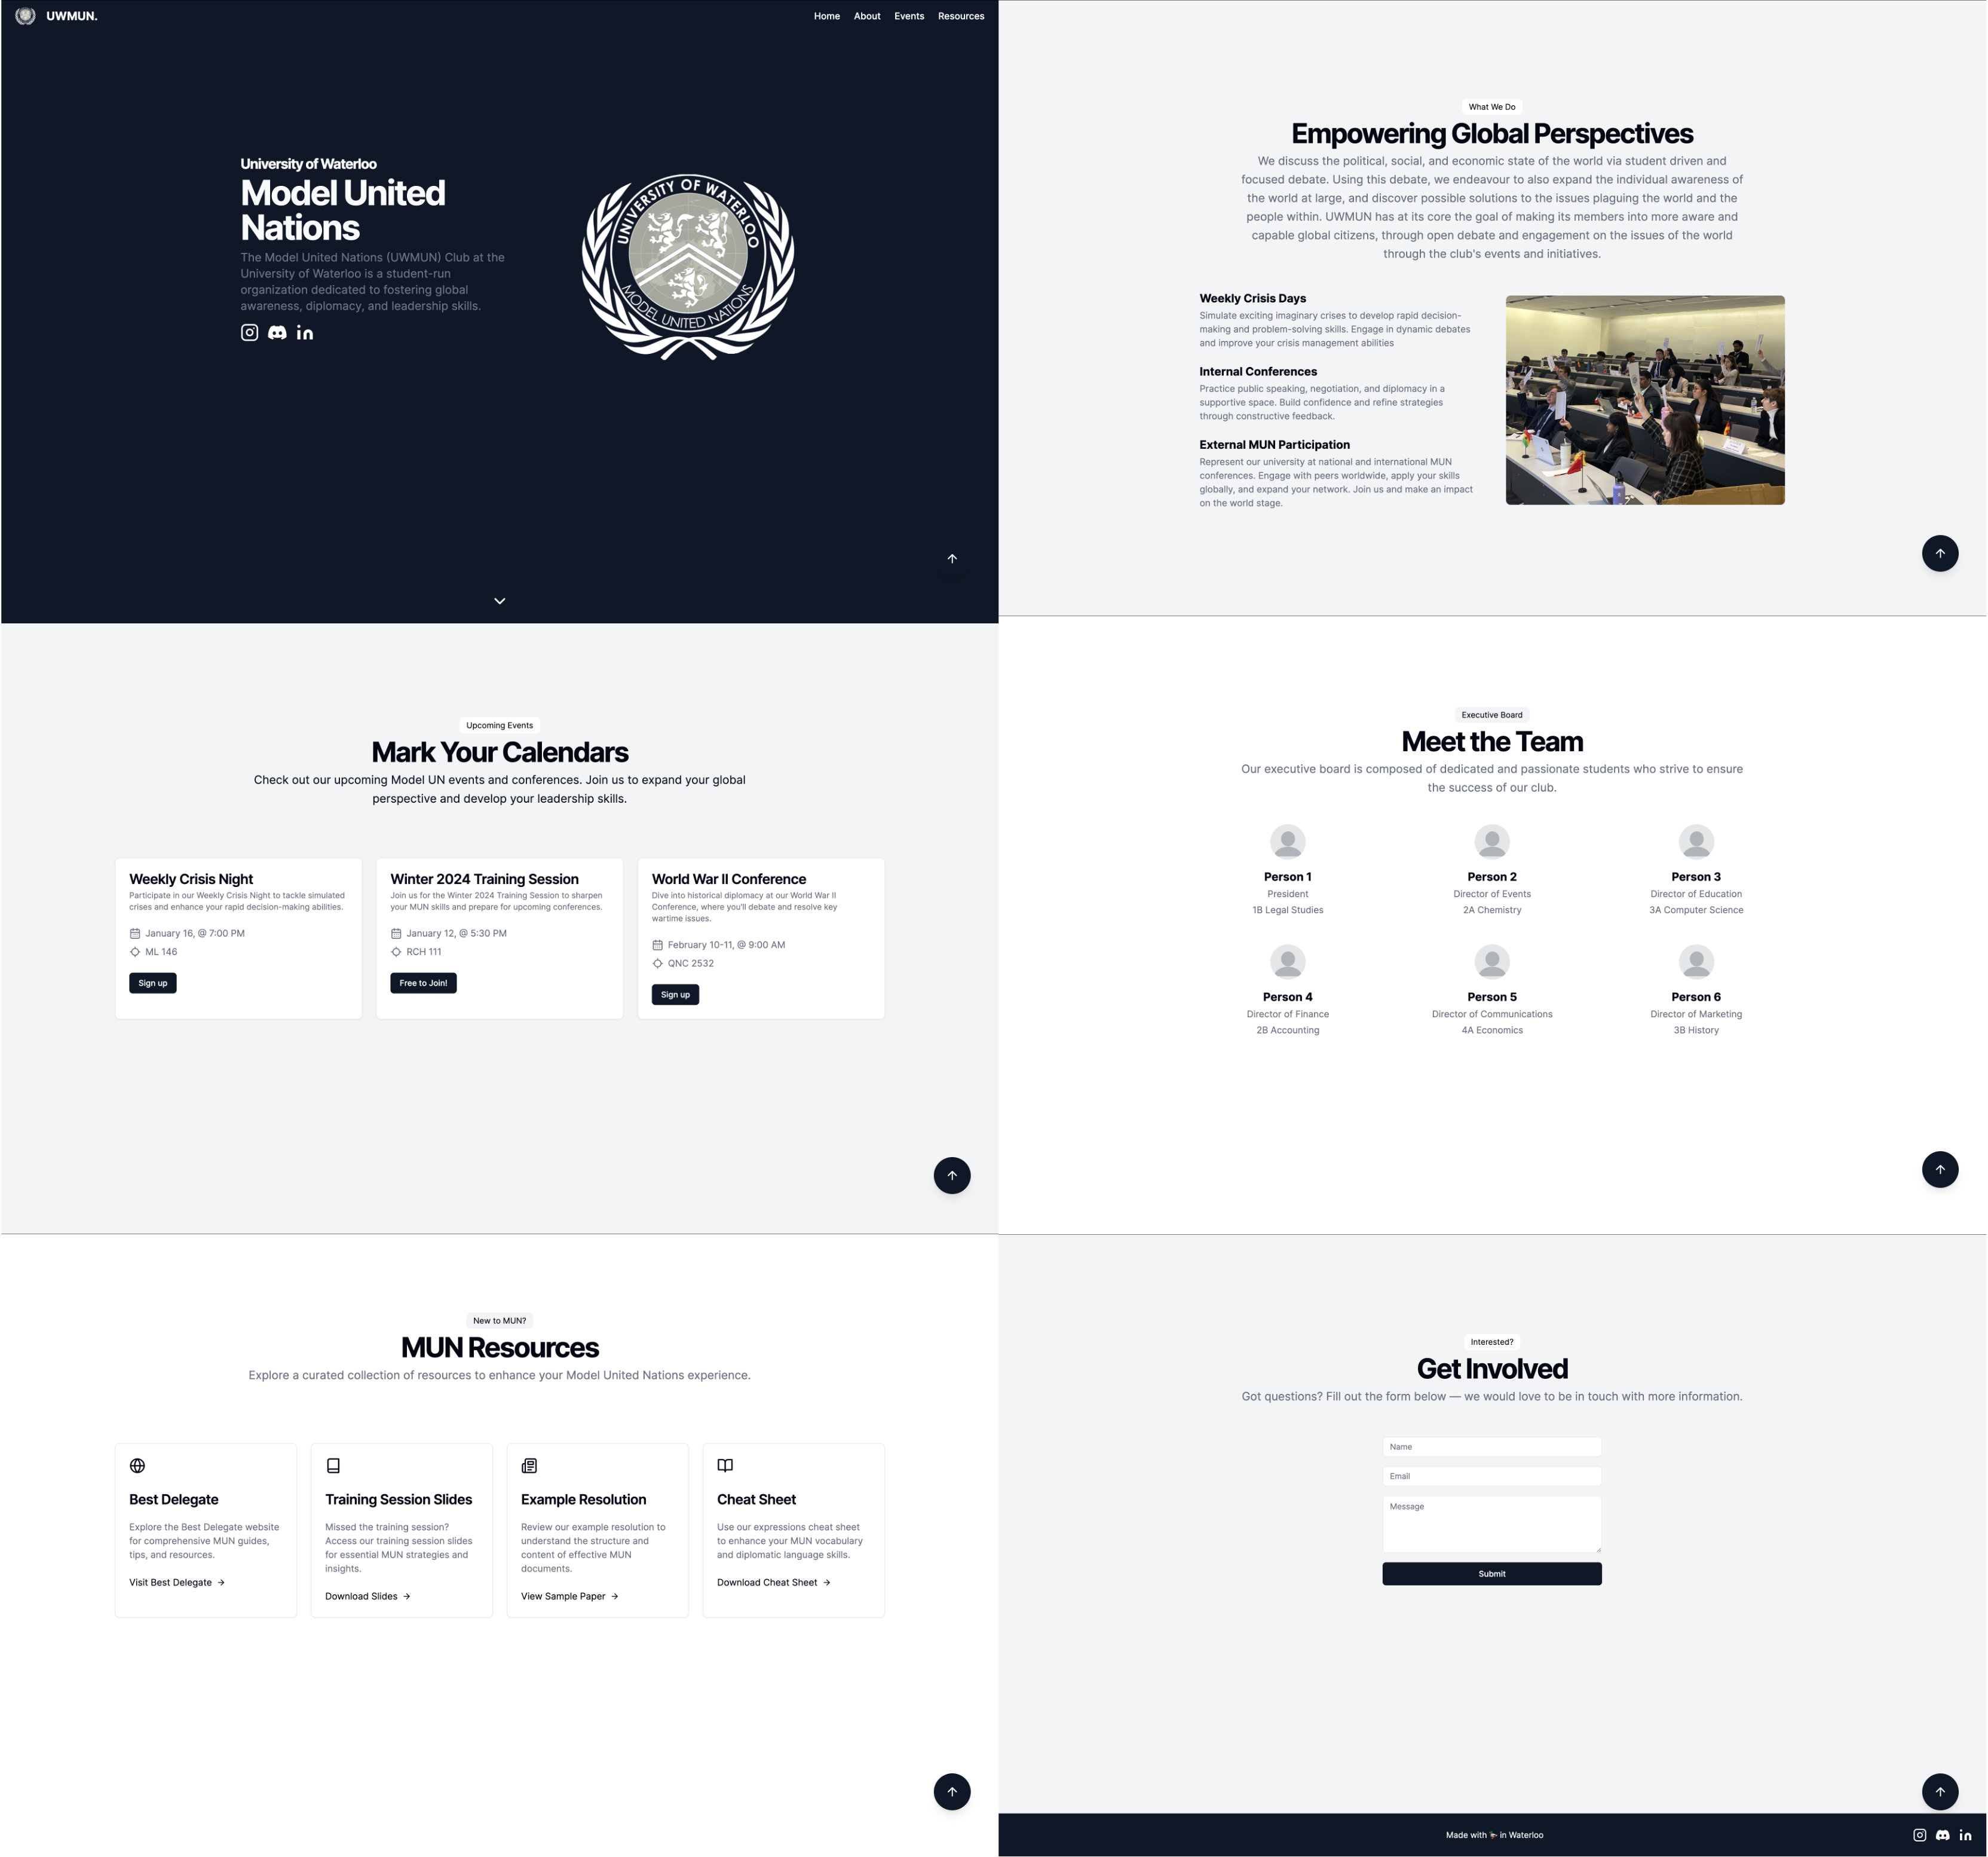
The UWMUN website features the integration of Notion API, enabling the club's administrators to effortlessly keep the site updated by making changes to a Notion workspace.
This allows those without a technical background to conveniently update the club's website!
This project can also be open-source — if you are a future member/executive at UWMUN with a technical background, feel free to publish pull requests with new features or updates!
To set up the project locally and get a local copy up and running:
- npm
npm install npm@latest -g
- Clone the repository:
git clone https://github.com/bkctrl/uwmun.git
- Navigate to the project directory & install the dependencies:
cd uwmun && npm install
- Install the dependencies for the backend:
cd server && npm install
- Set up the environment variables. More information on each of them are given further below. Your
.env.localfile should consist of (with similar names):
NEXT_PUBLIC_NOTION_API_KEY=
NEXT_PUBLIC_NOTION_EXECUTIVES_DATABASE_ID=
NEXT_PUBLIC_NOTION_EVENTS_DATABASE_ID=
NEXT_PUBLIC_NOTION_RESOURCES_DATABASE_ID=
NEXT_PUBLIC_EMAIL_API_KEY=
NEXT_PUBLIC_EMAIL_SERVICE_ID=
NEXT_PUBLIC_EMAIL_TEMPLATE_ID=
NEXT_PUBLIC_VERCEL_SERVER=
- A Notion account
- Navigate to Notion and create a document.
- Create a new database by typing
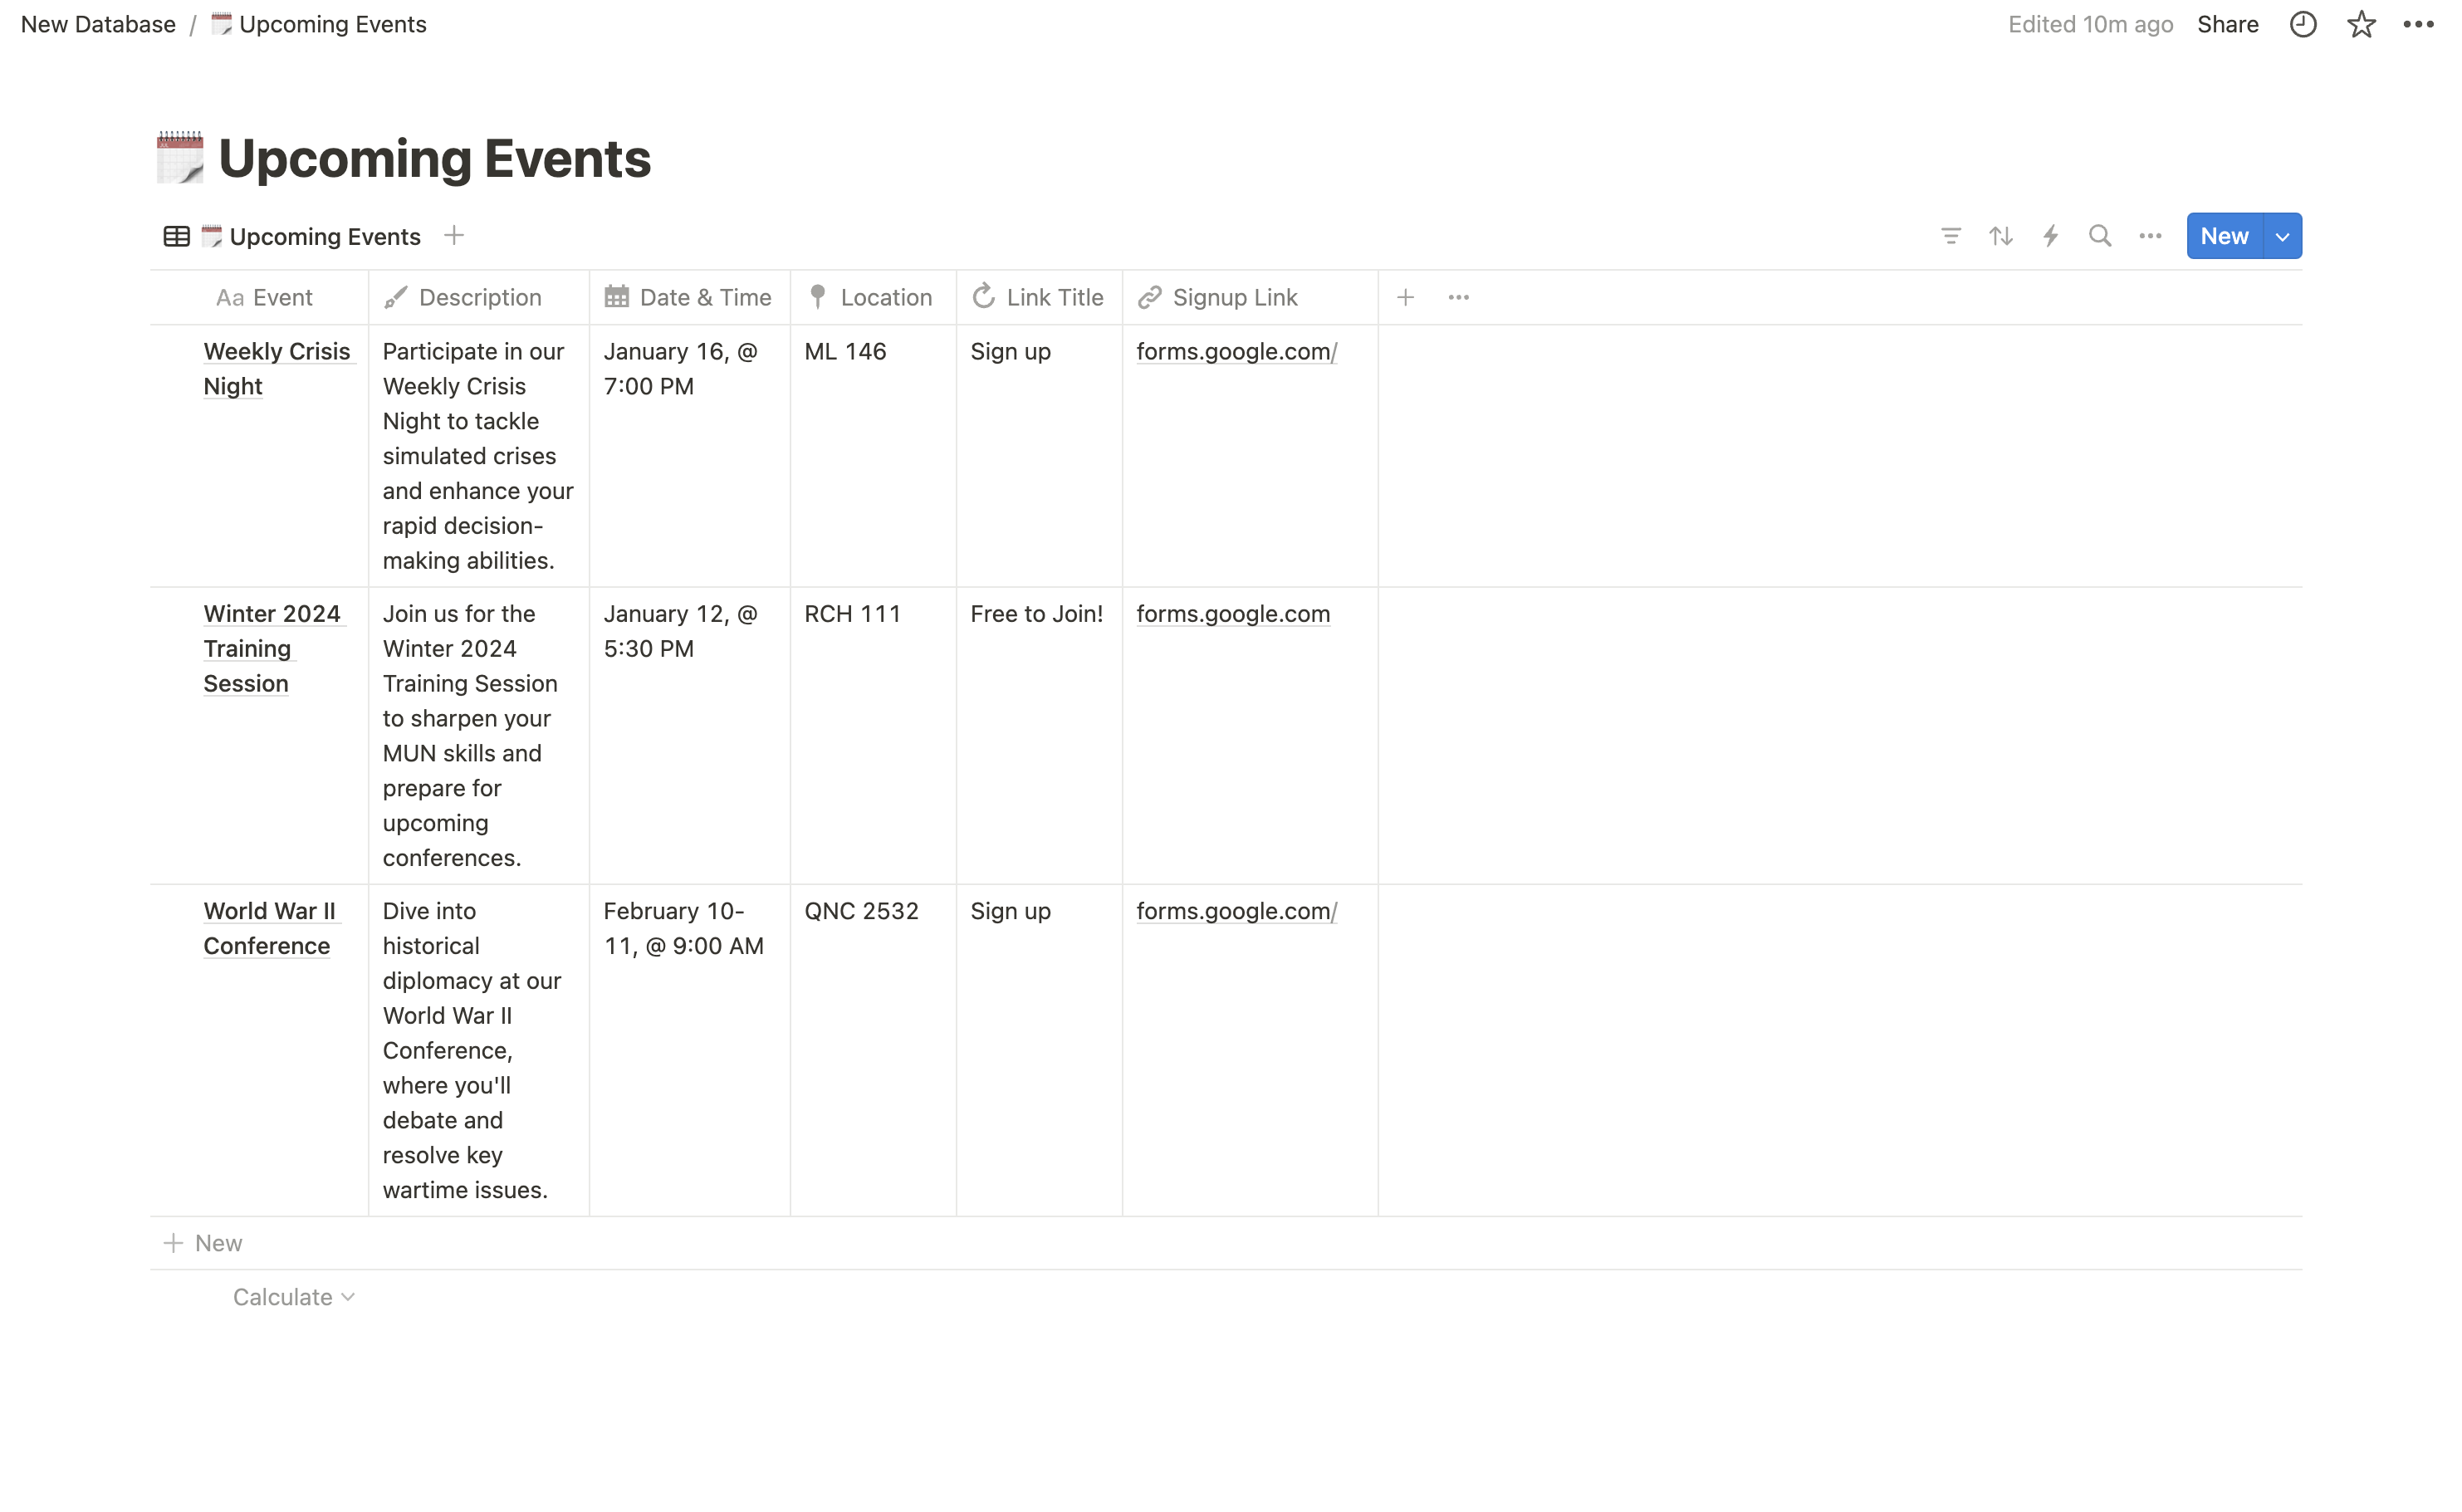
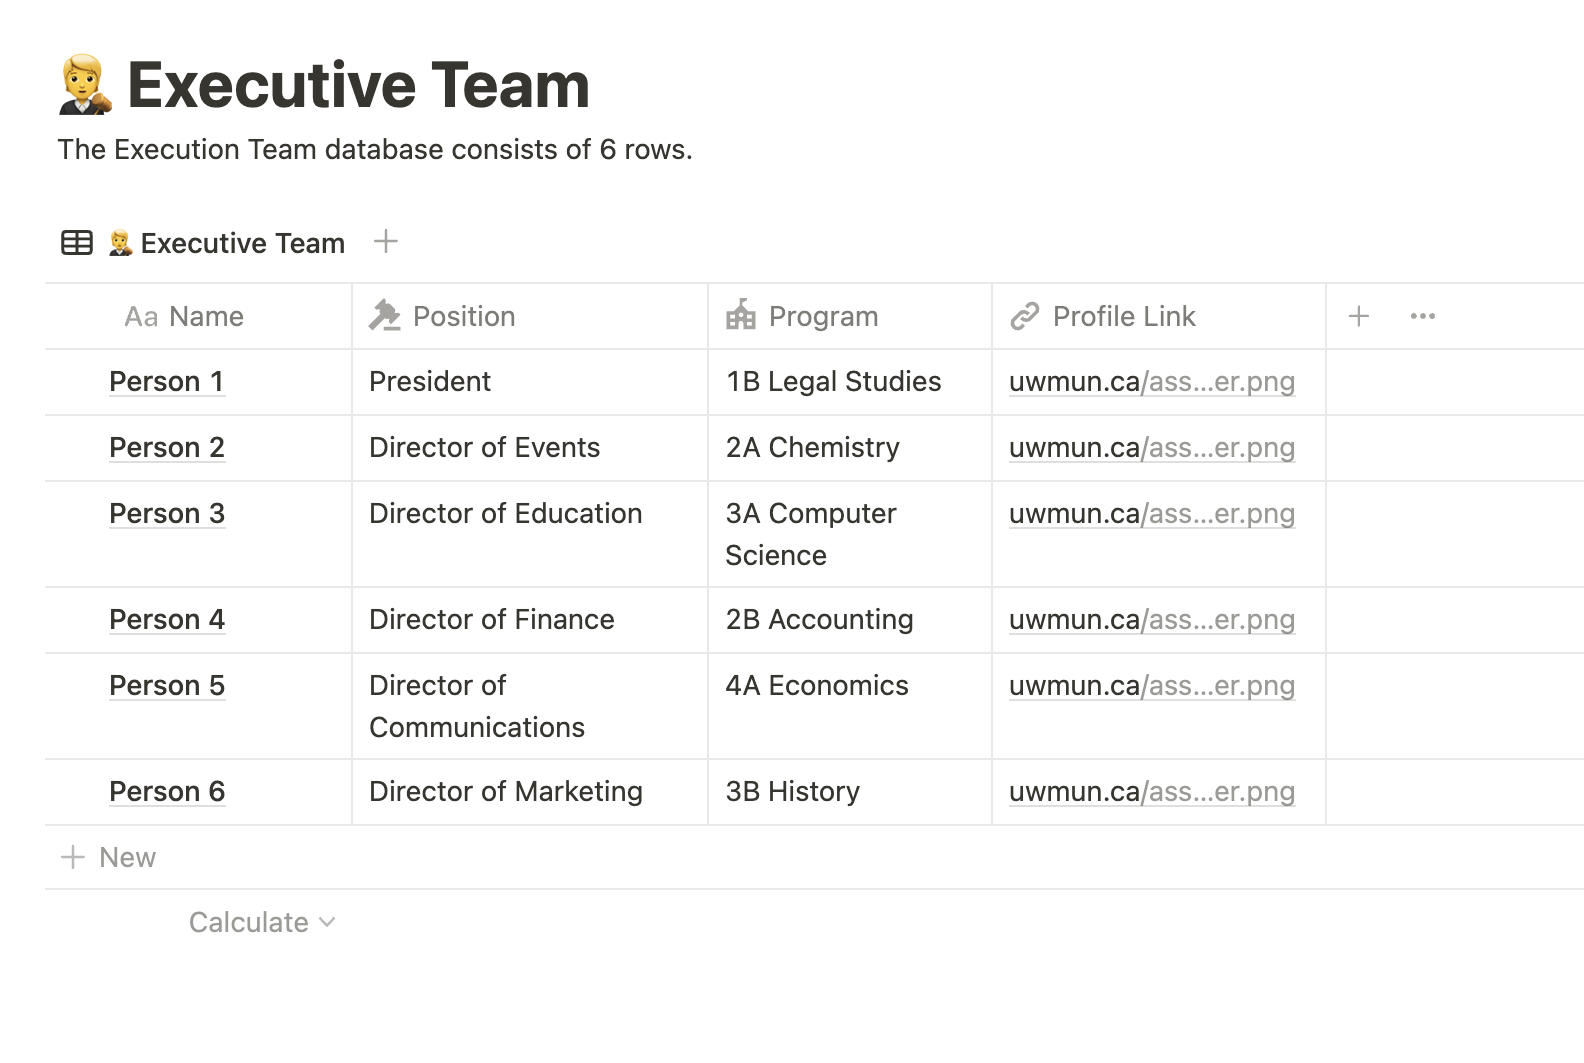
/database. - Populate the database with appropriate data. The database(s) you create should be in these formats:
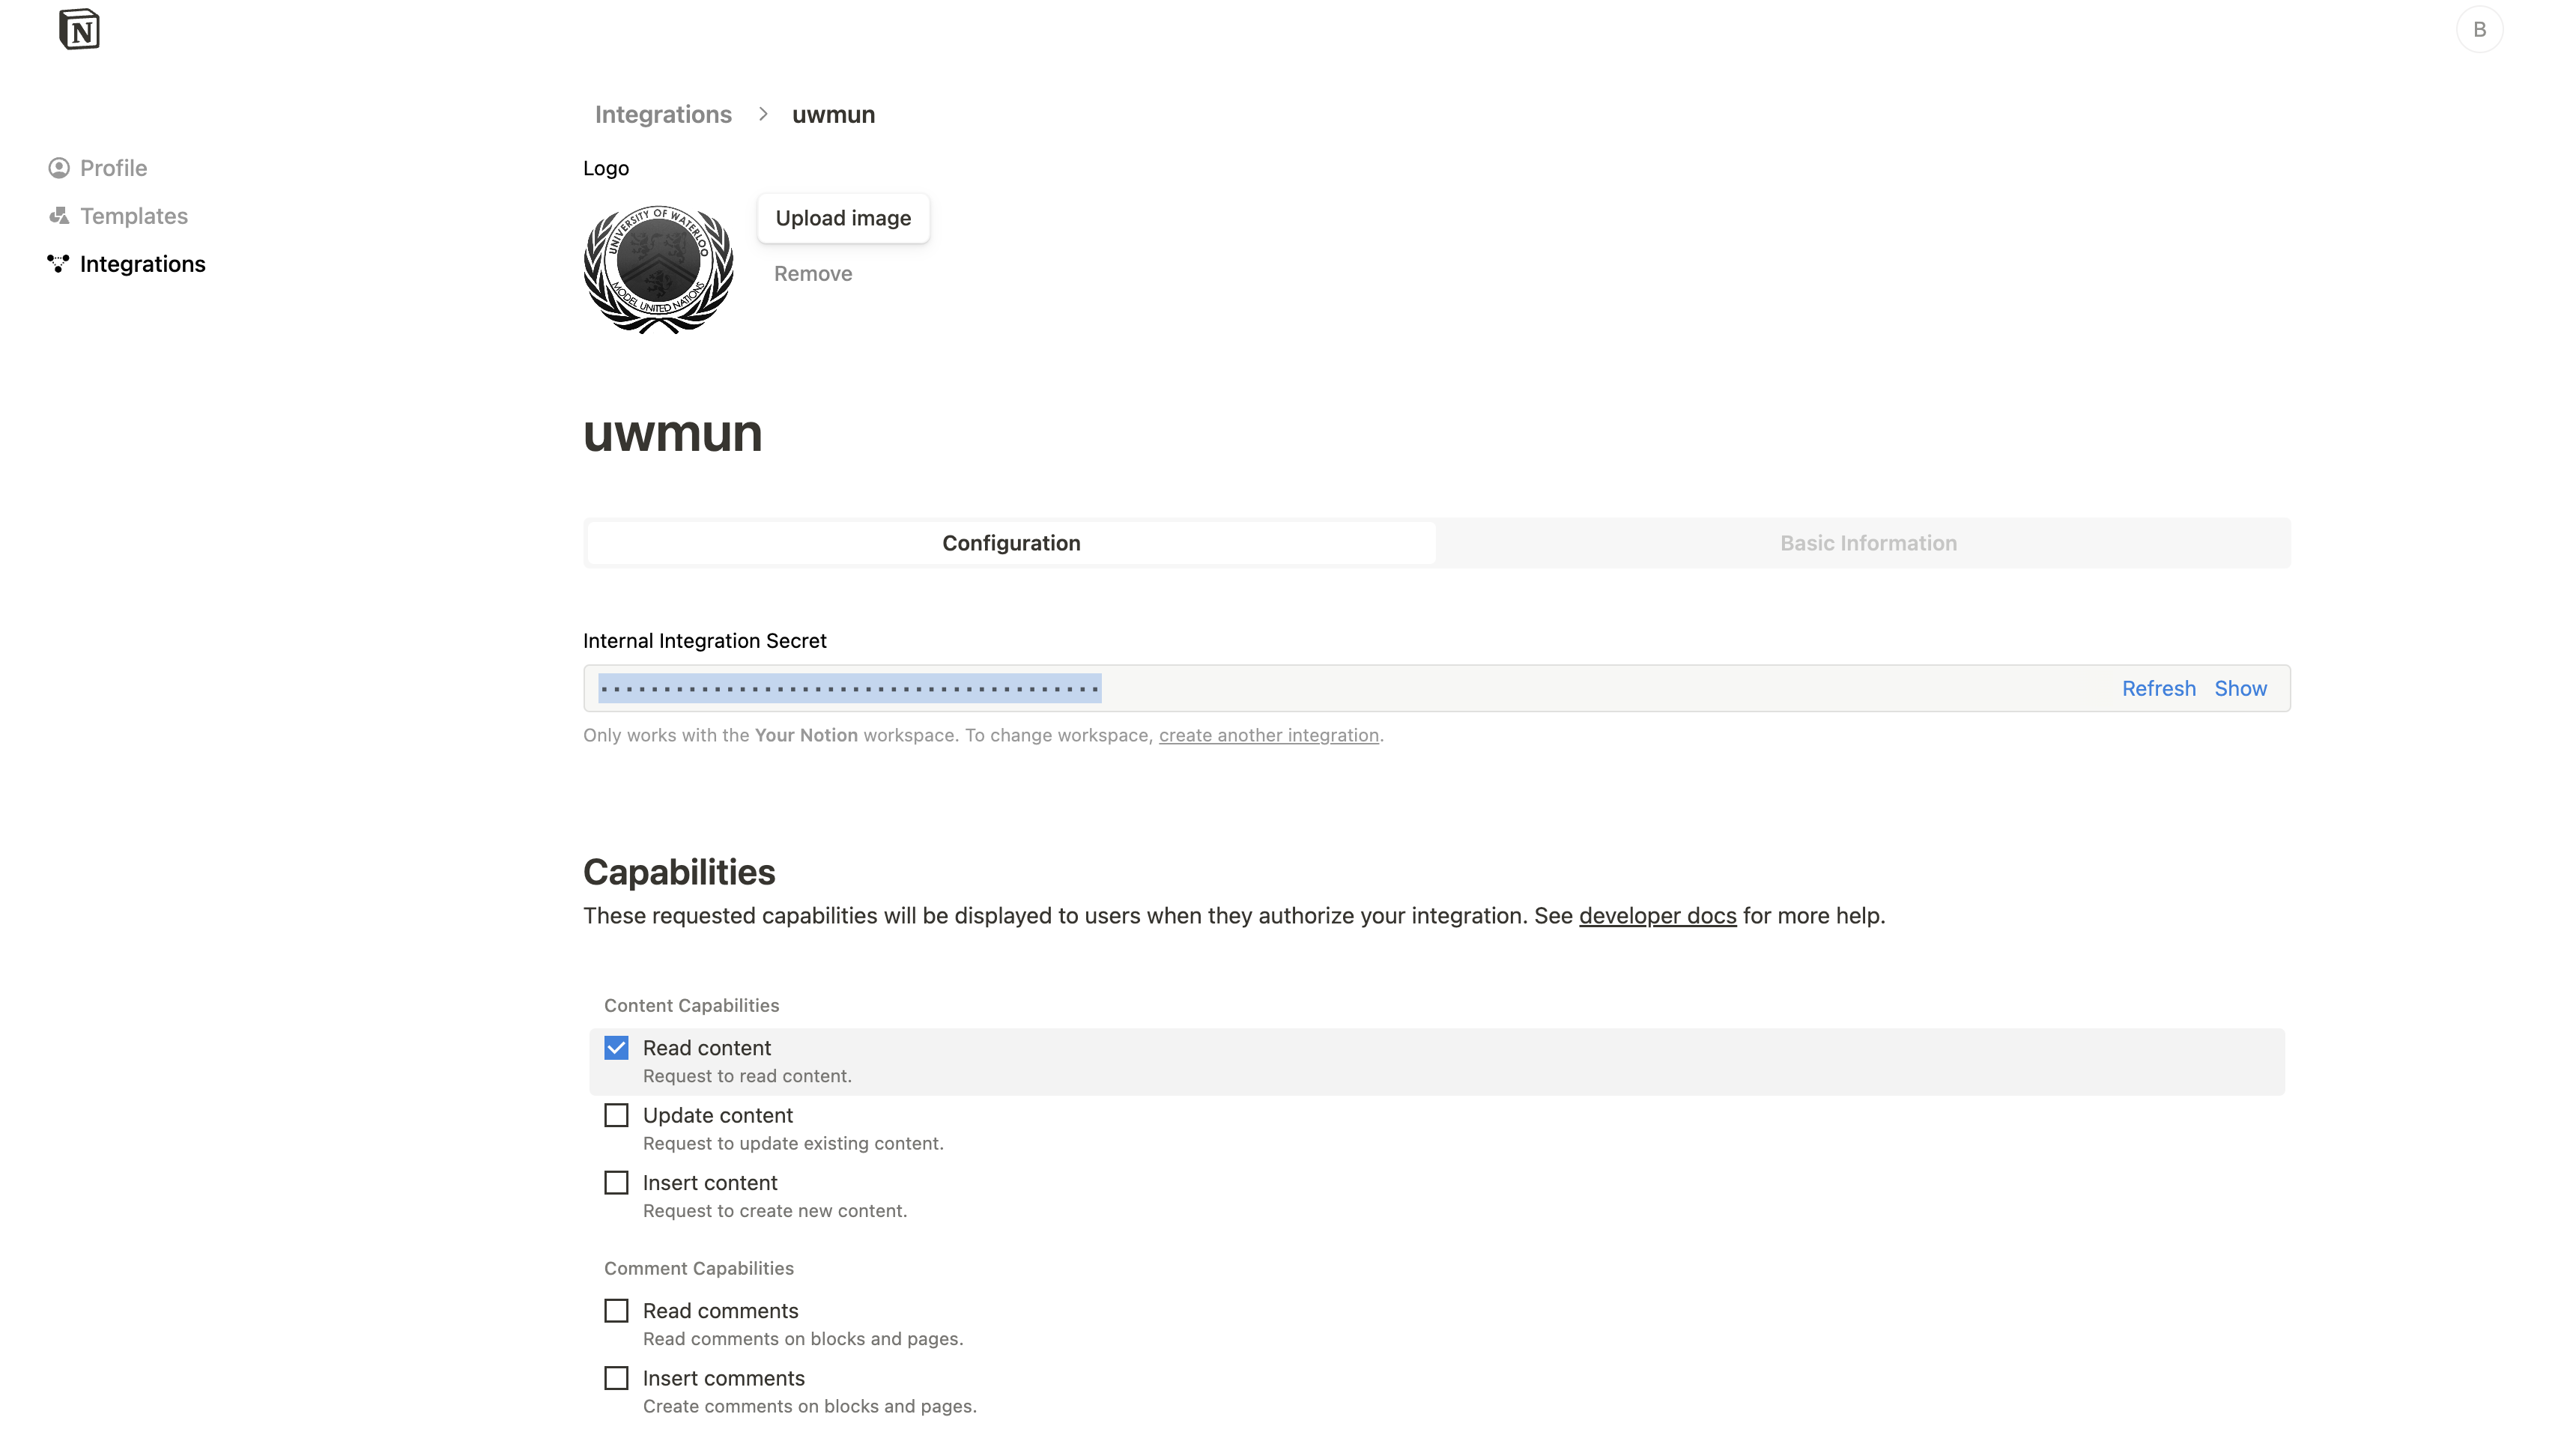
- Navigate to Integrations and create a Notion integration. Select the database you created. Select
InternalorPublicas appropriate and choose a logo. The UWMUN wesbite for instance uses an internal integration. - Select appropriate capabilities. Then show the Internal Integration Secret. This would be the
NEXT_PUBLIC_NOTION_API_KEYin your.env.local. Do not share this with anyone!
- Find out your database ID. This is what precedes
?v=of the link when you open the dabase in fulll screen:https://www.notion.so/<database_ID>?v=<view_ID>
This would be the NEXT_PUBLIC_NOTION_EXECUTIVES_DATABASE_ID or the ID of your specific database. The UWMUN website for instance has one for the executives database.
There are numerous options. This project uses EmailJS for its email submitting functionality.
- Take a look at EmailJS's Getting Started page for detailed instructions.
- Fill in the following in your
.env.localfile:NEXT_PUBLIC_EMAIL_API_KEY= NEXT_PUBLIC_EMAIL_SERVICE_ID= NEXT_PUBLIC_EMAIL_TEMPLATE_ID=
You could test the backend both locally or by using a deployed API. The following is on testing locally.
- Uncomment the commented-out code in
src/app/page.tsxandserver/api/index.jsfor local testing. - Navigate to
index.jsand run the server. Assuming you are at the root directory:cd server/api && nodemon index.js
- Open a new terminal and run the frontend. On the new terminal:
npm run dev
- Navigate to
localhost:3000on your browser and see the project demo!
The website automatically updates to the changes you make to the Notion document!
For instance:
After making some changes:
The key functionality of this project is to make it easier for teams with non-technical members to participate in website updating. To achieve this, simply:
- Click
Sharein the top right corner of your Notion document. - Select
Anyone with link at Your Notion. - Select
Full access/Can edit/Can comment/Can viewappropriately. For instance, the President and the administrator at UWMUN have full access while other executives have an editing privilege. - Share the link(s) with your colleagues!
Data from Notion is fetched with:
const [execData, setExecData] = useState([]);

const API = process.env.NEXT_PUBLIC_VERCEL_SERVER;
// const API = "http://localhost:4000"; // enable for local testing

useEffect(() => {
  AOS.init();
  const fetchData = async () => {
    try {
      const execResponse = await fetch(`${API}/execs-data`);
      const execJson = await execResponse.json();
      setExecData(execJson);
    } catch (error) {
      console.error(error);
    }
  }
  fetchData();
  if (execData.length === 0) {
    return;
  }
}, []);
    ...
The components in the frontend are then mapped from the Notion data:
<div className="mx-auto grid max-w-5xl items-center gap-6 py-12 lg:grid-cols-3 lg:gap-12">
        {execData.map((exec, index) => {
          return (
            <div key={index} data-aos="zoom-in" aos-duration="1500" className="flex flex-col items-center justify-center space-y-4">
              <Avatar>
                <img src={(exec as any)["Profile Link"].url} className="mx-auto" style={{borderRadius : "50%", width : "20%", height : "20%"}}/>
              </Avatar>
              <div className="space-y-1 text-center">
                <h3 className="text-xl font-bold">{(exec as any).Name.title[0].plain_text}</h3>
                <p className="text-muted-foreground">{(exec as any).Position.rich_text[0].plain_text}</p>
                <p className="text-muted-foreground">{(exec as any).Program.rich_text[0].plain_text}</p>
              </div>
            </div>
          );
        })}
</div>index.js uses the @notionhq/client library to fetch data from Notion using the Notion integration key and database ID from above:
   const notion = new Client({
      auth: process.env.NEXT_PUBLIC_NOTION_API_KEY,
   });
   app.get('/execs-data', async (req, res) => {
      try {
        const response = await notion.databases.query({
          database_id: process.env.NEXT_PUBLIC_NOTION_EXECUTIVES_DATABASE_ID,
        });
        const data = response.results.reverse().map(result => result.properties);
        res.json(data);
      } catch (error) {
        res.status(500).json({ error: error.message });
      }
}); Make sure all rows and columns in the databases are filled, as empty rows/columns may cause unexpected behaviour.


