-
Notifications
You must be signed in to change notification settings - Fork 125
HISE Tutorial Part II: Importing Samples
We'll be using samples with well-formed file names, that means that the mapping information can be fully extracted from the names without having to use the mapping editor.
There are a multitude of ways to map audio files in the sampler, from drag 'n drop to batch processing via regex commands. However I strongly recommend using a strict file naming scheme. There is a powerful file name parser in HISE which allows to map the samples automatically so if you do it right, you'll never have to touch the mapping editor ever.
You can download a sample set ready to be imported into HISE here:
For the sake of simplicity, extract and copy all samples you want to import into the Samples subfolder of the new project (you can also opt to redirect the sample folder to another location, which is useful if you have a large sample library on another hard disk).
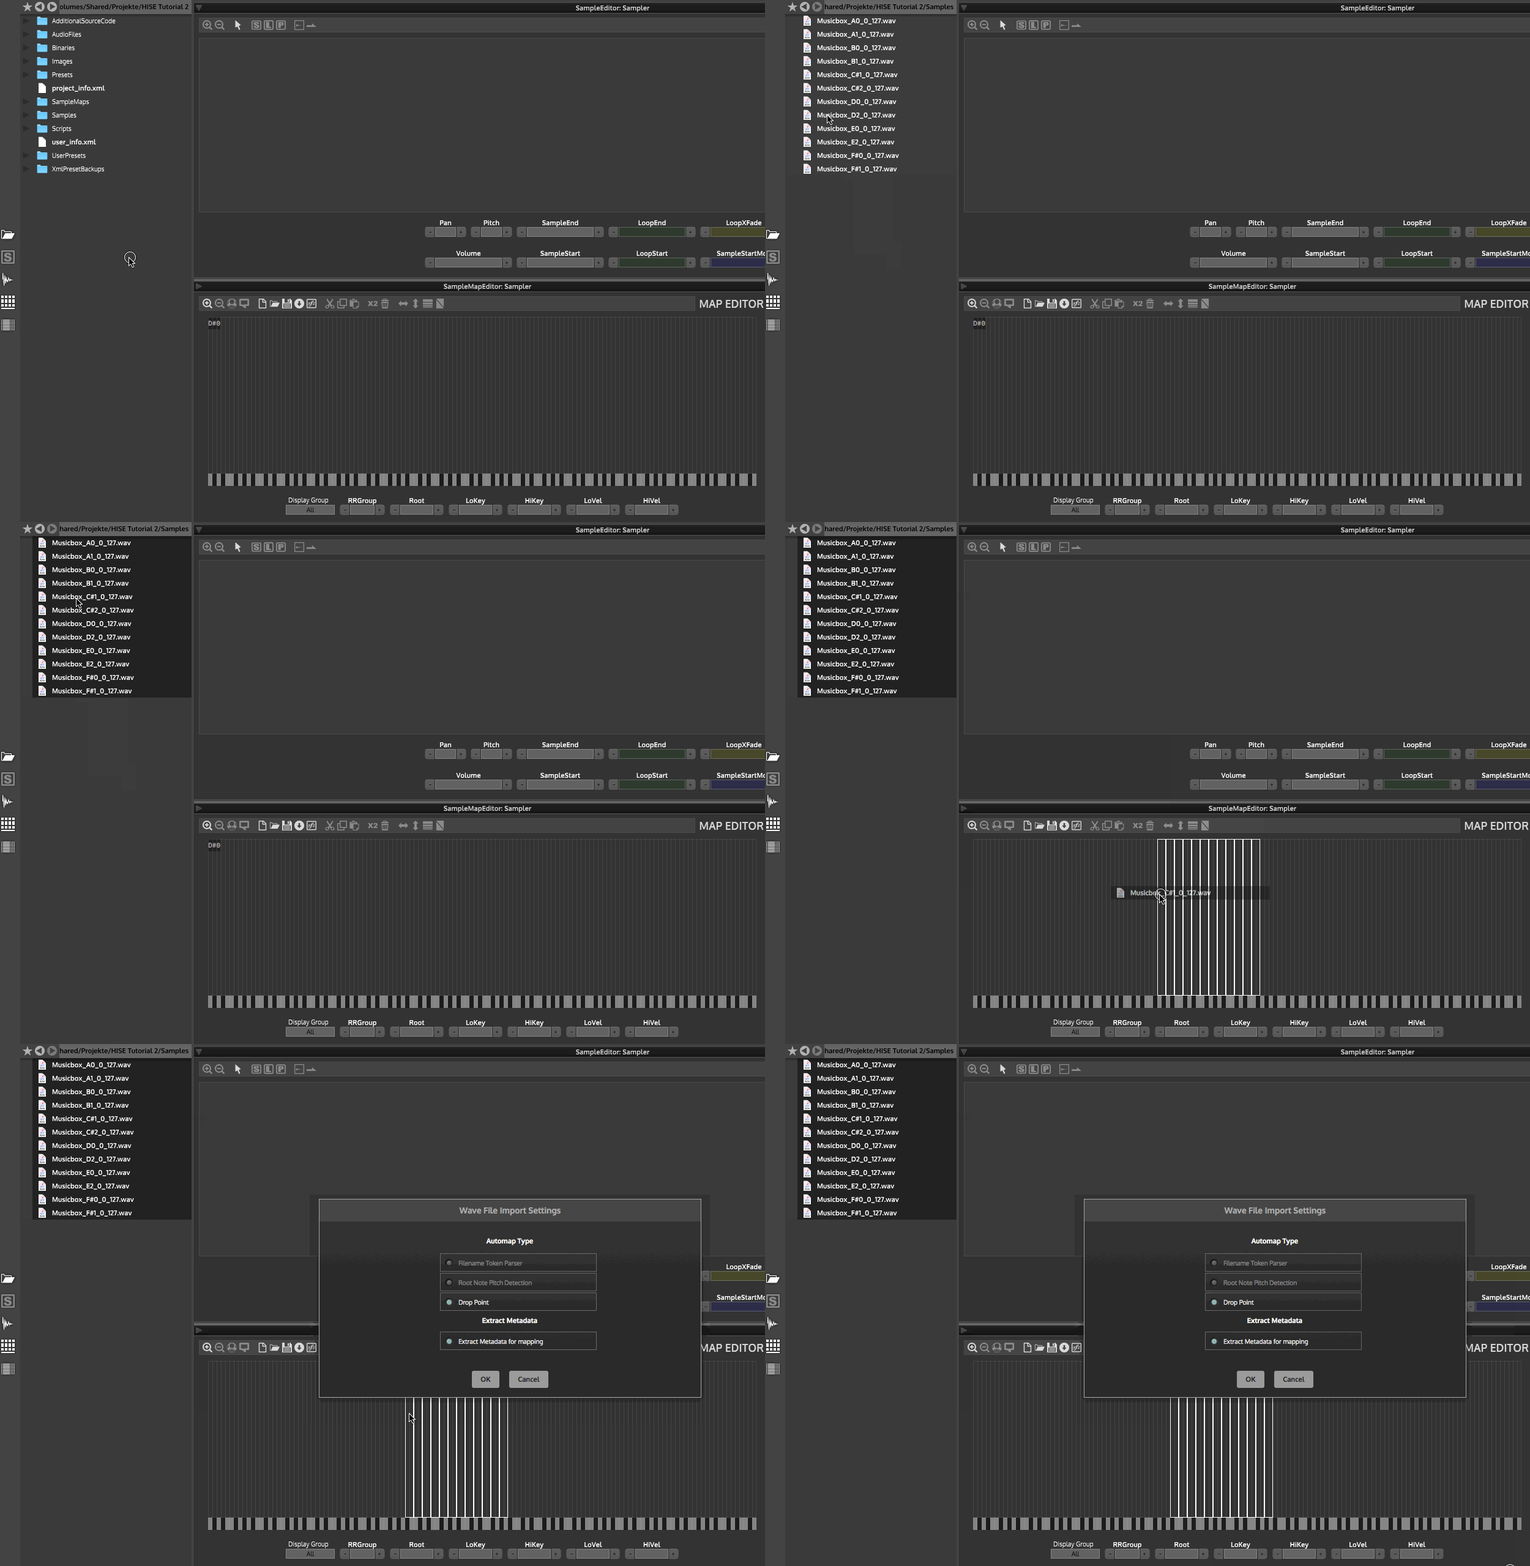
You need to create a sampler module that the samples will be imported to. Click on the + icon next to the "Master Chain" label and select "Sampler".
You can use multiple sampler modules within one patch (and for more complex projects it is obligatory to do so). However for our little tutorial, one sampler should be enough (we'll be adding some synths later too).
Now open the file browser (make sure you're in full screen mode with all three panels shown and click on the folder icon on the left panel). Go to the project root folder (you can quickly navigate to the current project folder by clicking on the star icon and select Current Project Folder).
Double click on the sample folder, select all samples (Cmd / Strg + A) and drag them into the map of the sampler. Select "Automap based on file name and press OK".
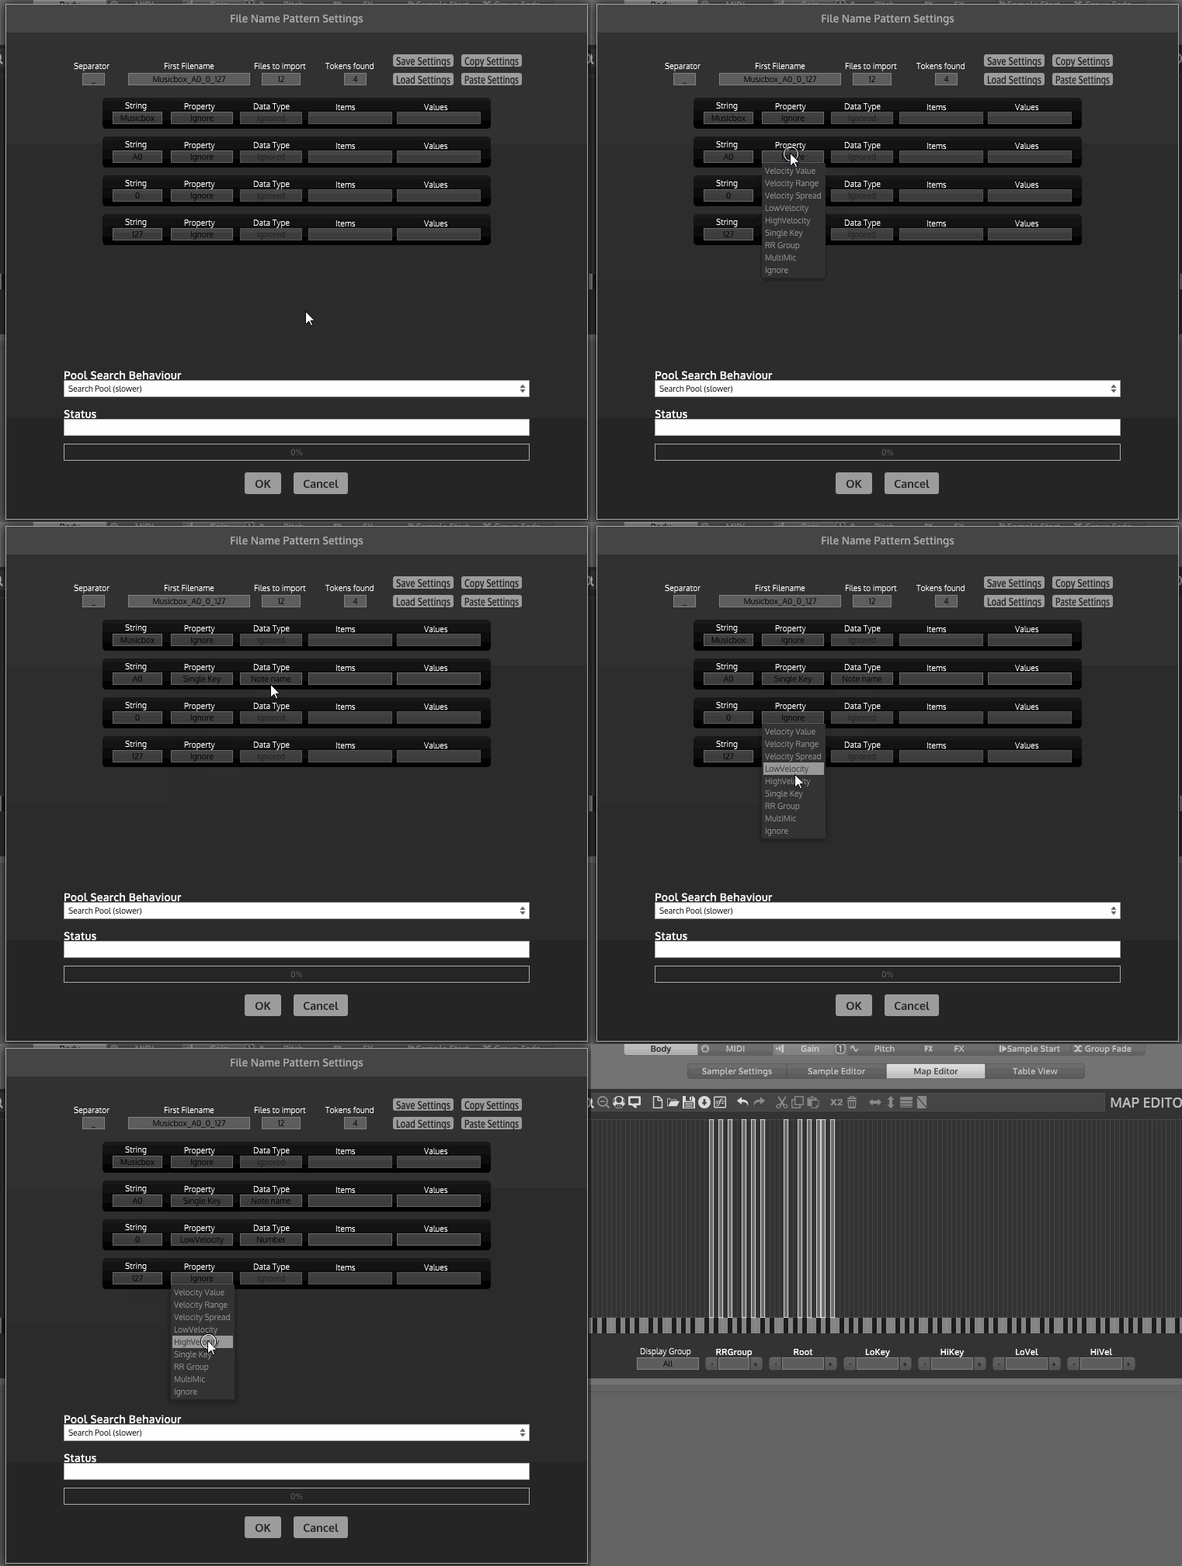
You should now see the file import dialog Select the properties for each token:
- Ignore
- Single Key
- Low Velocity
- High Velocity
and press OK:
For a detailed explanation of the file import dialog, please refer to the chapter in the Reference Manual.
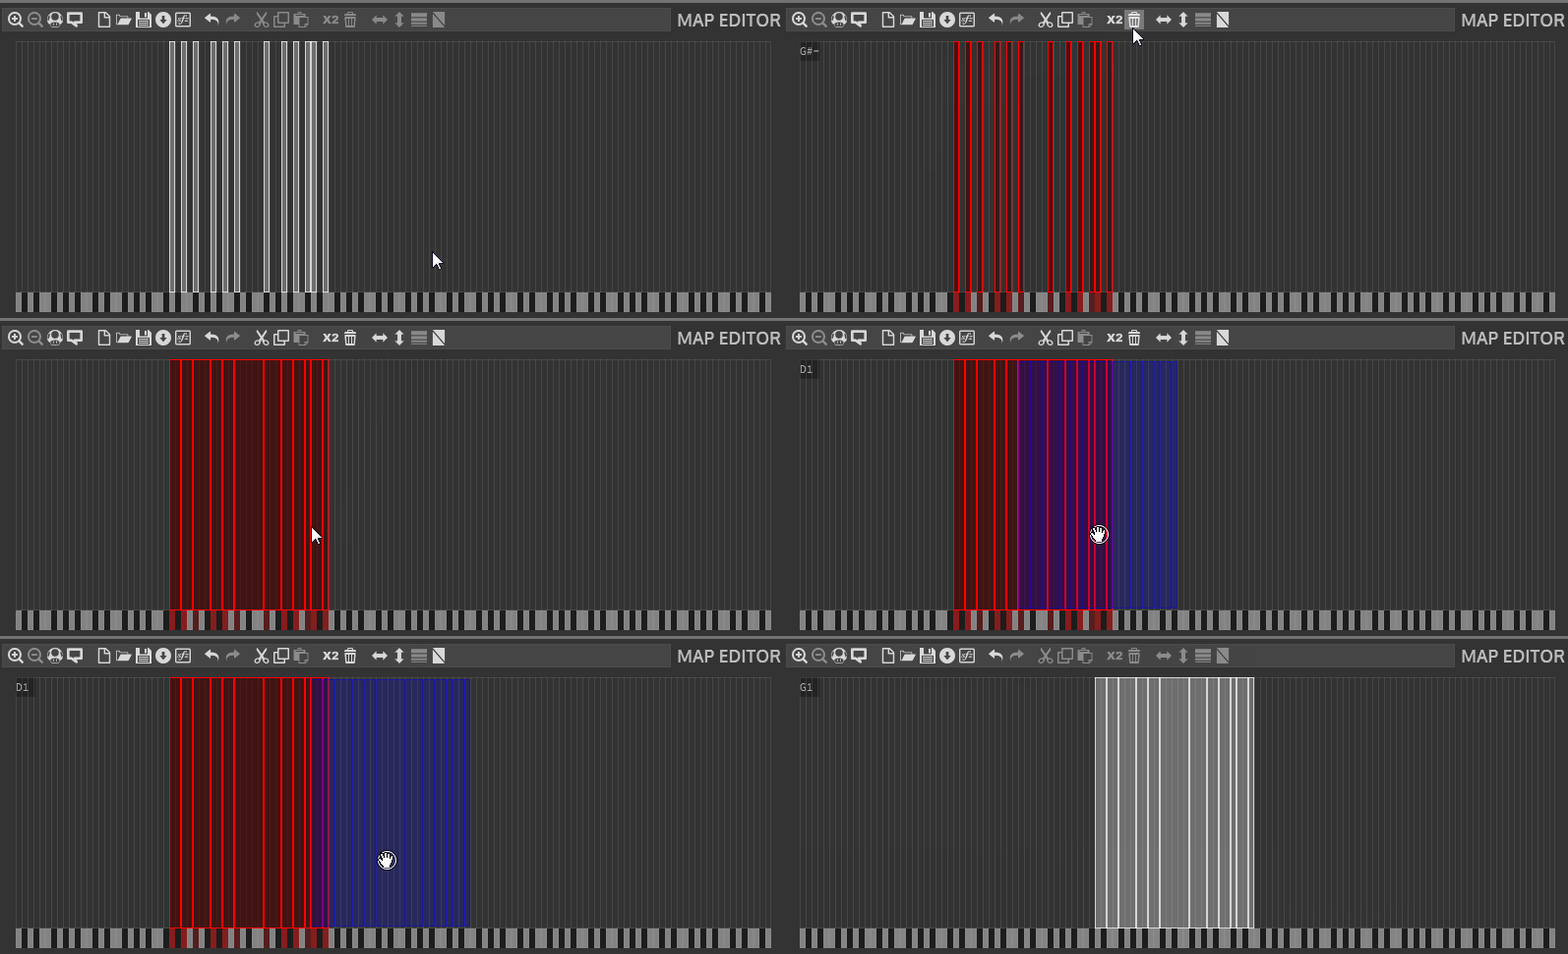
In a ideal world, you could start playing now with the samples and proceed to the next part. However the current mapping has two issues:
- There are gaps between notes because it is not chromatically sampled.
- The note names are off by two octaves
So we need to get our hands a little dirty and fix those issues manually in the sample map editor. To fix the gaps, select all samples by dragging the lasso and click on the "Close vertical gaps icon".
To fix the octave offset, press and hold down the Alt key (that the cursor changes to the hand) and move the selection two octaves up):
That's it. You now have a perfectly mapped sample set ready to be played. In the next chapters we will add some modulators and effects to the patch.


