How to make the Maludo Uno, a single key Digispark Morse Code Keyboard mainly intended as a keychain suitable gadget.
It runs my Digispark Morse Keyboard Arduino script.

I was inspired by Snipeye's Uno:

It's based on the AtMega32u4 Microcontroller. In contrast, my "Maludo Uno" is based on the weaker, but cheaper AtTiny85/Digispark.
I used my Digispark Morse Keyboard Arduino Script to be able to use Morse Code for Input. Previously I hardly knew any Morse Codes, but I reckoned this would be quite a fun project for getting involved into Morse Code.
- More cost efficient: 5 Digispark Boards are about 10€ on Banggood and Amazon (incl. shipping), whereas a single AtMega32u4 board is at least 5€
- Speed Switch for adjusting the Morse Code timings
- Smaller
- No support for a RGB LED (too little available pins on the Digispark)
- Not QMK support (but full Arduino IDE support)
Visit DigisparkMorseCode/MorseCodes.txt, or open a Text Editor and hold the key down for 4sec. It prints out all available Morse Codes. Hold down the key to switch between DE and US keyboard layout.
Example:
"M  A   L    U   D   O      U  N   O"
"-- •- •-•• ••- -•• ---    ••- -• ---"
Setting the Speed Switch to "Fast" activates automatic space insertion between words and allows your "dah's" (long presses) to be shorter.
If you set the switch to "Slow", you must manually add spaces between words with the morse codes "----" or "•-•••".
- Get a Digispark
- Order the PCB (I got mine from jlcpcb.com). You can find the gerber files at ./KiCadFiles/GerberFiles
- Get yourself a Cherry MX style key switch
- (Optional) Get yourself a MSK 12C01 SMD Switch
- Assembly
- Solder Male Headers onto the Digispark (facing upwards)
- Solder the Speed Switch onto the PCB. This requires precise SMD soldering as the switch is tiny
- Solder the key switch onto the PCB
- Solder the PCB to the Digispark
- Upload the code to the Digispark. Visit my DigisparkMorseKeyboard repository for reference.
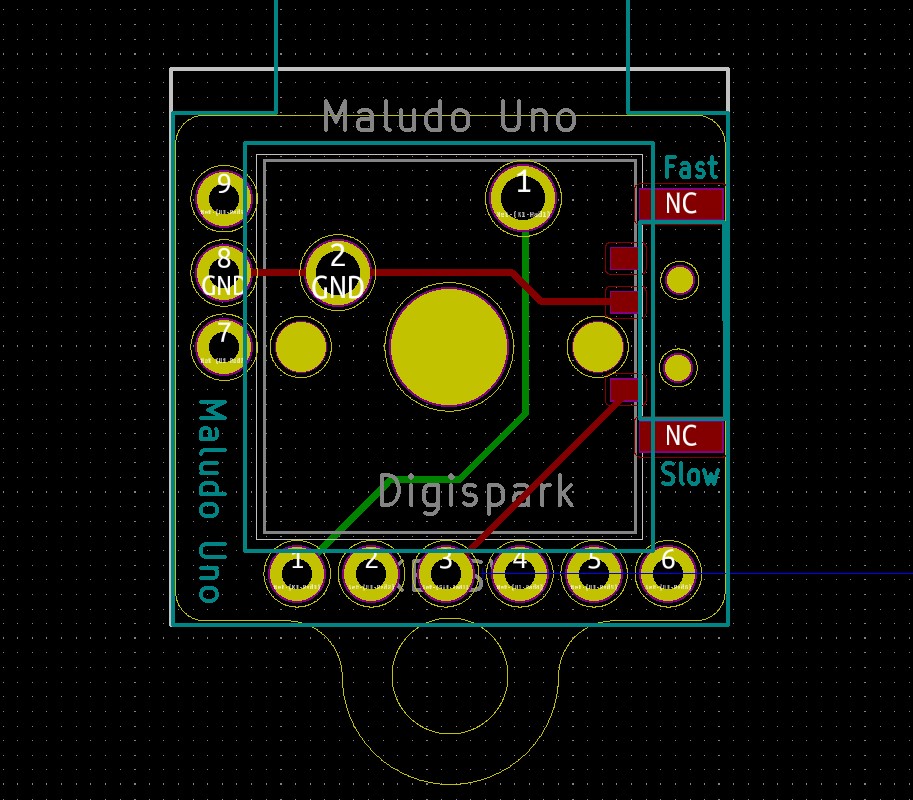
Feel free to improve my PCB design (e.g. add compability for other key switches). You can find the KiCad PCB Design files at ./KiCadFiles.
The PCB inside KiCad looks like this: