git clone [email protected]:htchaan/ASRock-Z390-Phantom-ITX-OpenCore-Hackintosh-BigSur.git EFI --single-branch -b efi --depth 1- Just the EFI in this branch
- RefindPlus for Windows 11 dual boot (randomly freeze at loading screen)
git checkout .to restore the EFI in case of freeze- 9900KF
- RX 580 build
- iMacPro1,1
- 1. Warning
- 2. Component List
- 3. Functionalities Checklist
- 4. Getting Ready
- 5. More
- 6. Known Issues
- 7. Change Logs
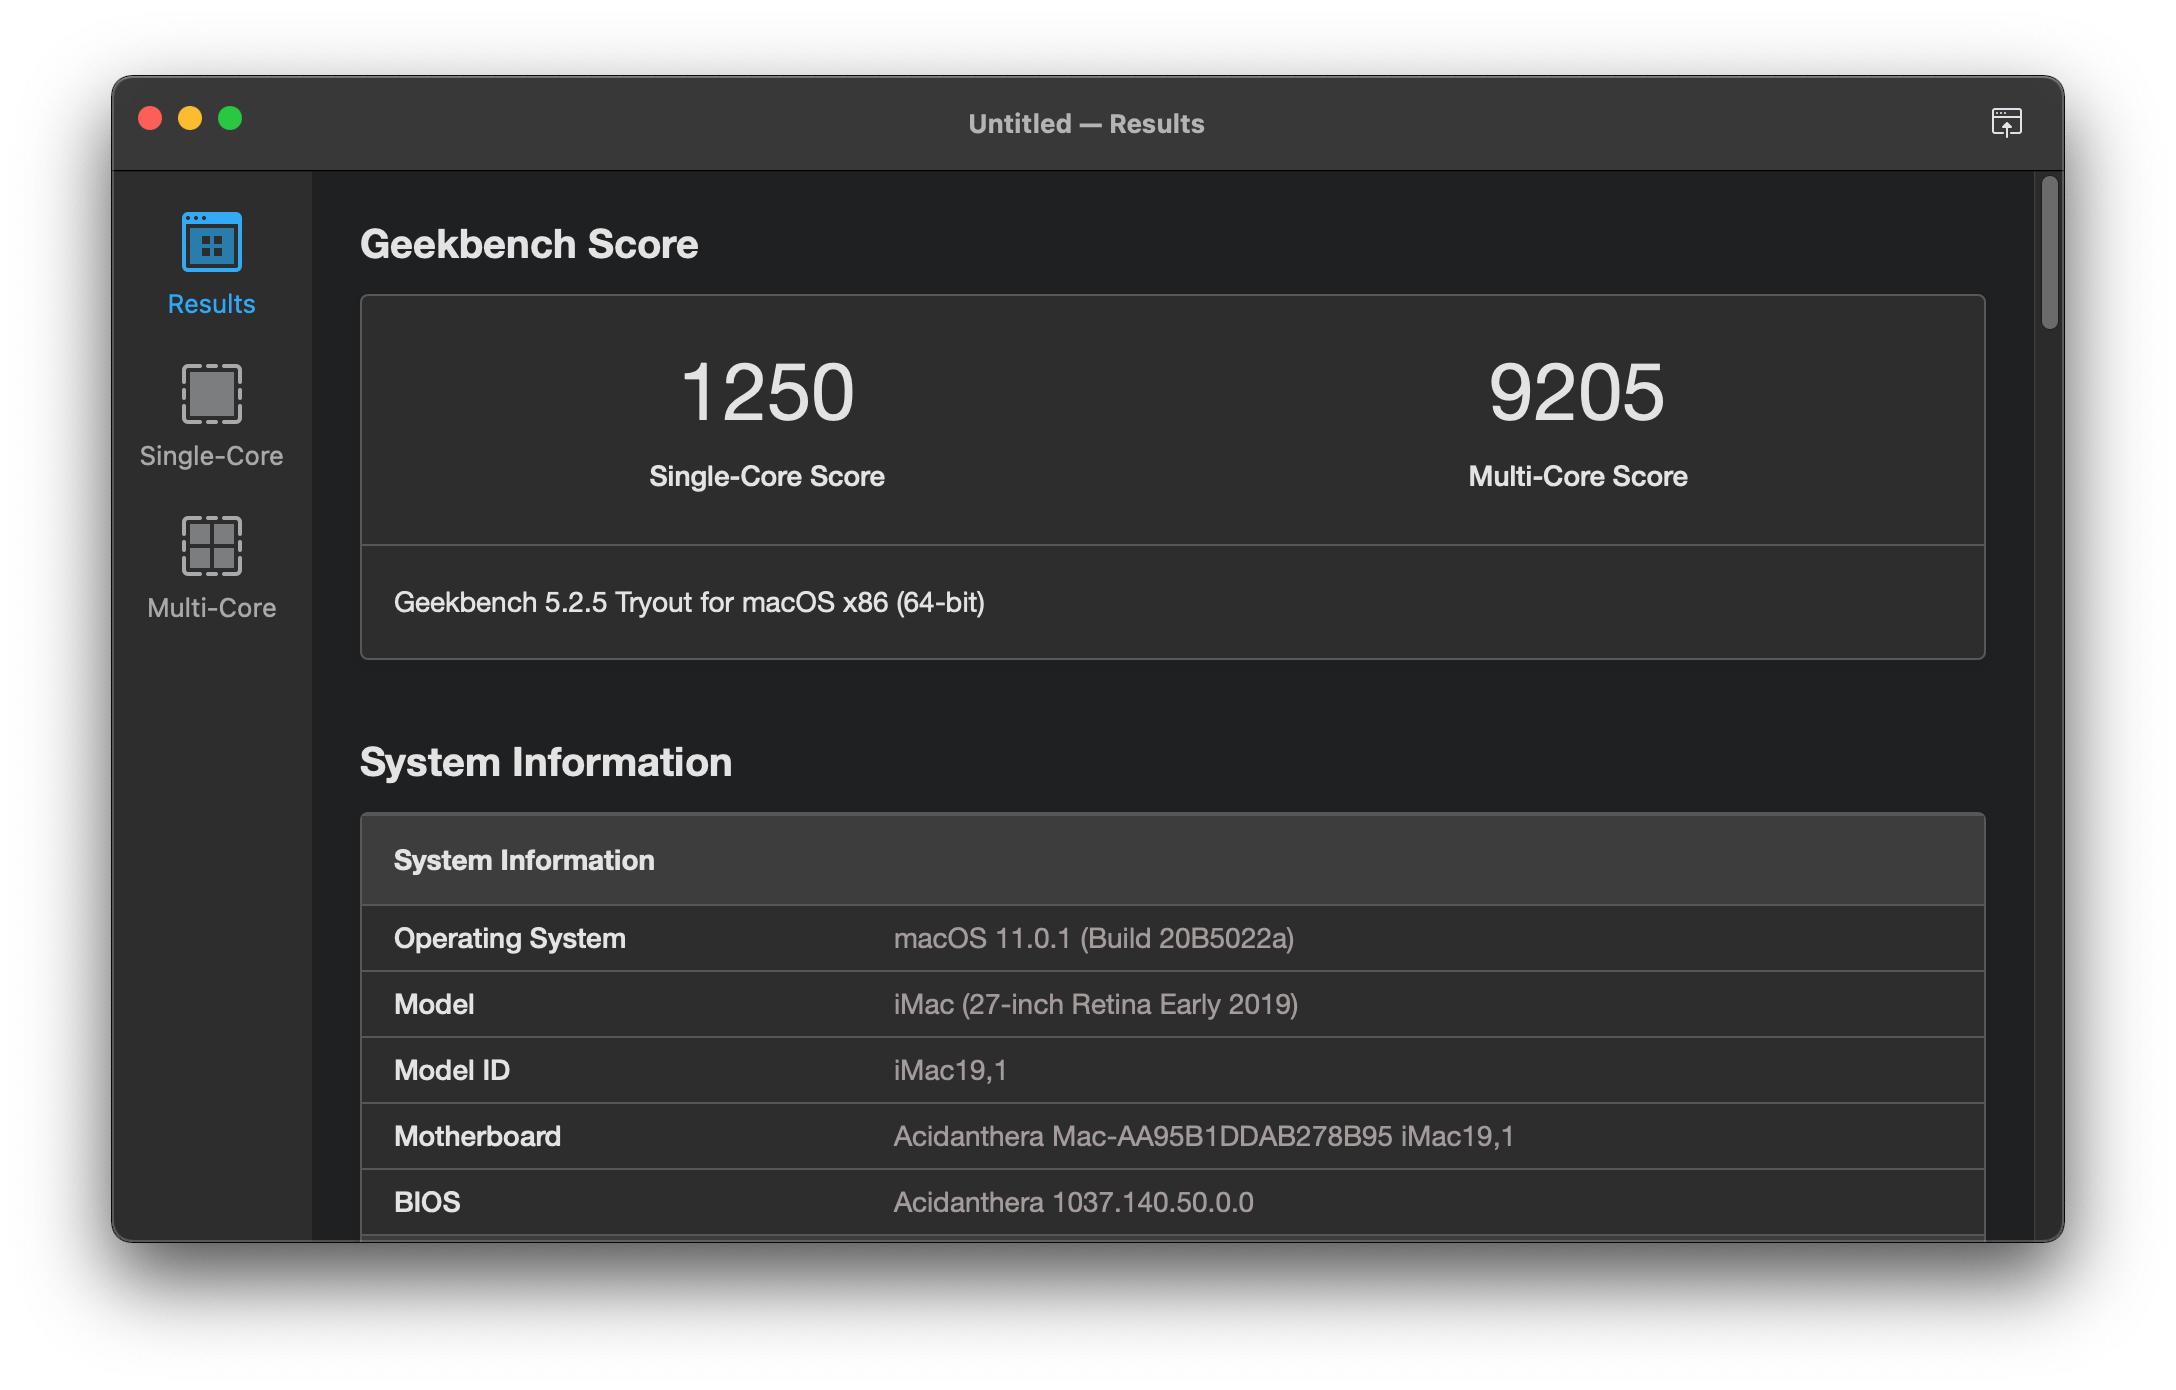
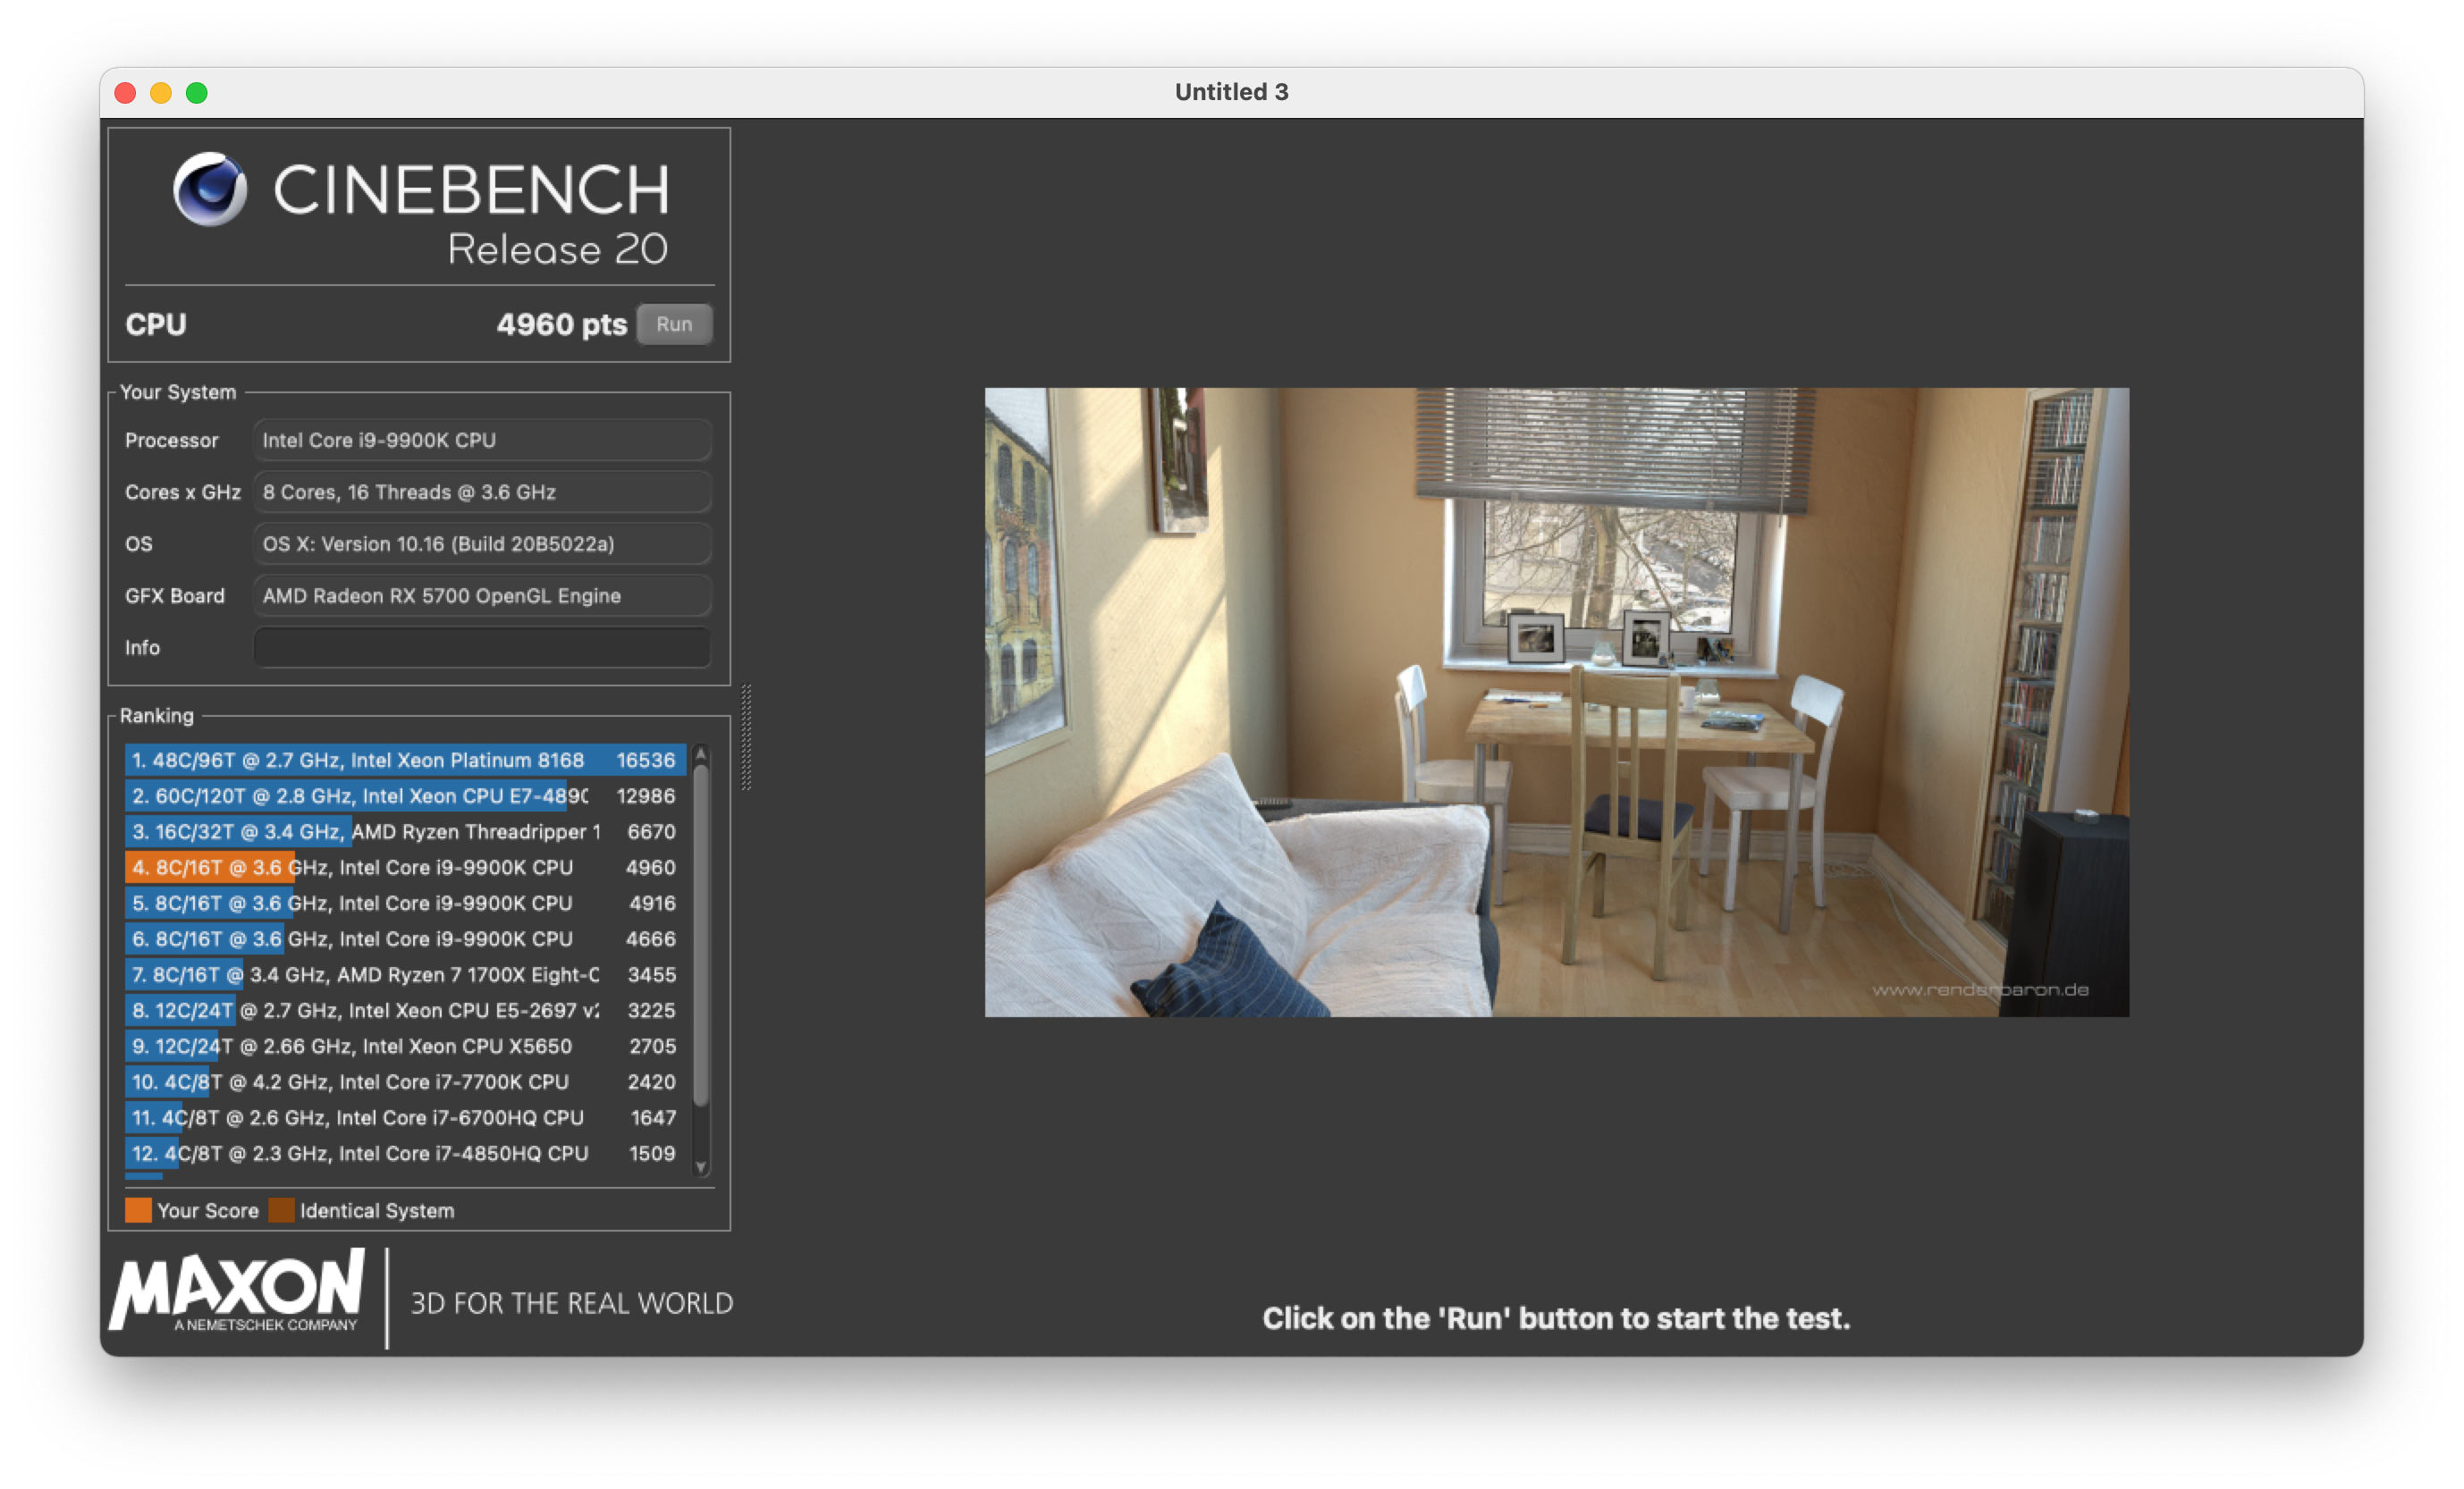
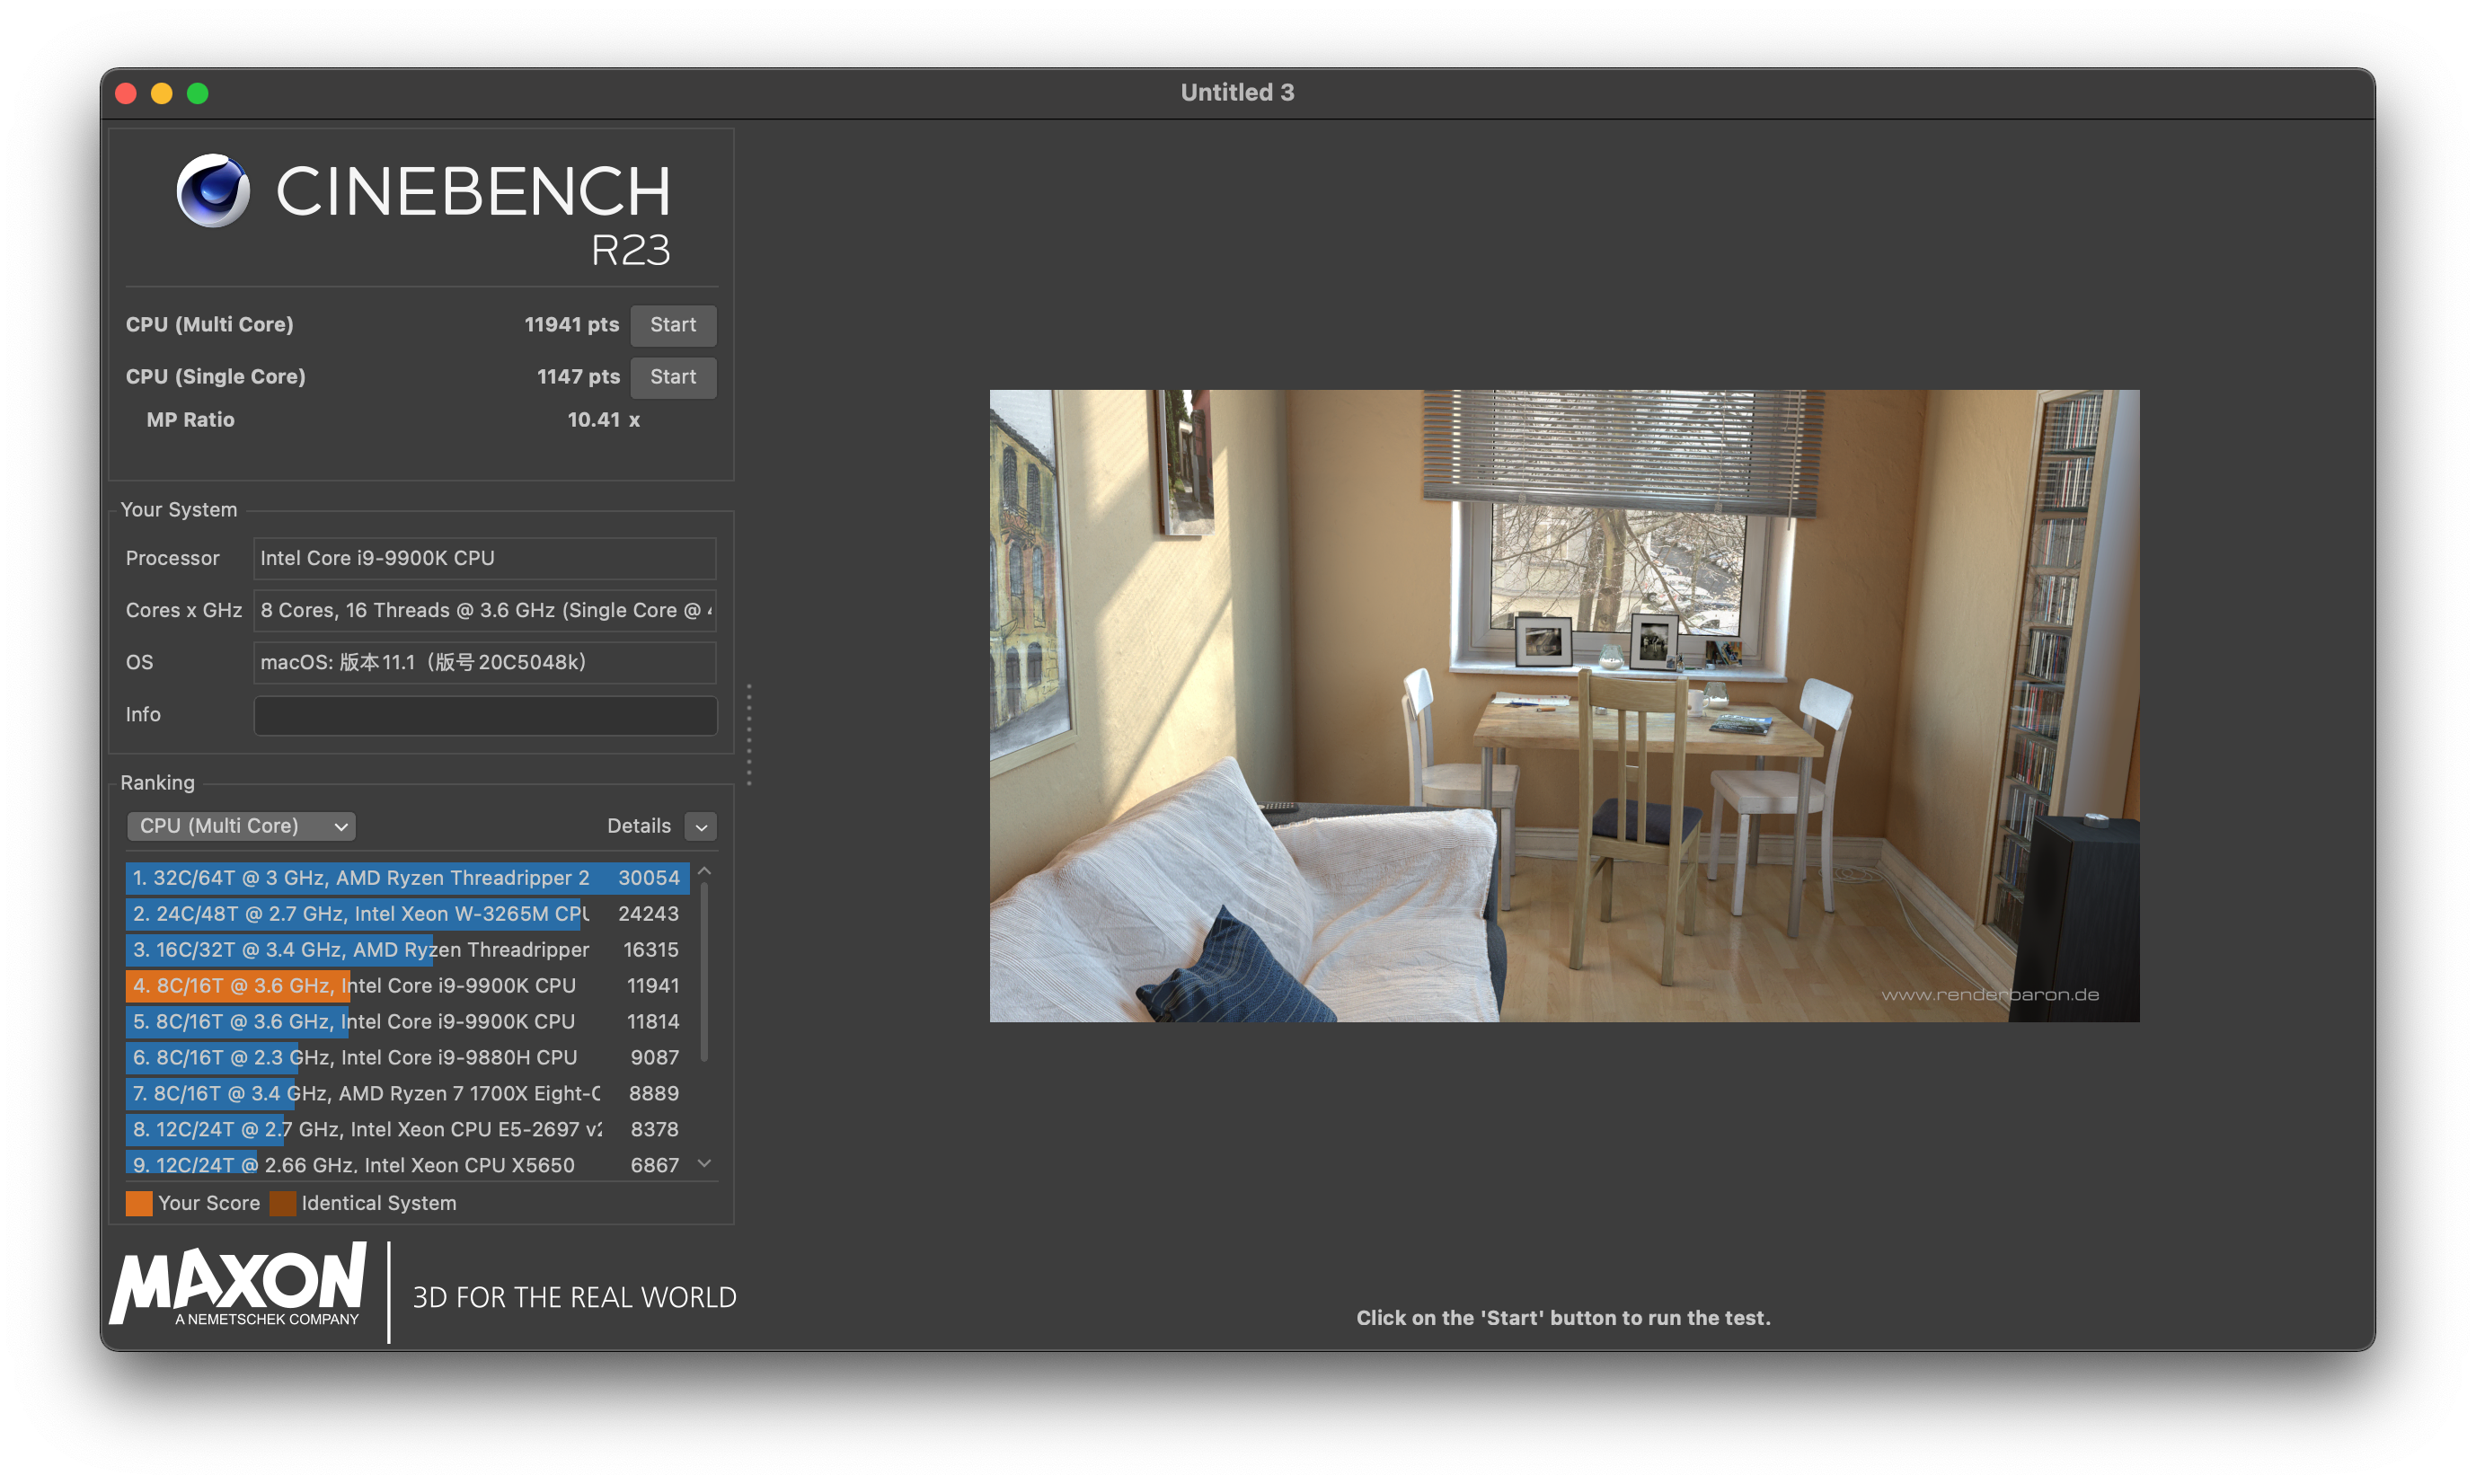
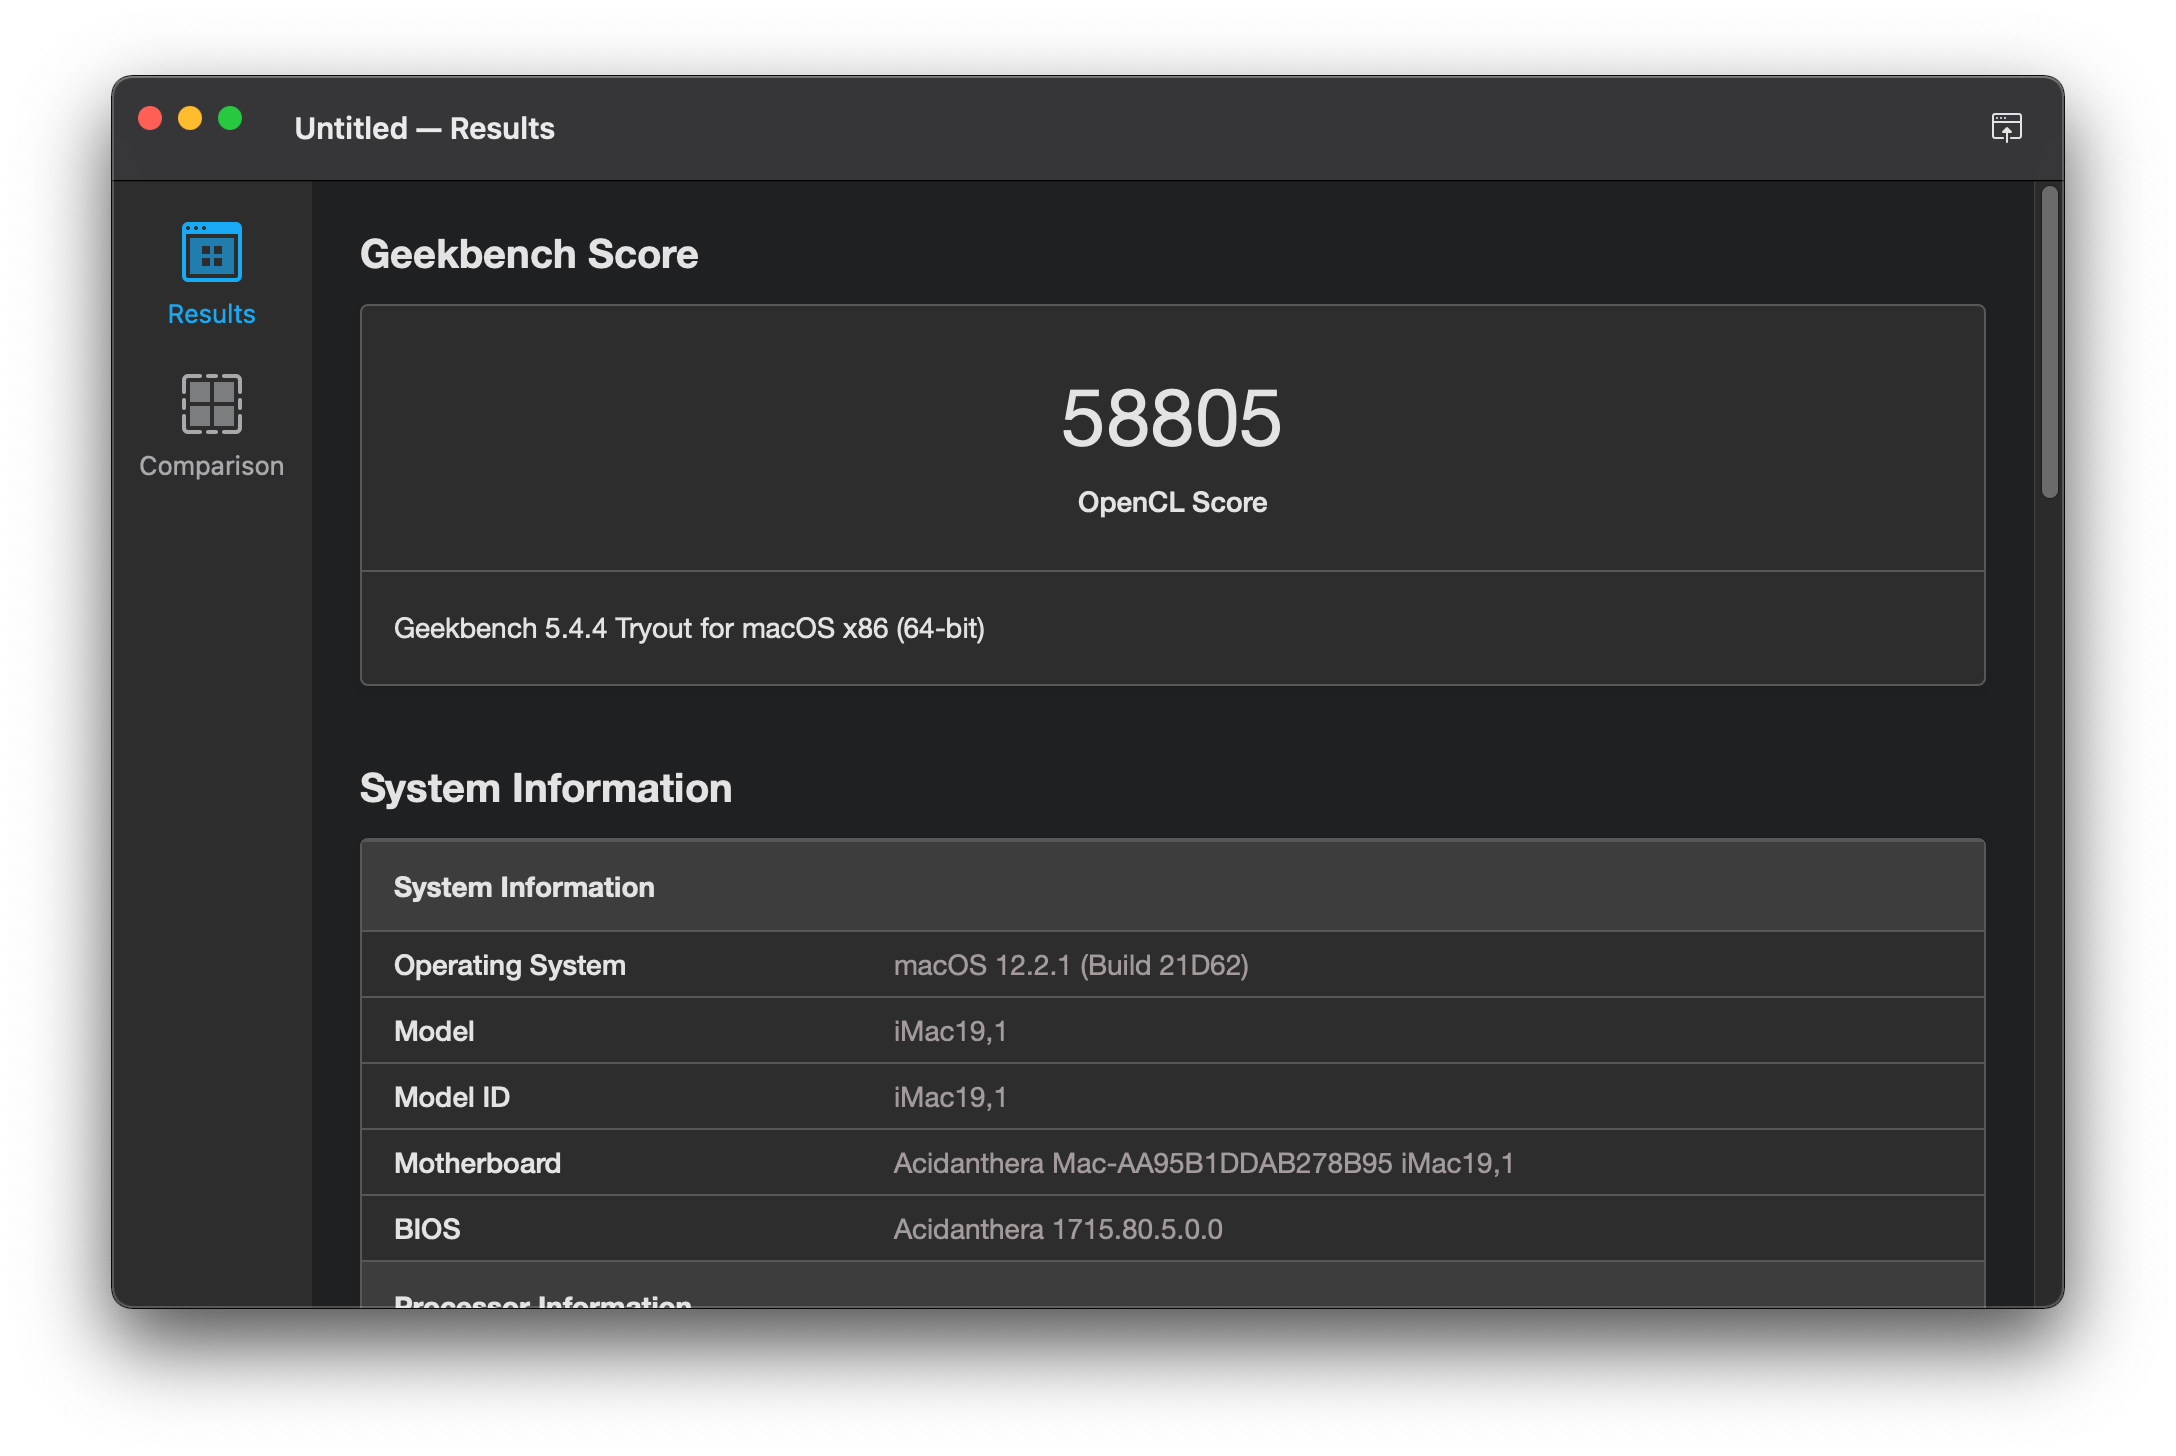
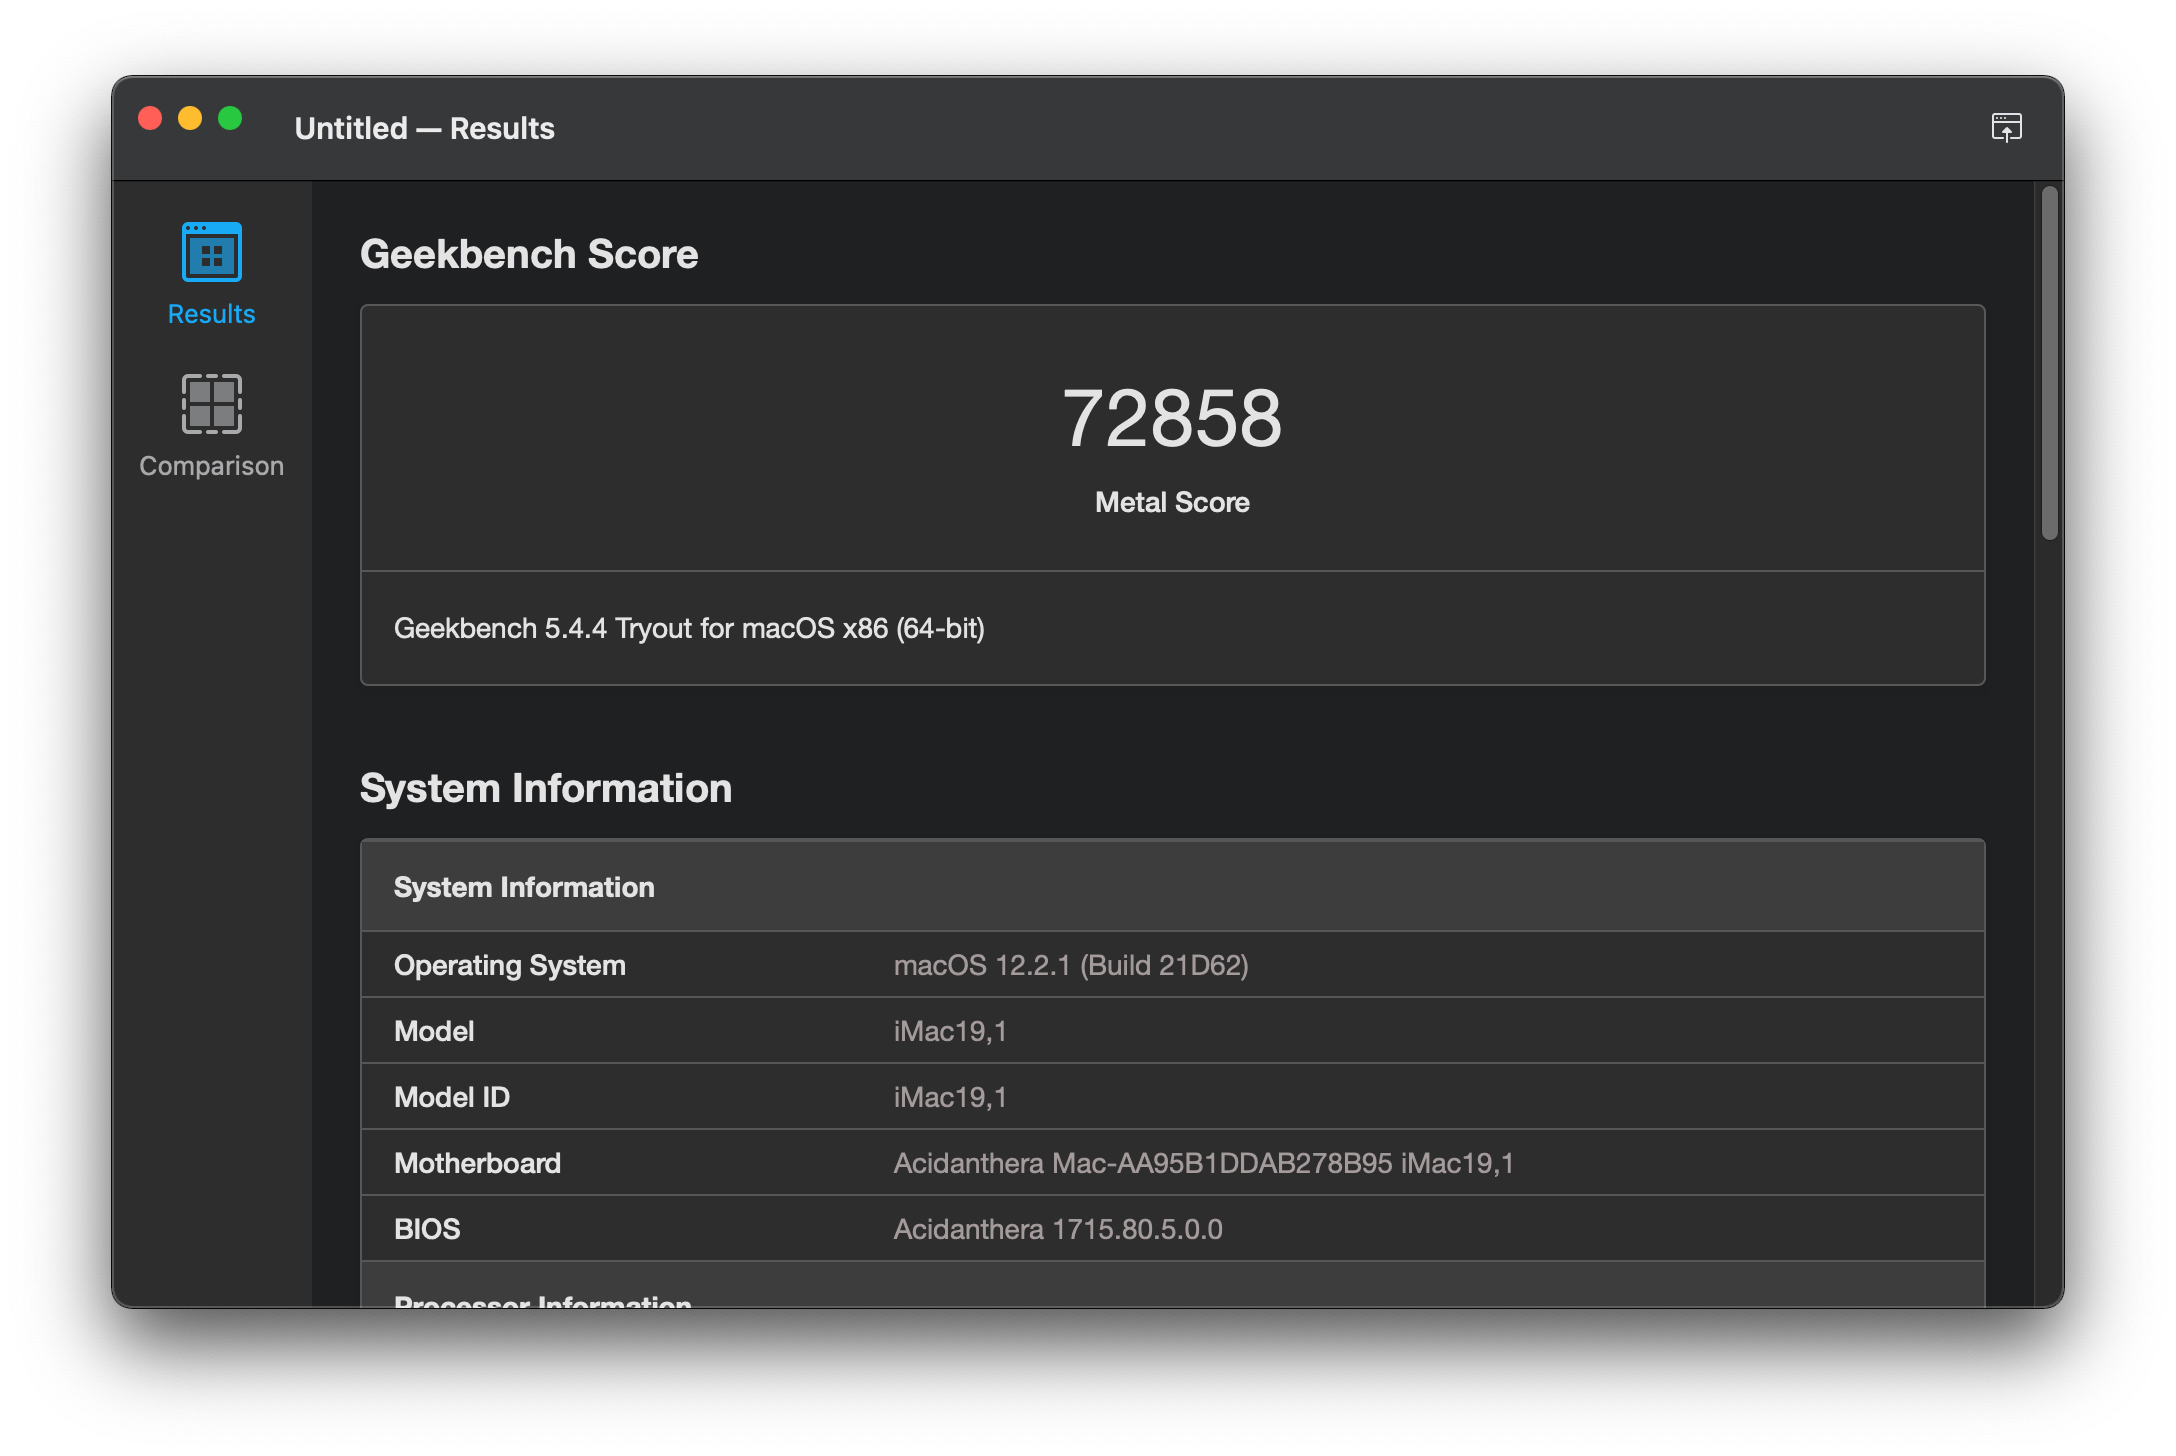
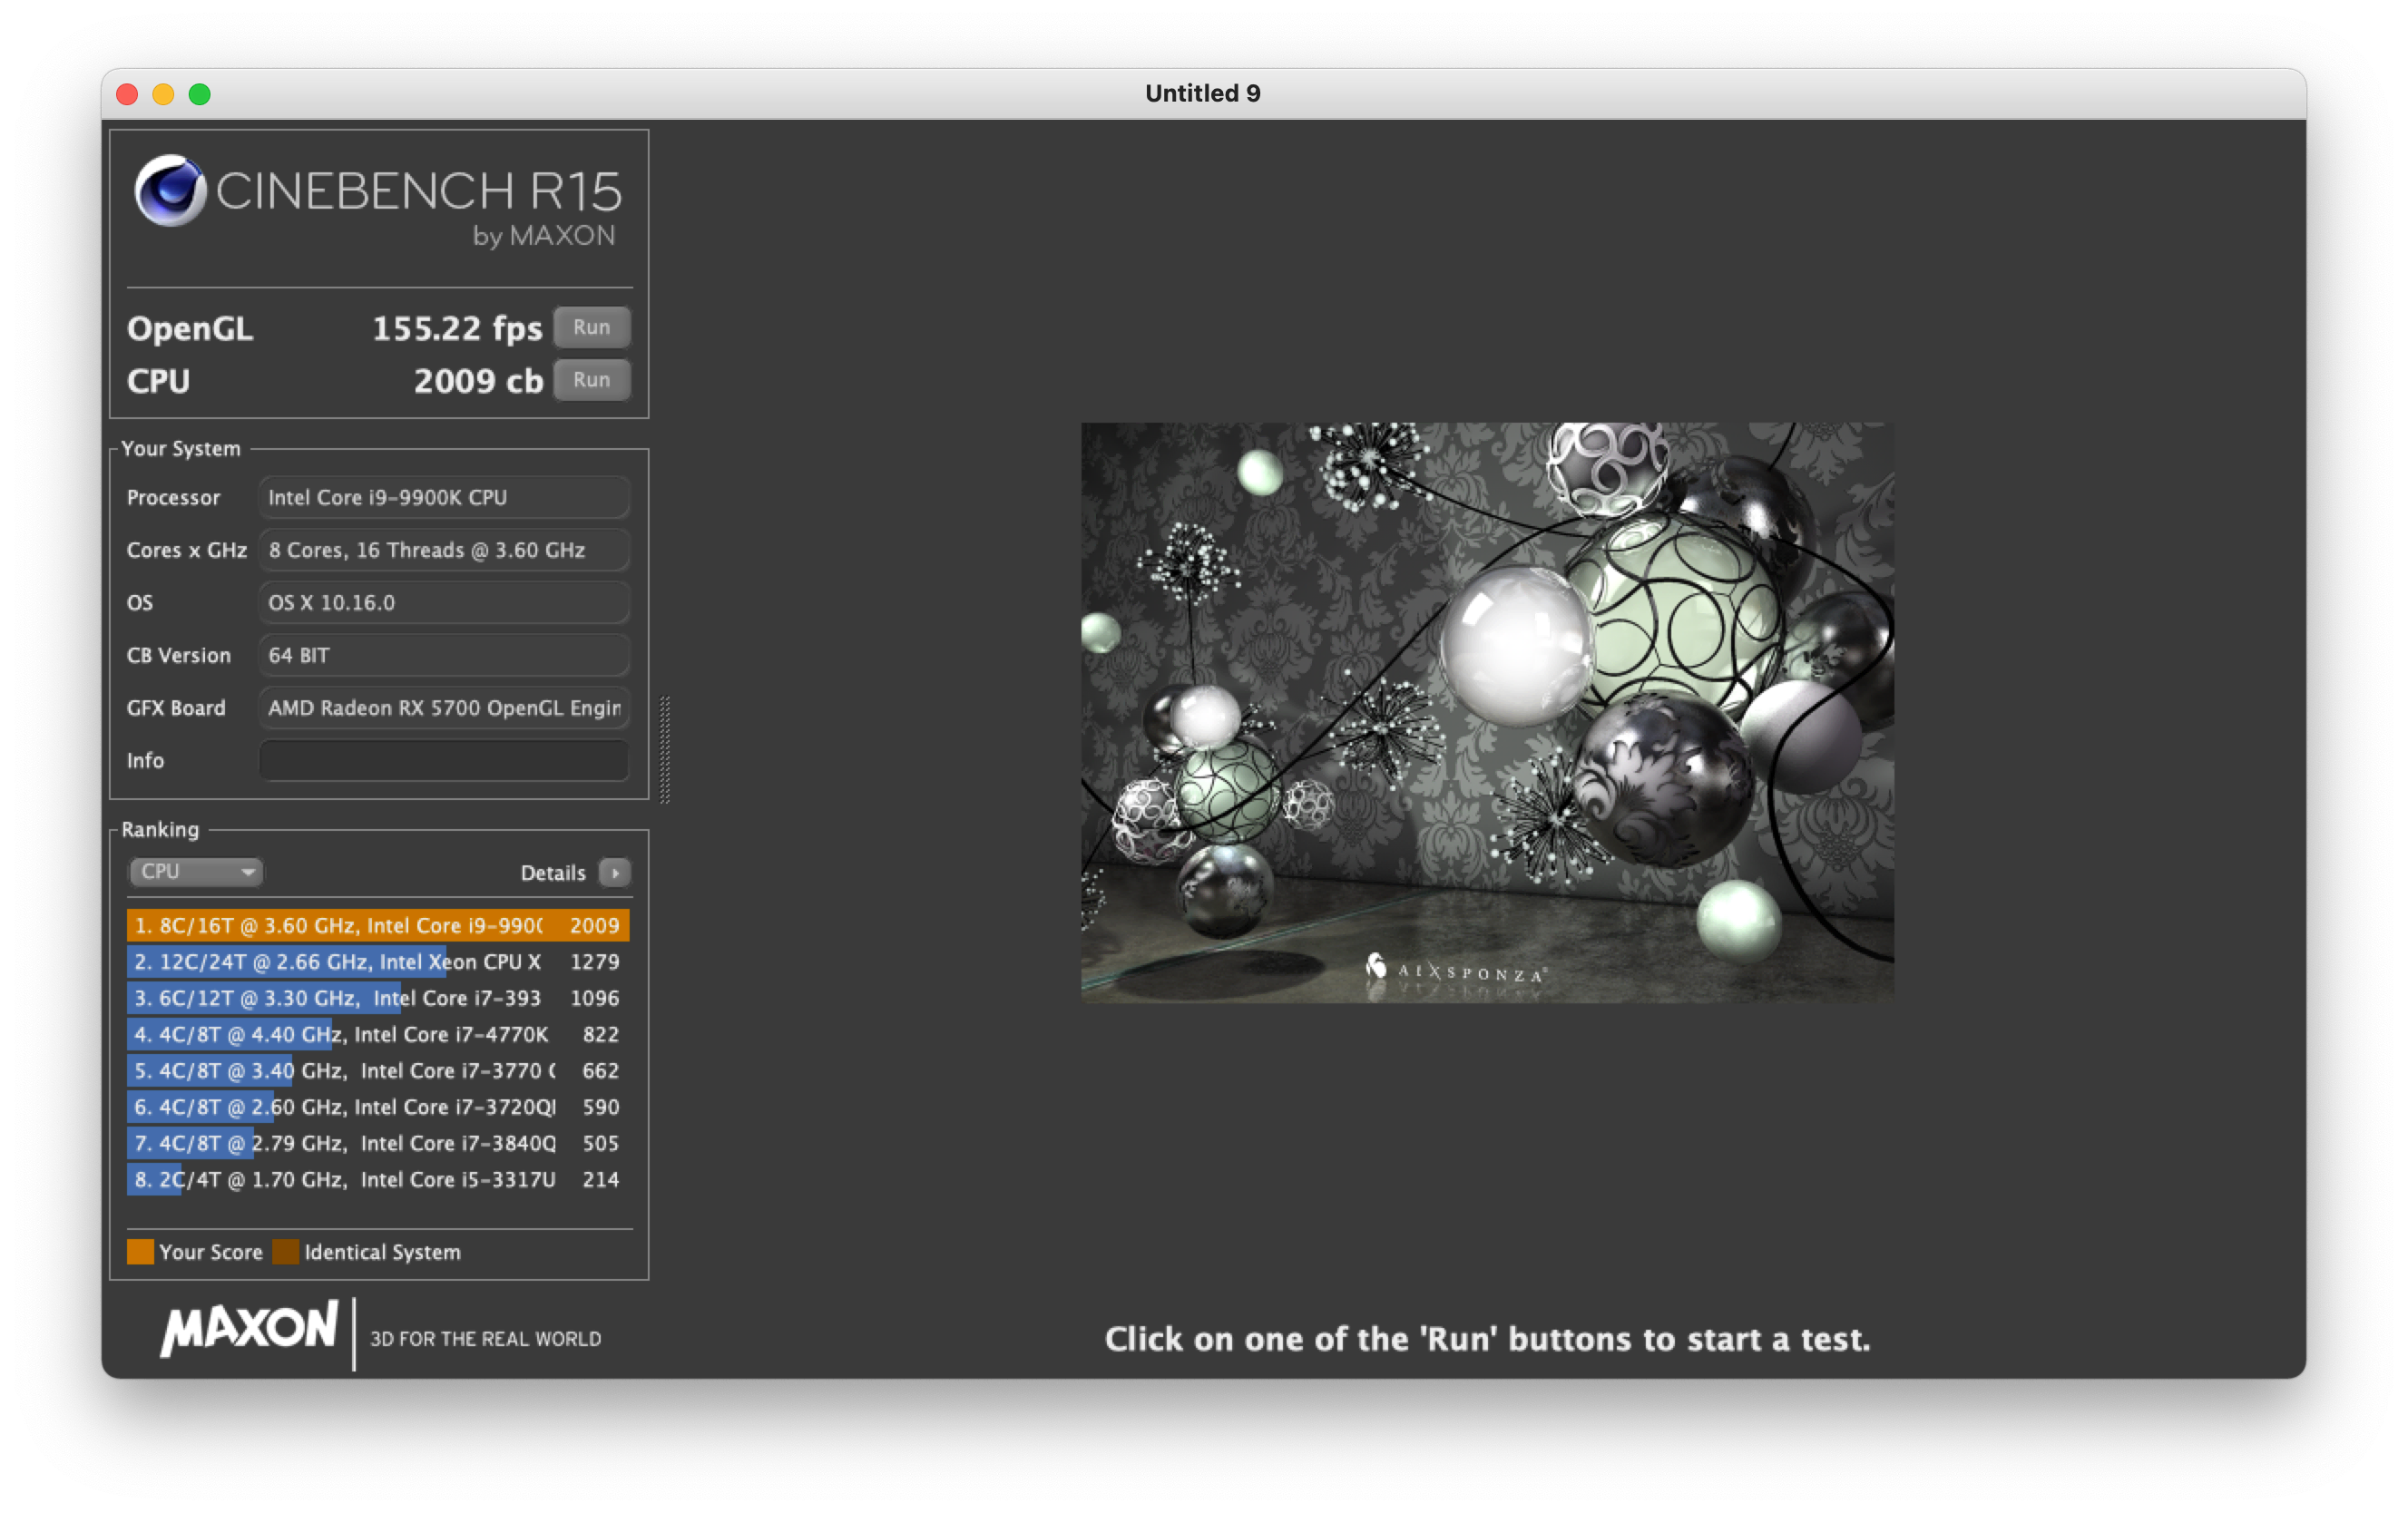
- 8. Benchmark
- 9. References
- 10. Special Thanks
⚠️ Warning A⚠️ : Before using the EFI, you should at least understand how do you install macOS and understand the file structure of OpenCore.
Directly using this EFI does not mean your system can boot normally, even though the configuration is identical, you would need these knowledge to solve problems in your case.
⚠️ Warning B⚠️ : This EFI is based on OpenCore, if you currently are using Clover, please read following document to avoid unpredictable error.
⚠️ Warning C⚠️ :This EFI does not contain any platform information (SN, UUID etc.). You can generate these information by using OpenCore Configurator.
| Parts | Model | Notes |
|---|---|---|
| Motherboard | ASRock Z390 phantom gaming-itx/ac | |
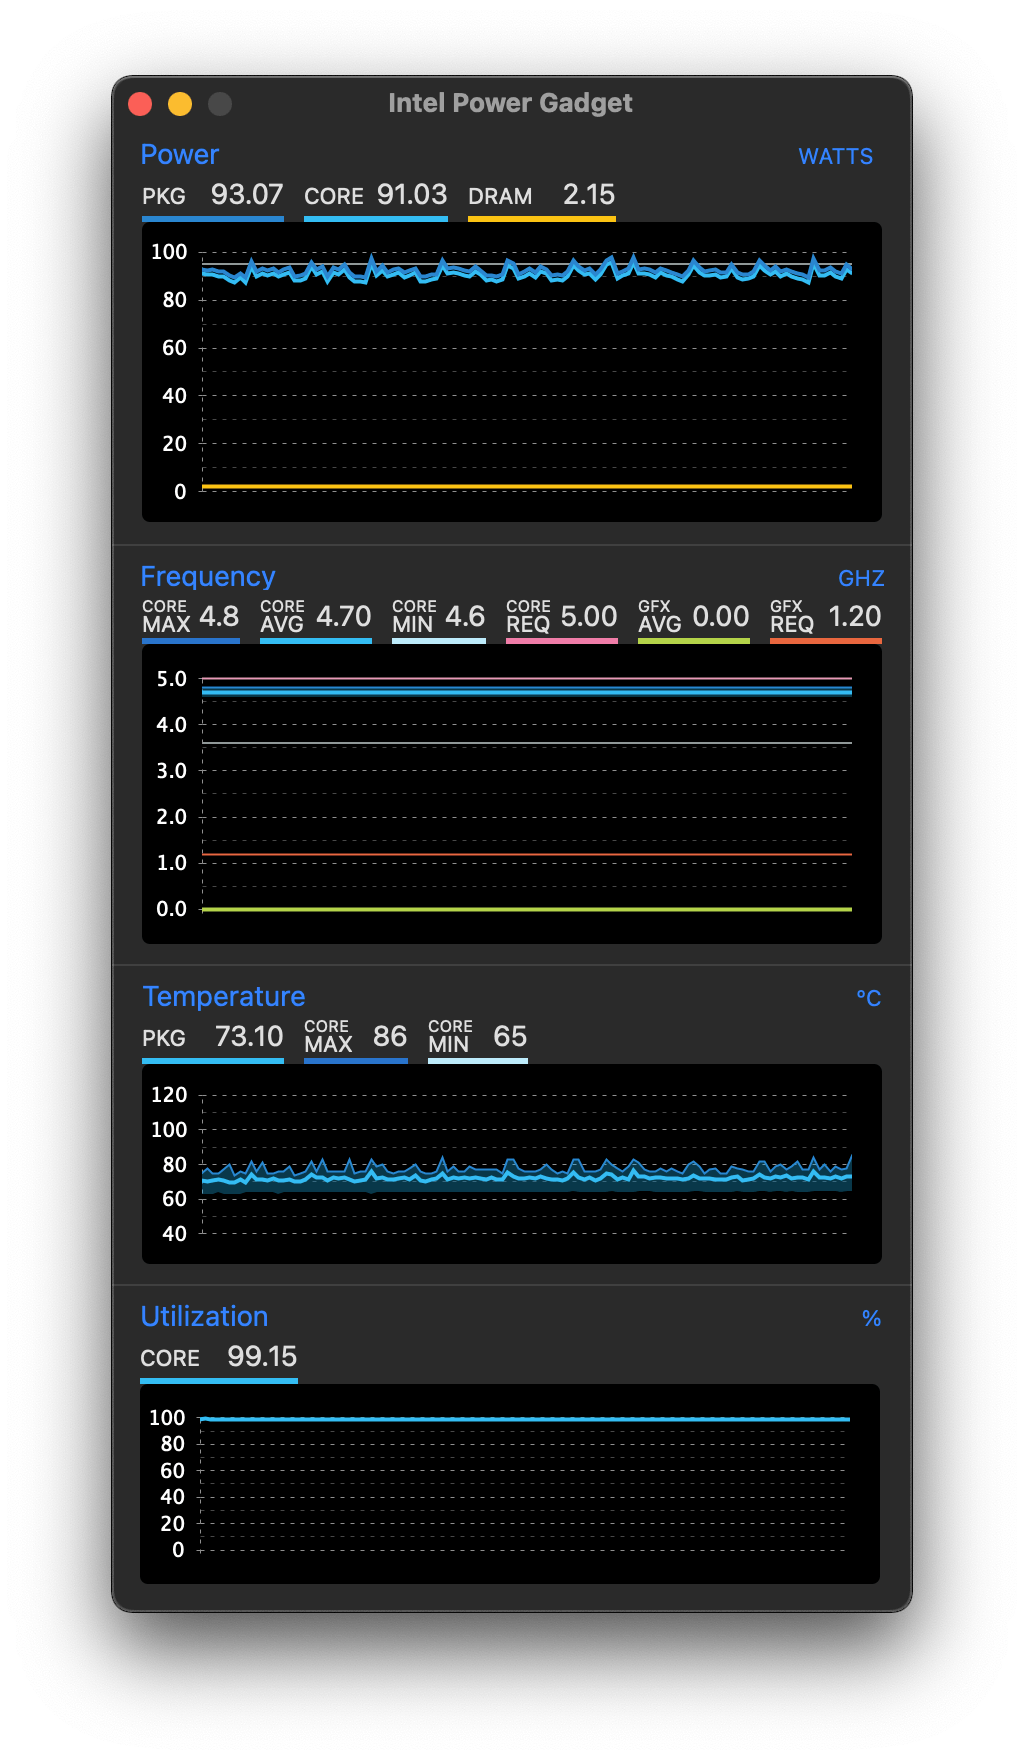
| CPU | Intel 9th Gen i9-9900k | Set the frequency of all core to 4.5Ghz, full load temperature is around 90 degrees. |
| Wireless Network Card | BCM94360CS2 | NGFF to M.2 adapter required |
| Cooler | Thermalright AXP90 | Noctua A9x14 Fan |
| RAM | TEAM DDR4 3200Mhz PC4-25600 32GBx2(64GBkit) | Elite Plus Series |
| Case | Loli 1s mini itx | You can get this case from ChinaHao.com |
| Power Source | Enhance 7660b | 600W 1U Power |
| GPU | Powercolor RX5700 8G [AXRX 5700 ITX 8GBD6-2DH] | PowerColor Only for Japan market, you can get it from Amazon.co.jp |
| Main M.2 Cooler | Noctua A4x10 Fan x 2 | Required to remove the offical M.2 armor |
| Function Name | Normal or not | Notes |
|---|---|---|
| CPU | ⭕️ | CPU frequency scaling is working |
| GPU | ⭕️ | |
| Sound card | ⭕️ | The green audio port on the rear of motherboard is the “internal speaker”, support adjust in volume by pressing the function shortcuts in MacOS |
| LAN port | ⭕️ | |
| Wi-Fi | ⭕️ | |
| Bluetooth | ⭕️ | |
| Sensors | ⭕️ | Support Motherboard Sensors, Fans speed and GPU Die temperature |
| Hand-off | ⭕️ | |
| Unlock with Apple Watch | ⭕️ | |
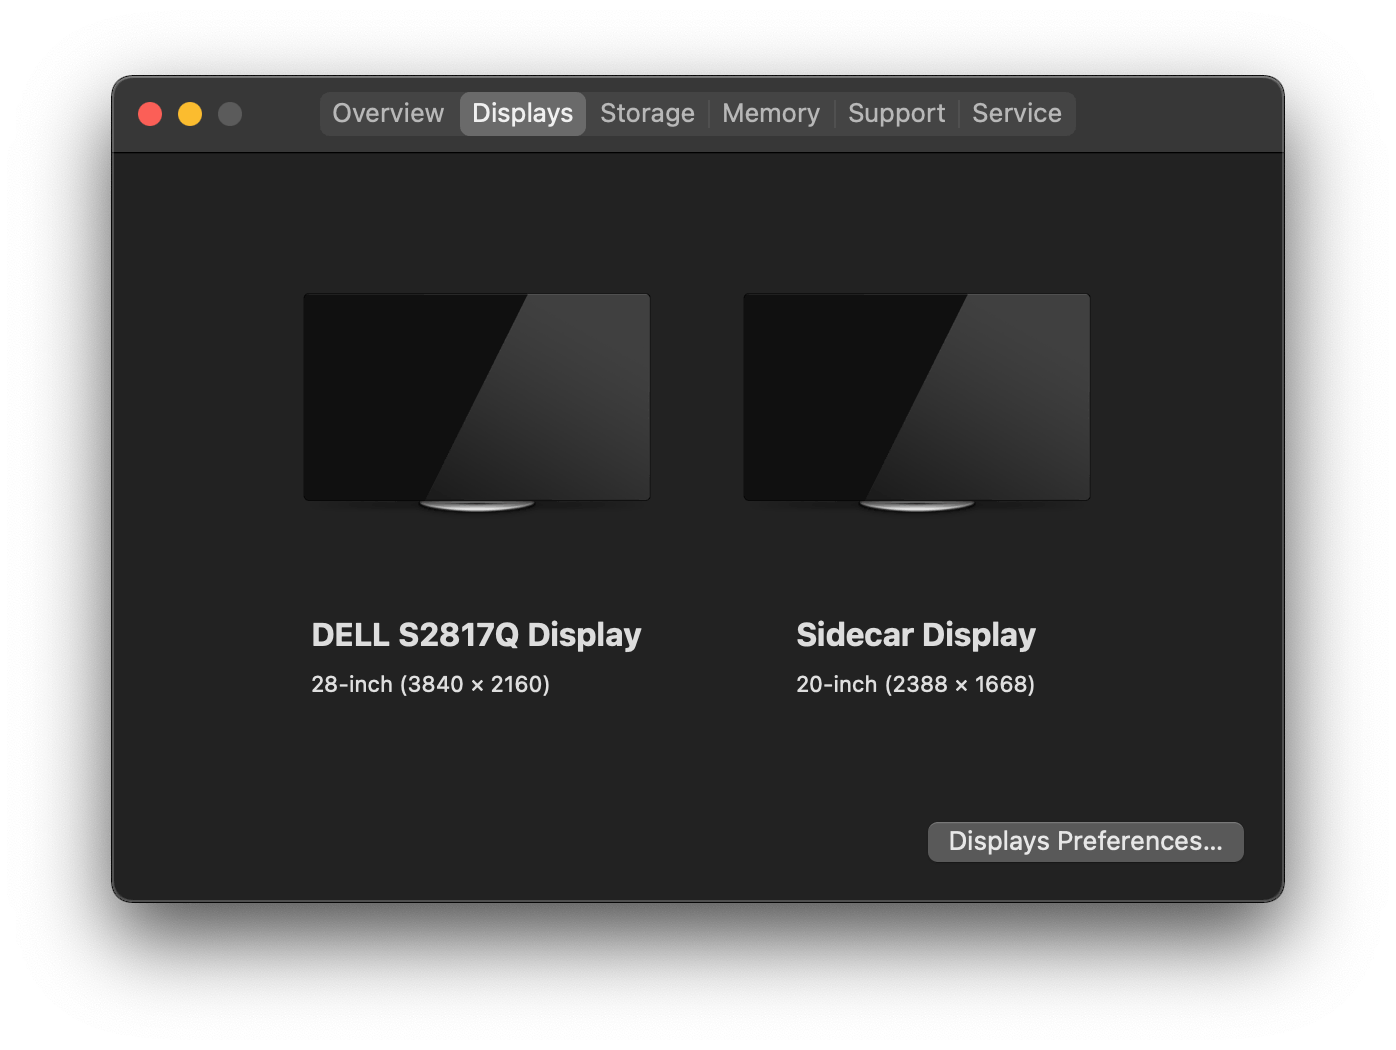
| Sidecar | ⭕️ | |
| Sleep and wake | ⭕️ | |
| Location Service | ⭕️ | |
| NVRAM | ⭕️ | |
| USB | ⭕️ | |
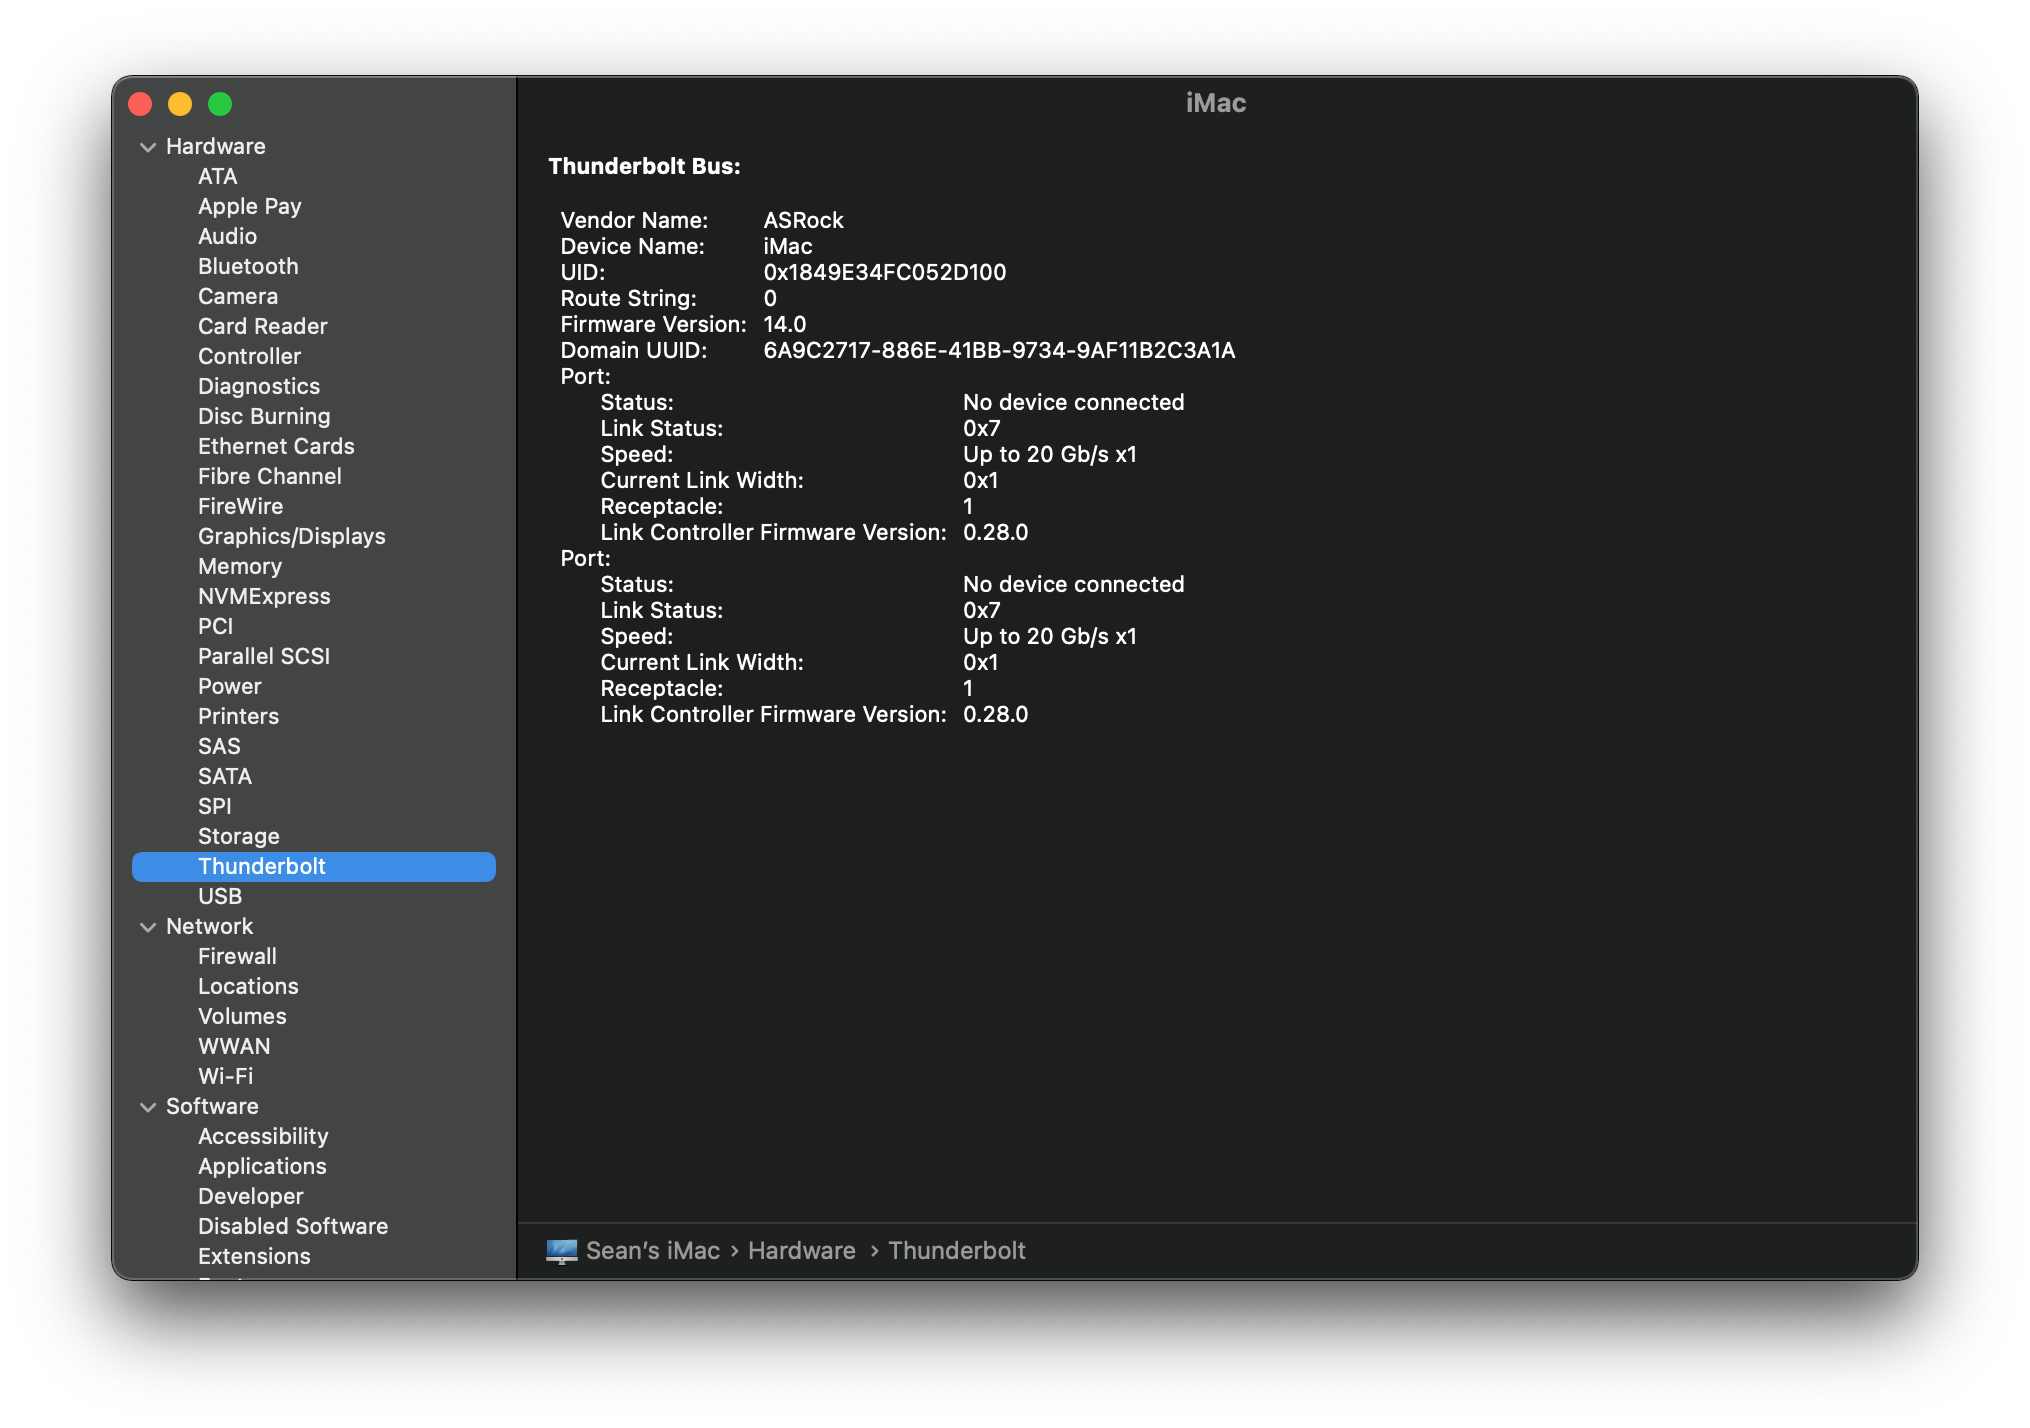
| Thunderbolt 3 | ⭕️ | Thunderbolt 3 |
| DRM | ⭕️ | The DRM required by Apple TV + can be force enable by running override codes For more info |
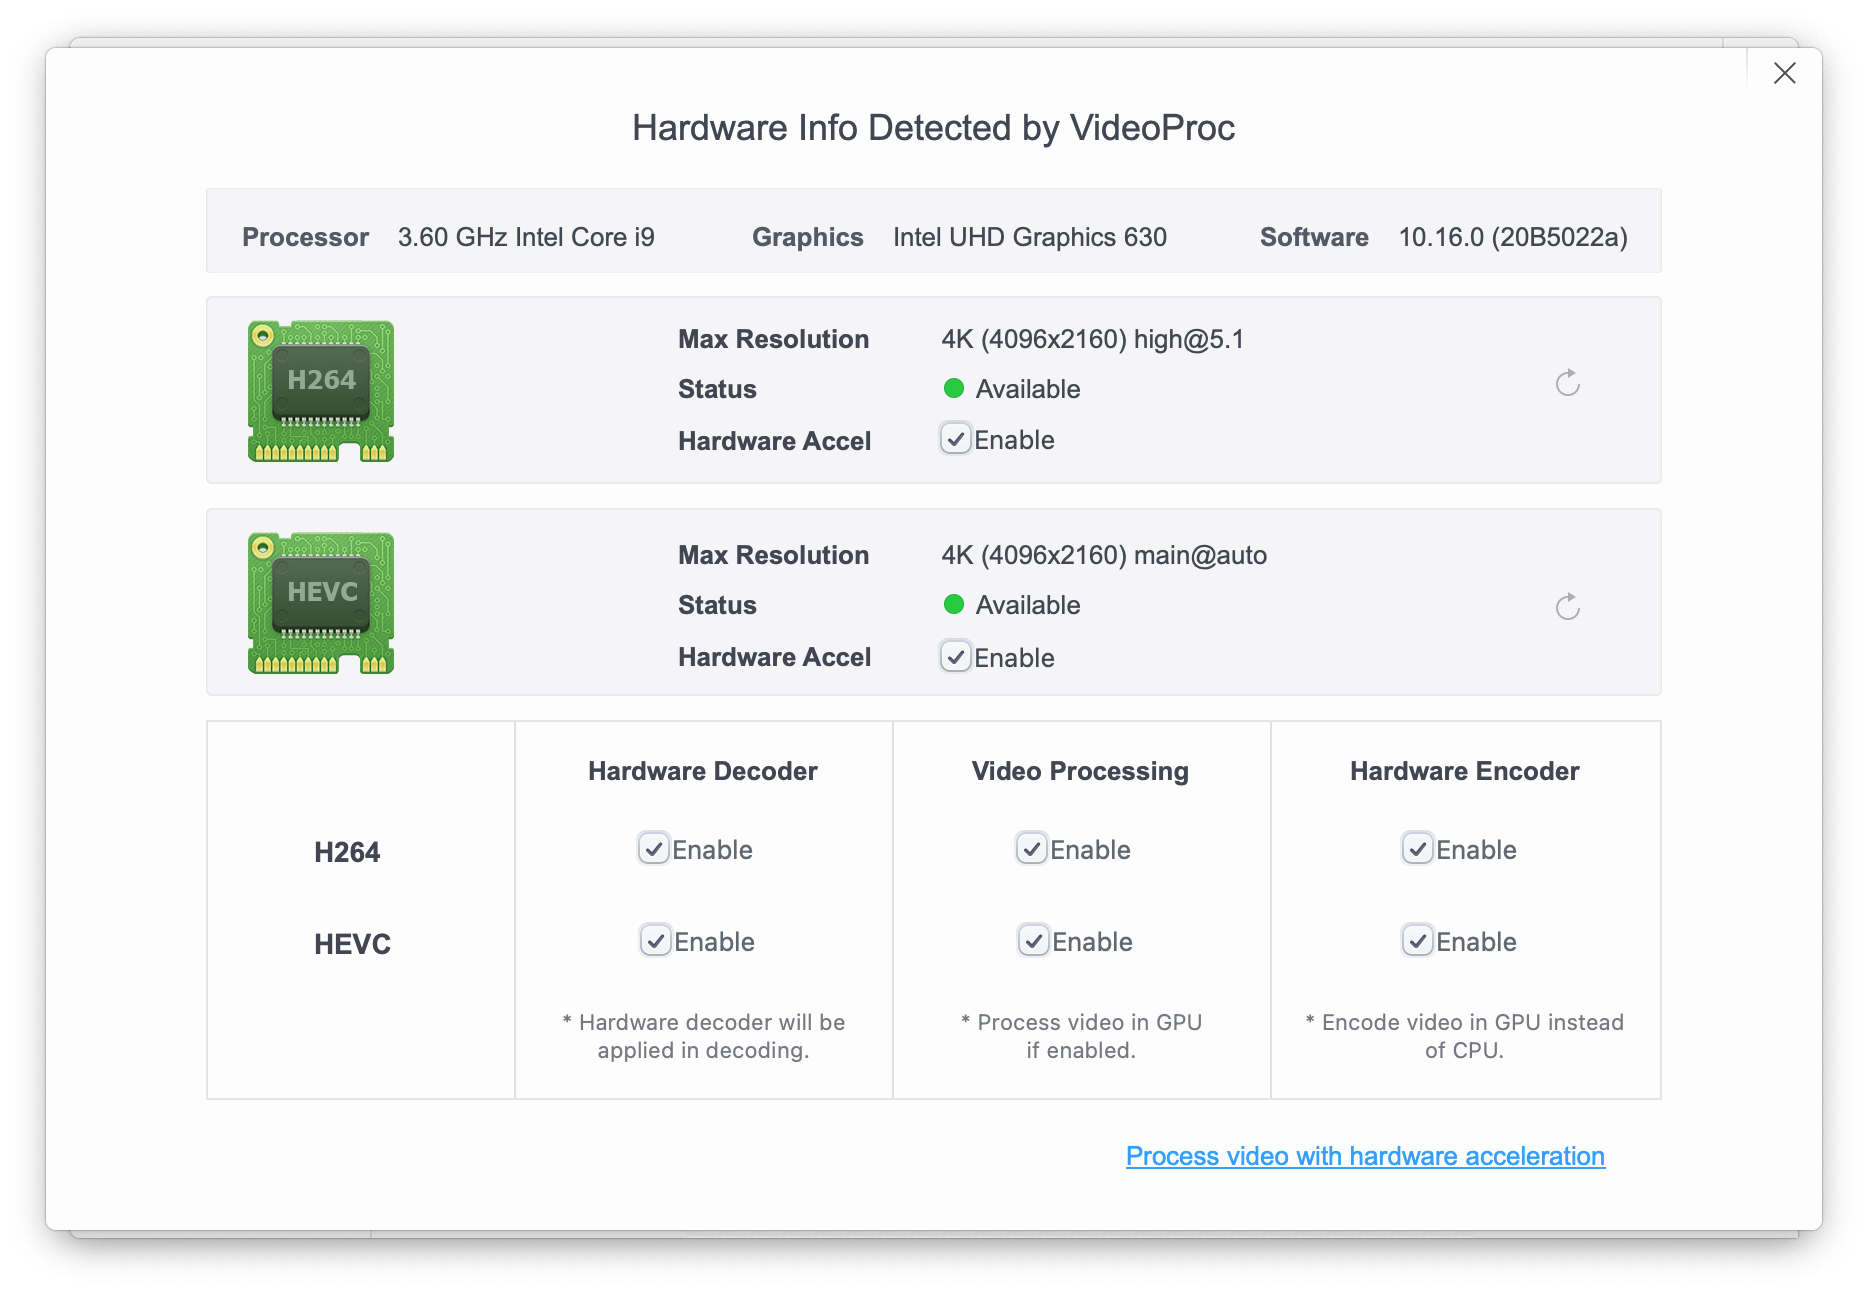
| Hardware acceleration | ⭕️ | Support H264 and HEVC |
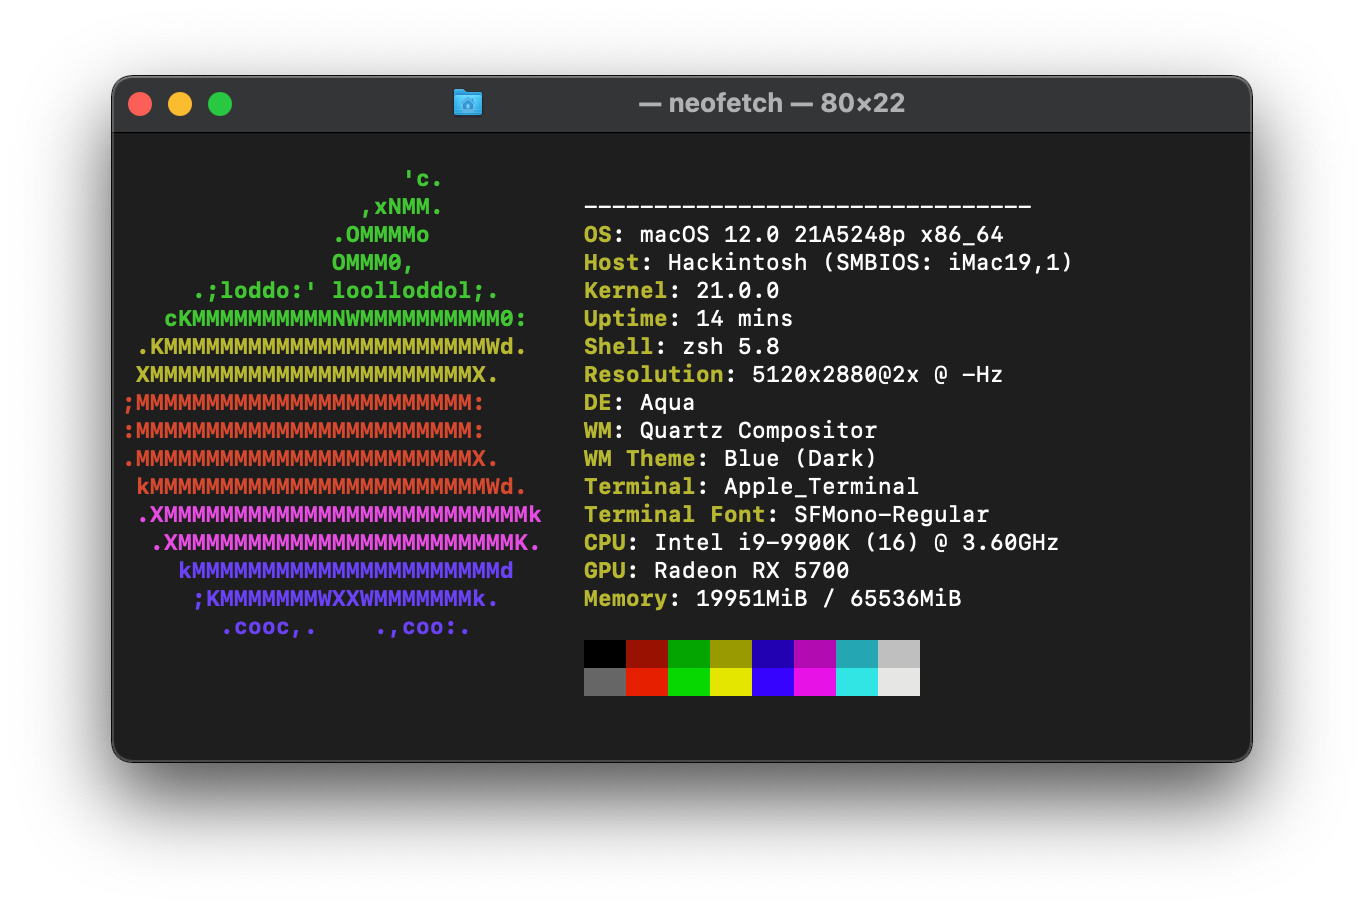
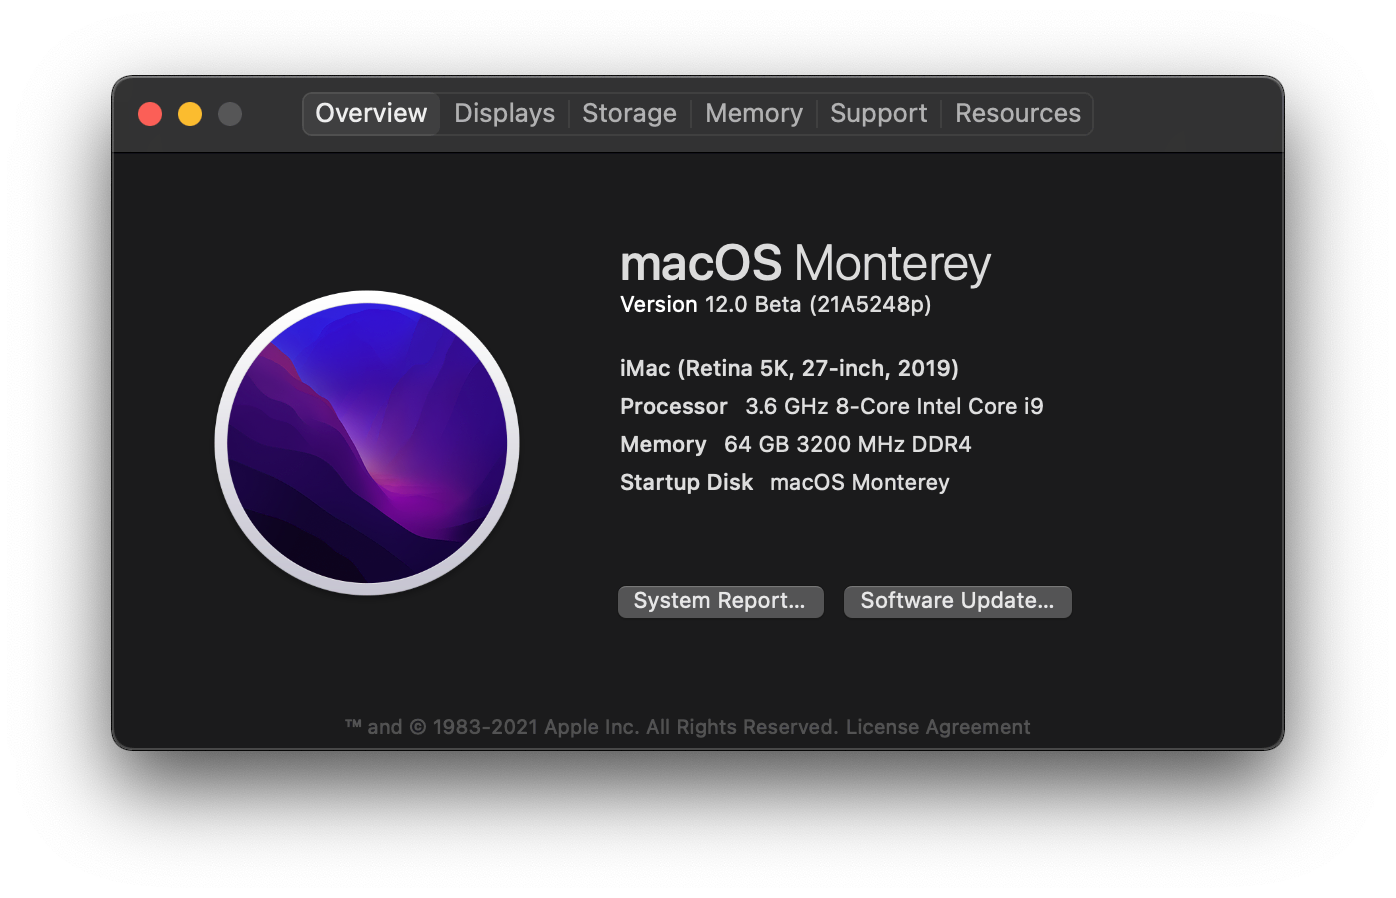
| RAM | ⭕️ | Mac Pro7,1 without error |
The motherboard comes with Intel® Wireless-AC 9560 module, support 802.11ac and Bluetooth 5.0 with 2x2 802.11ac 2.4/5Ghz Wi-Fi. We need to remove this module and replace it with BCM94360CS2 module,BCM94360CS2 module required an NGFF to M.2 adapter. Steps shown below(By icyleaf):
In Windows 10 you might need to install drivers manually in order to use Wi-Fi and Bluetooth.
Download Z39PGIX4.40C, store in a thumb drive and flash the BIOS by executing Instant Flash. Steps of how to flash BIOS can be found on Asrock Official site 📖ASRock BIOS Upgrade Instruction.
This is for enabling Thunderbolt 3 on MacOS.(Do I have to flash this BIOS? I tried and no good with TB 3 while using BIOS 4.40😂.) If you do not use Thunderbolt 3 port, you can skip this step. You can flash back to 4.40 anytime you want.
- ⚠️Warning:There are risks while flashing BIOS,
- ⚠️This instruction dose not responsible for any hardware damage.
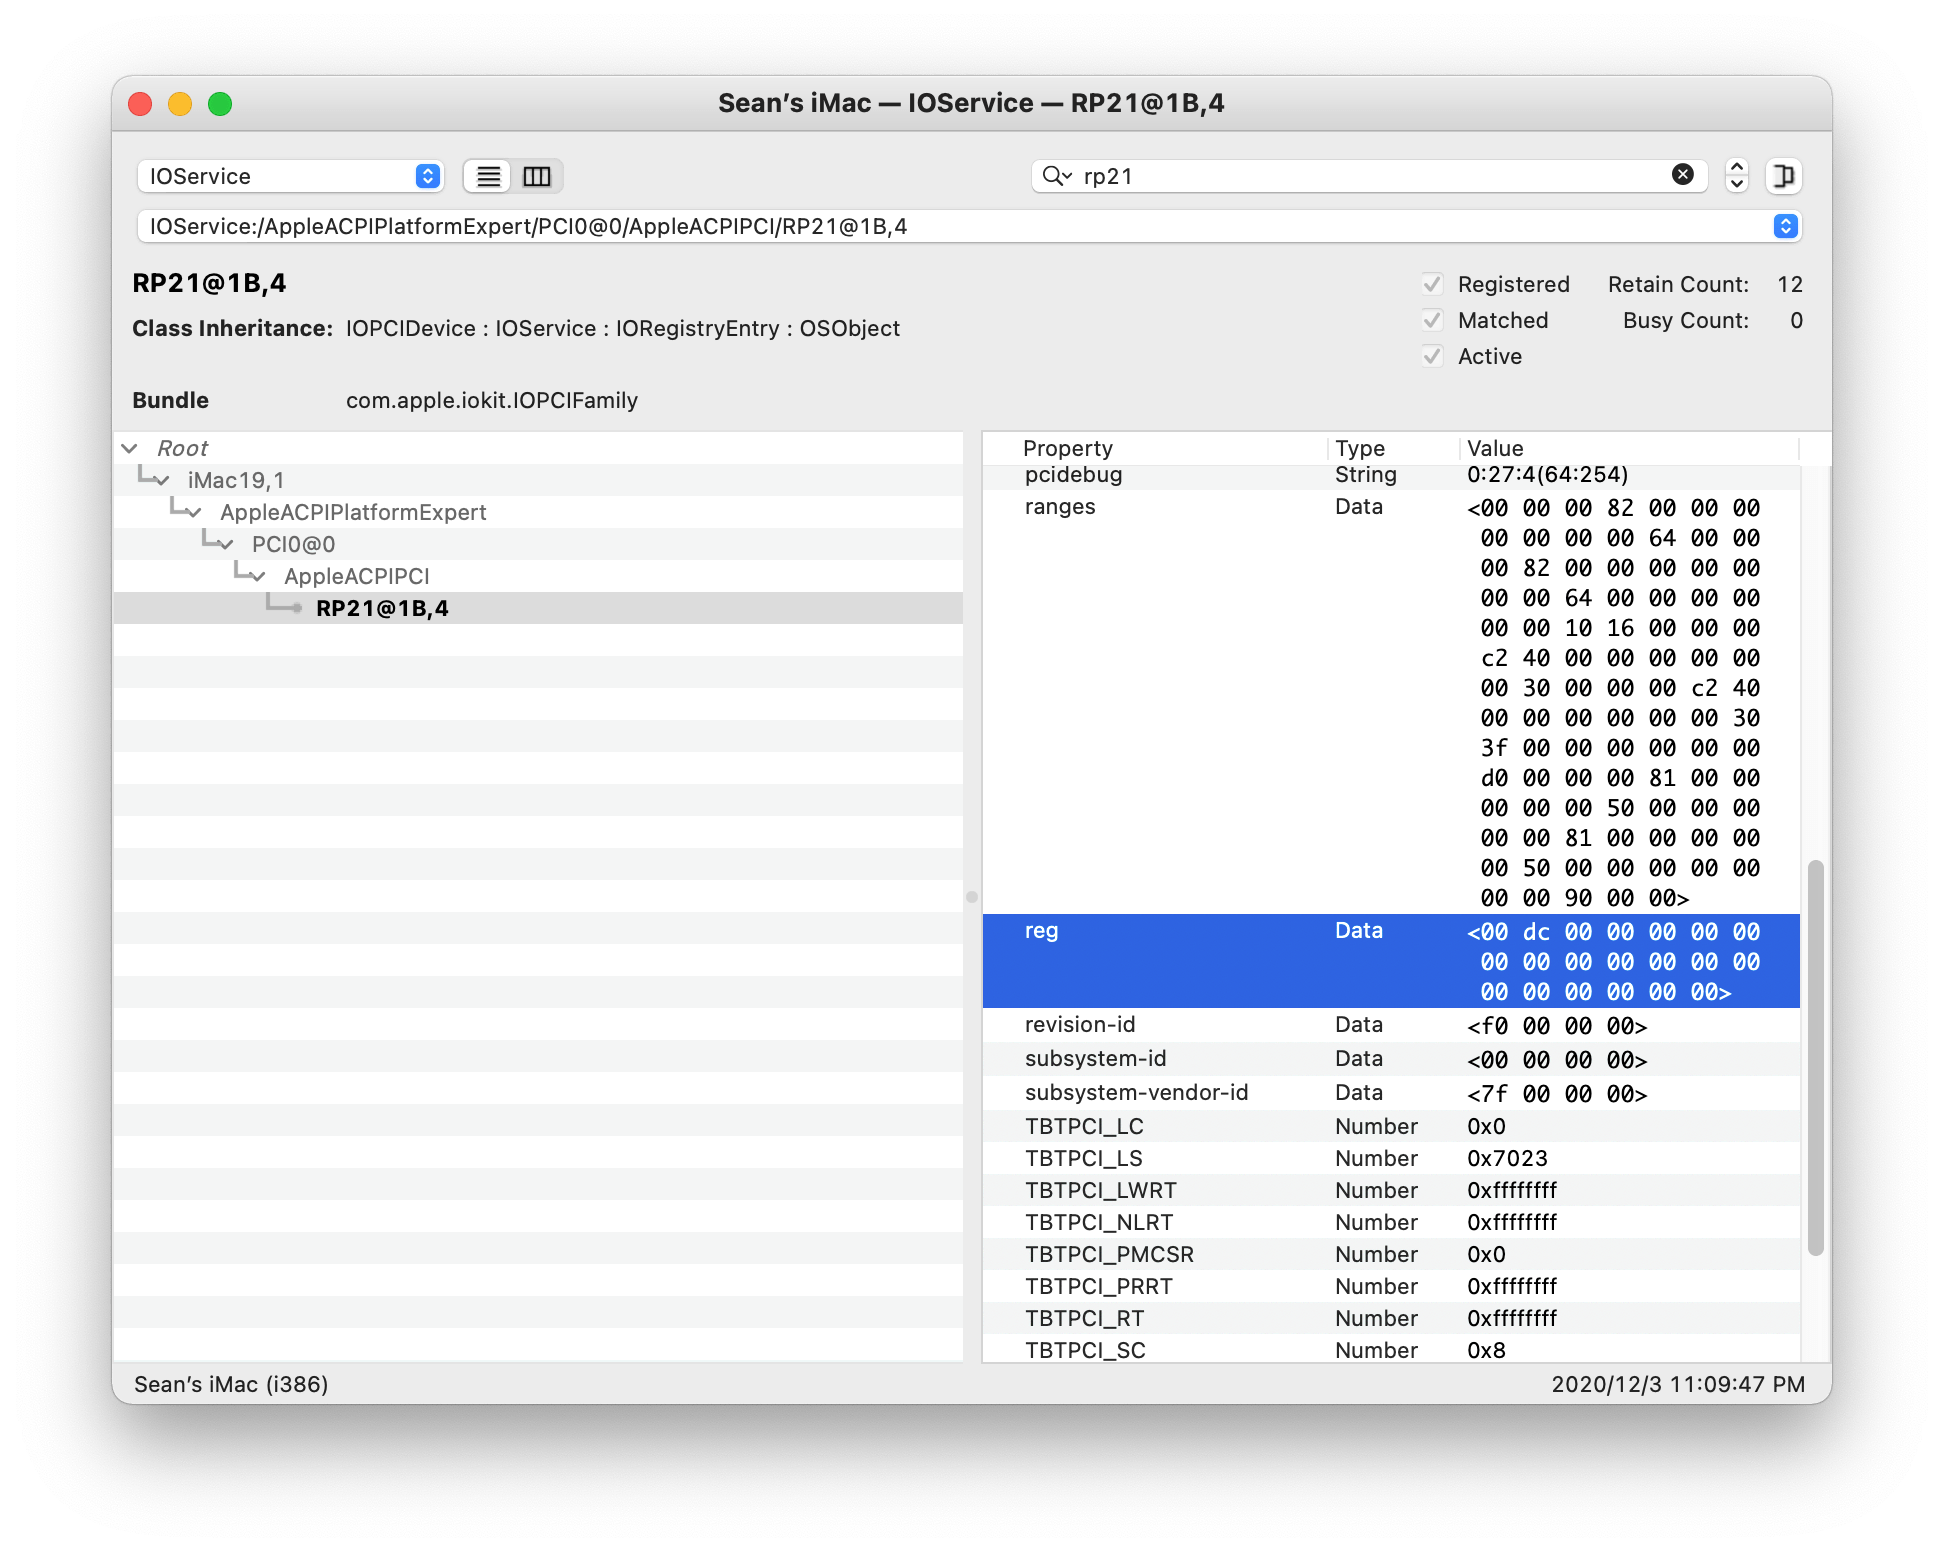
You also need to check your rp21's reg value to choose the proper SSDT file by using IORegistryExplorer.
Download IORegistryExplorer , search for rp21 and check the value under reg.
If it includes dc, you don't need to do anything. However if it includes d8 then you need to download the SSDT-TbtOnPch_PINI_D8.aml file under Tools, then put it under OC -> ACPI and remove SSDT-TbtOnPch_PINI.aml. You need to made modification to your config file as well.
- Advanced
-
Chipset Configuration
- Vt-d → Disable
- Share Memory → 128MB
- IGPU Multi-Monitor → Enable
-
Super IO Configuration
- Serial Port → Disable
-
USB Configuration
- XHCI Hand-off → Enable
-
Intel (R) Thunderbolt
- Thunderbolt (TM) Support → Enable
- Thunderbolt Usb Support → Enable
- GPIO3 Force Pwr → Enable
-
- Step 1:
- Use the latest OpenCore Configuratortor open
config.plist.
- Use the latest OpenCore Configuratortor open
- Step 2:
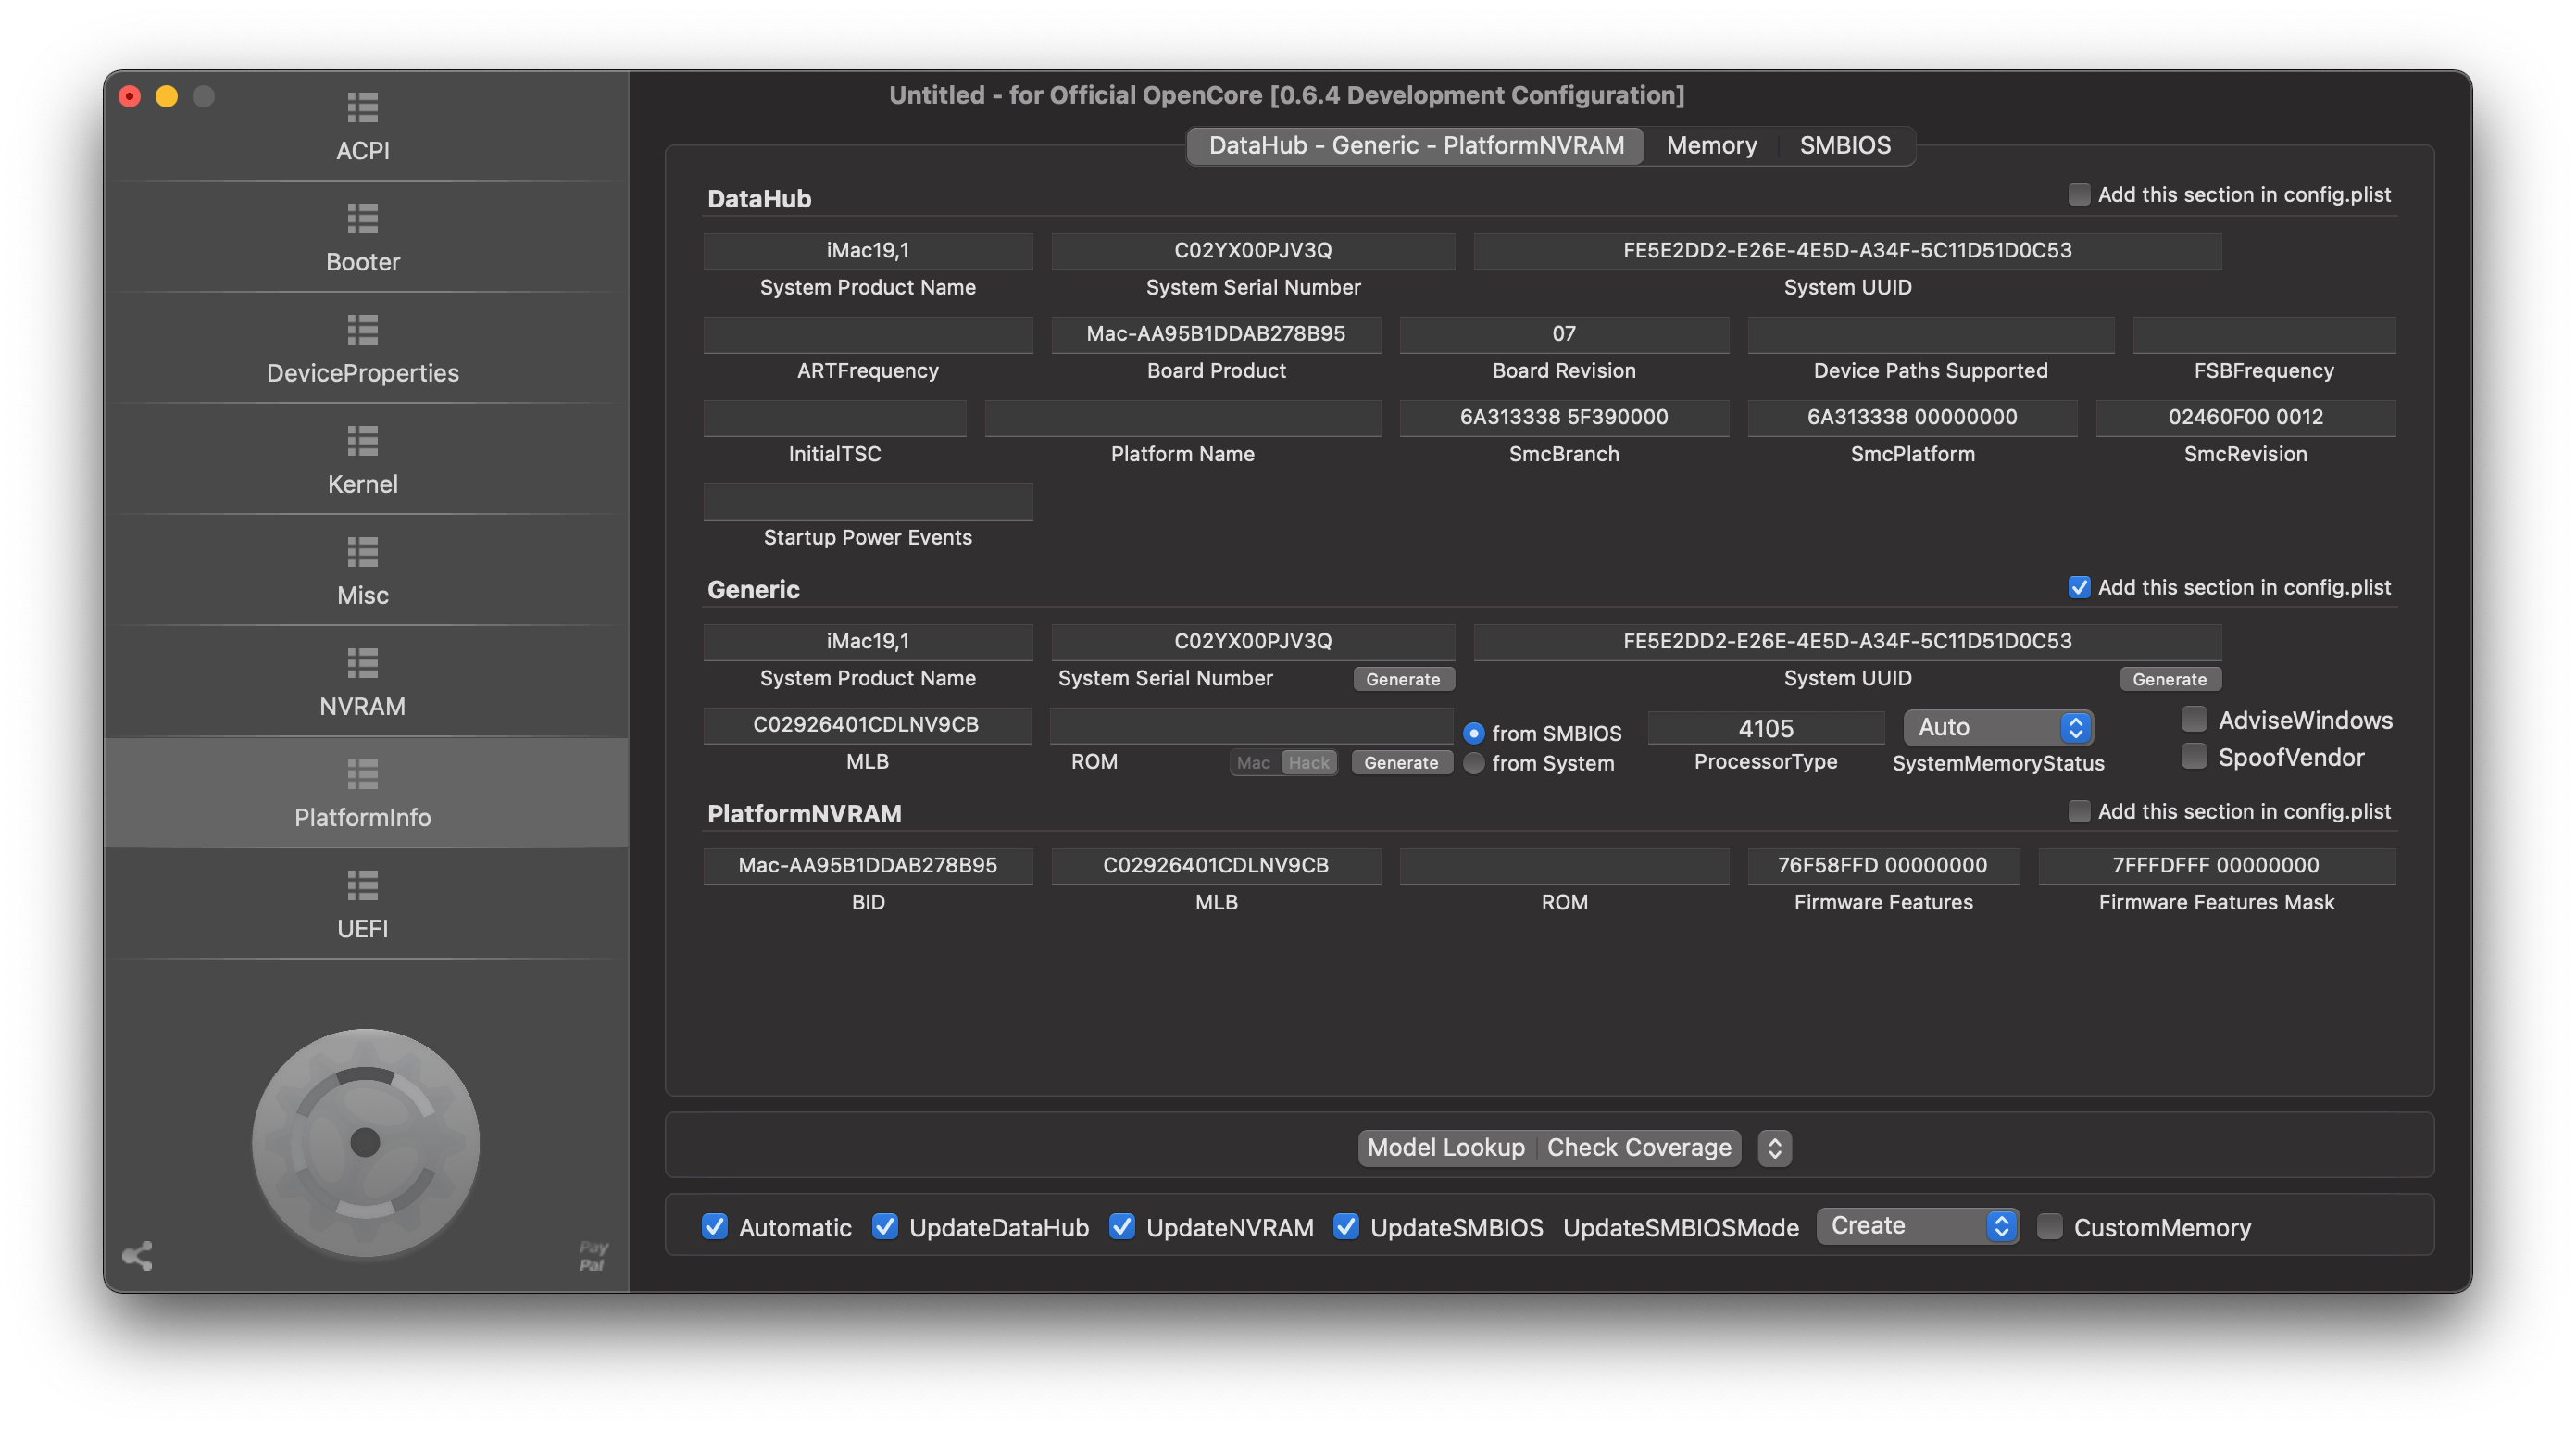
- Choose
PlatformInfothen choose on the topDataHub - Generic — PlatfromNVRAM, click the "up and down arrow" button on the right side on theCheck Coveragebutton located at the bottom of the interface.
- Choose
If you used emulated NVRAM before, you need to clean up the emulated NVRAM to get the native NVRAM works. If you never used emulated NVRAM or you are doing a fresh install, you can skip this part.
-
Step 1:
Execute in terminal
sudo defaults read com.apple.loginwindow LogoutHook
If the output is
The domain/default pair of (com.apple.loginwindow, LogoutHook) does not exist
Means no LogoutHook left.
-
Step 2:
Remove
LogoutHook.commandfile,execute in terminalsudo rm -rf $(sudo defaults read com.apple.loginwindow LogoutHook)
-
Step 3:
Clean up
LogoutHooktrigger setting, execute in terminalsudo defaults delete com.apple.loginwindow LogoutHook
nvram.plistinEFIprartition.VariableRuntimeDxe.efiandEmuVariableRuntimeDxe.efiin/EFI/OC/Drivers
- Execute in terminal each line at a time,
sudo -s
sudo nvram -c
sudo nvram myvar=test
exit
- Reboot your device, then execute in terminal
vram -p | grep -i myvar
- If
myvar testis included in your return line, then the NVRAM is working properly.
- Downlaod Hackintool
- Launch
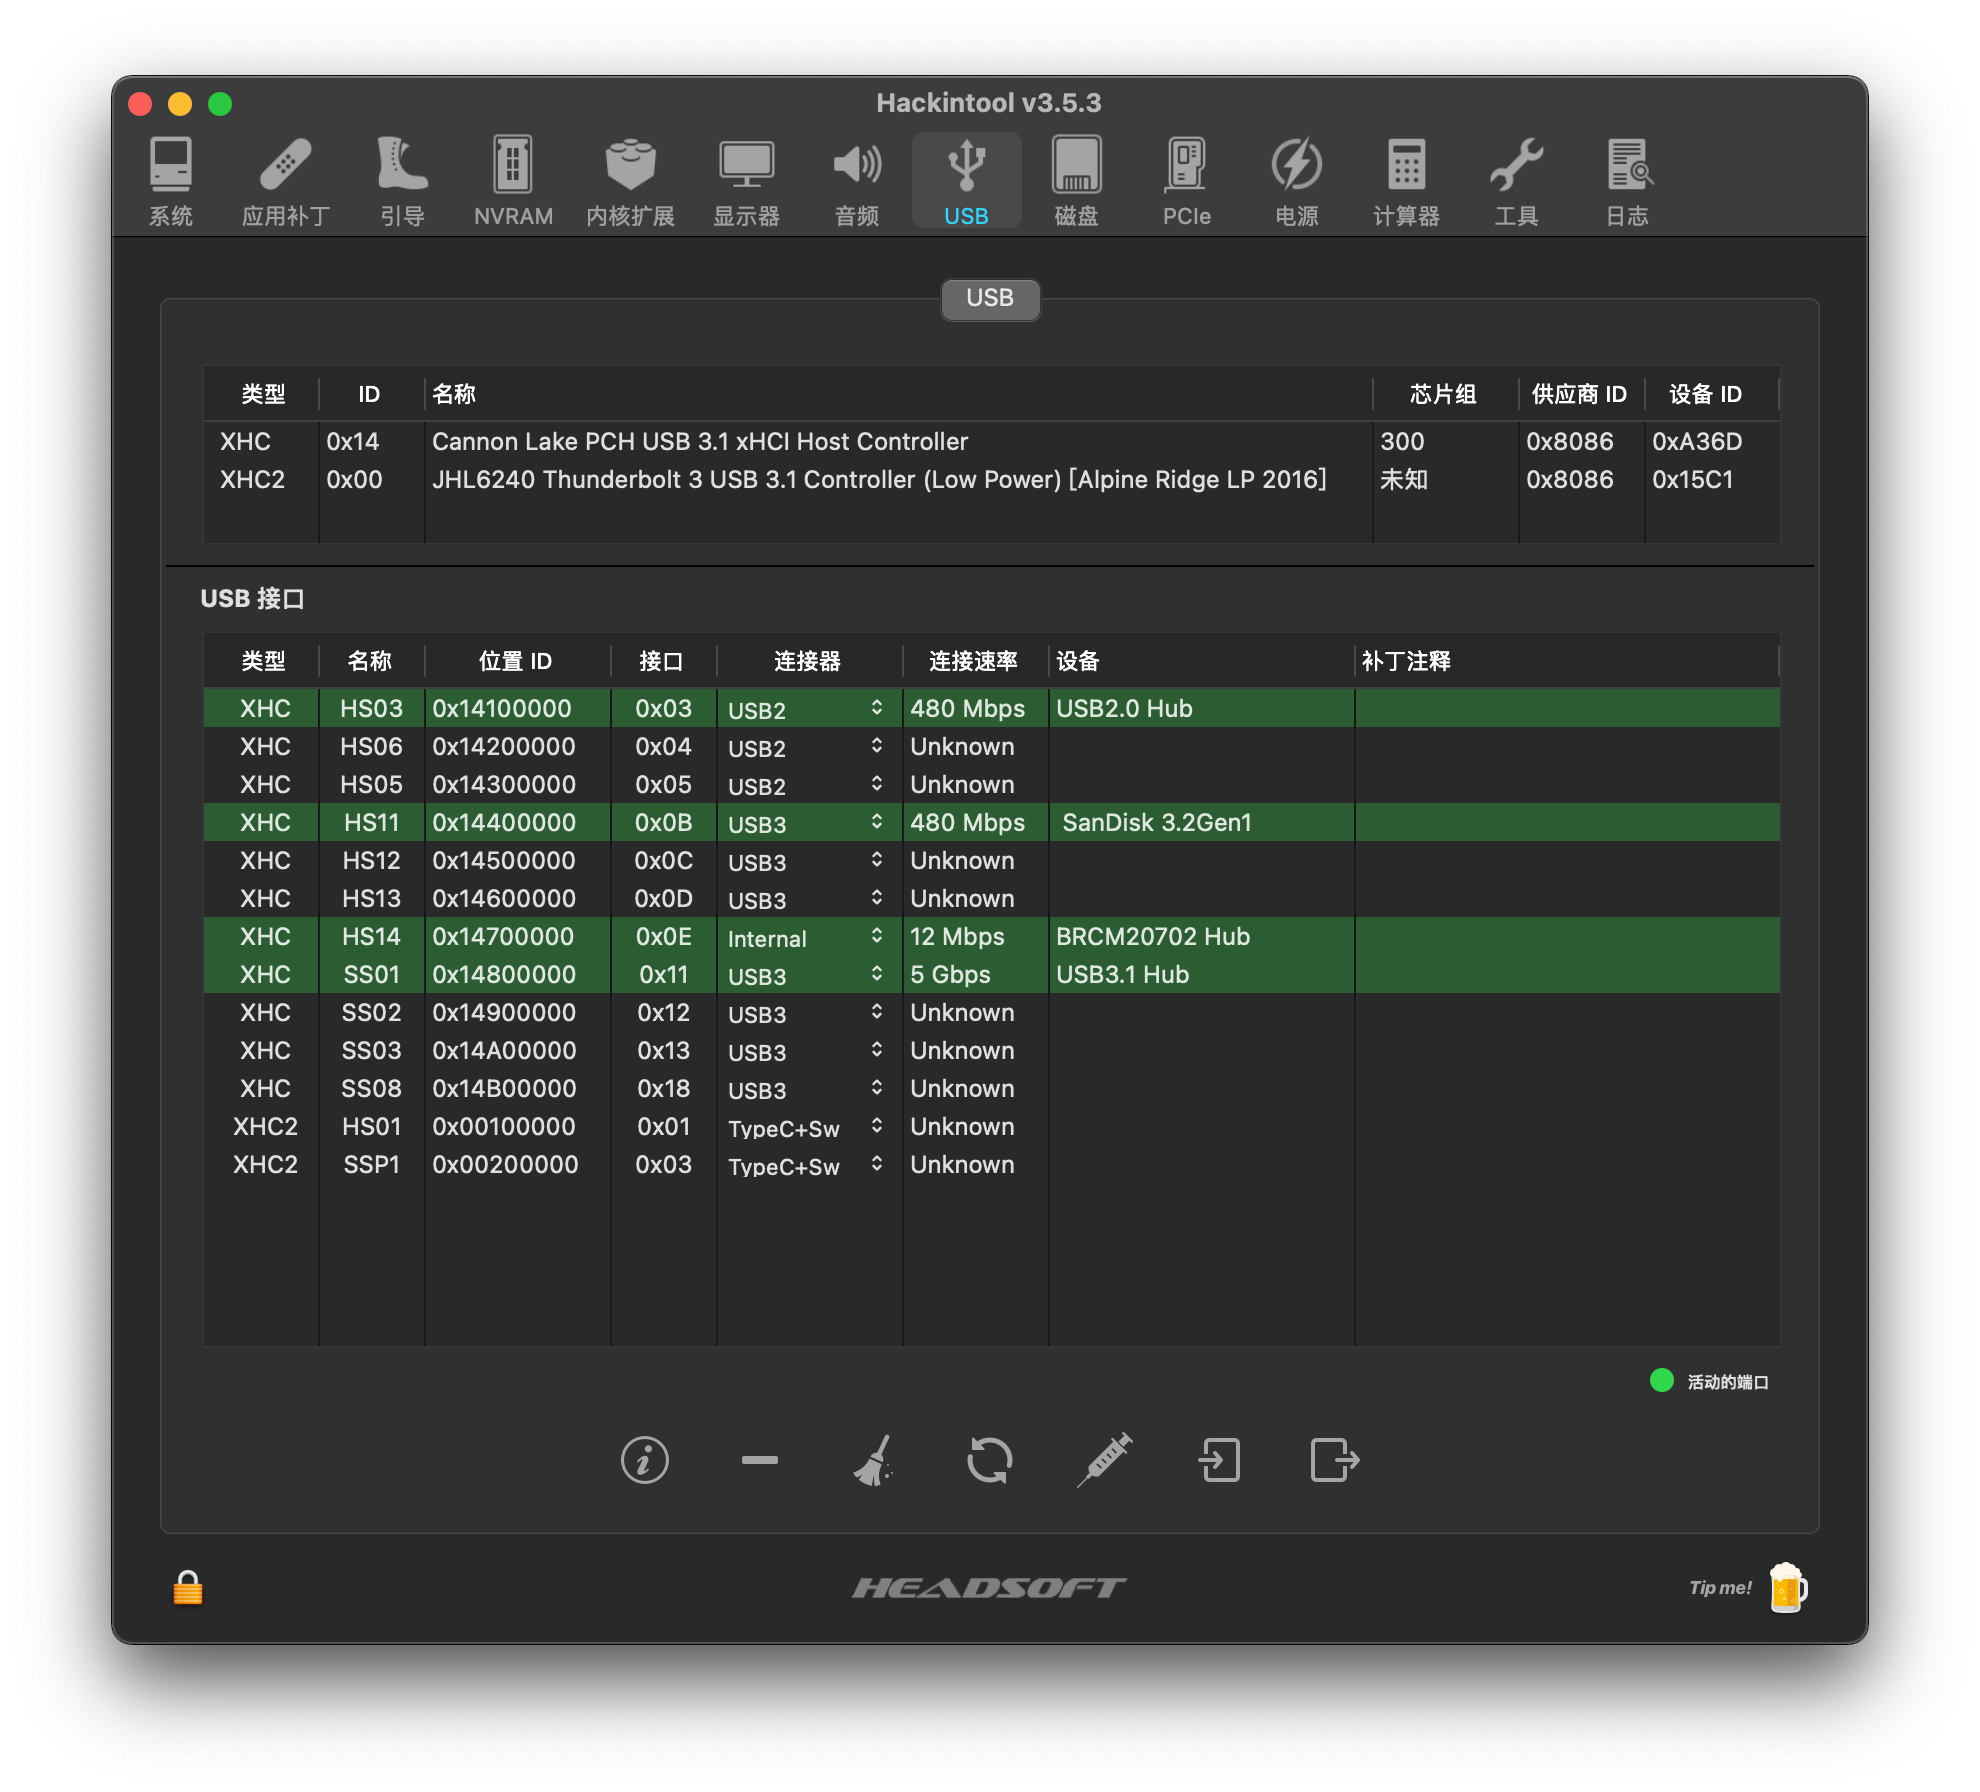
Hackintoolthen chooseUSB
- Select the ports you don't need then click
-to delete them. - The number of ports(
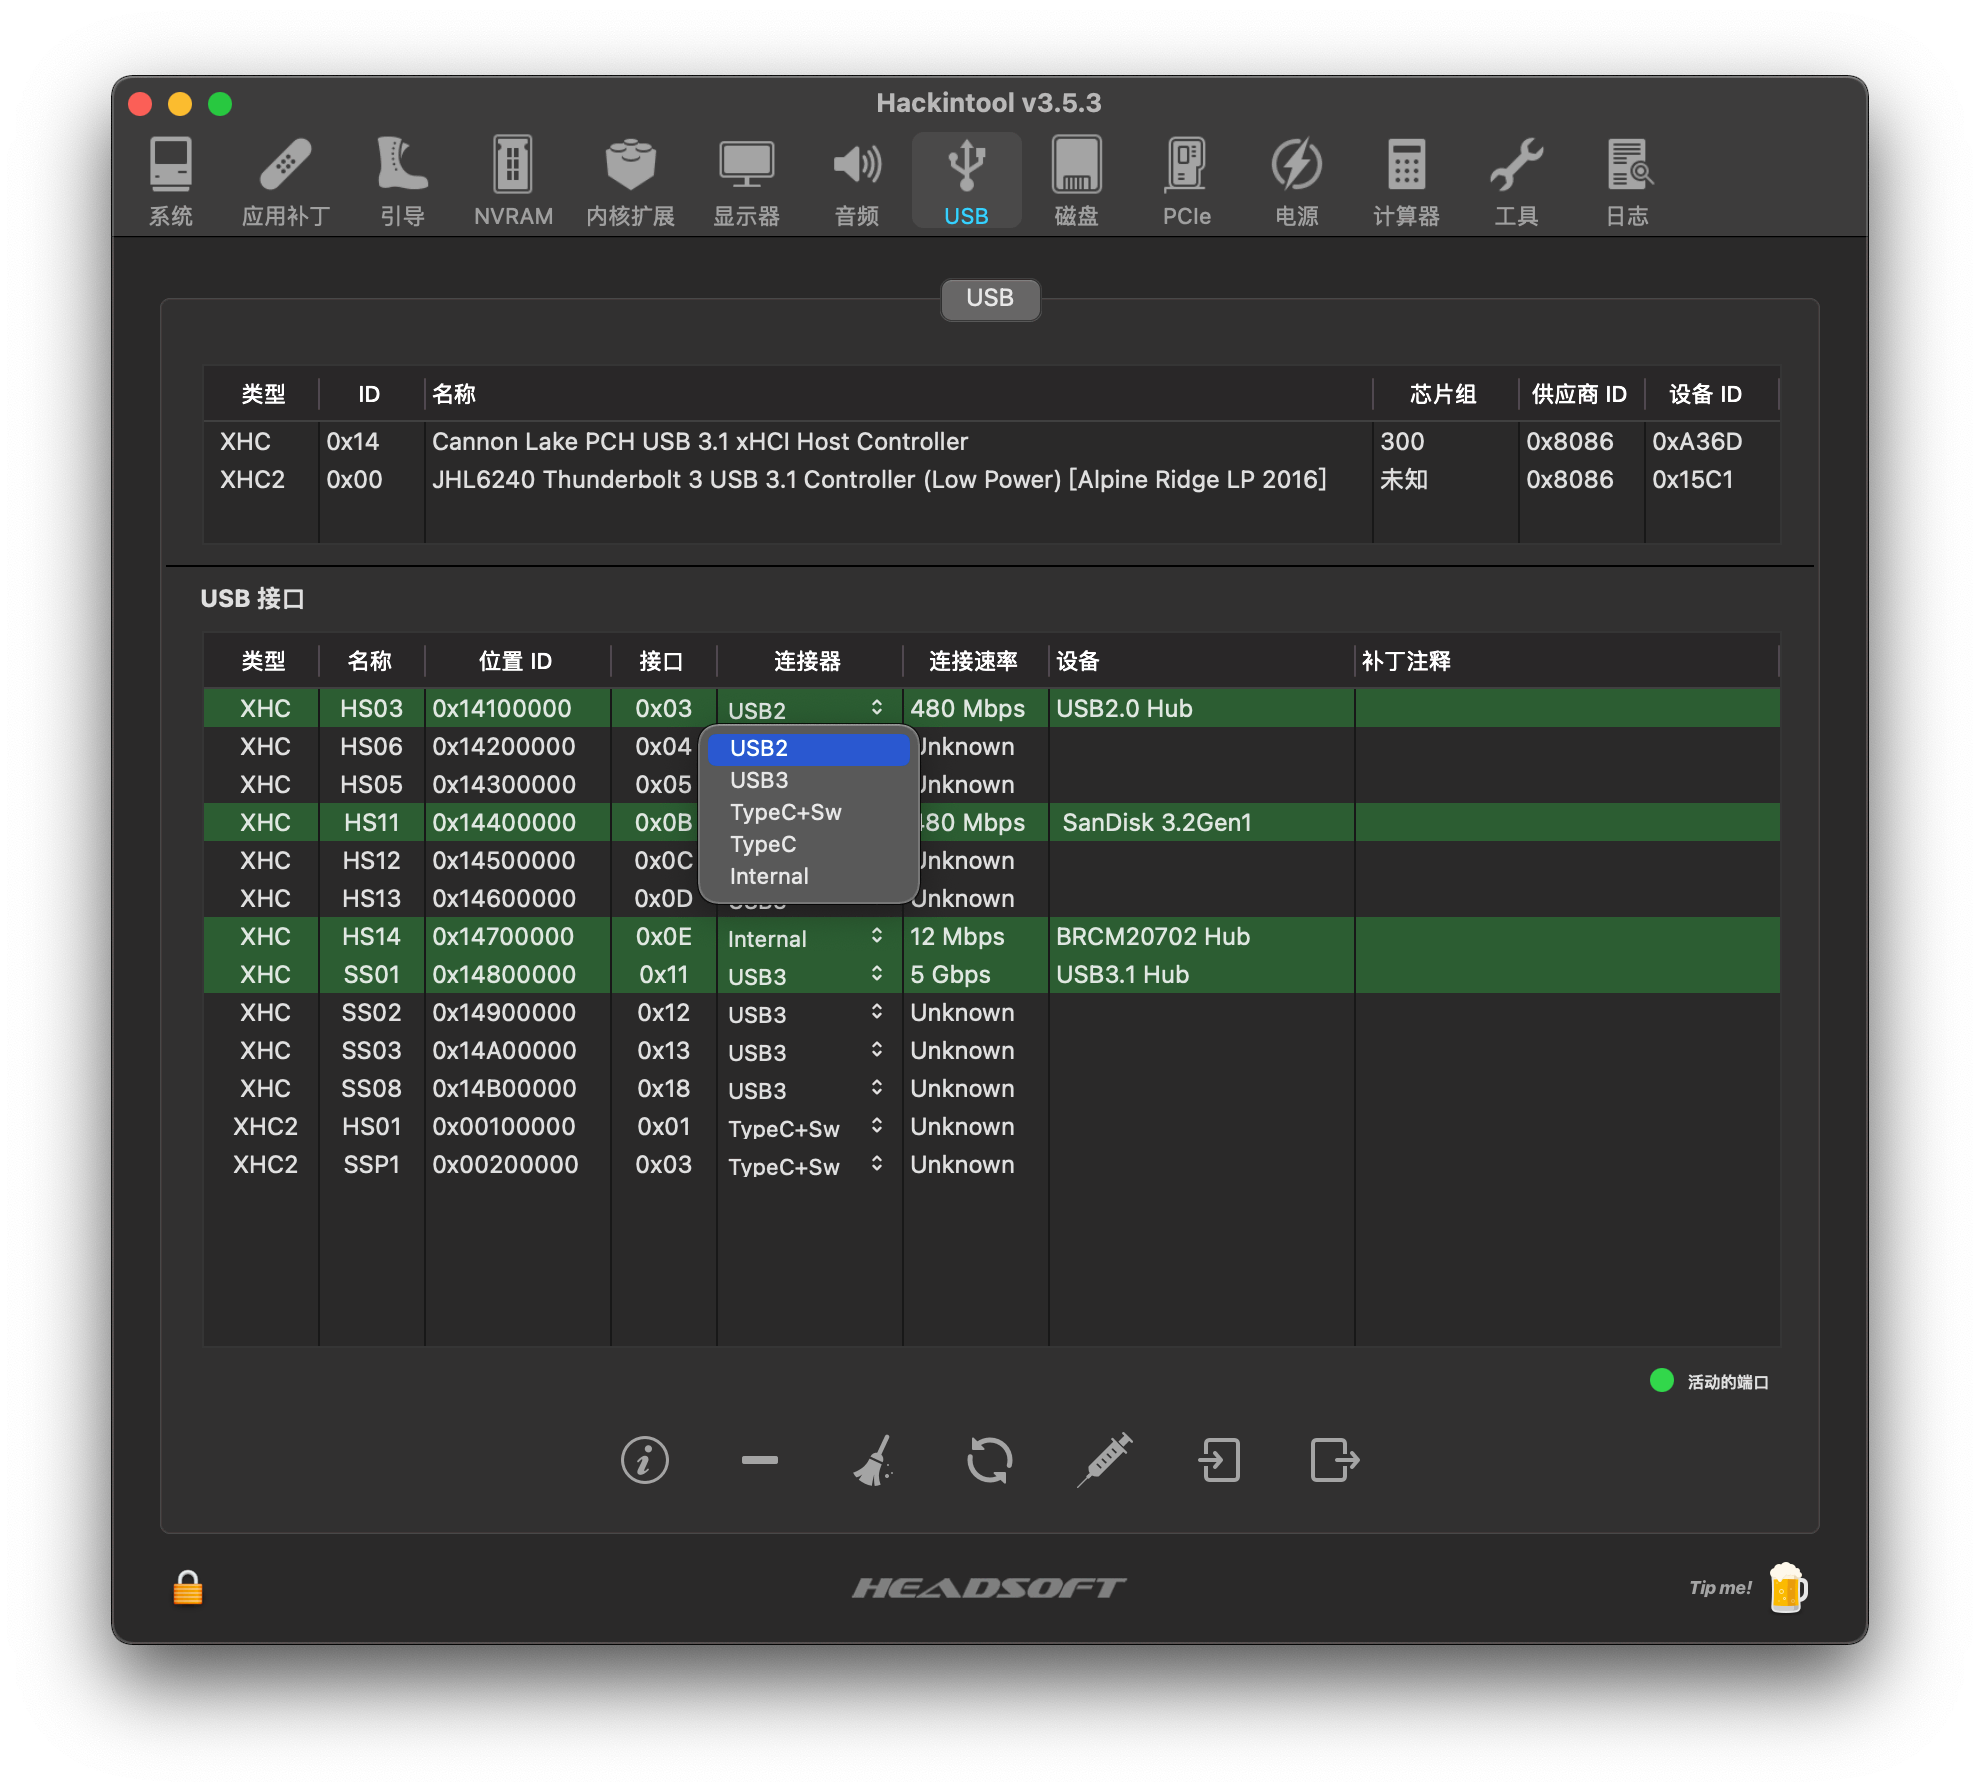
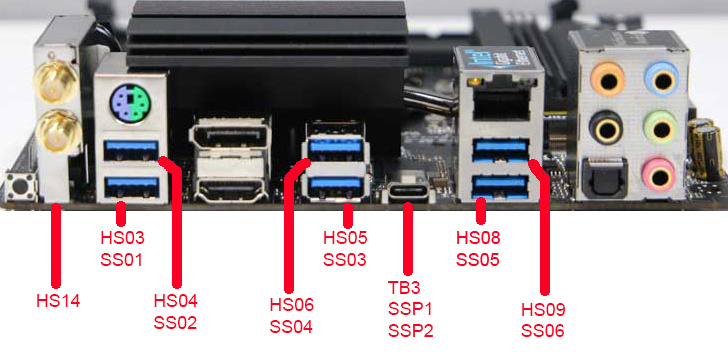
SSP1is not included)should below 15, you need to choose the type of device for them as well(USB2,USB3,TypeC+SW,TypeCandInternal) ⚠️ Noticed:HS14should be set asInternal
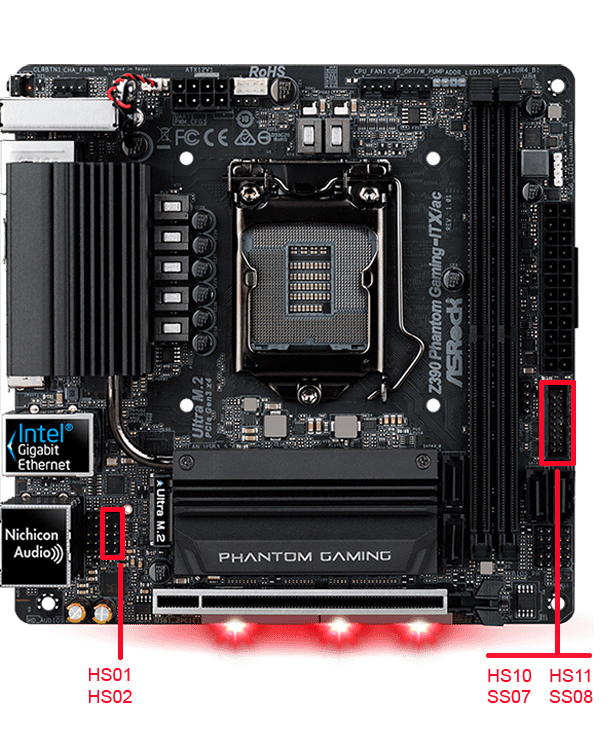
- Port distribution shown as below(
HSstands forUSB2andSSstands forUSB3)
- Export the kext file, which usually would save to your desktop as
USBPort.kext, put it inEFI->OC->Kext. - Reboot your system.
The latest release of this EIF is using the FakeSMC by CloverHackyColor which supports AMD's RX5000 Series and RX6000 Series GPU Die temperature sensor.
There are many applications are not optimized for Big Sur with the new icon style, we can replace these icons for a unify UI. Image below is how the lunchpad looks like in my case :
You can download these icons form macosicons.
I personally also make some of the icons and uploaded them to this website (this is an open-sourced project). If you are capable to make icons for the application you are using, please feel free to make contribution to this project.
-
The enable of the patch change _E2C to XE2C will cause APIC Error while booting Windows with OC
Solution: disable the TB3 Function or boot Windows with BIOS interface.
-
My device dose not support Apple TV + ?
Solution: Run
defaults write com.apple.AppleGVA gvaForceAMDKE -boolean yesforces AMD DRM decoder for streaming services (like Apple TV and iTunes movie streaming)
-
Time do not sync between Windows 10 and macOS.
- Solution:In Windows 10, run following code in CMD
Reg add HKLM\SYSTEM\CurrentControlSet\Control\TimeZoneInformation /v RealTimeIsUniversal /t REG_DWORD /d 1
- Solution:In Windows 10, run following code in CMD
📖 macOS Catalina 10.15安装中常见的问题及解决方法
📖 使用HIDPI解决睡眠唤醒黑屏、花屏及连接外部显示器的正确姿势
📖 华擎ASRock Z390 Phantom Gaming ITX/ac 雷电3 完美驱动 热插拔
📖 Sidecar and SMBIOS : iMac19,1 vs. iMacPro1,1
daliansky(黑果小兵)
ZeRo° Xu(冰水加劲Q)


-ff69b4)
-191970)
