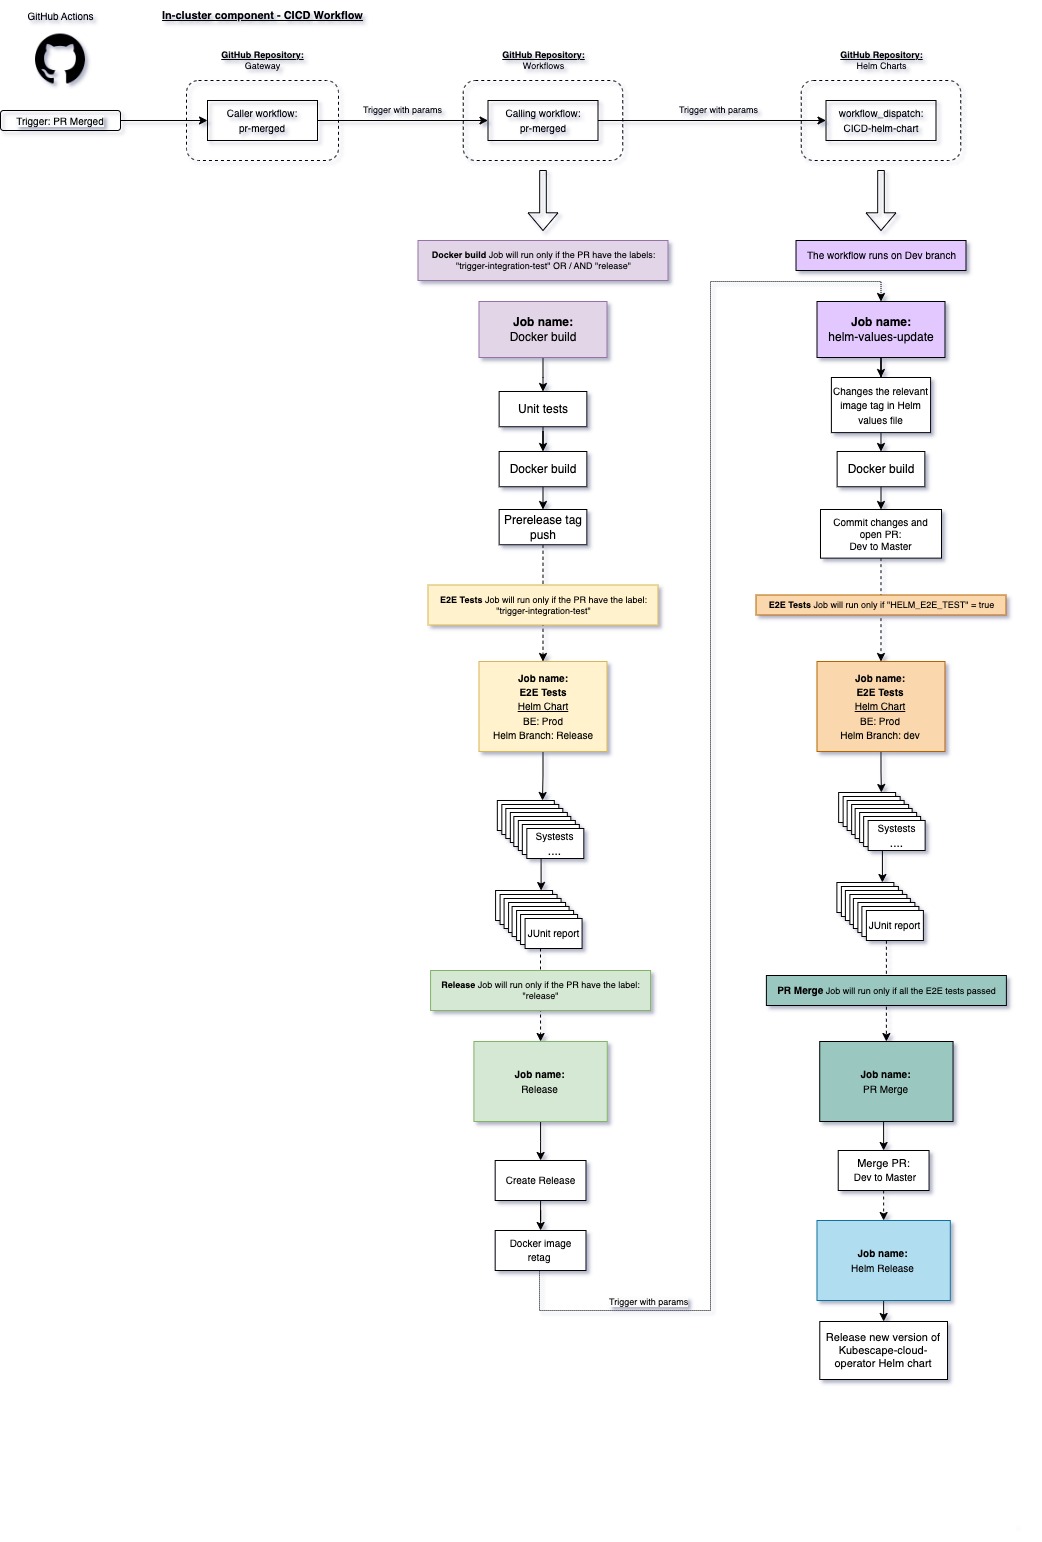
The helm chart CICD runs on GitHub Actions, and in most cases will be automatically triggered by one of the in-cluster components:
- Operator
- Kubevuln
- Kollector
- Gateway
You can find more about the automatic process of in-cluster components here.
When the CICD will be triggered by one of them, it will run always on the dev branch and will do the following steps in this order (High-level explanation):
- Check for valid inputs combination to prevent cases of providing incorrect inputs (most useful for manual triggers, see instructions below).
- Update the
values.yamlfile according to the arguments that passed. - Create a new commit for the new changes.
- Create a new PR from the
devbranch into themasterbranch. - Run E2E tests using
helm_branch=devparameter against the ARMO production backend, the tests will run as parallel jobs. - Create a JUnit report for every test.
- Only if all the tests successfully passed, the PR will be automatically merged into the
masterbranch. - The last step will create a new GitHub release and Helm release for the new chart.
If you want to manually trigger the CICD:
- Click on the “Actions” tab and click on the
00-CICD-helm-chartworkflow on the left side. - Click “Run workflows” on the top of the previous runs list.
- A new pop-up will appear with some options:
Branch- the branch you want to run the workflow from (in most cases will be the “dev” branch)CHANGE_TAG- if filled (true) the workflows will change thevalues.yamlfile according to the inputs you provided forIMAGE_TAGandCOMPONENT_NAMECOMPONENT_NAME- will be the in-cluster component we want to change the tag for.IMAGE_TAG- the new docker image tag of theCOMPONENT_NAME.HELM_E2E_TEST- if filled (true), the CICD will run the E2E Tests usinghelm_branch=devparameter
- Click on the
Run workflowgreen button.
This process will run only the release step from the CICD and will create a new GitHub release and will be published the helm charts
- Click on the “Actions” tab and click on the
03-Helm chart releaseworkflow on the left side. - Click “Run workflows” on the top of the previous runs list.
- Select the branch you want to create a release from by specifying it using the
Branch. in most cases will be the “master” branch - Click on the
Run workflowgreen button.
Note that running only the release process will not run any E2E tests
