How amazing it would be if we could just focus on code writing and at the same time have all the documentation of our projects created automatically. Even better if it could have the same feeling and style of Apple’s official documentation, right?
It is completely possible using Jazzy!
In this project, you can find a few technics to write native documentation while coding and have it converted to a great website that can be hosted using Github Pages.
Jazzy generates all the HTML, CSS and JS files for us. So, we don't need to worry about that. There can be a description of classes, enums, protocols, extensions, functions, properties, and a lot more.
Simply hold Command + Space, type Terminal in the Spotlight Search and hit return.
Now, type the following command:
sudo gem install jazzy
Enter your system password and wait until the process is completed.
It's important to understand a little bit about Markdown, once that's the way we need to comment our code to be used by Jazzy to generate the documentation for us.
Here you can read the Markdown Guide to give you some great inspiration.
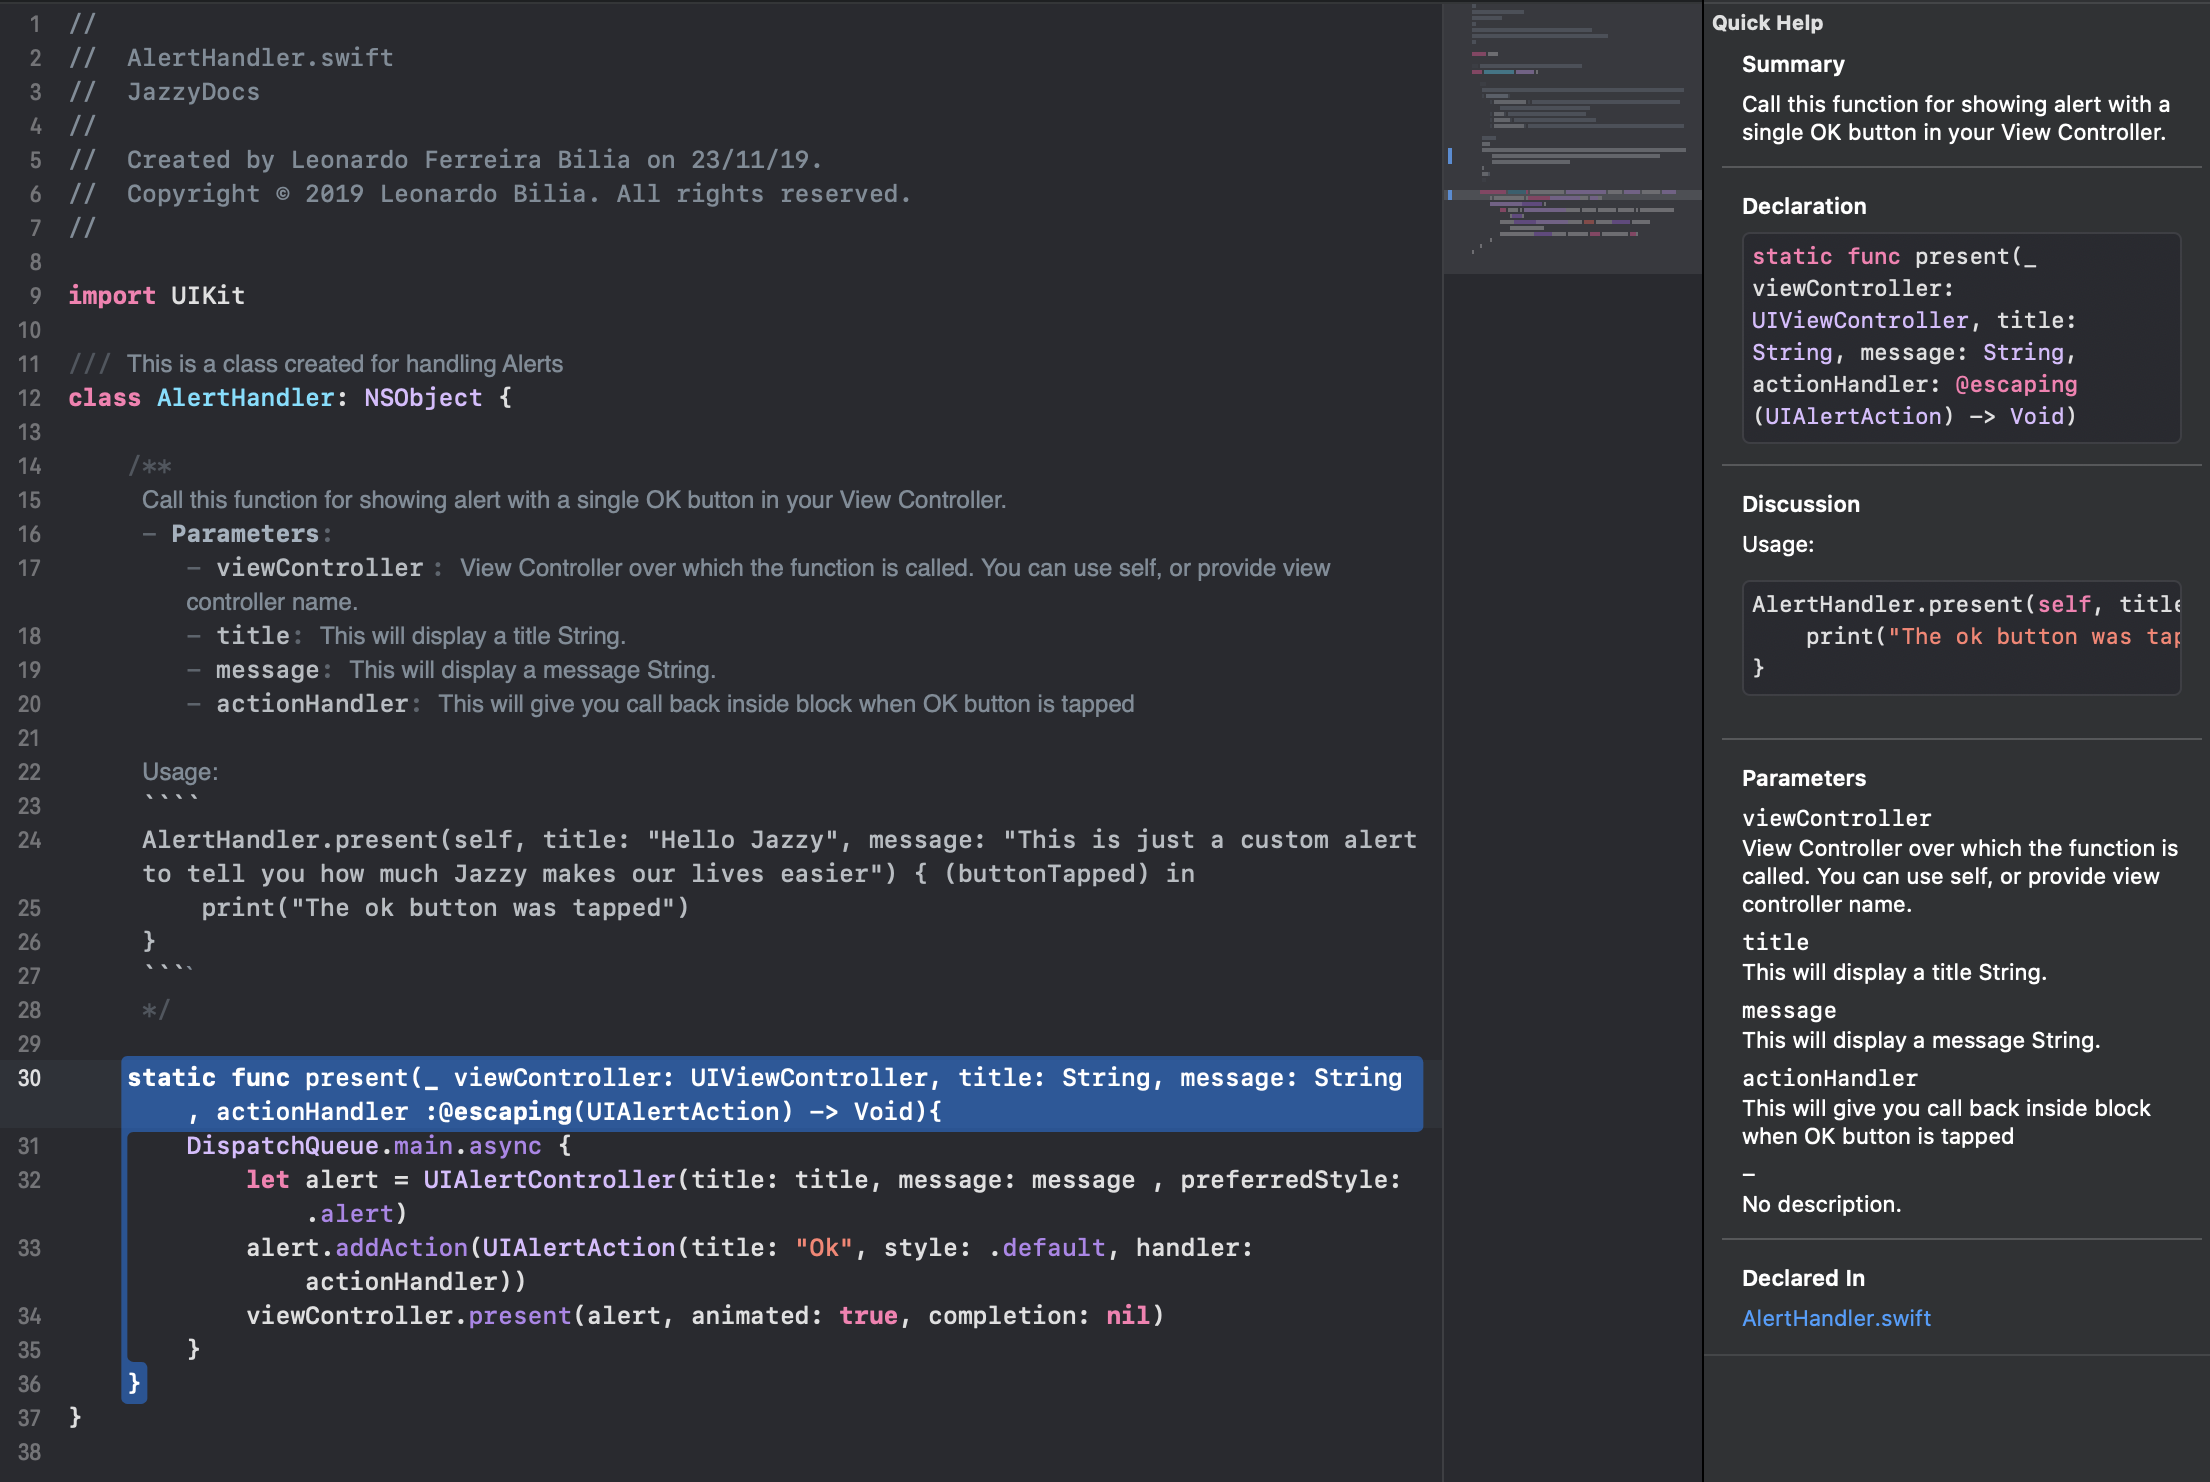
Take a look at this screenshot to have a glance at how I have commented on the class and how the native documentation looks like on the quick help inspector on the right side.
Back to Terminal and navigate to project root folder using the following command:
cd YOUR-PROJECT-ROOT-FOLDER-PATH
Ah, I was almost forgetting! If you need any extra help, you can use:
jazzy --help
Now for creating the magical document, just use:
jazzy --min-acl internal
And that's it!
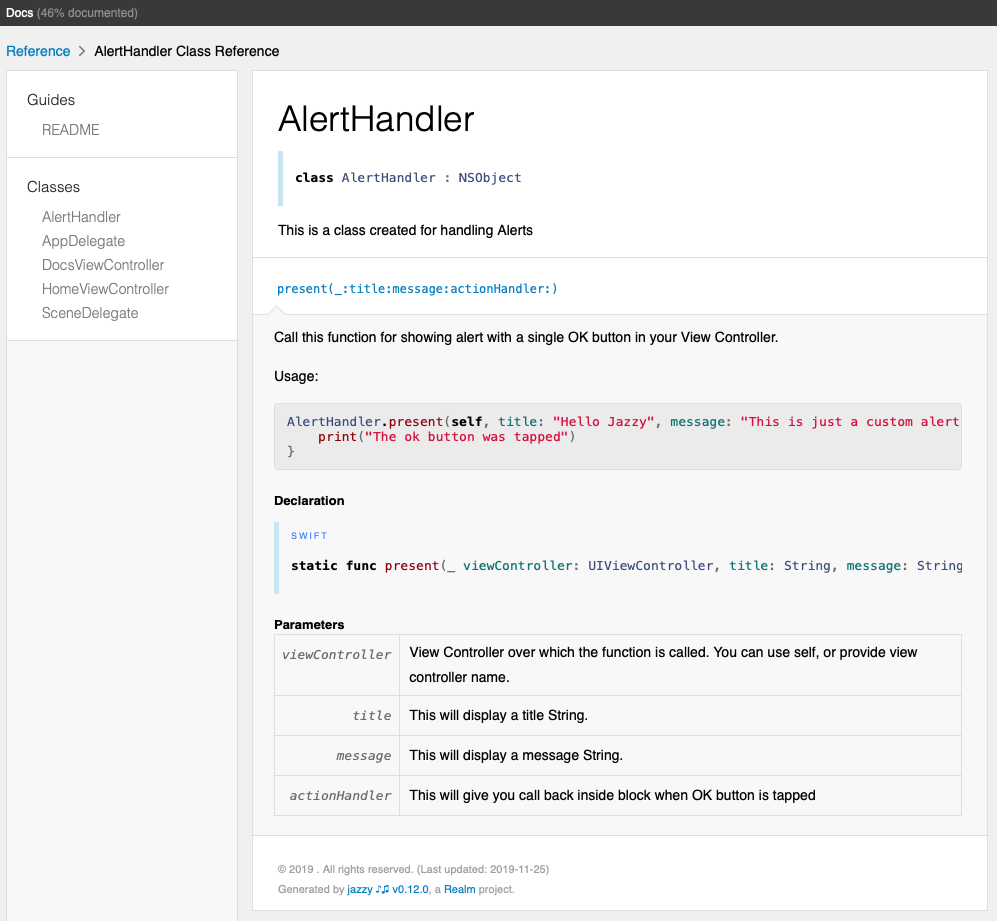
Go to your Xcode project folder and you will see a folder ‘docs’. Open the index.html and you will get your shine Apple's style documentation that will look like this:
Of course, there is! Instead of typing a weird code every time you want to re-generate your docs. Such as:
jazzy --min-acl internal
Why not making it sound more natural by encapsulating the Jazzy commands and settings inside of a Makefile?
documentation:
@jazzy \
    --min-acl internal \
    --no-hide-documentation-coverage \
    --theme apple \
    --output ./docs \
    --documentation=./*.md
@rm -rf ./build
Just open your favorite text editor and create a new Makefile with the code above and save it on the root folder of your Xcode project.
From now on we can simply run the code below on the Terminal to generate the documentation.
make documentation
min-acl internal
To document all public functions and variables, we set it to internal. But, if you would like also to document and expose private and fileprivate functions, the min-acl will need to be set to private.
no-hide-documentation-coverage Enables the project documentation percentage in the docs.
theme apple Pick the best theme for your project. Check the examples below:
output ./docs That is the output path of the generated documentation.
documentation = ./ * md Last but not least, we can add a section in the generated docs with a link to the ReadMe. So, we can use that as a home page for the docs.
Of course, you can host your docs on any website hosting you might own. Here I'm showing you how to use GitHub Pages. If, and only if you meet one of the following criteria.
- Your project must be set to public on Github.
- You have a Github Pro account
First of all, commit and push your project to Github and then:
- Go to your Github Settings
- Scroll to the bottom of the page until you find the section for the Github Pages
- Open the source dropdown menu and select the docs folder
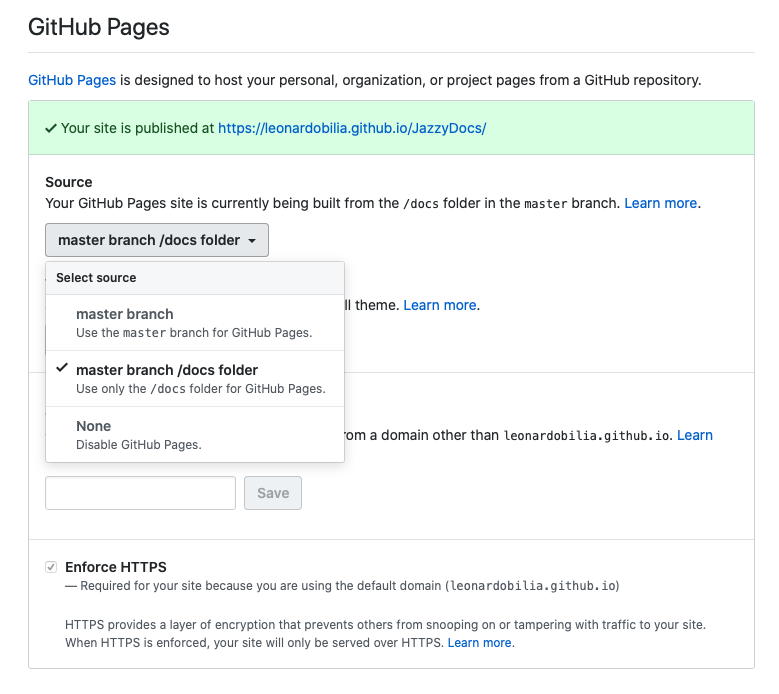
That's it. You will get a custom URL that you can use to link the ReadMe page to your brand new documentation. So, go ahead and check the one I have generated for this project.
Documentation examples for this project can be found here.
This project is released under the MIT license.