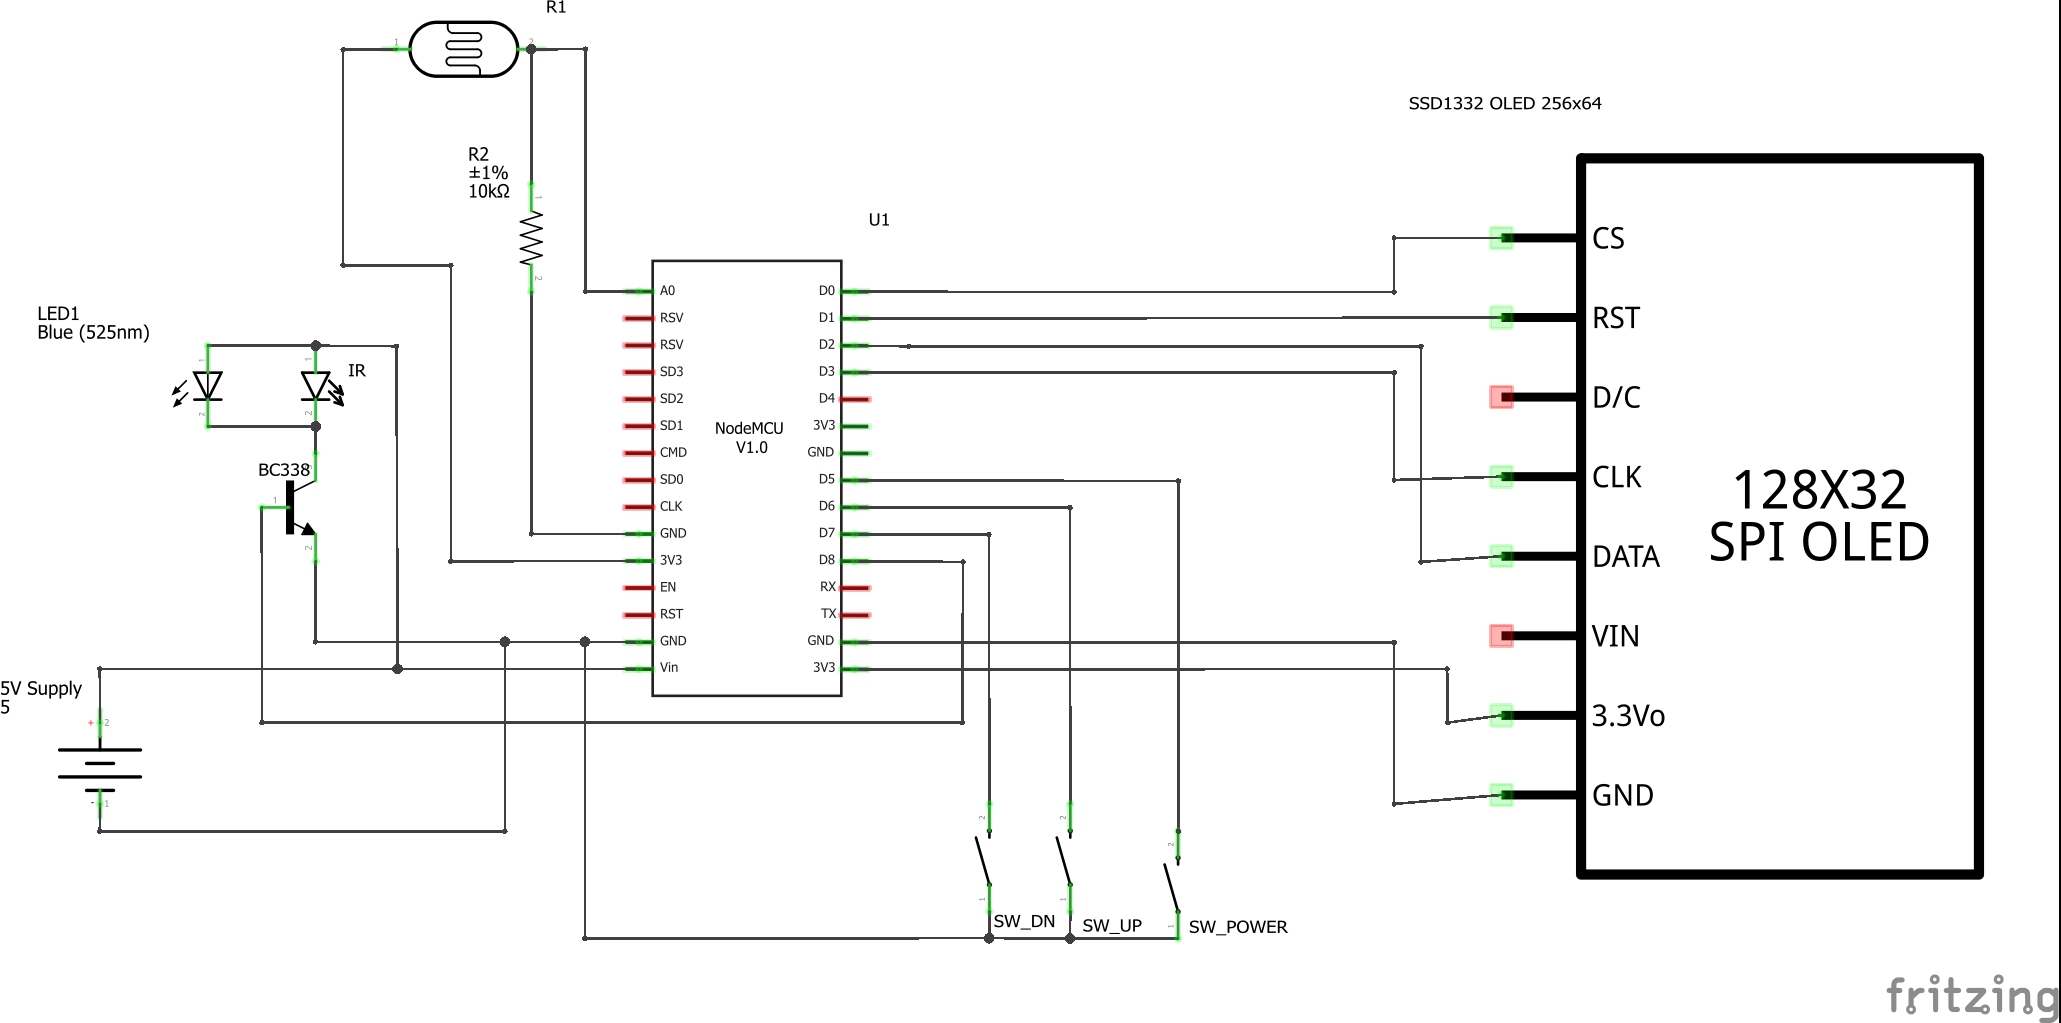
Code for ESP8266 Microcontrollers that control my DIY Air-Conditioner remote. Code in this repo is intentionaly to use with Homebridge MQTT plugin on raspberry Pi. I made a circuit and enclosure by myself. I know that my circuit might need to add some resistors, feel free to edit it in your design.
- Display NTP Clock when standby.
- Simple button control. Power, Temp up/down.
- Can control temperature, swing, fan speed and mode with HomeKit.
- Auto brightness according to ambient light.
- OTA Firmware upgrade.
- Control via HomeKit using HeaterCooler Service (iOS 11+)
- Control via HomeKit(Below iOS 11), Amazon Alexa using Fan service because it does not support AC control.
- ESP8266 NodeMCU
- OLED 256×64 SSD1332
- LDR(Light Dependent Resistor)
- Push Button
- IR LED and LED (normal led for indicate when IR is emitting)
- NPN Transistor BC338 - for increse voltage level for IR LED
You can use program like MQTTLENS to send this command
Topic
homebridge/to/add
Payload
{
  "name": "Smart AC",
  "service_name": "smart_ac",
  "service": "HeaterCooler",
  "manufacturer": "ESP8266",
  "firmwarerevision": "1.0.0",
  "SwingMode": 1,
  "RotationSpeed": {"maxValue":3, "minValue": 0, "minStep": 3},
 "CoolingThresholdTemperature": {"maxValue":28, "minValue": 18, "minStep": 1}
}- I didn't made this project to supports all AC. It requires some modification to works with your AC. Please take a look at IRremoteESP8266 library which supports variety of AC brand.
- I developed this program with VSCode with PlatformIO plugin. Please install all missing libraries with PlaformIO
- Don't forget to change MQTT server ip address to match yours.
- For the first time, use Wifi setup to connect to your router.
- PubSubClient
- IRremoteESP8266
- U8g2
- WifiManager
- ArduinoJson
- Schematics can be improved.
- Interrupt can cause system crash.

