pull_request
Step by step instructions that will guide you through the code contribution process. We will be using ataiya as an example GitHub username here, as it will allow us to show some "live" examples of pull requests.
Further information is also available here.
Sign the Contributor License Agreement.
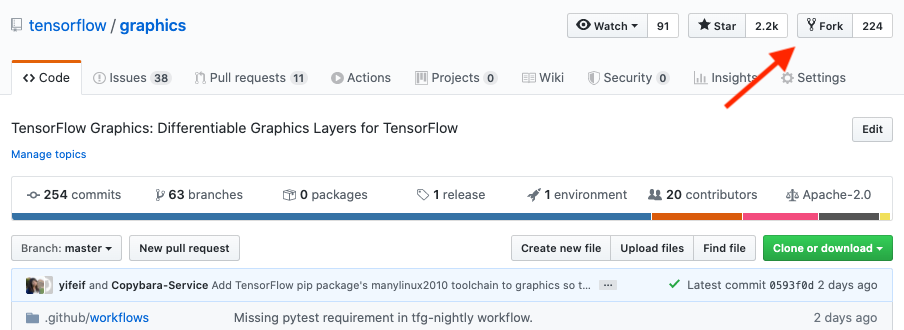
Fork the tensorflow_graphics repository on GitHub
~/: git clone [email protected]:ataiya/graphics.git ~/tfg
~/: cd ~/tfg
~/tfg:
Above we use SSH authentication, but you can use classical HTTPS too:
~/: git clone https://github.com/ataiya/graphics.git ~/tfg
~/: cd ~/tfg
~/tfg:
You will want to keep your fork up-to-date with the main codebase.
To do so, we will add an official remote:
~/tfg: git remote add official https://github.com/tensorflow/graphics.git
You can inspect the remotes you will be using:
~/tfg: git remote -v
official	https://github.com/tensorflow/graphics.git (fetch)
official	https://github.com/tensorflow/graphics.git (push)
origin	  https://github.com/ataiya/graphics.git (fetch)
origin	  https://github.com/ataiya/graphics.git (push)
If you are planning to make multiple isolated contributions, it is a good idea to use different branches, one per contributions you plan to perform. You can do so via git commands:
~/tfg: git checkout -b contribution1
Switched to a new branch 'contribution1'
~/tfg: git push -u origin contribution1
Branch 'contribution1' set up to track remote branch 'contribution1' from 'origin'.
~/tfg: git branch
* contribution1
  master
The published branch is now visible https://github.com/ataiya/graphics/tree/contribution1.
You could omit git push -u if you only wanted local branch, but we will need it to be public to be able to create a pull request.
You will want to update your branch often with the (master branch of the) official repo to minimize the chance of conflicts, or at least make them easier/faster to resolve:
~/tfg: git pull official master
 * branch            master     -> FETCH_HEAD
Already up to date.
As we just forked the official repository, our branch is already up to date.
WARNING: this will erase any local changes
~/tfg: git fetch official
~/tfg: git reset --hard official/master
HEAD is now at 0593f0d [...]
~/tfg: echo "Simple test change" >> simple_test_change.txt
~/tfg: git add simple_test_change.txt
~/tfg: git commit -m "A simple test change"
~/tfg: git push
And now our simple "A simple test change" is visible on the public fork: https://github.com/ataiya/graphics/commit/cdb1eae62febf7850871aa5efd466165d03fcdf4
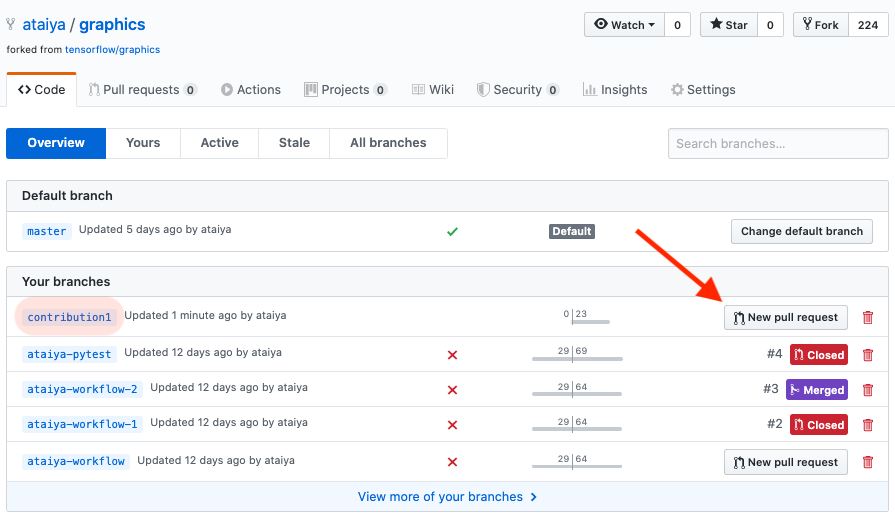
We can now visit the branches page of your fork
https://github.com/ataiya/graphics/branches
and press New pull request:
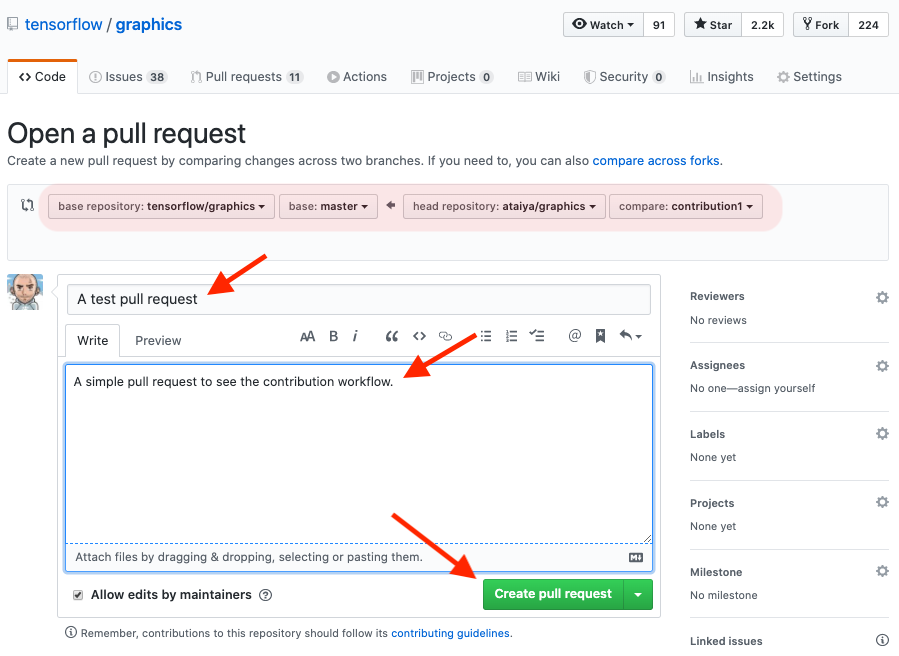
Make sure to choose a good name for your PR (pull request) and fill out a description of your work.
Also ensure you are creating a PR against base repository: tensorflow/graphics and base: master.
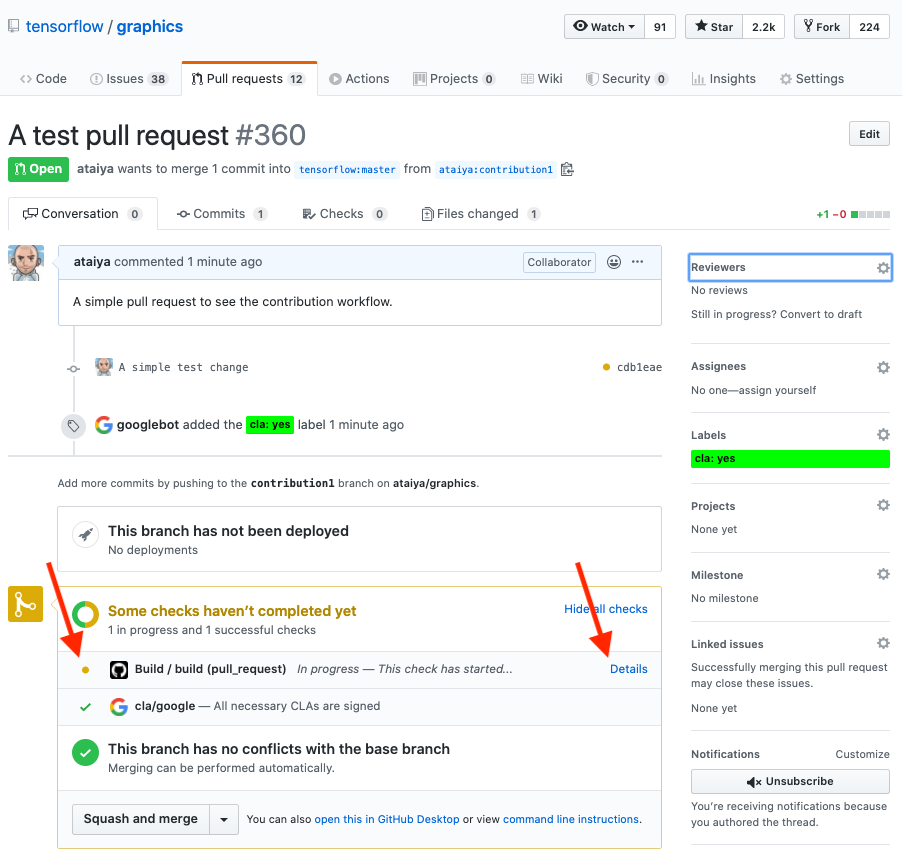
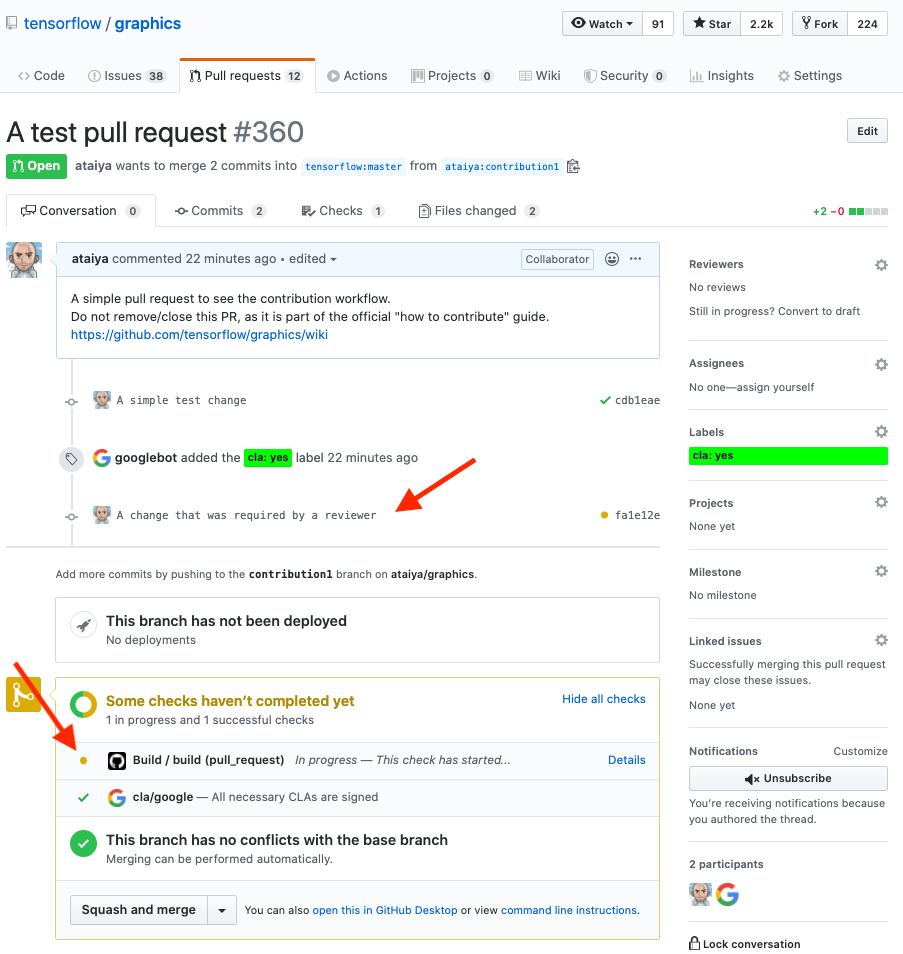
Pressing "Create pull request" created Pull Request #360 in the official repo. The important bits to notice here is that the CLA check has passed, and that the Github Actions / Build continuous integration has started executing (this can take a few minutes).
You can press on Details to see the progress of the Build action, and check how to replicate the execution of these tests locally by inspecting //.github/workflows/build.yml. Once these checks have completed successfully, the orange dot to the left will be changed to a green checkmark.
WARNING: we will not be notified about your pull request until all checks have passed.
Once the pull request is created, one of the official contributors will perform a code review of your pull request, and likely require a few changes. To make any change, you can simply push to that branch, as Github automatically syncs a pull request with the branch it originated from; let us see this with an example:
~/tfg: echo "Another simple test change" >> another_simple_test_change.txt
~/tfg: git add another_simple_test_change.txt
~/tfg: git commit -m "A change that was required by a reviewer"
~/tfg: git push
Note that the page of Pull Request #360 has now been updated with the changes you just made, and, as you updated your code, a new continuous integration test was launched by GitHub actions.
WARNING: do not modify the code in the PR branch after the branch has been approved, as this will result in you losing these changes.
Once your PR is fully approved, the pull request is transferred to the Google side, where one of the Google software engineers will perform another round of code review, and apply any necessary fine-tuning changes. Your PR will be merged with the master without you having to take any further action, but it might take a few days for your changes to become visible. As a rule of thumb, smaller PRs are approved significantly faster. So try to breakdown your project into smaller, self-contained, and independent contributions.