- The first thing is to tell the build system which arm-gcc you want to use. To do that makefile expects the environment variable
ARM_GCC_BIN_FOLDERto be set.
export ARM_GCC_BIN_FOLDER="$PATH_TO_ARM_GCC_TOOLCHAIN/gcc-arm-none-eabi-10.3-2021.10/bin"
Note that you can add the previous export to your ~/.bashrc so that you don't have to repeat the export each time you open a new terminal.
- Clone Simple Slave Project
$ git clone [email protected]:trns1997/simpleSlave.git
$ cd $PATH_TO_SIMPLE_SLAVE_PROJECT
- Build Binaries
$ ./build.sh -h
Usage: ./build.sh mcu product board
OR
Usage: ./build.sh unit
Supported mcus:
  - XMC4800_F144x2048
Supported products:
  - ankle
  - blinker
  - fallsafe
Supported boards:
  - ankle
  - relax
Example if you wish to build product blinker on the board xmc4800 relax kit which has mcu XMC4800_F144x2048:
./build.sh XMC4800_F144x2048 blinker relax
$ ./deploy.sh -h
Usage: ./deploy.sh target product board
Supported targets:
  - XMC4800-2048
Supported products:
  - ankle
  - blinker
  - fallsafe
Supported boards:
  - ankle
  - relax
Example if you wish to deploy product blinker on the board xmc4800 relax kit which has target XMC4800-2048:
./deploy.sh XMC4800-2048 blinker relax
Debugger using Visual Studio Code
1. Download Visual Studio Code: [link](https://code.visualstudio.com/)
2. Visual Studio Code Plugins:
3. Running the debugger
- In Visual Studio Code, open this project :
File->Open folder - Plug in the XMC board with USB connection.
- Press F5 to run debugger
Debugger using Eclipse
1. Install Eclipse Embedded CDT https://projects.eclipse.org/projects/iot.embed-cdt
2. Install Jlink, GCC ARM, OpenOCD
3. Setup in the project options the MCU tools: 


4. Setup in the project options the build options: 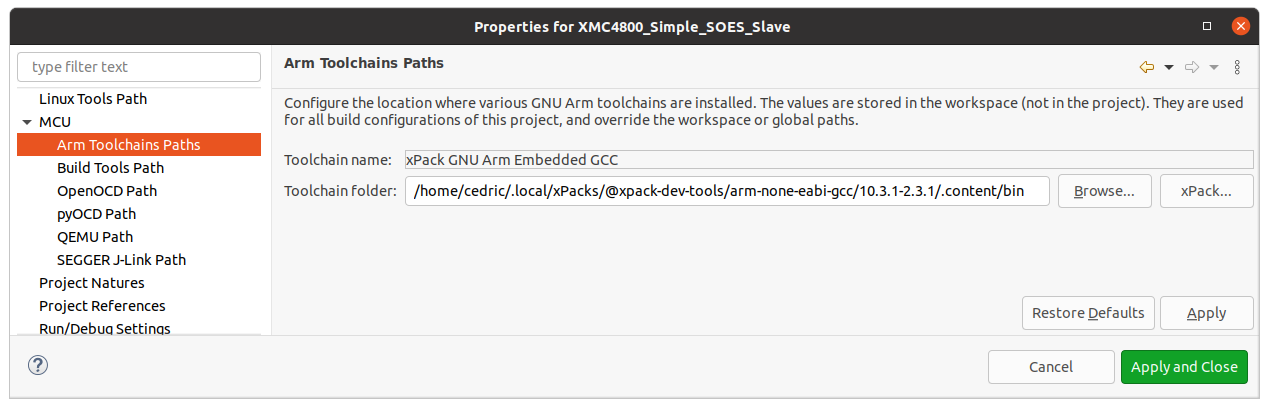

5. Setup the debug configuration: 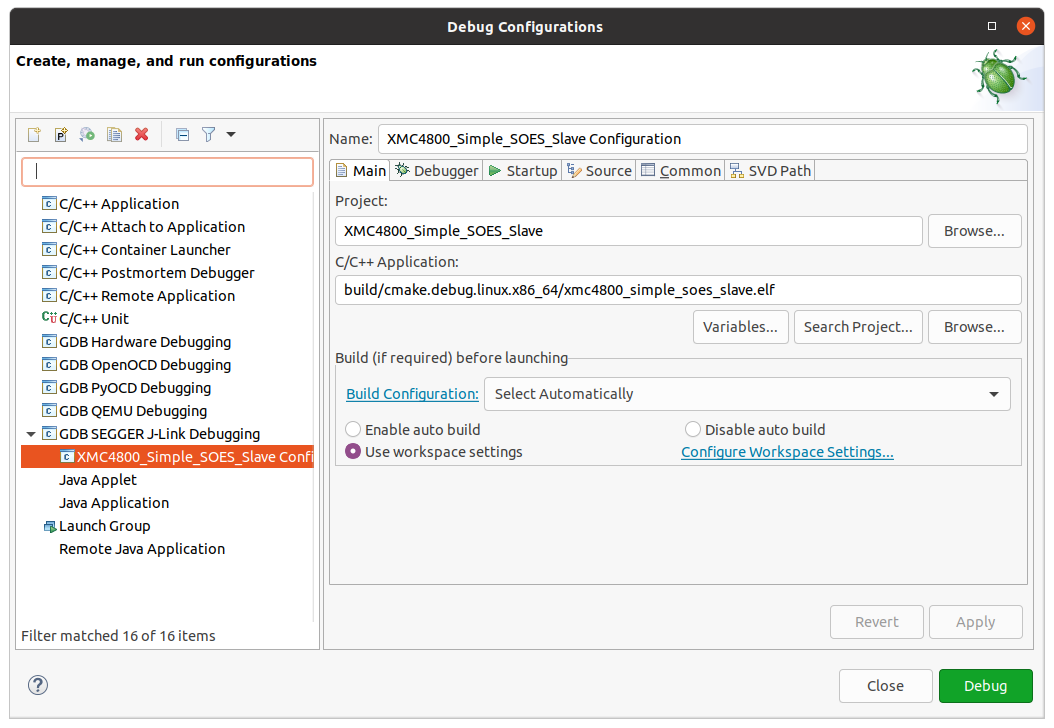

