- Navigate to Library/Application Support/adobe/CEP/extensions
- Place the com.giadc.digitalToolbox folder into the extensions Folder
- Drag and drop the extensions folder into the favorites side panel on your finder
- In terminal type:
defaults write com.adobe.CSXS.6 PlayerDebugMode 1
killall -u <username> cfprefsd
- Run plugin from Window > Extensions > digitalToolbox
- Restart computer if plugin does not load.
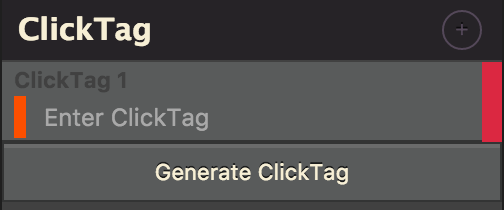
- The only thing required at this point is a url for the clickTag.
- The orange box will appear on the left indicating it is required to enter a clickTag.
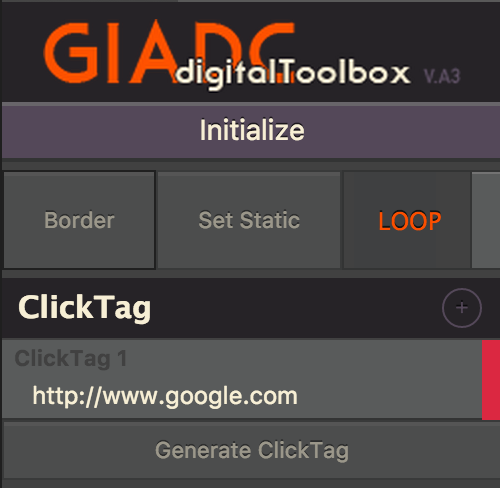
- After a url is entered, the initialize button can be pressed. The border will default at 1px black, the loop at loop, and the static image at the end of the timeline.
- The publish settings will be set at this point. You should not have to worry about the publish settings from this point.
On the top row you will find the Border, Static, and Loop settings.
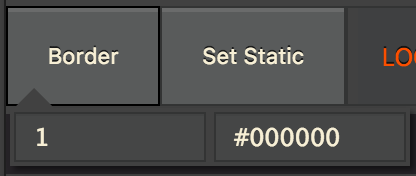
- To set the border click the button. A menu will appear with the border settings:
-
Change the settings as needed.
-
Once you have the values set, click the border button again. The menu will disappear and the border will be created. A preview of the border will also be applied to the border of the button. The settings menu will not disappear until the border button is hit again.
This button needs to be used to at least edit the border's width in order to have a border that displays properly. If you don't want to use the button to edit the color, you can edit the color by directly selecting it.
You can set the static jpg and the end frame by moving your timeline to the desired location and clicking set static. You can also drag the keyframe with the static flag in the timeline if you do not wish to use the button.
The toggle switch can be used to choose a 3x loop or a replay button. If set to replay, a replay button will be added to the last frame, and default to the upper right corner. It can be moved and the color changed manually if needed.
- To change url, just click on the area containing the url.
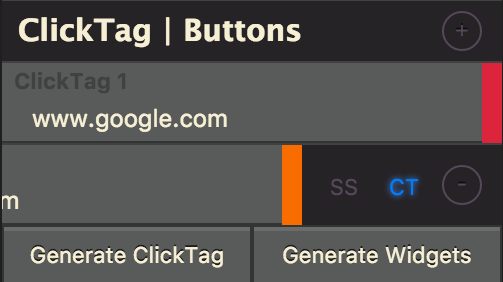
- You can add up to 9 clickTags by pressing the + button in the clickTag area header.
- To remove a clickTag, click on the specific clickTag you want to remove. The panel will slide over allowing you to remove that specific clickTag by pressing the - button:
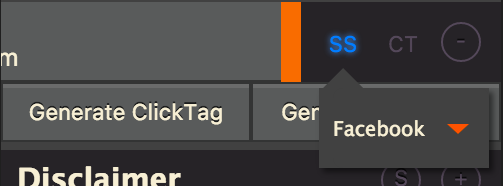
- The CT (clickTag) button will be blue if it is a clickTag. If it isn't, you can press the CT button to convert it back to a clickTag.
- When the SS(Social Share) button is pressed, a drop down menu will appear. You can use this menu to choose the type of icon what will be imported in. They are all svgs for optimum resolution. (Facebook, Twitter, Instagram, Button):
-
The button option can be used to generate cta buttons and misc social icon clickthroughs. To make a button, design or import the content you want to make a clickable button, turn it into a symbol, then name it 'btn_button' followed by a number.
-
After you have the tags and urls wanted, click Generate ClickTag. They will default being over the entire ad, and be spread even over the timeline. This can be edited manually if a hotspot clickTag is needed. If the size and position is edited, be sure to edit the outside button symbol, not the inside content of the button. To generate the widgets/buttons, click the generate widgets button. All social icons and custom buttons will be generate and imported to the stage. You can edit them and reposition them as needed, but leave the code as is to make sure it clicks through properly. A prompt will now also appear to control whether or not the clicktags will be distributed even along the timeline. If that is not wanted just enter 'n' and all the clicktags will be on the whole timeline.
Only this tool should be used to add/remove clickTags rather than removing them manually.
The disclaimer tool is able to add up to 3 disclaimers. The text field on the disclaimer entries is used to select which clickTag's clickthrough url that disclaimer will use.(Disabled if click version of disclaimer is selected).
- You can add a disclaimer by clicking the + button in the disclaimer area header:
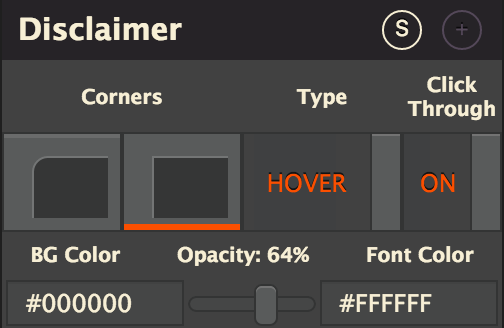
- To edit the settings for the disclaimers, click the S button in the in the disclaimer area header. A menu will slide down where you can edit corners(round or sharp), activate the disclaimer by click or by hover, click through or not(click version of disclaimer defaults this to off), color of font, opacity of bg(slider), and the color of the background:
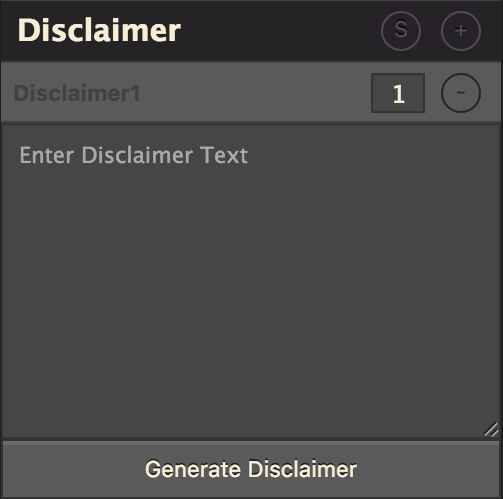
- To edit the text of the disclaimer, click the box of the disclaimer you wish to edit. The font will be open sans(web font). The bottom right corner can be dragged to resize the disclaimer textarea if more space is needed. IMPORTATNT: Before you generate a disclaimer, be sure that your text tool is set on dynamic text. I'm not sure if I can set that from the plugin, but I'm looking into it
- To remove disclaimer just click the - button.
- After everything, is set just click the Generate Disclaimer button and it will be add.
Note: currently we do not have web fonts(we need the latest update), so it will default to times New Roman(ugly) for now. This may cause the disclaimer to size itself strangely, if this happens, you can go in an edit the content in the symbols. Everything should be ok as long as you don't mess with the code. You can even alter the animation, just not the code.
The footer tool includes the publish button, the publish jpg button, the size of the static jpg, the size report, and lastly the refresh button.
This will publish the html document and the sprite sheet. The size report will be calculated at this point. The publish settings will also be set here as well, just as a fail safe to make sure the ad is published properly.
This publishes the static jpg based on where you have the static flag on the timeline set. It will also put the jpg in the correct folder and automatically name it based on the SUB or COR file. If neither file is present, it will name it based on the name of the fla file.
This sets the max size the static jpg will be. It will default to 40kb, but can set to what ever you need.
This will be generated when you publish the html file. It includes the size of the html + size of the sprite sheet.
This will automatically retrieve the info in an already created ad and auto populate the fields. It's a way to force it if, for some reason, it doesn't auto populate on it's own. It is also used to clear all info on a new ad. If you have a blank fla file open, and this is pressed, it will put everything back to default. The size report will also re-calculate the size report. This can be especially useful if you have optimized the sprite sheet and want an up to date size report.
