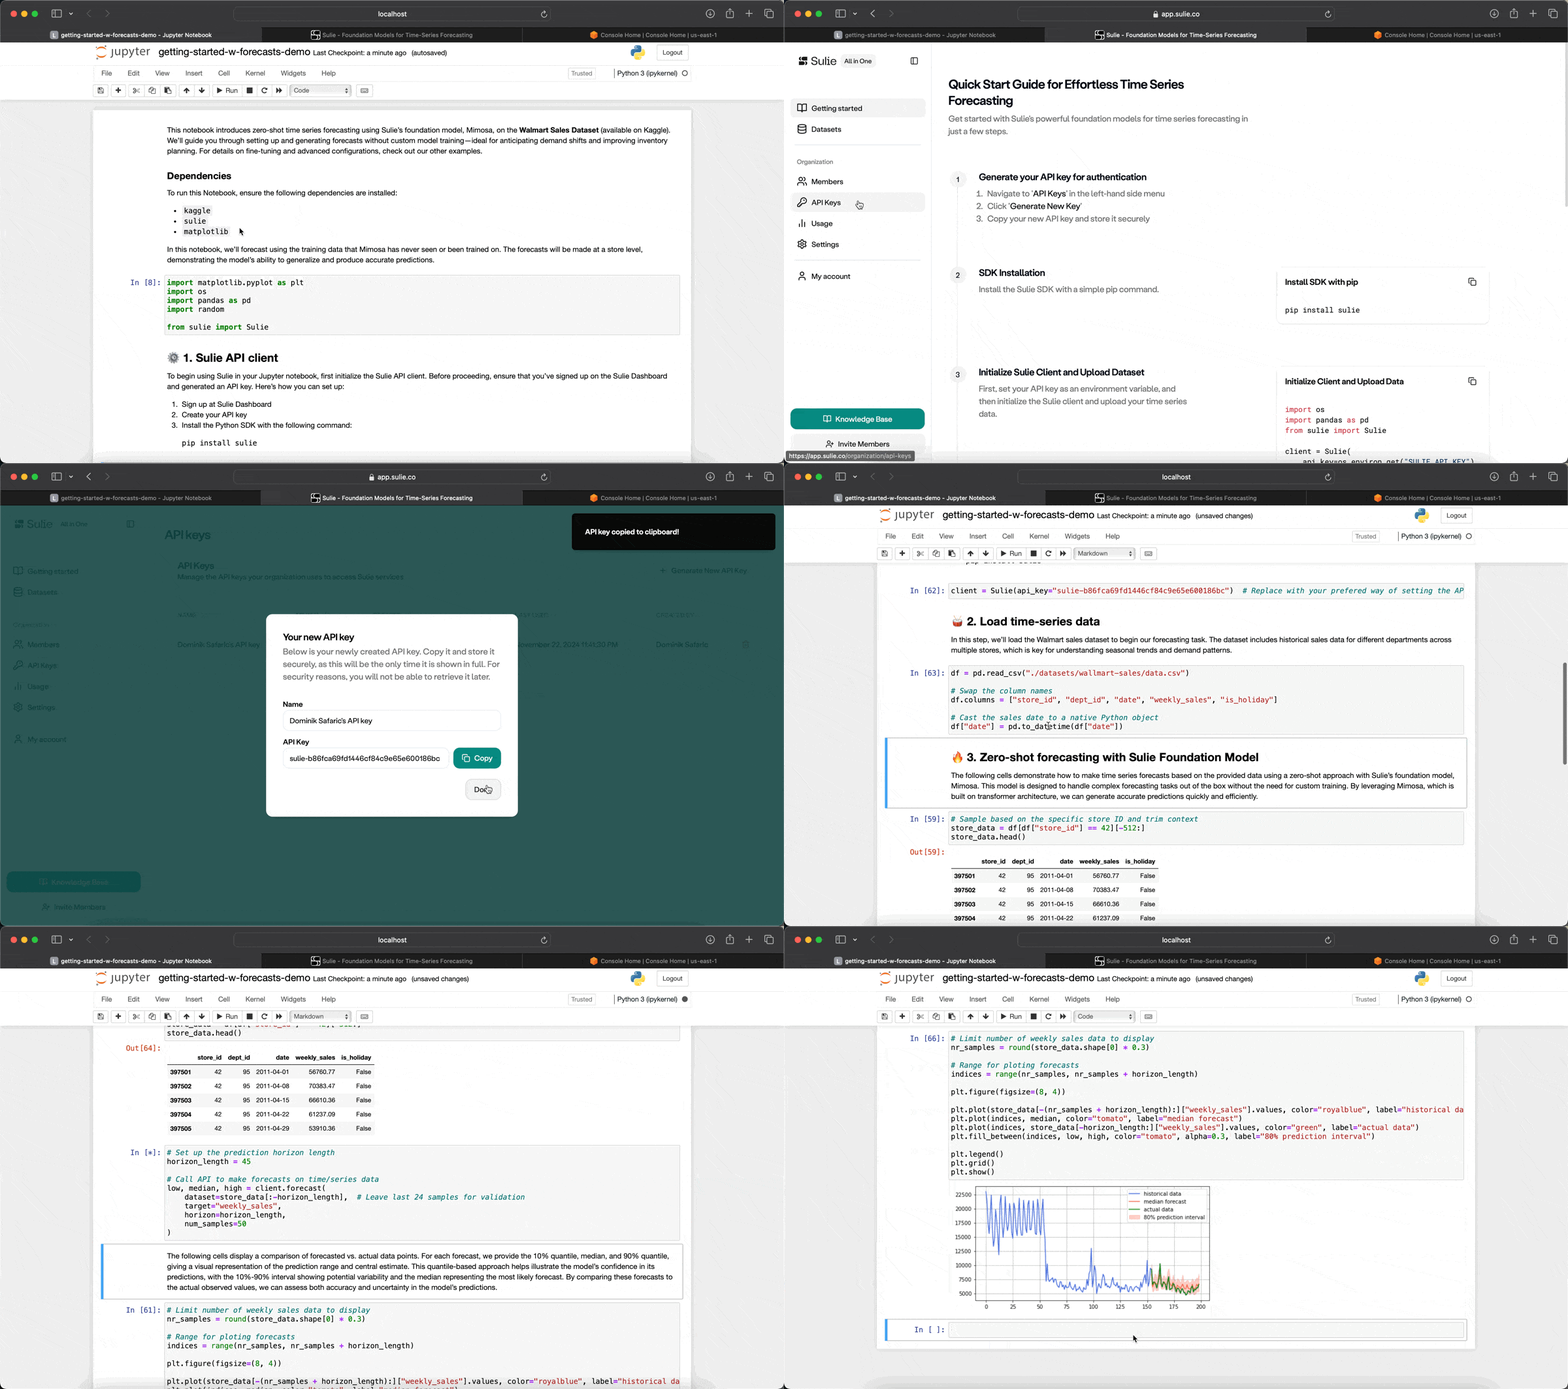
Sulie offers cutting-edge foundation models for time series forecasting, enabling accurate, zero-shot predictions with minimal setup. Our transformer-based models automate the process, eliminating the need for manual training and complex configurations.
Documentation · Report Bug · Join Our Slack · Twitter
- Zero-Shot Forecasting: Obtain precise forecasts instantly with our foundation model, without requiring training or preprocessing of historical data.
- Auto Fine-Tuning: Enhance model performance with a single API call. We manage the entire training pipeline, providing transparency into model selection and metrics.
- Covariates Support (Enterprise): Conduct multivariate forecasting by incorporating dynamic and static covariates with no feature engineering needed.
- Managed Infrastructure: Focus on forecasting as we manage all aspects of deployment, scaling, and maintenance seamlessly.
- Centralized Datasets: Push time series data continuously through our Python SDK, creating a centralized, versioned repository accessible across your organization.
To begin using the Sulie SDK, you’ll need an API key, which can be generated from the Sulie Dashboard:
- Visit the Sulie Dashboard.
- Sign in to your Sulie account.
- Navigate to the API Keys section.
- Generate a new API key and copy it to use within the SDK.
With your API key ready, you’re set to start forecasting.
To install the Sulie SDK, simply run:
pip install sulie==1.0.8After installation, initialize the SDK using your API key to start forecasting with Mimosa:
from sulie import Sulie

# Initialize the Sulie client
client = Sulie(api_key="YOUR_API_KEY")Generate accurate time series forecasts using Mimosa’s zero-shot inference capabilities. This approach is ideal when you need fast, reliable predictions without training the model.
import pandas as pd

# Example time series data
df = pd.DataFrame({
    'timestamp': pd.date_range(start='2023-01-01', periods=1000, freq='H'),
    'demand': [ ... ],           # Demand data
    'location': ['Plant A', ...] # Data for different locations
})

# Forecast demand for each location over the next 24 hours
forecast = client.forecast(
    dataset=df,
    target_col='demand',
    id_col='location',
    timestamp_col='timestamp',
    frequency='H',
    quantiles=[0.2, 0.8],
    horizon=24            # Predict 24 hours ahead
)
print(forecast)
The Forecast object includes two properties: median and quantiles, corresponding to different certainty levels in the predictions. These help you understand the range of possible outcomes, from conservative to optimistic.
If the id_col was set, forecast returns a list of Forecast objects.
You can also visualize the forecasts directly by calling the plot function:
forecast.plot()This quickly generates a chart showing the forecast ranges, making it easy to spot trends and variability in the results. Perfect for a fast, clear analysis.
| Name | Description | Default |
|---|---|---|
dataset |
A Dataset or pd.DataFrame containing time series data. |
Required |
target_col |
Column name for the forecast variable. | Required |
id_col |
Column name for multiple time series IDs (e.g. locations). | None |
timestamp_col |
Timestamp column name. | None |
frequency |
Frequency of the time series (e.g., H for hourly). |
None |
horizon |
Time steps to forecast ahead. | 24 |
With automatic fine-tuning, you can optimize Mimosa for unique datasets and business cases. The fine-tuning process uses Weighted Quantile Loss (WQL) for evaluation, ensuring high accuracy.
# Fine-tune Mimosa on custom dataset
fine_tune_job = client.fine_tune(
    dataset=df,
    target_col="demand",
    description="Fine-tune for Plant A demand prediction"
)

# Check the fine-tuning job status
print(f"Job status: {fine_tune_job.status}")| Name | Description | Default |
|---|---|---|
dataset |
A Dataset or pd.DataFrame with time series data. |
Required |
target_col |
Target variable for optimization. | Required |
id_col |
Name of the column to group the DataFrame series by. | None |
description |
Description of the fine-tuning job. | None |
Once fine-tuning completes, the model is automatically deployed and available for forecasting.
Sulie’s Dataset API lets you manage and version your datasets, making them accessible for forecasting and fine-tuning across teams.
# Upload a dataset to Sulie
dataset = client.upload_dataset(
    name="product-sales-data-v1",
    df=df,
    mode="append"  # Choose 'append' or 'overwrite'
)

# List available datasets
datasets = client.list_datasets()
print(f"Available datasets: {datasets}")- Upload: Store and version your data for easy access and updates.
- List: Retrieve a list of uploaded datasets.
- Update: Append or overwrite data for an existing dataset.
Note
Datasets are an optional feature. To make forecasts or even fine-tune a foundation model, you may also pass a Pandas DataFrame to the forecast and fine_tune functions.
Fine-tuned models can be selected for new forecasts using list_custom_models or get_model.
# List custom and fine-tuned models
custom_models = client.list_custom_models()

# Select and forecast with a fine-tuned model
model_name = custom_models[0].name
custom_model = client.get_model(model_name)

# Forecast using the selected model
forecast_custom = custom_model.forecast(
    dataset=df,
    target_col='demand',
    id_col='location',
    timestamp_col='timestamp',
    frequency='H',
    horizon=24
)
print(forecast_custom)- API Documentation: Full documentation with detailed usage.
- Forecasting Guide: Detailed parameters for Mimosa forecasting.
- Fine-Tuning Guide: Options and tuning customization.
- Support: Assistance and feedback on the SDK.


