-
Notifications
You must be signed in to change notification settings - Fork 257
Visual Studio Code智能提示
-
进入 "Code -> 首选项 -> 用户代码片段",选择xml。 在打开的xml.json中将下面文件中的内容粘贴到里边保存 https://raw.githubusercontent.com/zhenglibao/FlexLib/master/Doc/res/vscode-xml.json
-
进入 "Code -> 首选项 -> 设置" , 在打开的用户设置中添加如下内容 (注意:对于某些版本的VSCode,可能弹出的是一个窗口界面,则点击右上角的"..."按钮,打开json设置页面)
{
  .......
  //////////////////////
  // 要增加的内容
  "editor.quickSuggestions": {
    "other": true,
    "comments": true,
    "strings": true
 },
 //建议增加下面这行,可以屏蔽自带的html提示
 "emmet.showExpandedAbbreviation": "never",
 /////////////////////
 ......
}
然后你就可以方便的使用vscode来编辑布局文件了 😀
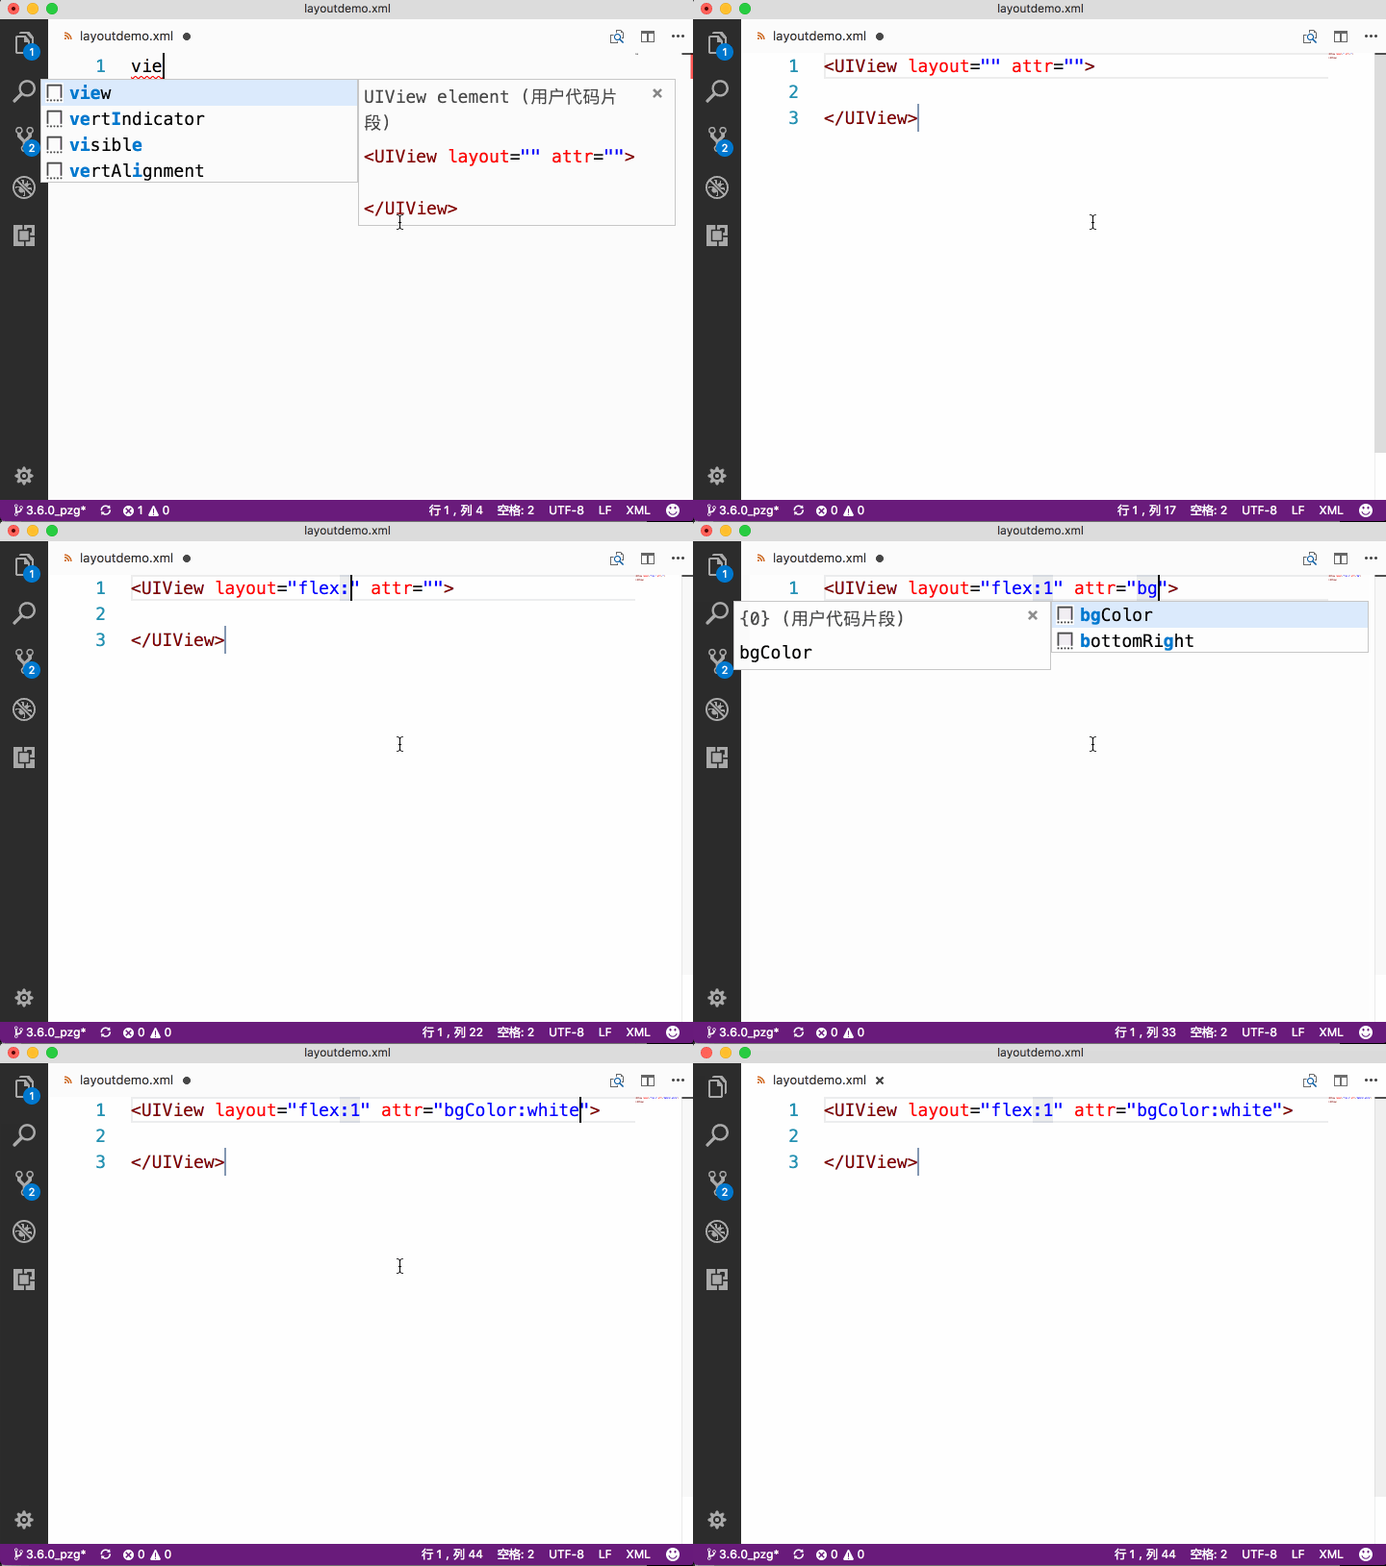
编辑时智能提示效果如下:

- 打开Finder,选择一个xml文件,右击选择“显示简介”,在弹出的面板中的“打开方式”中选择Visual Studio Code,然后点击“全部更改”,关闭窗口。
- 在XCode中右击文件,选择“Open With External Editor”即可打开
- 在Xcode中绑定快捷键,进入Preference,选择Key Bindings,在Filter中输入open,然后选择Open With External Editor,点击右侧的key,输入快捷键,比如Alt+V
去除控件前缀将自动替换成完整的组件,如
label ===> <UILabel name="" layout="" attr=""/>
textview ===> <FlexTextView name="" layout="" attr="fontSize:14,color:black,textAlign:left"/>
view ===> <UIView layout="" attr=""> </UIView>
其他提示的内容将直接等效于所提示的内容,如
UILabel ====> UILabel
white ====> white
Flexbox Introduction & performance (in Chinese)
Tutorial 1: Create View Controller with xml layout
Tutorial 2: Create Table Cell with xml layout
Tutorial 3: Embed xml layout into traditional view hierarchy
Tutorial 4: Use custom view in xml layout
Tutorial 5: Create reusable view using xml layout file