Flashing DroneBridge for ESP32
You have three options to flash/install DroneBridge for ESP32 to your device.
- Use the Online Serial Flasher
- Use the official espressif python-based tool esptool.py
- Windows only: Use flash download tools
In any case go and conduct the following steps first:
- Connect the ESP32 via USB to your computer
- Determine the serial port number e.g. via the Windows Device-Manager - in this example it will be COM4
-
Download the latest release of DroneBridge for ESP32 from github and extract the
esp32c3folder - Choose any of the below options in order to flash the pre-compiled firmware
This options requires no download of any additional tool and works on all platforms. However, it requires you to use Microsoft Edge or Chrome.
For detailed instructions on the web-based tool please refer to this page.
- Navigate to esptool-js using a Chrome-based browser like e.g Google Chrome or Microsoft Edge
- Connect to the ESP32 serial device by clicking "Connect" and then selecting the previously determined serial device (e.g. COM4). The console should now show some output
- Click "Erase Flash" and wait for it to finish (Chip erase completed ...)
This step may not be necessary for every new release but it prevents issues when updating the firmware to a newer version - Click "Add file" till you have 4 entries
- Upload the files
bootloader.bin,db_esp32.bin,partition-table.binandwww.bineach into one entry - Specify the address for each entry according to the
flash_argsfile that came with the release. - Click "Program" in order to flash/install the firmware to your ESP32 module
An example is given here for release v1.4 and an ESP32C3:

- Install esptool.py via pip
- Erase the flash first with
esptool.py -p COM4 erase_flash(may not be necessary with all releases, but prevents issues) - Change to the extracted esp32c3 folder (the pre-compiled release files of DroneBridge for ESP32 you downloaded from github)
- Run the flashing command that came with the release binaries for the esp32c3. It may look something like:
esptool.py -p (PORT) -b 115200 --before default_reset --after hard_reset --chip esp32c3 write_flash --flash_mode dio --flash_size 2MB --flash_freq 80m 0x0 bootloader.bin 0x8000 partition-table.bin 0x10000 db_esp32.bin 0x110000 www.bin
Look here for more detailed information
- Get it here
- Erase the flash of the ESP32 before flashing a new release
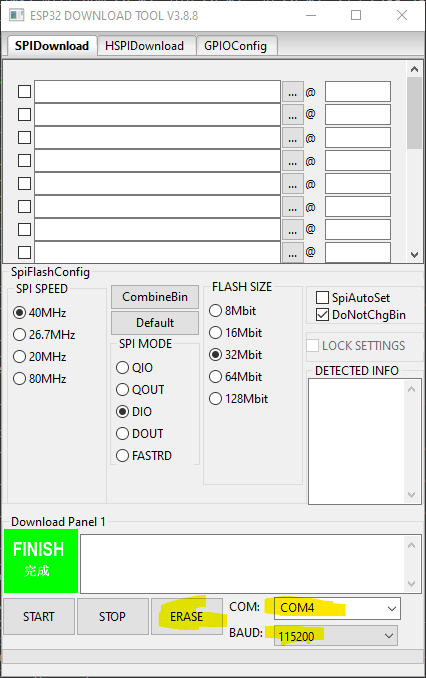
- Select the firmware, bootloader & partition table and set everything as specified for your board in the file
flash_args.
The below options are only valid for ESP32 (not C3)0x8000 partition_table/partition-table.bin 0x1000 bootloader/bootloader.bin 0x10000 db_esp32.bin 0x110000 www.bin
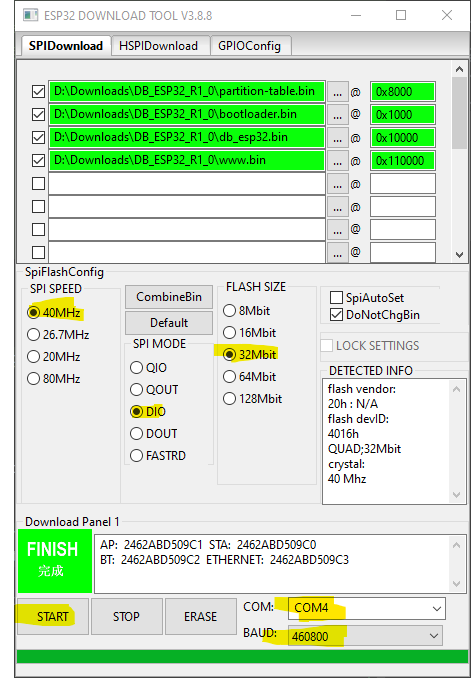
- Hit Start and power cycle your ESP32 after flashing
Run the command specified with the release binary and for your board using esptool.py erase the flash first by running esptool.py -p <port> erase_flash.
Alternatively, you can follow the guide for the web-based serial flasher.