-
Notifications
You must be signed in to change notification settings - Fork 19
Blender Modeling Tips
EZRASSOR.blend- This file is the "project" file for all of the Blender objects that were assembled. Open this to begin Blender development.
move_meshes.sh-
This script moves new meshes into to the correct package (
ezrassor_sim_description/meshes). This package expects your meshes to have the following names:- base_unit.dae
- drum_arm.dae
- drum.dae
- wheel.dae
Although Gazebo allows you to specify the pose of objects when building a robot, the initial pose for an object with a custom mesh is definitely affected by the (x, y, z) values for the Blender objects as you export them. Always export values at (0, 0, 0) one at a time.
When you work with the .blend file to modify the existing pieces of the EZ-RASSOR, make sure you take the following two things into account: the required export pose and the export format.
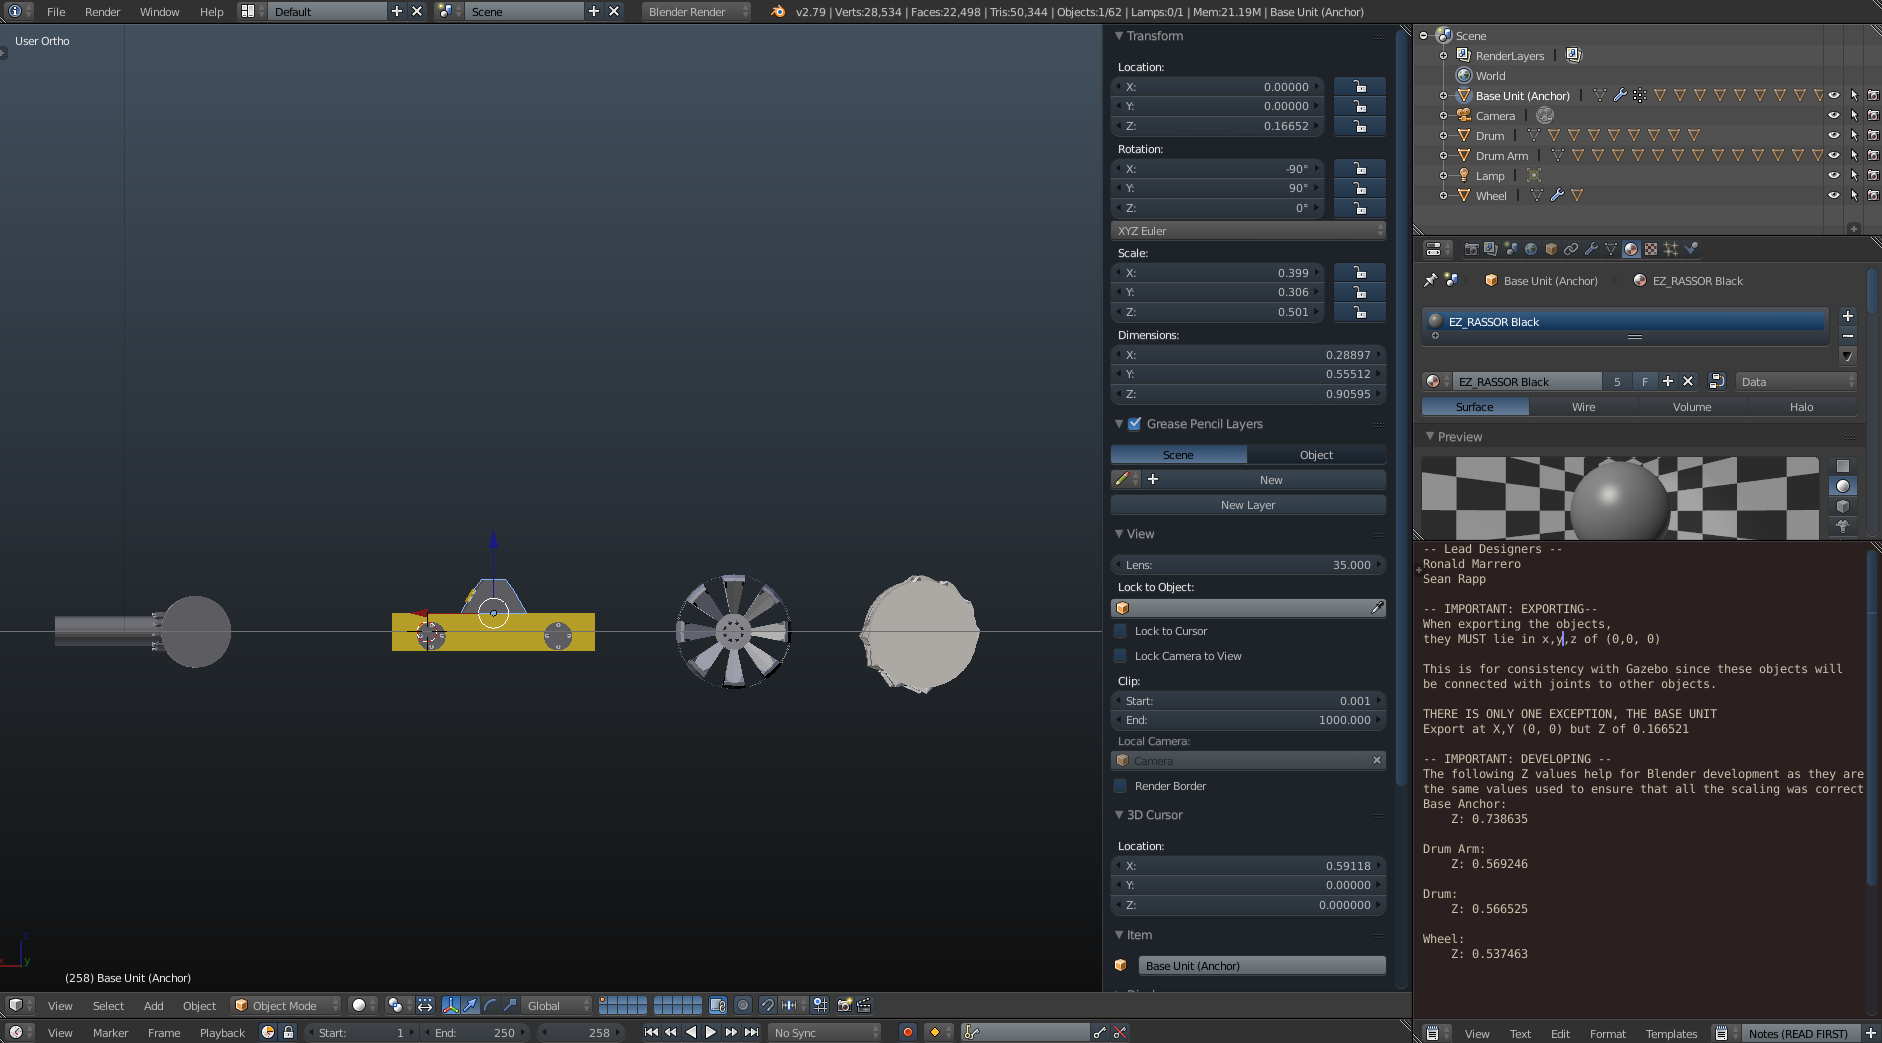
Once the EZRASSOR.blend file is open within Blender, open up the Text Editor window (bottom right) and take note of the values specified there. There's a reminder that the exports should be at (0, 0, 0) and you can also see the z values that you must set every object to if you want to view them in Blender at their relative heights to each other.

For modularity, export objects one item at a time. Also ensure that you export the files as .dae files since that format works well with Gazebo and displays the model with the proper colors.
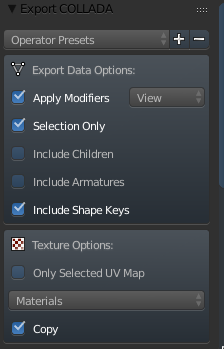
To do this (from object mode) type b and drag the cursor down over the object. Once it is selected, select File -> Collata (Default) (.dae). Under Export Settings, check the boxes for Apply Modifiers and Selection Only. Leave all other default values as they are. Finally export the file to the EZ-RASSOR description directory as normal. At the time of this writing, you would place the file in packages/simulation/ezrassor_sim_description/meshes.

Adding new models to the robot is fairly straightforward. As before, the only thing to note is that objects should be exported while they are in (0, 0, 0) position. This will help significantly when configuring the robot in the .xacro file.
When configuring the colors for the model, do not enable transparency on the materials. Gazebo7 can render the objects but Gazebo9 will not show the meshes at all when transparency is enabled. Therefore, avoid enabling transparency.
Home
Architecture
Technologies
Blender Modeling Tips
ROS Actions
Privacy Policy
Non-ROS Software
└ EZ-RASSOR Controller
Communication Packages
├ ezrassor_controller_server
├ ezrassor_joy_translator
├ ezrassor_topic_switch
├ ezrassor_teleop_actions
└ ezrassor_keyboard_controller
Simulation Packages
├ ezrassor_sim_control
├ ezrassor_sim_description
└ ezrassor_sim_gazebo
Autonomy Packages
├ ezrassor_autonomous_control
└ ezrassor_swarm_control
Extra Packages
└ ezrassor_launcher