CommandLineRendering
blender --background ${1} --engine CYCLES --scene ${2} --render-output "Renders/${2}-###.png" --render-frame ${3-1} -- --cycles-device OPTIX+CPUBlender's rendering functions can be invoked from the command-line! An astonishing array of benefits arises from this seemingly-minor feature, especially with regard to workflow automation. Only a little bit of setup is needed to make optimal use of this facility.
Full documentation for this feature is available here. The purpose of this article is to draw special attention to command-line features I have found useful in our context.
The minimal command syntax to ask Blender to render a file in the background is as follows:
blender --background ${blender_file} --render-output ${output_file_path}In the above example, ${blender_file} should be replaced with the path to the .blend file to render, and ${output_file_path} with the path to the desired image output. The --background argument can be reduced to the short-form -b, and --render-output can be reduced to -o.
blender -b MetalPlate.blend -o metal_plate.pngThis alone has the benefit of allowing one or more instances of Blender to cook while working on other things, though this may cause performance problems on certain computers. Another possibility is allowing the user to schedule renders during off-hours, or rendering on a remote device, such as with AWS. However, rendering a Blender file with more than one scene, or with animations (most likely both), will require some additional configuration.
To render a particular Scene inside a Blender file, one can use the --scene argument (short-form -S, with a capital "S") followed by the name of the scene to render:
blender --background ItemFile.blend --scene brass-gear --render-output brass_gear.pngCreating separate scenes for each thing to be rendered will help leverage this capability; for instance by putting each item model (or a Collection Instance) into its own scene essentially enables the user to select specific things to be rendered from within the Blender file.
To render a particular Animation Frame, one can use the --render-frame argument (short form -s, with a lower-case "s")
blender --background ItemFile.blend --scene sand-variants --render-frame "0..3" --render-output "//sand-###.png"There's something interesting going on with the --render-frame and --render-output arguments in the above example:
The --render-frame argument can accept multiple types of parameter:
- A single number, to render exactly that frame index
- A range of numbers, expressed as two numbers concatenated with
.., e.g.0..3to render frames 0 to 3 inclusive - A comma-delineated list of numbers to render those frames, e.g.
3,5,7to render only frames 3, 5 and 7 - A
+or-token followed by a number to render frames relative to the start or end frame of the Scene, e.g.+3to render the third frame from the first frame of the Scene (which is not necessarily frame index 3), or-29to render the 29th frame before the end frame. (The author has yet to find a use for this argument type in this context.)
The --render-output argument can accept a string, and will decode it as follows:
- A
//token will be taken to mean "The file path relative to the location of the Blender file". Thus//RenderOutput/block.pngwill try to put the render outputblock.pnginside theRenderOutputfolder that is itself in the same directory as the source Blender file. - Any number of
#symbols will be replaced with the frame number, with#symbols beyond the first being used for zero-padding. As such,space-broccoli-###.pngwill output asspace-broccoli-013.pngwhen rendering frame index 13.
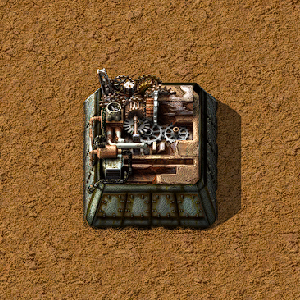
The --render-frame argument is not only useful for "conventional" animations, as with sprites of factory buildings. The Animation feature of Blender can be abused to generate variants of items for belt representation as well, for instance with each frame of the Animation being a separate variant. It is simple enough to create Keyframes to view the same model from separate angles, but what about other properties?
As it happens, just about every manipulable Properties field can be Keyframed in an Animation. Consider the Bevel Modifier below:
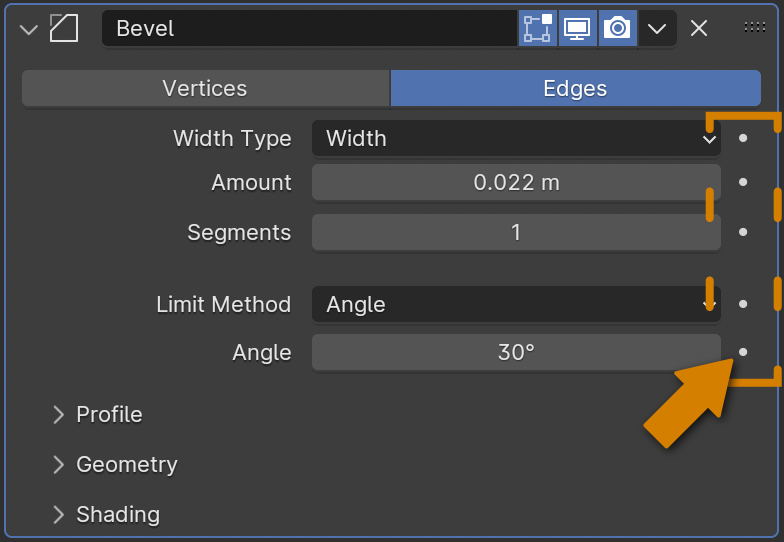
The dots to the right of each field indicate that it is an Animatable Property, and can therefore be Keyframed; simply click it to do so. Thus, to create belt-only variants from dynamic properties, one can simply advance the Animation Frame, adjust the properties, and set a new Keyframe.
Just about every aspect of Blender can be invoked using their Python API, and one can invoke Python files or expressions from the command line. To invoke a Python file as a script within Blender's environment, for instance, one can use the --python argument.
While this would probably only be useful for more complex setups, it is given special mention here as the potential for workflow automation cannot be understated.