-
Notifications
You must be signed in to change notification settings - Fork 0
Lab 4. Protecting the Website
In this architecture, access to the web services running on the web VMs will be via an Application Gateway, which acts as a Layer7 HTTP reverse proxy and can load balance web traffic. The Application Gateway can be enabled with a WAF to protect our application against known vulnerabilities, such as those listed on the the 2017 OWASP Top 10 list.
Internet traffic destined for the web servers should always go through a load balancer or Application Gateway where possible, with the advertised endpoint for the traffic set as a public IP address attached to the gateway.
This section covers the deployment of an Application Gateway in one of two ways:
- Deploy the Application Gateway via the Azure Portal using a pre-configured ARM Template
- Creating an Application Gateway using the Azure CLI commands Click Here).
The workshop code repository contains the ARM Template file for deploying the Application Gateway. Open a new browser window/tab, and navigate to the following URL to review the file:
The template is configured as follows:
- Creates an Application Gateway inside a dedicated Virtual Network subnet with a Dynamic Public IP address
- Configures the backend pool with a server count of 2 VMs
- Includes the Web Server as one of the backend VMs
- Enables the WAF in Detection mode
These values are all set using template parameters.
Next, follow these steps to kick off the deployment...
-
In the Azure Portal, click on Create a resource from the side panel (it is typically at the very top).
-
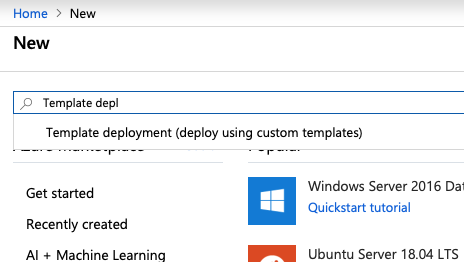
On the New panel, enter Template deployment in the Search the Marketplace field. The option Template deployment (deploy using custom templates) should pre-populate as you type. Select this option.

-
Click Create on the next screen to begin the creation process.
-
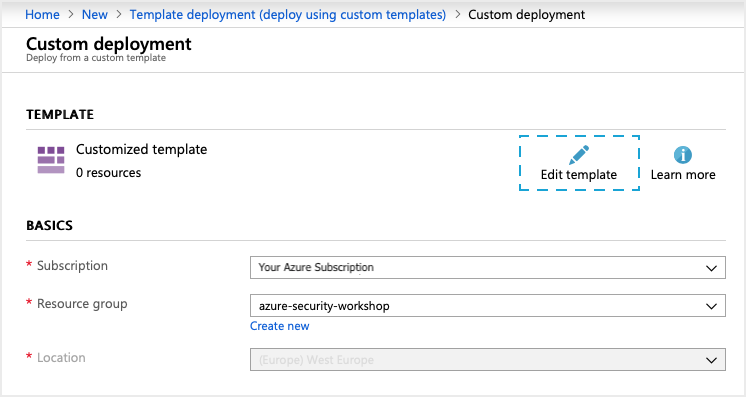
Complete the Resource group drop-down by selecting the Resource Group used for the workshop. This should pre-populate (and disable) the Location field.

-
Click the Edit Template button (highlighted on the image above). This switches the window to the template editor. The screen gives several options for entering template information:
i. Building the template resource by resource, manually editing the text as required
ii. Selecting and uploading a Quickstart Template
iii. Uploading a JSON file from the computer
iv. Manually editing the template in the template window
-
In a new browser window/tab, navigate to the 'raw text' view of the Application Gateway ARM Template by opening the following URL:
-
Copy all text from the ARM Template raw view, paste it into the Template Editor in the Azure Portal and click Save.
-
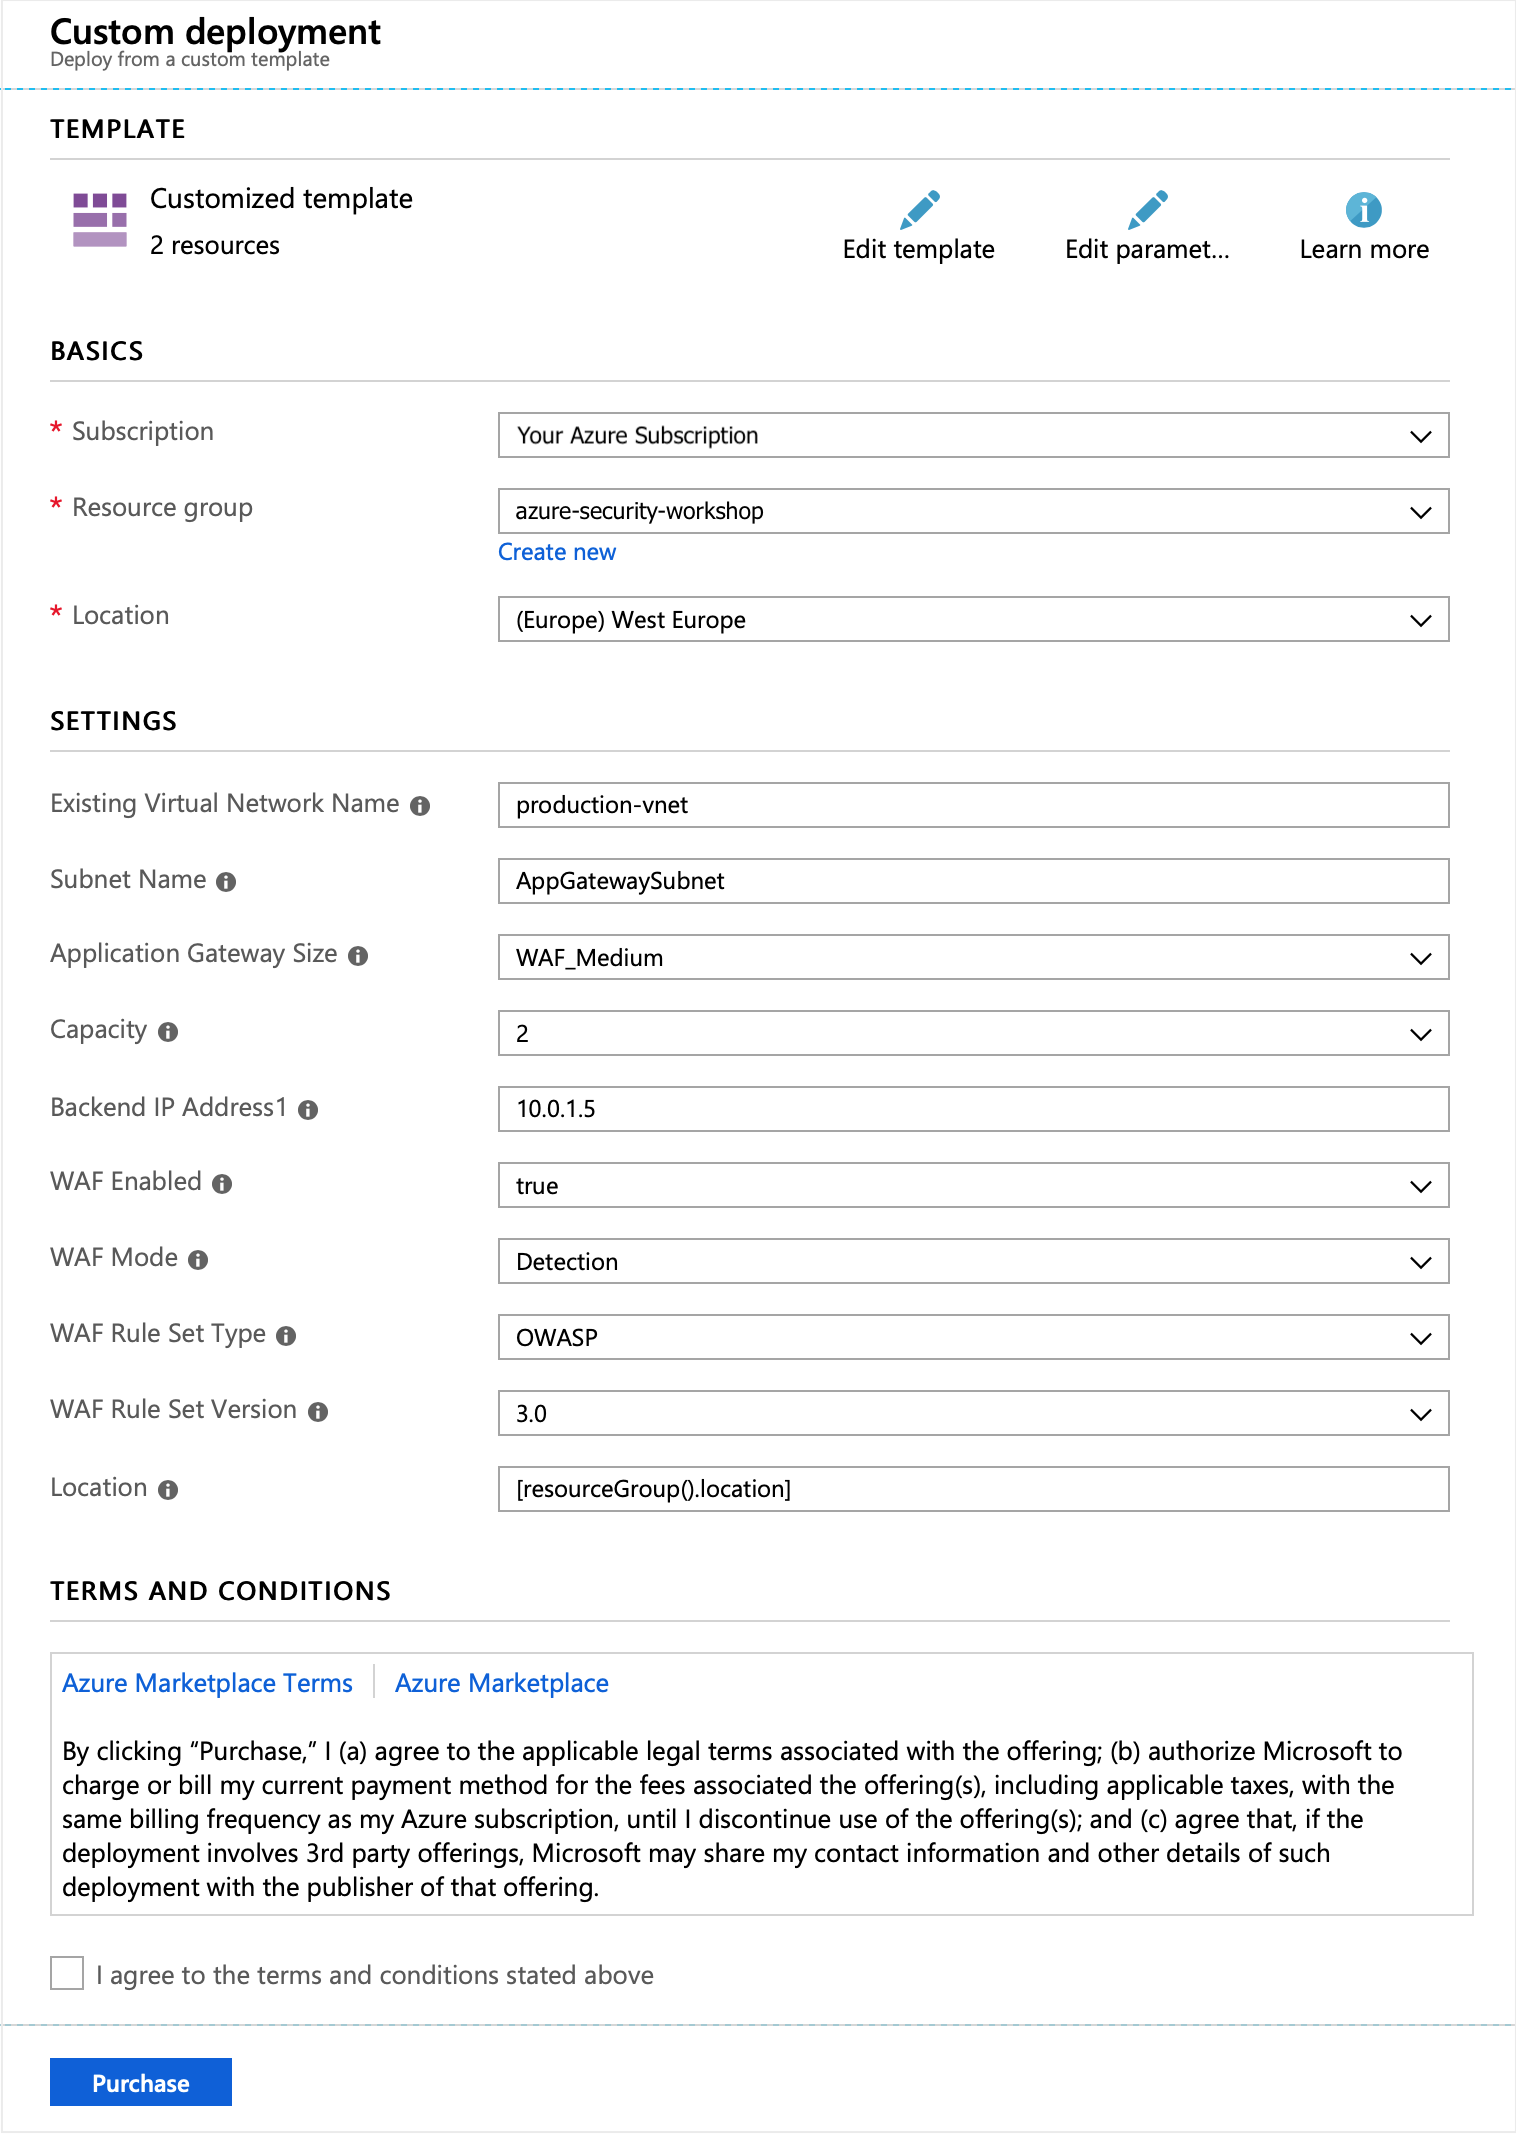
The Custom Deployment screen will now be populated with the Parameters (together with the default values) written into the template. Values such as the Virtual Network, Subnet Name and the IP address of the backend server (the Web VM running IIS) should all match the environment deployed at the beginning of the workshop.
The Application Gateway will be deployed into it's own subnet, with the Web Application Firewall enabled in Detection mode.

-
Tick the box to agree to the terms and conditions, and click on Purchase. This will start the deployment of the Application Gateway.
The creation of the Application Gateway will take approximately 15-20 minutes. Review the deployment with the Resource Group deployments section for updated information as it deploys. It will be listed as Microsoft.Template.
Please note: Once created, the Application Gateway may not show a Public IP address immediately even if the deployment shows as finished. This id because the Gateway has been configured to use the Web Application Firewall, which requires a Dynamic IP address. Therefore the IP address will be allocated once the Application Gateway is fully configured.
Please proceed to section 4.2 - Testing the Application Gateway
IMPORTANT: Do not complete this section if the Application Gateway has been deployed using the ARM Template in the section above, although feel free to review the content.
This section creates the Application Gateway (for the purposes of this lab) into the AppGatewaySubnet subnet of the Virtual Network using the Azure CLI.
For further information, refer to the Azure CLI documentation located at:
-
Prior to creating the Application Gateway, locate the internal/private IP address for the Web Server. This is shown on the Overview pane of the Web Server VM. Alternatively, run the following CLI command:
This IP Address will be needed as a parameter for the Application Gateway command.
az network nic show \ --resource-group <resource-group-name> \ --name WebServer-01-NIC \ --query "ipConfigurations[].privateIpAddress" -
Create the Application Gateway. From the command line, run the command below.
Parameters:
- --resource-group: The resource group used throughout the workshop
- --name: This is the name given to the Application Gateway itself
- --location: The region the Application Gatway will be created in. Enter westeurope
- --capacity: How many VMs the App Gateway will serve (maximum)
- --sku: Determines the size of Gateway to create
- --http-settings-cookie-based-affinity: Set this to Disabled to switch off session affinity to back-end VMs
- --vnet-name: Passes in the value for the Virtual Network the Gateway will reside in
- --subnet: This property is the name of the subnet. The subnet was created during the initial build, and is called AppGatewaySubnet
Command:
az network application-gateway create --resource-group <resource-group-name> --name Lab-AppGateway --location <location> --capacity 2 --sku Standard_Medium --http-settings-cookie-based-affinity Disabled --vnet-name production-vnet --subnet AppGatewaySubnet --servers <web-server-ip-address>
Please also note that we did not specify Public IP Address resources for this application gateway. Not specifying an IP address will create a new Public IP address, however you can be more descriptive and create these first before creating the gateway.
In the Azure Portal, navigate to the new Application Gateway and review the properties.
Notice the following:
-
On the Overview pane, the Resource Group, Location, Virtual network/subnet and most importantly, the Frontend public IP address. Copy the IP address to the clipboard.
Go to the AppGW resource you just created, and look for the Public IP address assigned under Frontend public IP address. Open a new browser tab and introduce the Public IP address, and confirm that you can reach to the Web VM IIS page through the AppGW.
We will create a DVWA (Damn Vulnerable Web Application) VM from the marketplace, add the VM to the Application Gateway Pool and run a sequence of SQL injection and XSS attacks to test that the WAF in detection and blocking mode
IMPORTANT: This DVWA is managed by a 3rd party company, so Azure Pass credits cannot be used. You will need to use either an Enterprise or Pay-as-You-Go subscription.
If you are interested to test the Azure WAF or any other 3rd party WAFs using the DVWA, please report to your proctors for addional guidance and further steps to simulate some attacks like SQL injection, XSS, etc.
<< Previous Lab . . . . . Next Lab >>
