Installation
- Install virtualization software
- Download the OVA
- Import the OVA file into the virtualization software
- Converting the OVA file to QEMU or KVM
To use the Trace Labs OSINT VM (Virtual Machine), you will need to use a virtualization software. You can easily create a snapshot before you start your investigations and rollback to it once the Missing Persons Search Party CTF event is over.
You can use VirtualBox or VMWare as your virtualization software. You also have the option to convert the OVA (Open Virtual Appliance) file to QEMU-KVM disk files.
If you don’t have a virtualization software, you can download the latest from VirtualBox here: https://www.virtualbox.org/wiki/Downloads
If you have VMWare installed, the instructions on how to import the OVA file are found in the sections below.
Obtain the OVA from this location: https://www.tracelabs.org/trace-labs-osint-vm/
Once downloaded check the hash of the file to ensure that the file you downloaded hasn’t been tampered with.
If you have a program that can check file hashes, such as 7-zip this can be done within in Windows Explorer as per the screenshot below:

You can find instructions on how to do this here: https://docs.oracle.com/cd/E26217_01/E26796/html/qs-import-vm.html
Step 1: Go to File>Import. Choose the OVA file you’ve downloaded.
Step 2: Once you’ve selected the OVA file, click Continue.

Step 3: Save the virtual machine.

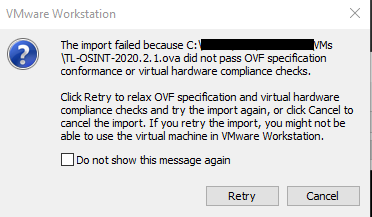
Note: If you encounter the message that the import failed because the OVA file did not pass OVF specification conformance or virtual hardware compliance checks, just click Retry.

Step 4: If you want to change the default virtual machine settings, click Customize Settings. Otherwise, just click Finish.

Step 1: Go to File> Open. Select the OVA you have downloaded.
Step 2: Choose the OVA file you’ve downloaded.
Note: If you encounter the message that the import failed because the OVA file did not pass OVF specification conformance or virtual hardware compliance checks, just click Retry.
Step 3: Wait for a few minutes for the importing to complete. Once it is completed, you will see it saved in your VMWare Workstation and you can use the green play button to start it.
If you prefer to use QEMU or KVM, below are the steps to convert the OVA file.
Step 1: Extract the files from the OVA:
tar xvf osintvm.ova
Note: osintvm.ova refers to the TL OSINT OVA file that you downloaded from Trace Labs' website.
Step 2: You must have QEMU installed to run the qemu img command. You can check if qemu is installed by typing the following command:
qemu-img -h | tail -n1
Step 3: To do the actual conversion, you have to convert the vdmk to qcow2 using the following command:
qemu-img convert -O qcow2 osintvm.vdmk osintvm.qcow2
Step 4: Once the image has been created, you can now start a new VM in QEMU and add the disk as the primary hard disk.