Administration
Administering content on the Galaxy Media Site (GMS) is supposed to be intuitive. A brief overview should be enough to get started - so feel free to skim!
However, a few topics have details that are worth checking out for clarity:
- Integrating with a Galaxy instance
- Login and user management
- News and Event entries
- Markdown editing and uploading images
The easiest way to point to the GMS landing page from within a Galaxy server instance is using an <iframe> element in the welcome.html template. This can be implemented either in a clone of galaxyproject/galaxy or, more properly, an Ansible playbook which deploys a specific galaxyproject/galaxy release. Check out the Galaxy admin docs for more details on welcome.html.
Here's an example welcome.html, assuming you host your GMS under the domain mysite.com:
<!DOCTYPE html>
<html xmlns="http://www.w3.org/1999/xhtml" xml:lang="en" lang="en">
<head></head>

<body>
    <iframe src="https://mysite.com" style="width: 100%; height: 100%; border: 0; top: 0; left: 0; position: absolute;">
    </iframe>
</body>
</html>
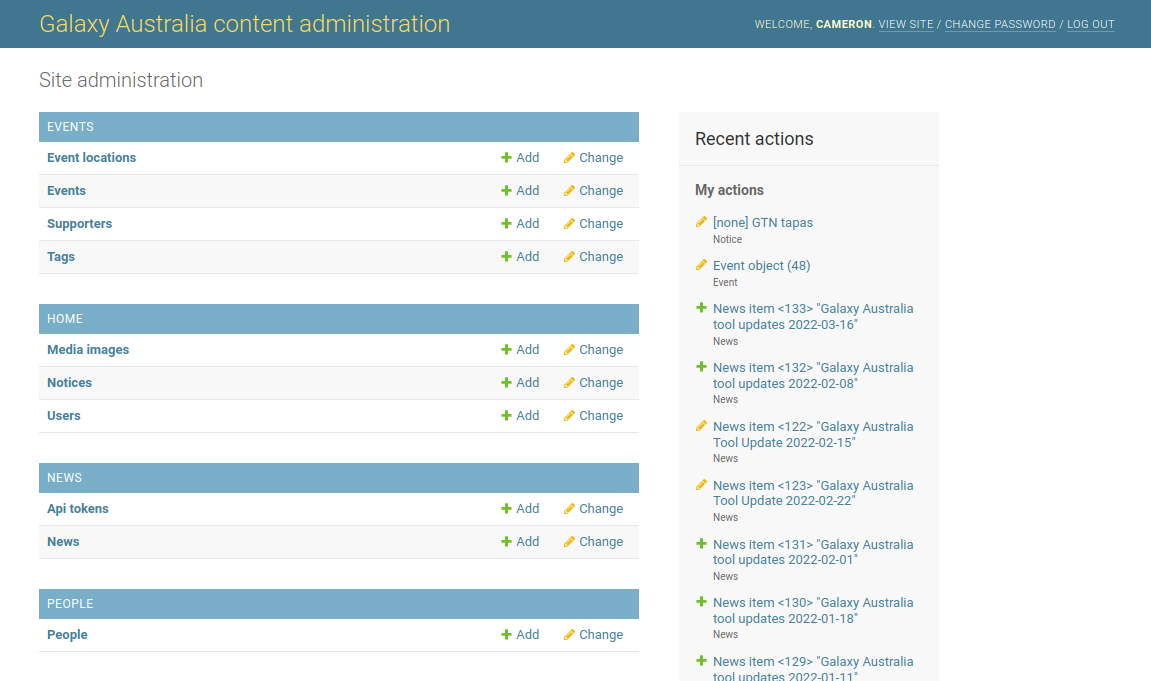
The admin panel (/admin) can be accessed from the navbar if you are logged in with a staff (aka admin) account. All content described on this Wiki page can be managed from the Admin panel through menu items:
-
You must be logged in with a staff account in order to view the Admin panel and update site content
-
While logged in, you may also notice some changes on the "public" site:
- An 'Admin' link appears in the navbar (access the Admin panel)
- Links to edit content appear on public pages
- Unpublished content is visible on public pages (with a red 'invisible' icon)
-
Log in and out with the link in the top-right corner of the site. The login link is barely visible until mouseover to reduce the likelihood of public users trying to log into the Admin panel. It is also only visible when viewing the site directly (i.e. not through a Galaxy
iframe)
-
A superuser login should be created when the site is deployed for the first time. If there are no known admin logins to the site, you'll need to SSH into the server and create one on the command line. This will prompt you to enter a username and password for the new account:
source <virtualenv>/bin/activate
cd <site-root>/webapp
python manage.py createsuperuser
-
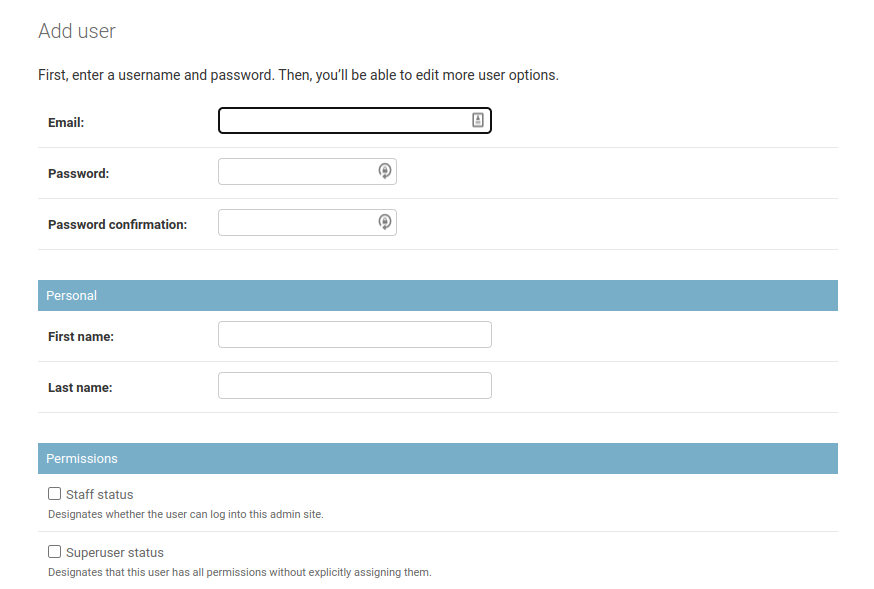
Once logged into the site as a superuser, creating more users is easy in the Admin panel:
-
Users can be easily created, updated and deleted from within this page (including password change).
-
Ensure that you select the "Staff" option, and select either specific permissions or "Superuser" status.
-
Superusers can delete any user or change their passwords from within here, so mutual trust is essential!
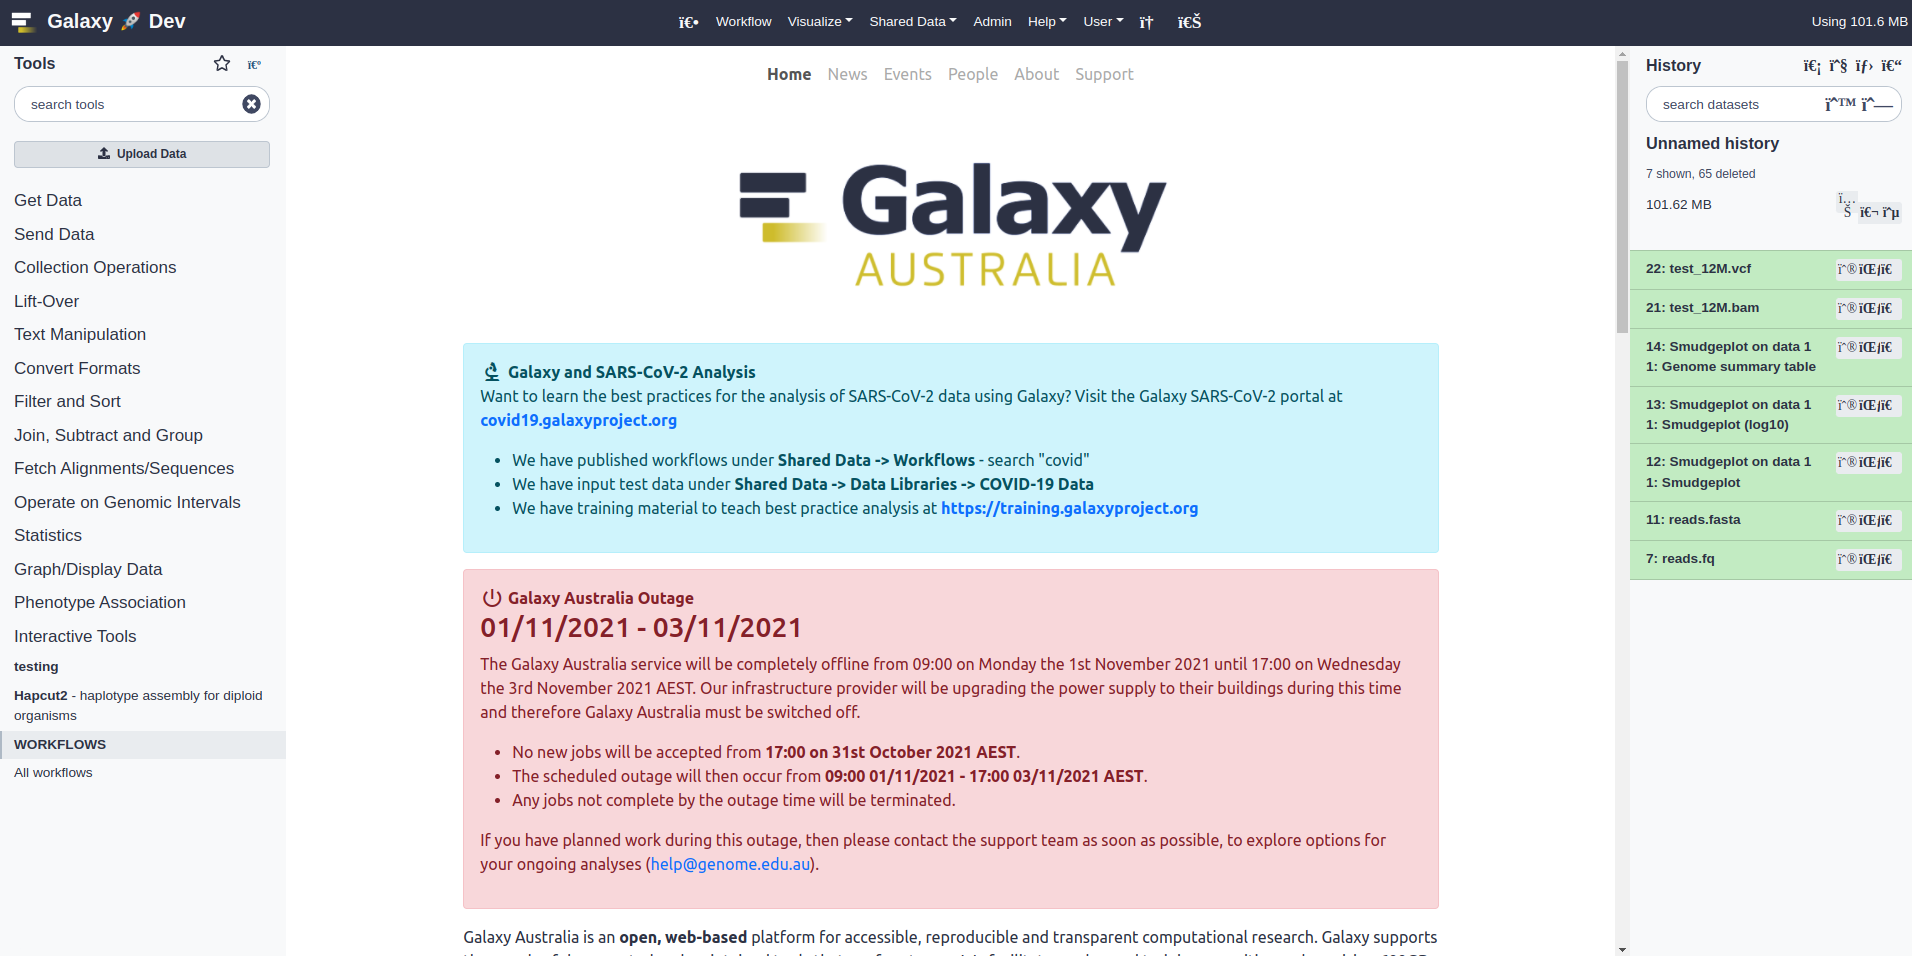
Galaxy admins often wish to post notices on the landing page to inform users of new features, site maintenance etc.
Notices can be managed through the Notice model in the Admin panel - /admin/home/notice/
- Create new Notices
- Modify and recycle existing Notices
- Switch Notice state between "enabled" and "disabled" or "published"
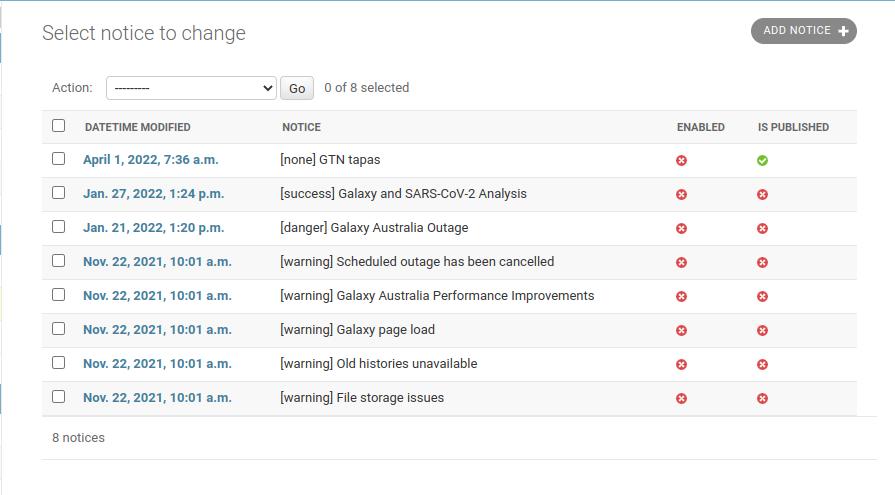
Set a Notice as "Enabled" to display it on the landing page. This one has the info class, so it is styled blue.
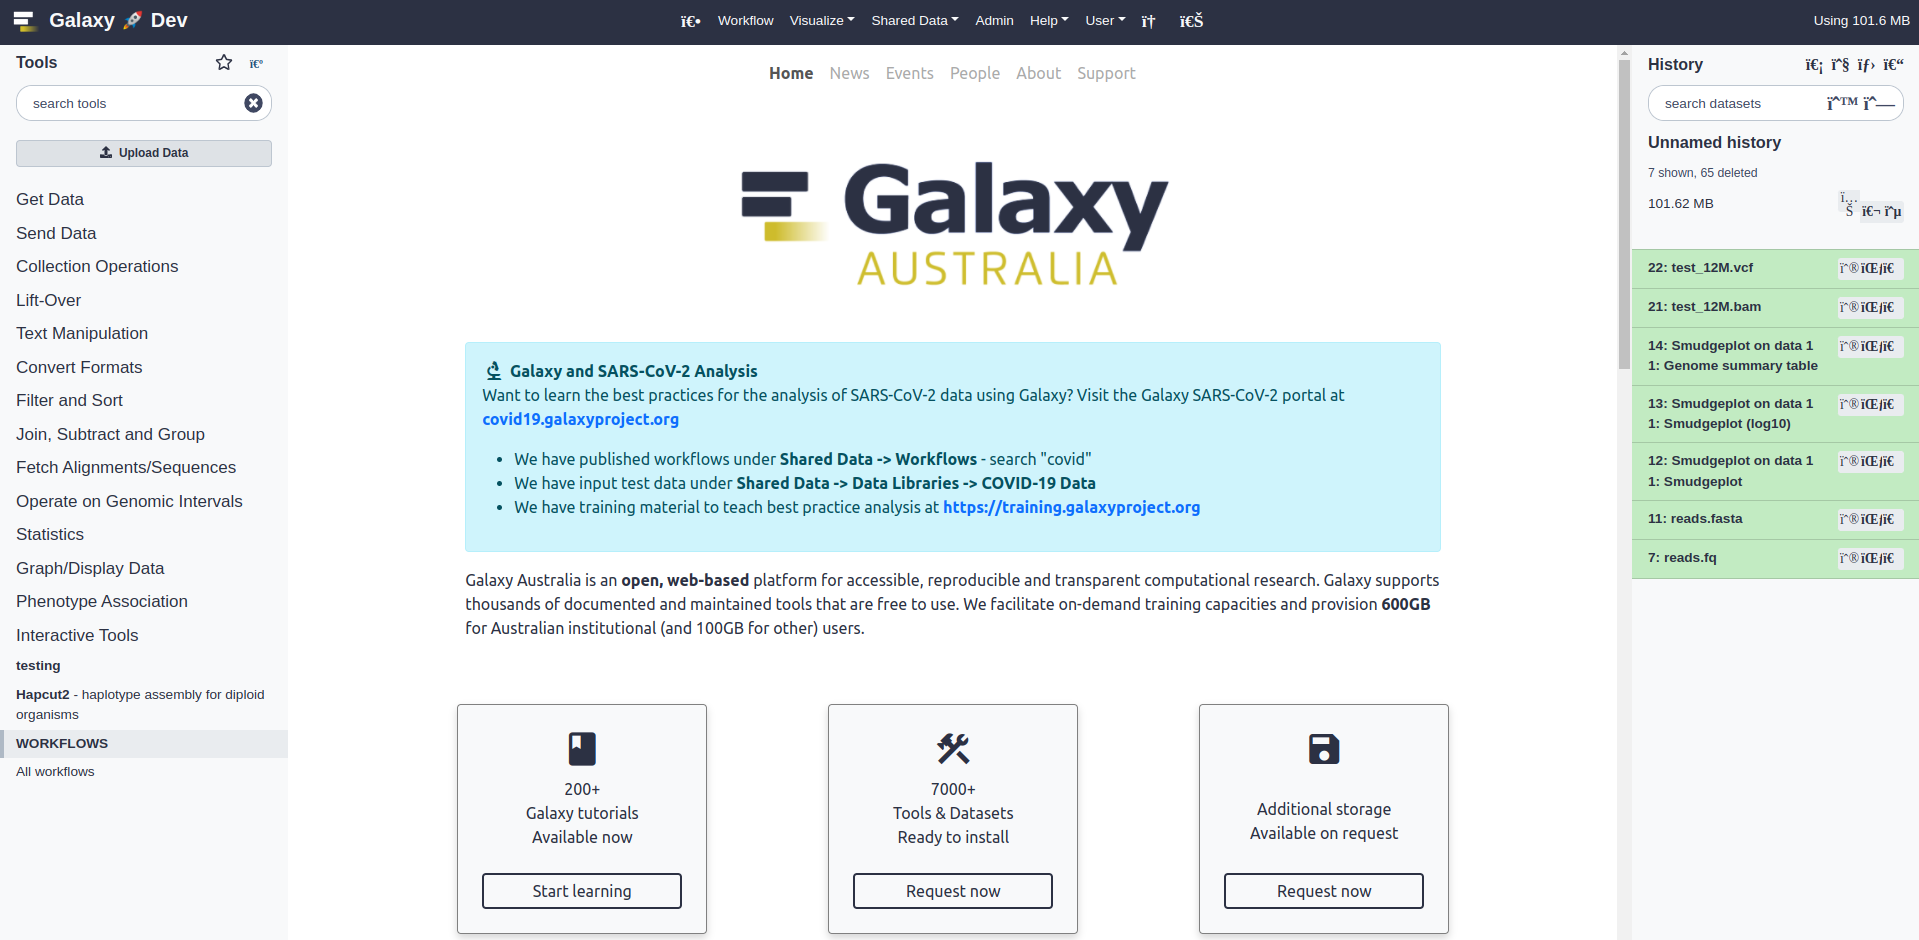
You can enable and display multiple notices, and they will be listed in the order they appear in the Admin panel list view. You can influence the order with the order field on the "Change Notice" form (see Fields below). The second Notice here has the danger class.
Note that the 'danger' and 'image' classes have been deprecated; only 'info' and 'warning' classes are now available.
-
Class: Notices have four "classes" that will affect the colour of the displayed notice:
- Info
- Warning
- Danger (deprecated)
- Image (deprecated)
-
Title: a title to be displayed on the notice.
-
Display title: For static notices, uncheck this option to hide the title.
-
Short description: Message to be shown on the rotating headline.
-
Body: a message for the body, written as valid markdown/HTML. This will be displayed on a dedicated webpage for the notice, so can be any length and HTML content.
-
Material icon: a valid identifier for a Google Material Icons icon - this allows you to choose between thousands of icons to display beside the notice title. It takes just a few seconds to search and pick one - identifiers are shown below the icons.
-
Enabled: Enable a notice for it to be displayed at the top of the landing page.
-
Order: Multiple enabled notices can be shown in ascending numerical order, based on this value. Notices with a blank
orderwill be shown last. -
Published: Notices will be visible to admins only until this is checked. This allows you to safely view and revise content before publishing.
-
Static display: in addition to being shown as a rotating headline notice, a static block display will be shown for high-profile notices e.g. upcoming downtime.
-
Subsites: Select which subsites (Labs) the notice will be shown on.
These were created to replace image class Notices, and are mainly used to insert banner-style images on the landing page. Simply upload an image, choose a display method and optionally provide a link URL for when the user clicks on the image. Unlike notices, only one cover image will be provided per request (randomly chosen). This allows many Cover Images to be shown without cluttering the landing page and makes the page more engaging as content changes on each page load.
- Title: a short title for the image, to be used for accessibility purposes on the webpage.
- Image: an image to upload, which should generally be banner-shaped (1000x300).
- Link URL: a link for when users click on the image.
- Max height (px): For image display, this will be the maximum height (better for square images).
- Auto full width: Overrides the above by displaying the image at full page width.
- Enabled: Enable a Cover Image for it to be displayed at the top of the landing page. Disabled images are not displayed anywhere.
- Published: Images will be visible to admins only until this is checked. This allows you to safely view and revise content before publishing.
- Subsites: Select which subsites (Labs) the image will be shown on.
These were created specifically for uploading images to be hosted by GMS. After uploading an image, it will be listed with a URI that you can reference the image with. Note that an uploaded image will not be displayed anywhere on the site without being linked to.
If you want to add an image to the markdown of a post, you can upload it here first. This is useful for adding an image to a Notice body if an online source for the image doesn't exist. You could also use them for a frequently used Event or News image, so you can upload once and reference many times throughout the site.
Of course, you can upload images on GMS and reference them anywhere, like in an email body or a Github page. Just reference them as <SITE_URL>/media/uploads/images/myimage.png.
This is where Galaxy team members can be added, to be displayed on a "people" page of the media site:
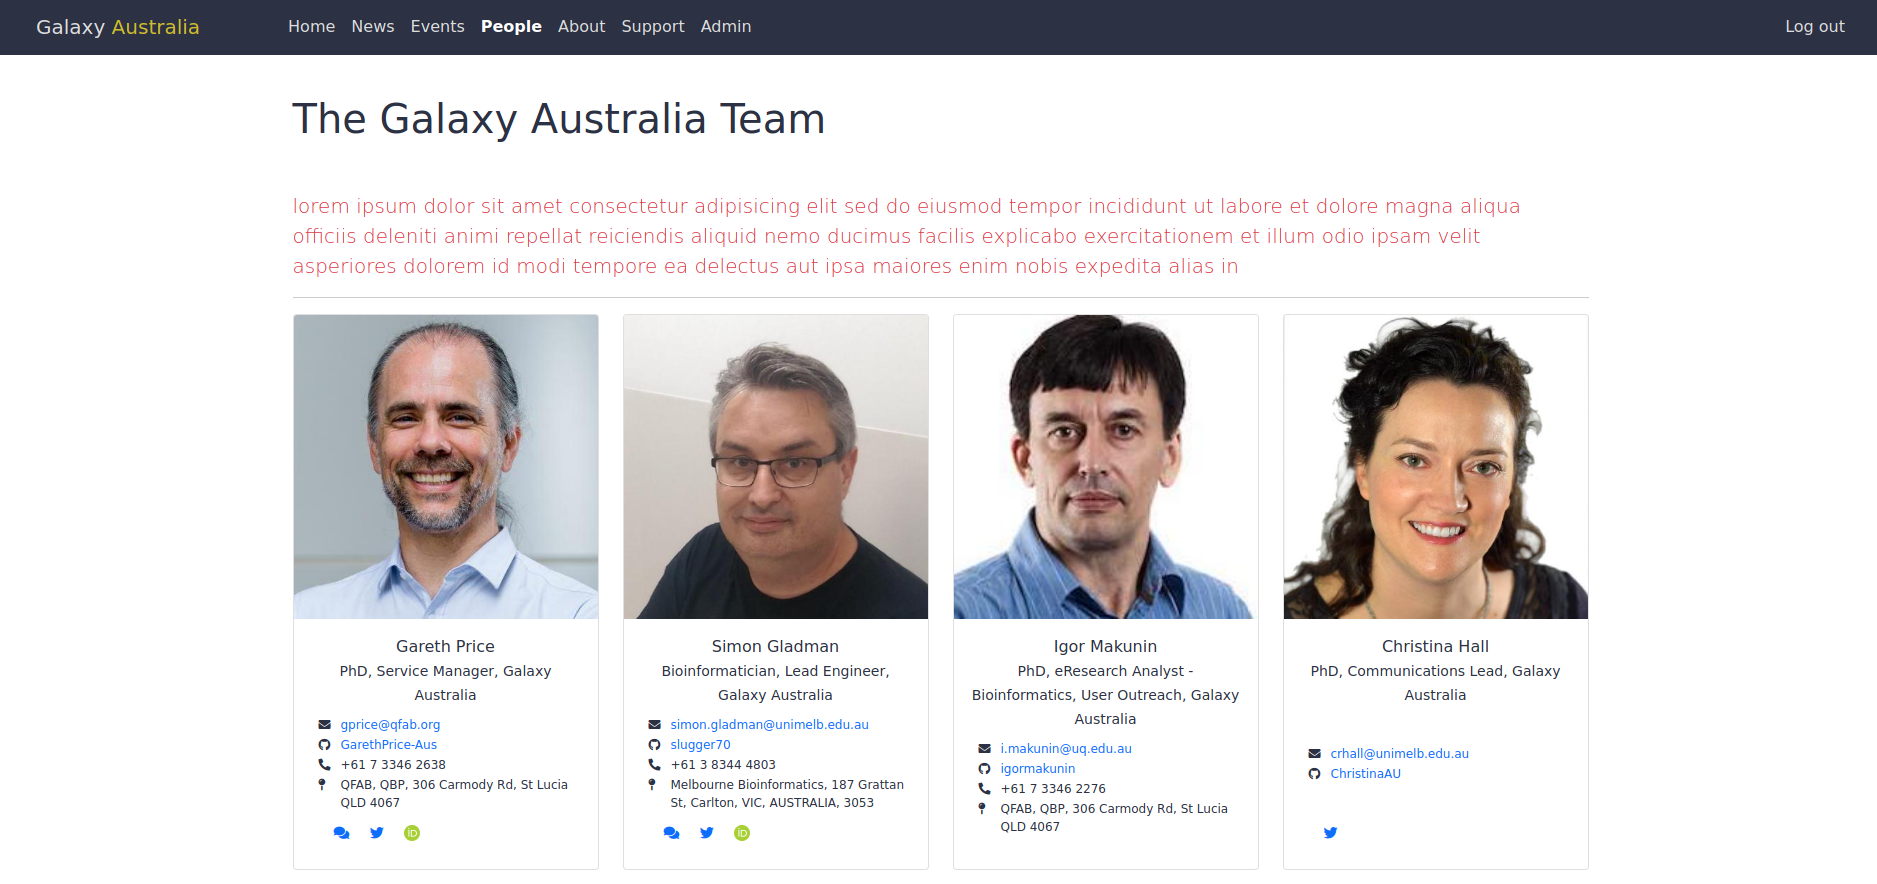
Manage people entries in the Admin panel - /admin/people/person
The usual "profile" fields: name, position, email, location. First and last name are the only required fields.
-
GitHub: Personal GitHub username (e.g.
janesmith70). -
Gitter: Gitter identity (e.g.
janesmith70). -
Twitter: Twitter handle (e.g.
janesmith70). - Image: upload a profile image.
- Bio: not currently displayed (for lack of UI space), but could be implemented in future.
- Ranking: Defaults to 99. If you wish to manually order the appearance of people, set their ranking to a lower number to make them appear first.
- Image: Make sure the image is roughly square and at least 300px wide!
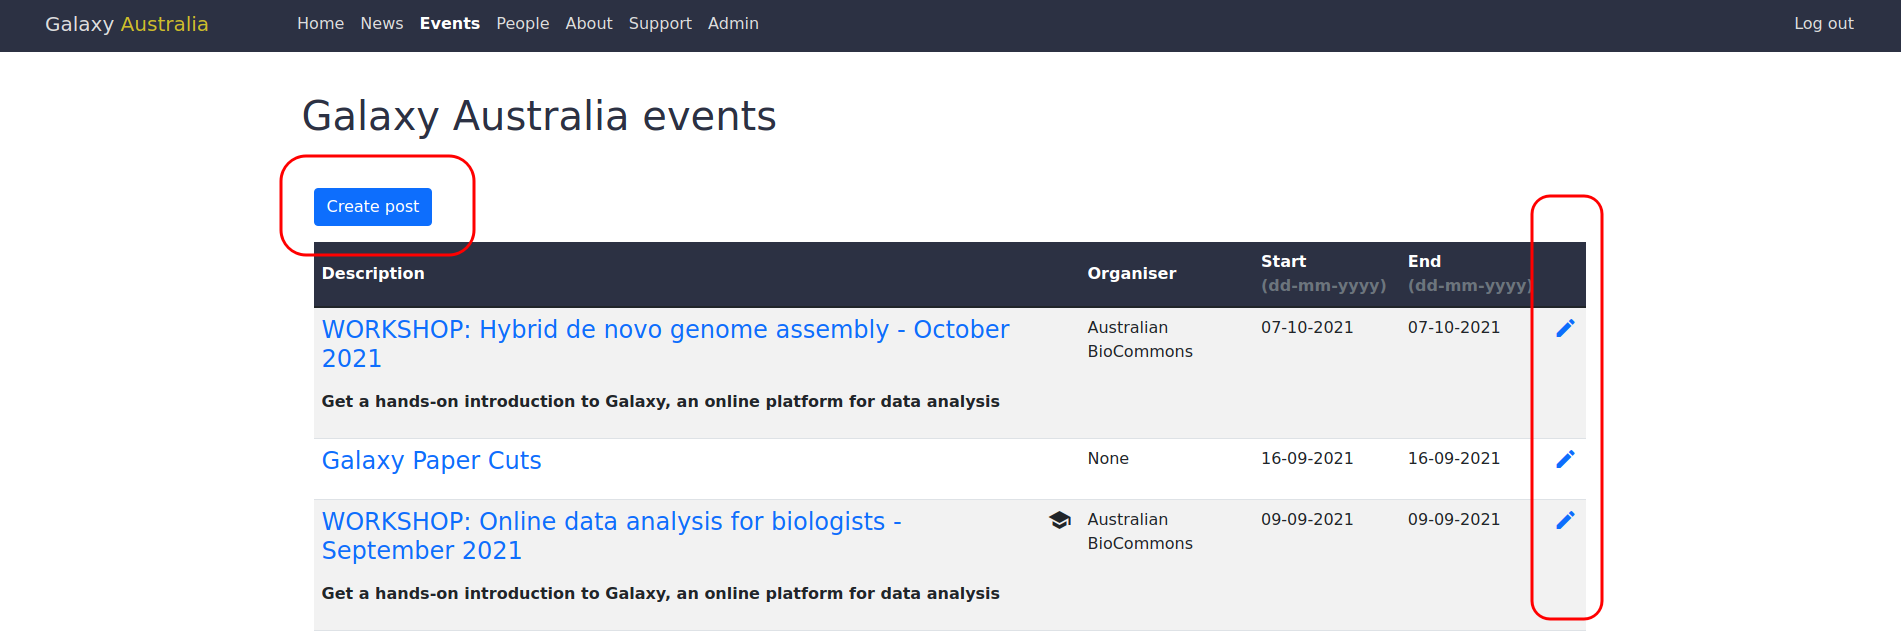
N.B. events are currently unlinked from the main site as event posts are not maintained.
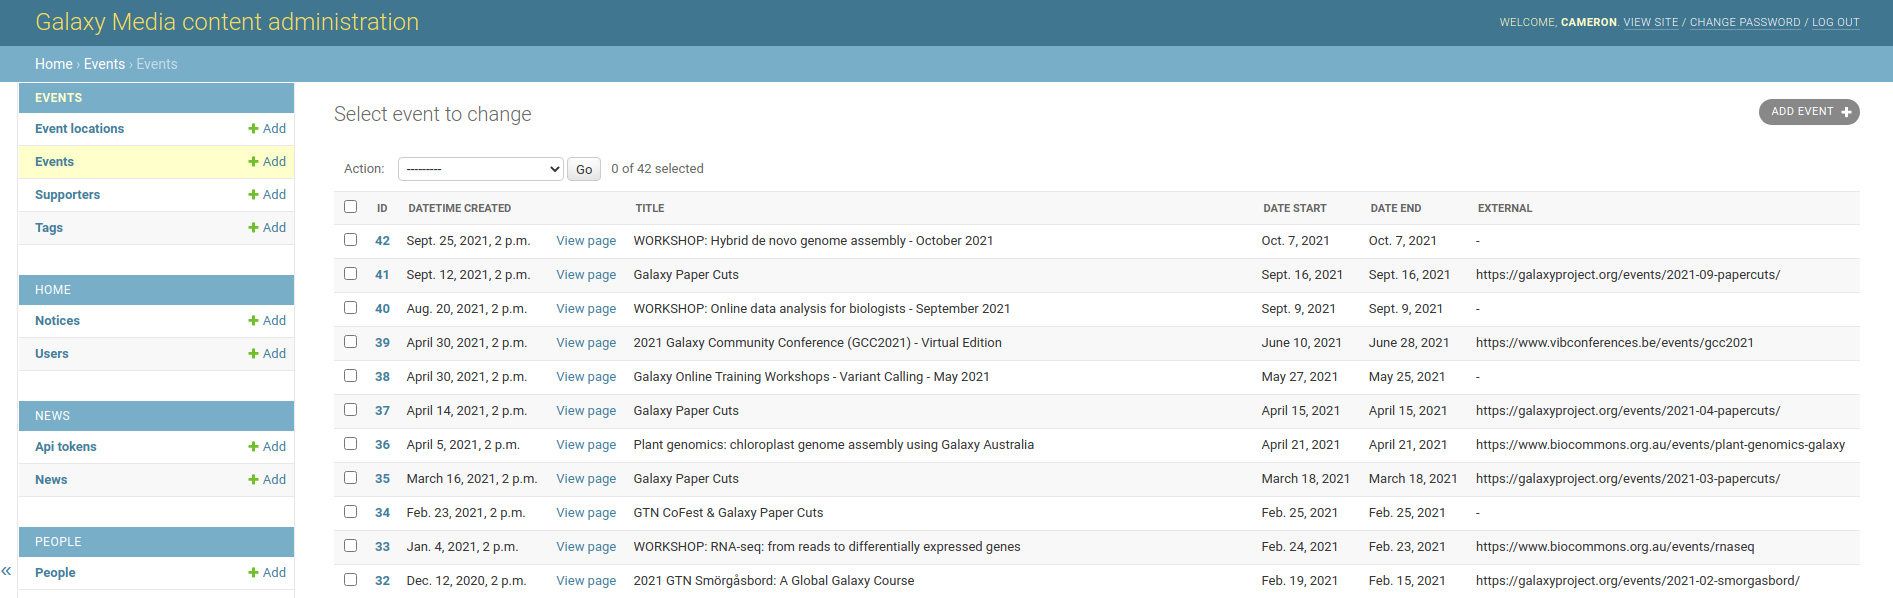
Events have the most elaborate content entry as there are many of attributes to capture. There is also a mechanism to upload images to be rendered into the body markdown in the Event form. When you logged in as an admin you will notice that the Event and News forms are accessible as buttons on public pages (public users do not see these links):
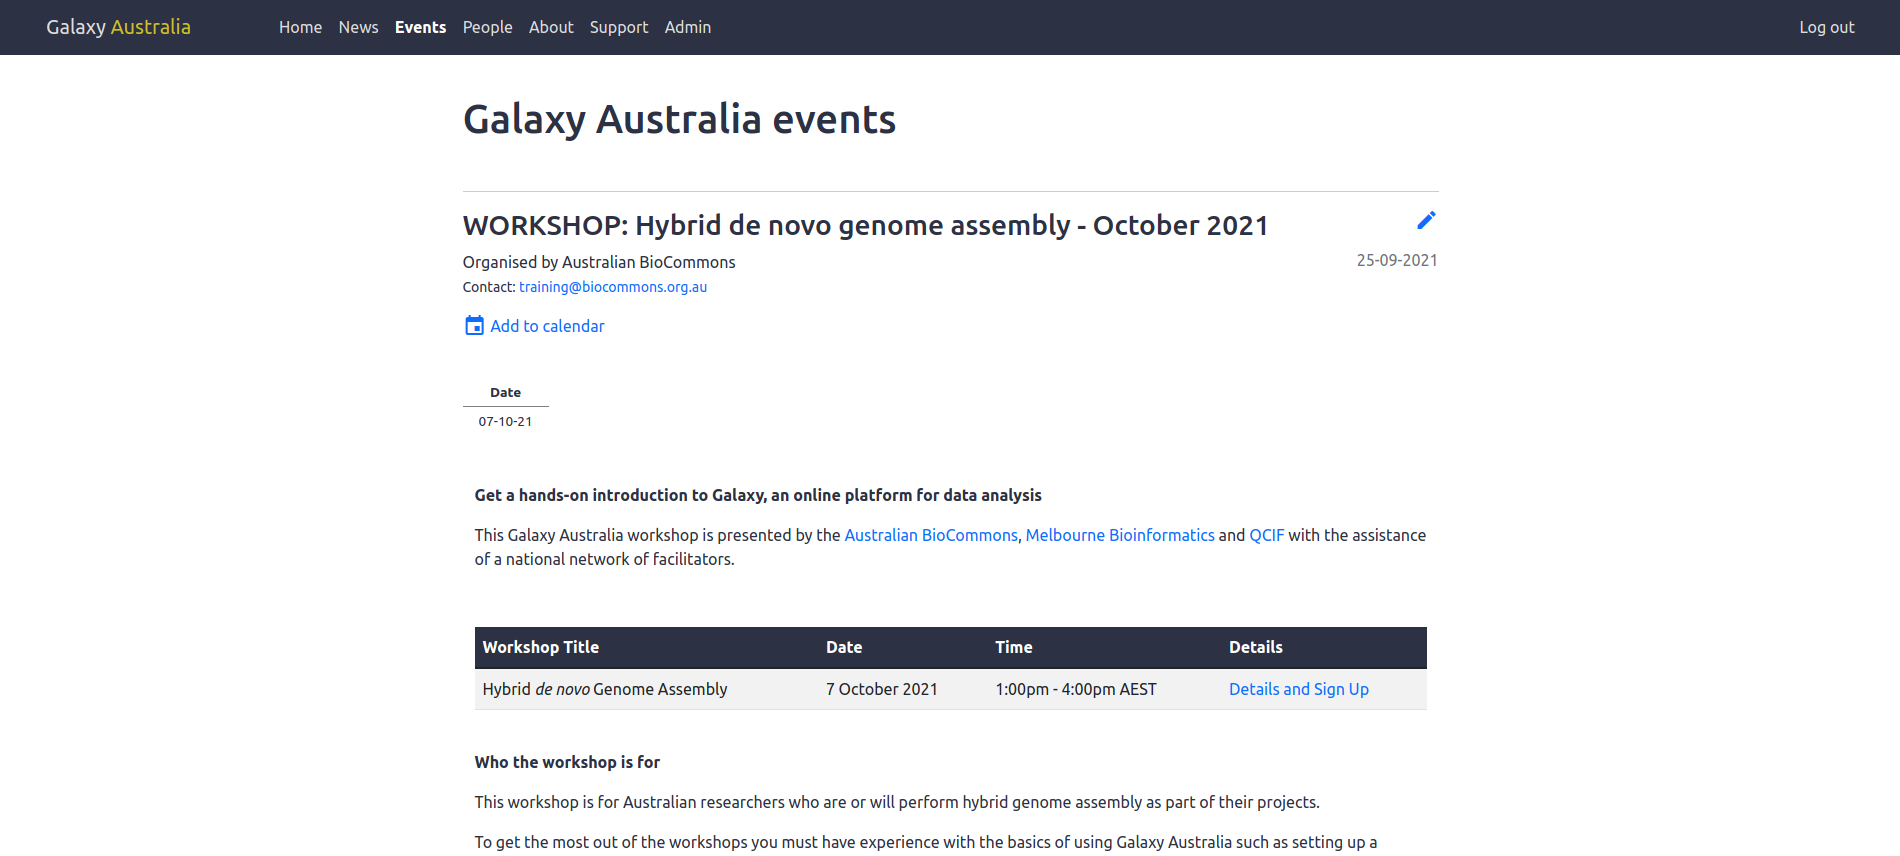
- Title: Title for the event (the only required field).
- Body: The main content for the post, written as valid markdown.
- Organiser name: Who is organising the event.
- Organiser email: A valid email address for users to make contact.
- Location: Relational field. Pick an existing address or create a new one with the "+" button.
- Timezone: A valid Olson timezone (see pytz package for reference).
- Date/time start/end: Start and end of the event. Please check that this renders as expected before publishing.
-
External: A valid URL for external content, if hosted by another organisation. Users will be directed here when they click on the event (instead of an internal "Event post" page), so this makes most other fields redundant (
body,location,Timezone,Supporters,Event images). -
Tags: Choose existing or create new.
Tagswill be rendered as icons in list view and a coloured badge in page view. -
Supporters: Choose existing or create new.
Supporterswill be rendered as linked logos at the bottom of the page view. - Published: Post will be visible to admins only until this is checked. This allows you to safely view and revise before publishing.
- Event images: Upload images to be linked in the body markdown.
The way this is implemented is somewhat hacky and could be improved, but it's not hard to do. Just upload an image or two to the "Event images" field and enter corresponding image tags in the body markdown like so:
# A great day to be alive
Some content.
 <!-- This will render the first image from the "Event images" field -->
Some more content, blah blah blah.
 <!-- This will render the second image in the "Event images" field -->This is also perfectly acceptable:
# A great day to be alive
Some content.
 <!-- Will render the second image in the "Event images" field -->
Some more content, blah blah blah.
 <!-- Will render the first image in the "Event images" field -->
Some bonus text before the same images are shown again, but this time make them smaller:
<img src="img2" width="250"/>
<img src="img1" width="250"/>Take note of the image order in the "Event images" upload field. The URI of the first image will be inserted into [img1], and so on. In the body, they can be reference multiple times and in any order. By default, they are displayed with width: 100%; height: auto;. If you need to specify the size, just tag them as a HTML <img> instead and specify a width attribute, as shown in the last example.
If you click "Save and continue", you will notice that the img1 tag has been replaced with a real URI.
Watch out: When modifying an Event and replacing/updating an existing "Event image", the old URI will not be replaced. You'll have to tag it in the body again (img1 etc.) for it to re-render.
Preview your post
To preview the article before publishing, you can use of the markdown editor's "preview" icon - but be aware that this is a very rough approximation of how the article will render!
A much more reliable way to sanity-check your post:
- Make sure that
Publishedis unchecked - Click "Save and continue editing"
- In a new tab, open the Events list view (
/admin/events/event/) and click on "View page" for your new post. - As you edit and save the form, refresh the event post page and check the content
- When you are happy, check
Publishedand save to publish the post
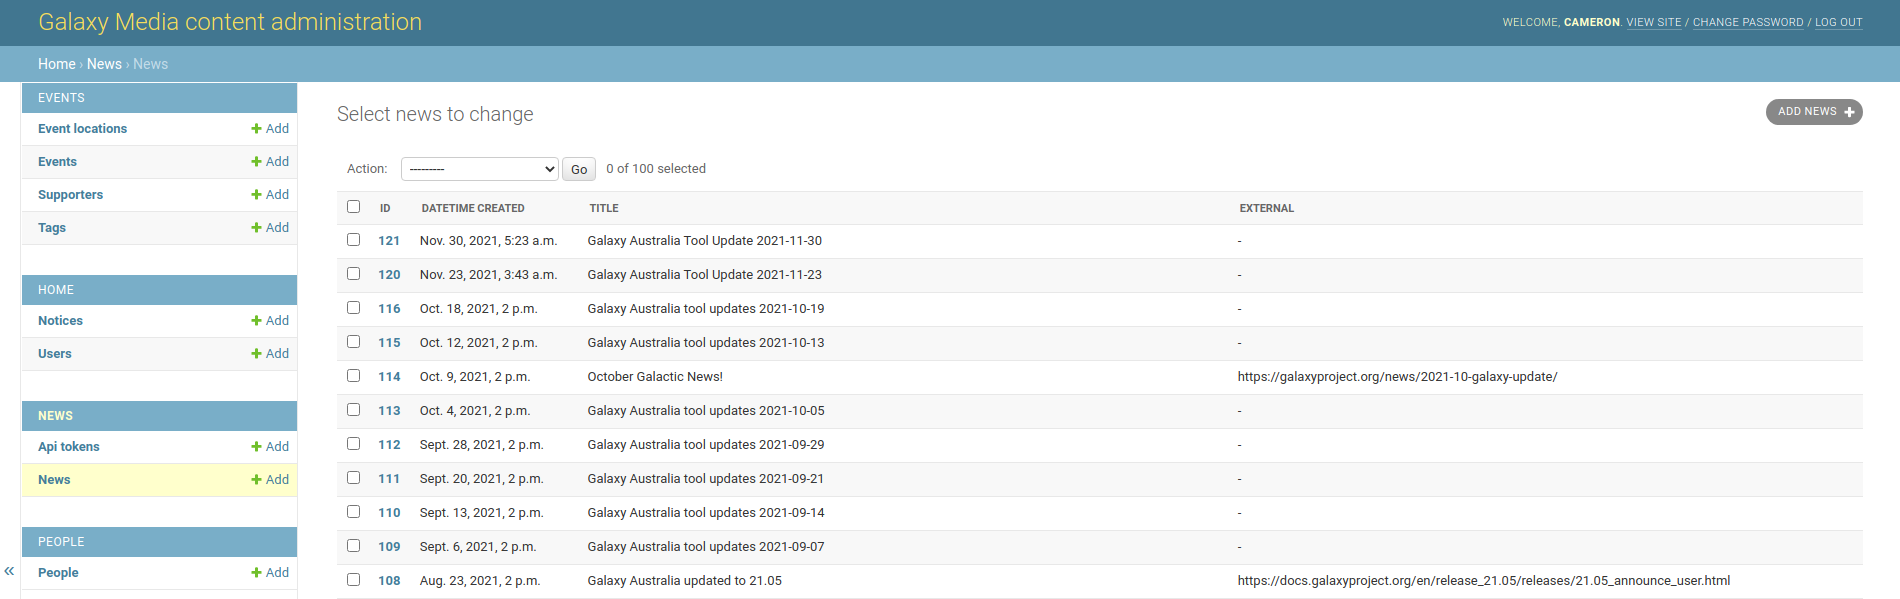
News posts copy much of their structure and logic from Events, but are simpler with fewer fields. They reuse the same Tags and Supporters objects from Events. As with the Events list view, you will find links to create and edit news posts if logged in as an admin.
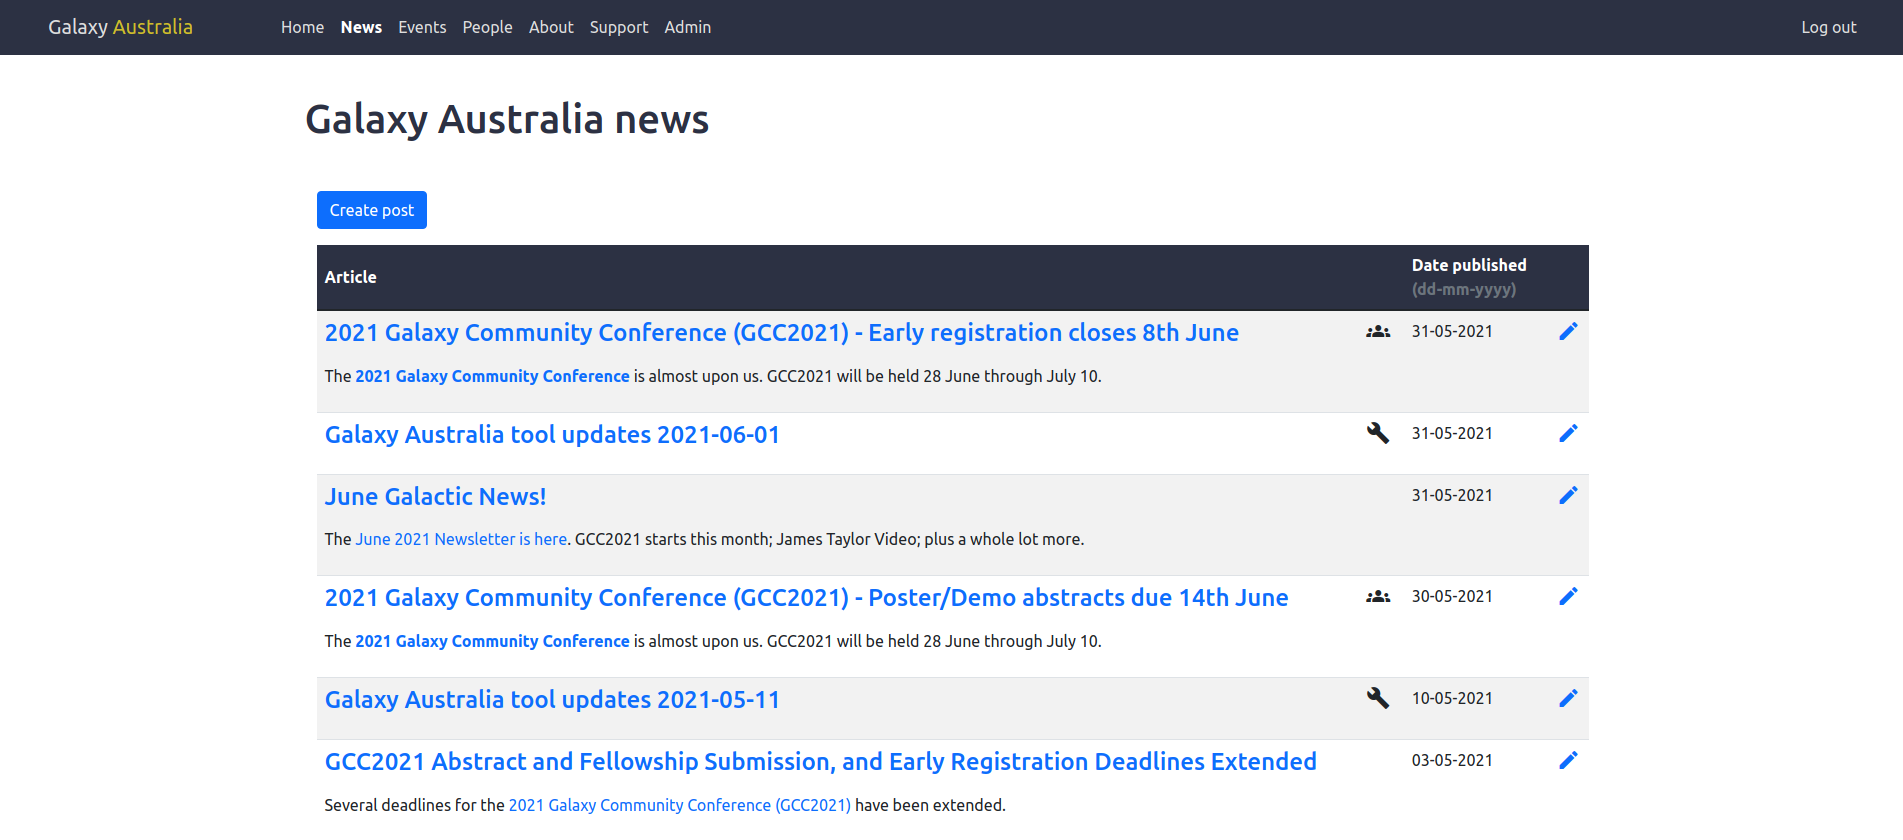
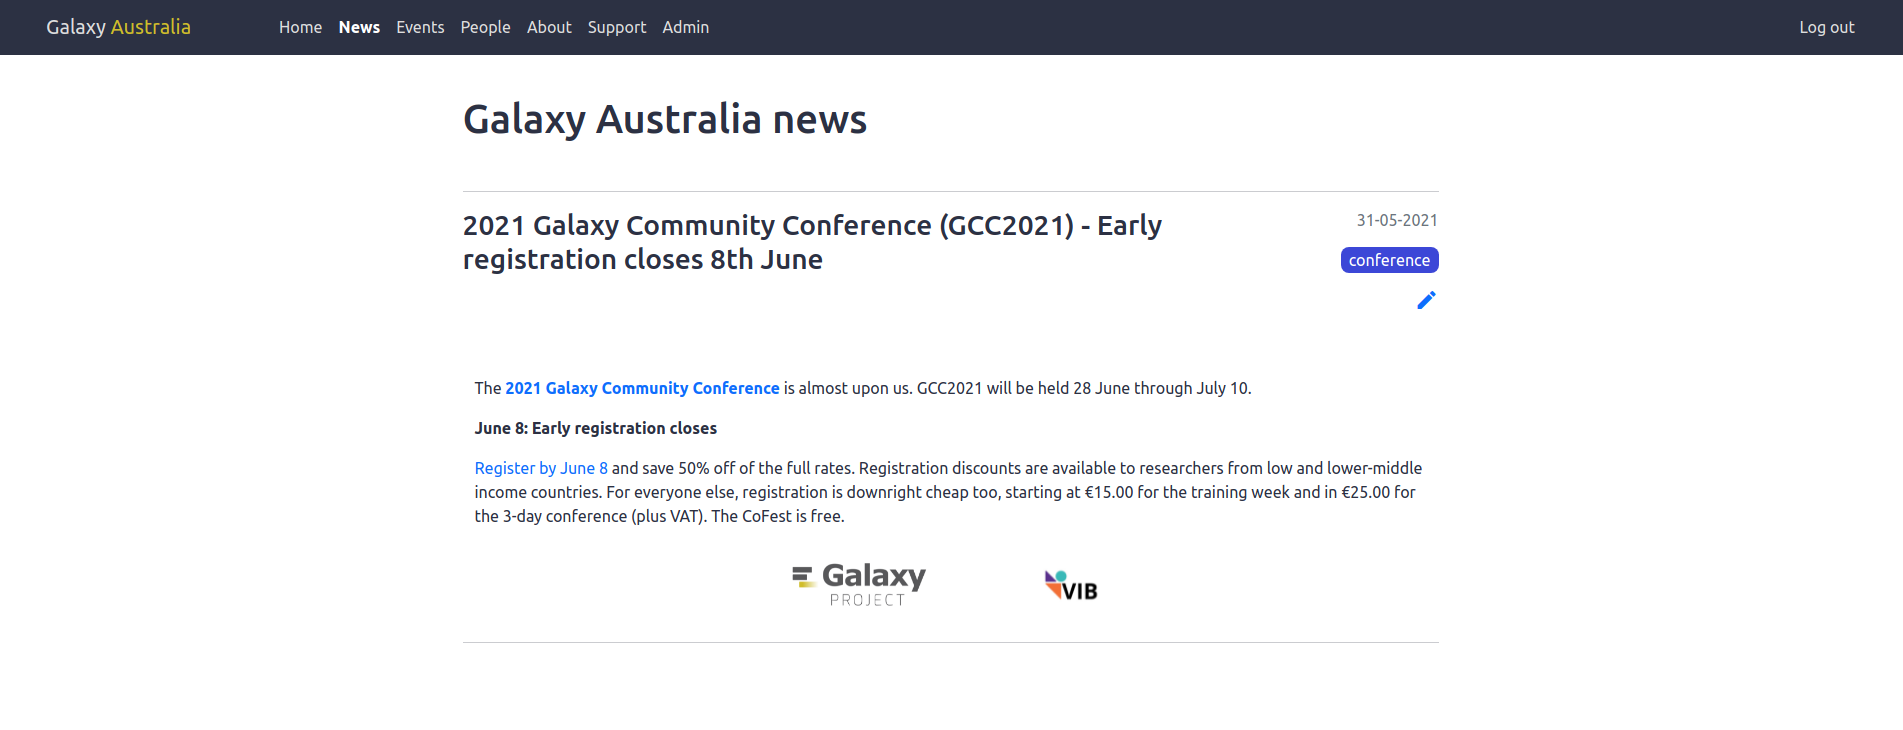
- Title: Title for the News article (the only required field).
- Body: The main content for the article, written as valid markdown (uses the same implementation as the Event body).
- External: A valid URL for external content, if hosted by another organisation. Users will be directed here when they click on the news item (instead of a rendered "News article" page), so this replaces the body.
-
Tags: Choose existing or create new.
Tagswill be rendered as icons in list view and as a coloured badge in page view. -
Supporters: Choose existing or create new.
Supporterswill be rendered as linked logos at the bottom of the page view. - Published: Post will be visible to admins only until this is checked. This allows you to safely view and revise before publishing.
- News images: Upload images to be linked in the body markdown.
For previewing a News post, refer to the above guide on Events posts.
On Galaxy Australia we use a Jenkins task to create automated "Tool Update" news posts over the GMS API. This is currently the only API endpoint that the site exposes and can be used for this purpose only. In order to post successfully to the API, the request must include a token created in the GMS Admin panel in a post request to mysite.com/news/api/create.
As with all content in the admin panel you can create and delete API Tokens as you please - you likely only require one token but you may wish to rotate them periodically. The token can be viewed in plain text once you hit "Save and continue" on the "Create Token" form - please keep it very secret!
Here's a mock example of how a Cron job might look on the Galaxy Australia Jenkins server:
N.B. WEBSITE_API_TOKEN should be set in the Jenkins credentials - DO NOT push this to a public git repository or you will compromise your GMS API!
#! /bin/bash
REPORT_DATE="$(date)"
REPORT_FILE="${REPORT_DATE}-tool-updates.md"

python create_my_tool_update.py > $REPORT_FILE

if [ -f $REPORT_FILE ]; then
  curl -X POST -d "api_token=${WEBSITE_API_TOKEN}&tool_update=true\
&body=$(cat $REPORT_FILE)" https://site.usegalaxy.org.au/news/api/create
else
  echo "No report generated for $REPORT_DATE"
fi
For further reference, have a look at the code repository for the Galaxy Australia Jenkins server.