-
Notifications
You must be signed in to change notification settings - Fork 0
Installation
The following guide will help you installing the Kaleyra Video iOS SDK in your app. Several installation methods are supported.
Starting from 3.7.0 version the SDK supports Swift package manager.
Step by step guide
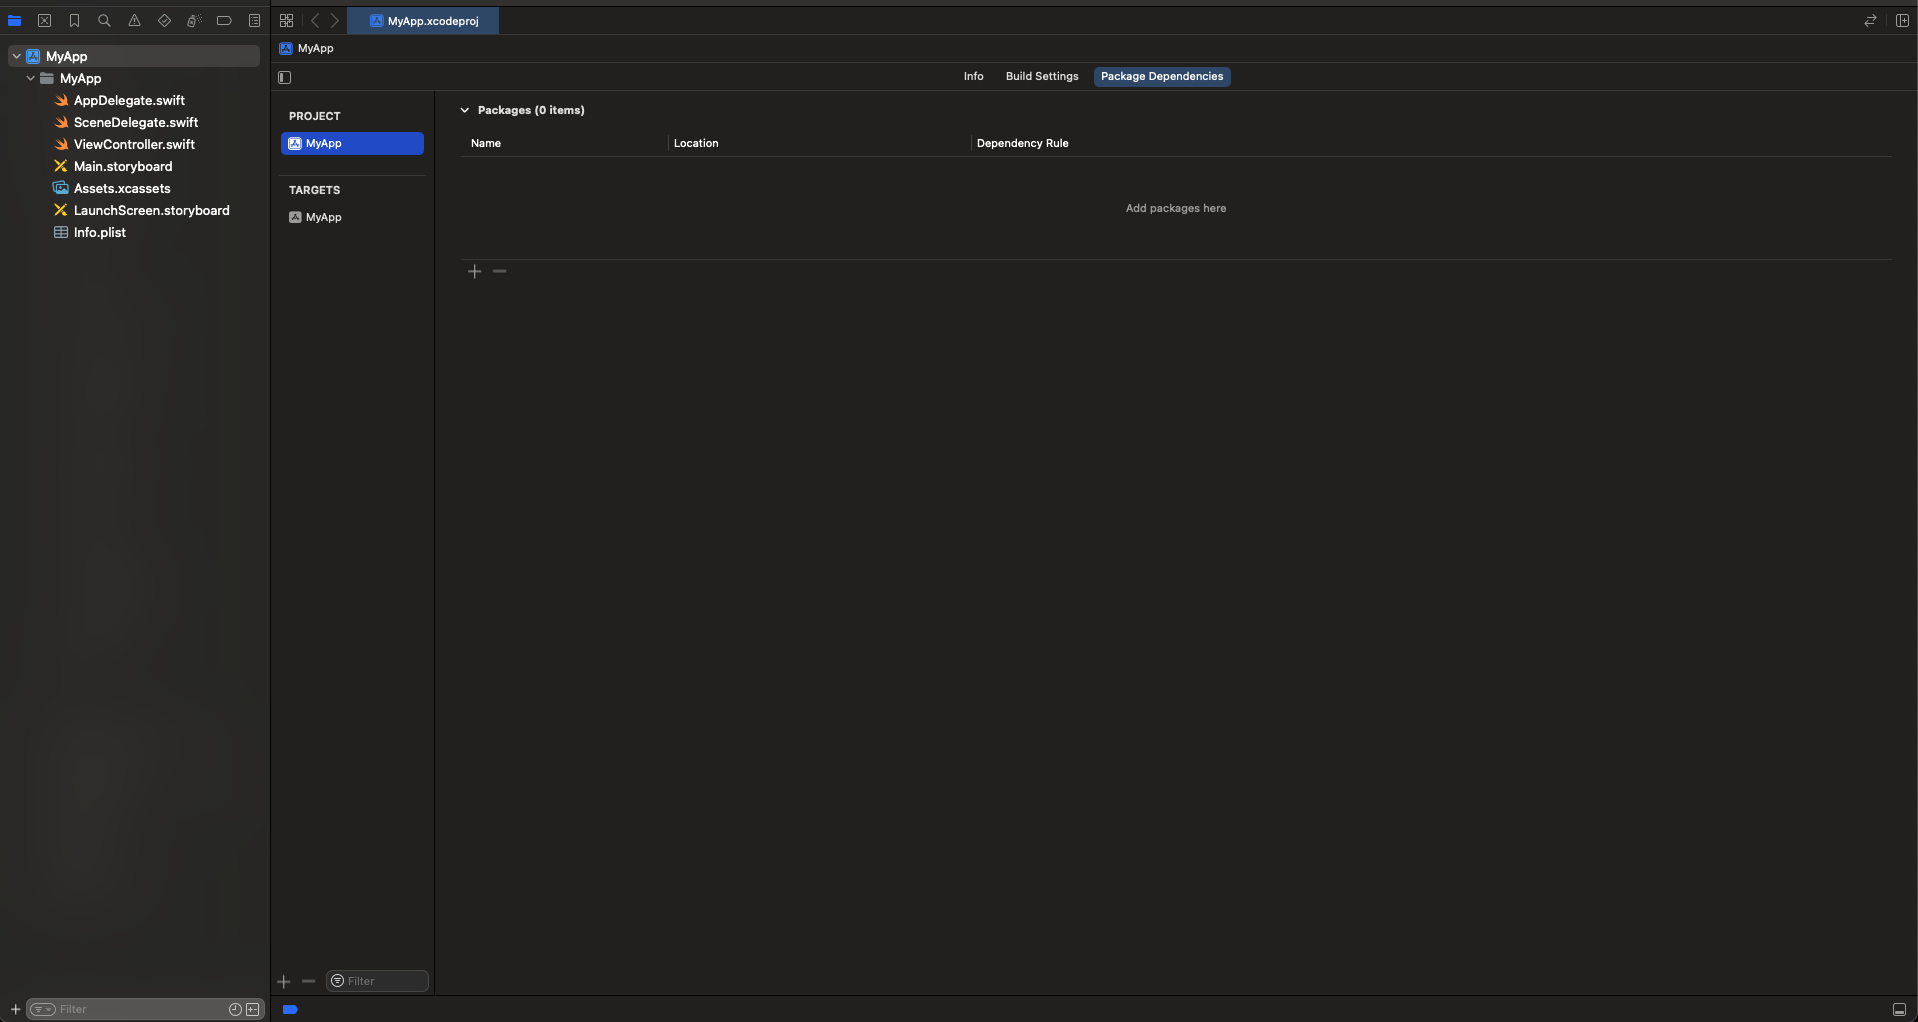
In order to add the package to your app, open Xcode then select the project file in the project navigator panel, then select your project in the editor sidebar on the left, finally select the "Package Dependencies" tab:

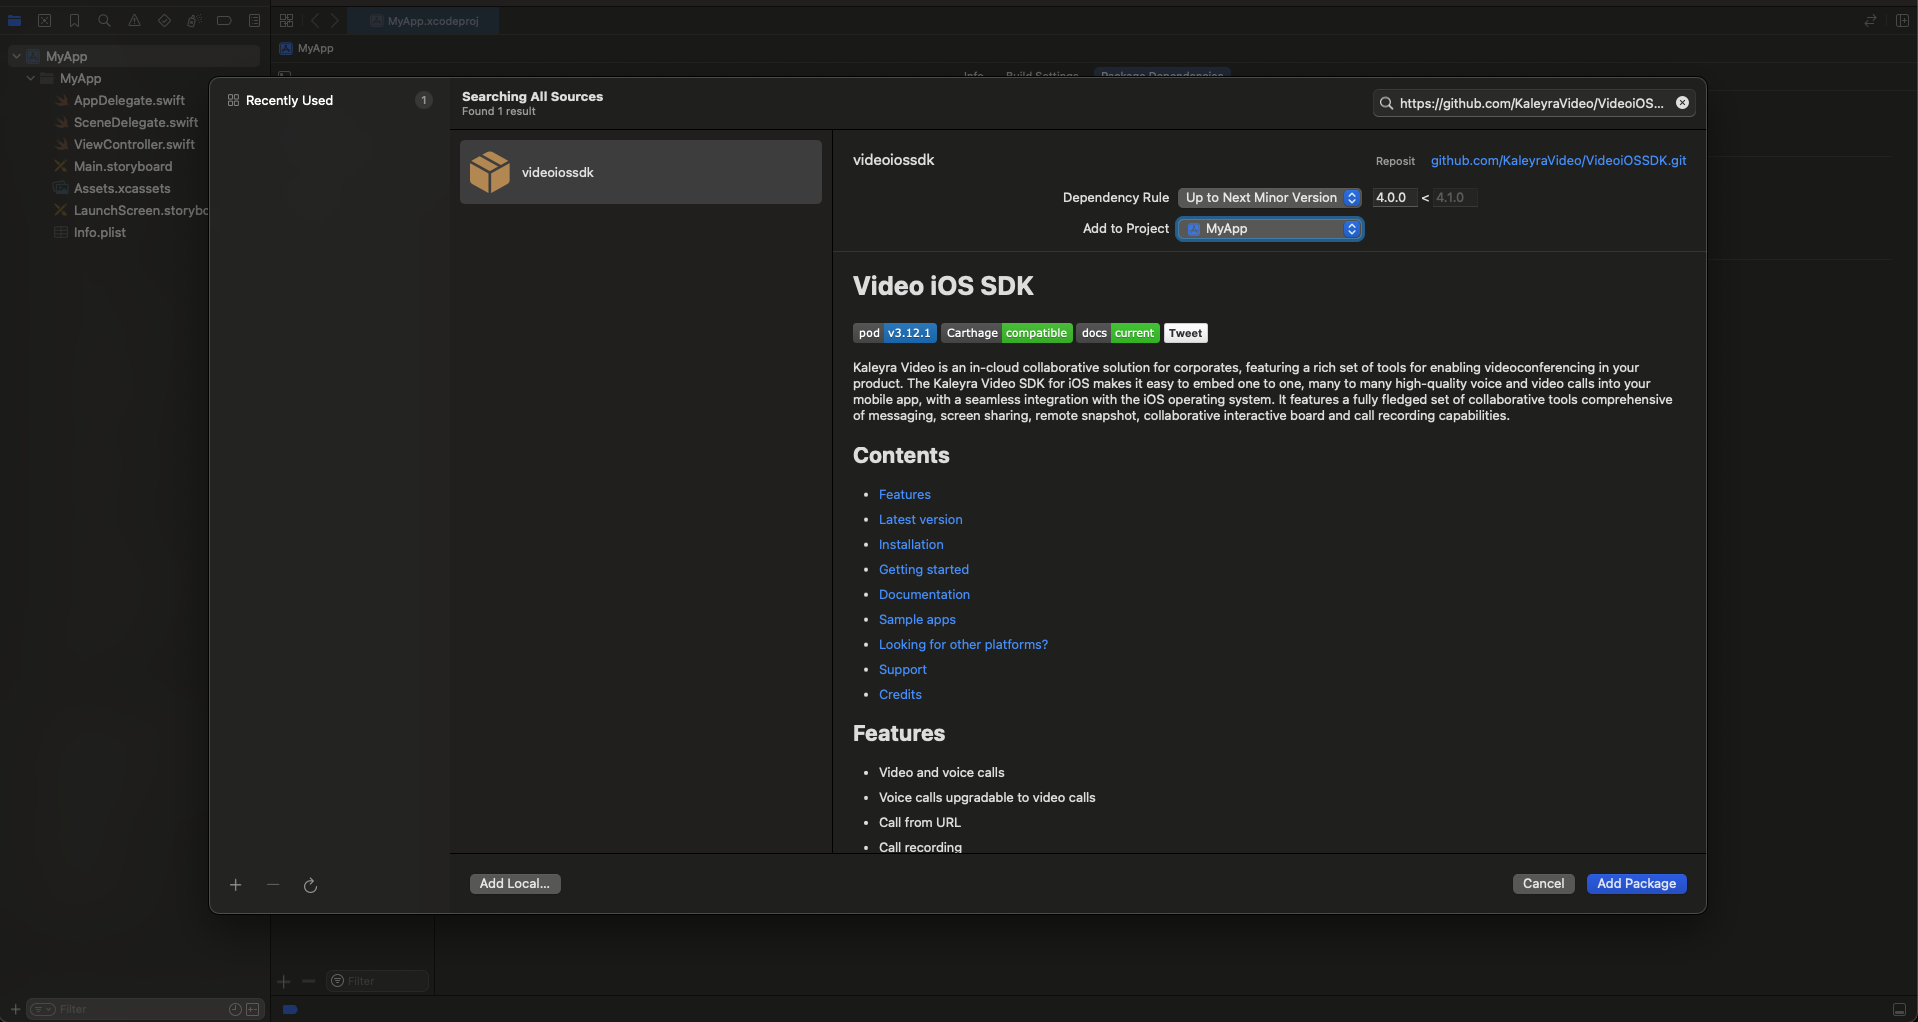
Once you are done with the steps above, you can add a new package to your project by clicking on the "+" icon. Xcode will prompt you to select the package you want to add to the project.
Copy the following URL in the search field:
https://github.com/KaleyraVideo/VideoiOSSDK
Then select the dependency rule you prefer.

Cocoapods installation
You can install CocoaPods with the following command:
$ gem install cocoapodsIf you're new to CocoaPods, the website contains lots of helpful documentation to get you acquainted with it.
Version 4.x
To integrate the latest major version into your Xcode project using Cocoapods, specify it in your Podfile:
platform :ios, '15.0'
use_frameworks!

target '<YOUR_TARGET_NAME>' do
    pod 'KaleyraVideoSDK', ~> '4.0.0'
end
Replace '<YOUR_TARGET_NAME>' with the name of your App target and then, in the Podfile directory, run the following command:
$ pod install --repo-updateVersion 3.x
To integrate the 3.0 SDK version into your Xcode project using Cocoapods, specify it in your Podfile:
platform :ios, '10.0'
use_frameworks!

target '<YOUR_TARGET_NAME>' do
    pod 'Bandyer', ~> '3.1.0'
end
Replace '<YOUR_TARGET_NAME>' with the name of your App target and then, in the Podfile directory, run the following command:
$ pod install --repo-updateStarting from version 3.10.2 we are allowing the installation of the Kaleyra Video framework as a standalone framework without the WebRTC framework when using Cocoapods. You are supposed to use this framework only if your app happens to have another framework providing the WebRTC framework in order to avoid conflicts
Caution
Beware, the WebRTC framework is still needed in order to compile and run the application. Moreover, you are responsible for using a compatible WebRTC module. WebRTC versions starting from M100 and above should be supported.
Podfile
To integrate the standalone SDK version into your Xcode project using Cocoapods, specify it in your Podfile:
platform :ios, '15.0'
use_frameworks!

target '<YOUR_TARGET_NAME>' do
    pod 'KaleyraVideoSDK/Core', ~> '4.0.0'
end
Replace '<YOUR_TARGET_NAME>' with the name of your App target and then, in the Podfile directory, run the following command:
$ pod install --repo-updateStarting from version 4, Kaleyra Video drops support for Carthage.
Version 3 (legacy)
The Kaleyra Video iOS SDK supports installation through Carthage dependency manager. If you are new to Carthage we strongly suggest you to take a look at its documentation before continuing reading this chapter. In order to add the Kaleyra Video SDK to your app using Carthage, you must update your Cartfile adding the following directive replacing "version" with the actual version you are interested in:
github "bandyer/bandyer-ios-sdk" ~> version
Then, once the Cartfile has been updated, you must tell carthage to checkout the Bandyer framework from terminal:
# Move to your project root directory, where the Cartfile is located, then run the following command:
$ carthage update --use-xcframeworks --platform iOS
If you see the following message: "Dependency "bandyer-ios-sdk" has no shared framework schemes for any of the platforms: iOS" when carthage has finished updating don't worry, it's not an issue.
As with all frameworks included with Carthage, you must manually update your project configuration. These steps however are required for any dynamic framework and are explained in detail in Carthage documentation, so we are not going to bothering you with a step by step guide.
XCFramework
Coming soon...
Fat framework (legacy)
-
Clone or download the SDK
-
Then drag and drop the following frameworks into you XCode project
Bandyer.frameworkWebRTC.framework
-
Then drag and drop the following projects into your XCode project:
-
Socket.IO-Client-Swift(3.5.0 version and below) -
Starscream(3.5.0 version and below)
-
-
In your project's build configuration (Go to your project's settings and find the "Build Phases" tab, then in the "Target Dependencies" section) add the following frameworks:
-
Socket.IO-Client-Swift(3.5.0 version and below) -
Starscream(3.5.0 version and below)
-
-
Then find the "General" tab and under the "Embedded Binaries" section add:
Bandyer.frameworkWebRTC.framework-
Socket.IO-Client-Swift(3.5.0 version and below) -
Starscream(3.5.0 version and below)
-
In the "Linked Frameworks and libraries" section add:
Foundation.frameworkUIKit.frameworkAVFoundation.frameworkSystemConfiguration.frameworkMobileCoreServices.frameworkWebKit.frameworkMediaPlayer.frameworkCoreGraphics.frameworkCoreMedia.frameworkCoreImage.frameworkCoreServices.frameworkPhotos.frameworkSecurity.frameworkCallKit.frameworkIntents.frameworkPushKit.frameworkReplayKit.framework
-
In the "Build Settings" tab, if your app doesn't contain any swift code, set Always Embed Swift Standard Libraries to YES.
-
Last thing, Bandyer.framework, WebRTC.framework are Fat frameworks and they contain x86 and x64 slices that must be removed before submitting your app to the App Store, otherwise your binary won't pass through the AppStore validation checks, and your binary will be rejected. For an example of how to remove unsupported architecture see https://dzone.com/articles/creating-a-universal-framework-in-xcode-9
Looking for other platforms? Take a look at Android, Flutter, ReactNative, Ionic / Cordova. Anything unclear or inaccurate? Please let us know by submitting an Issue or write us here.