-
Notifications
You must be signed in to change notification settings - Fork 200
Hardware ~ Proper Wiring
Rodizio edited this page Jan 9, 2019
·
2 revisions
Read these instructions carefully and follow them! You may run into all kinds of strange problems, crashes, unstabilites, packetloss, bad blocks and glitches if you don't!
YOU NEED TO SUPPLY BOTH THE RASPBERRY PI AND THE WIFI CARDS WITH STABLE 5 VOLTS!
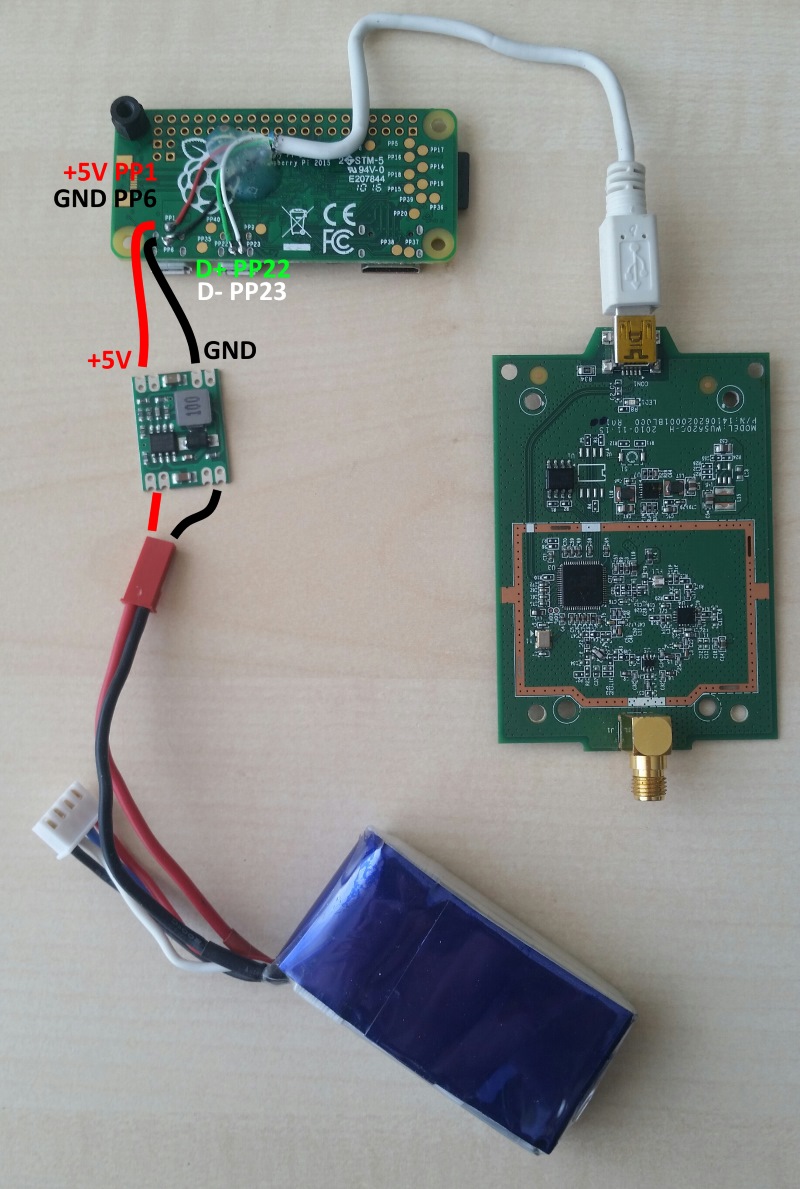
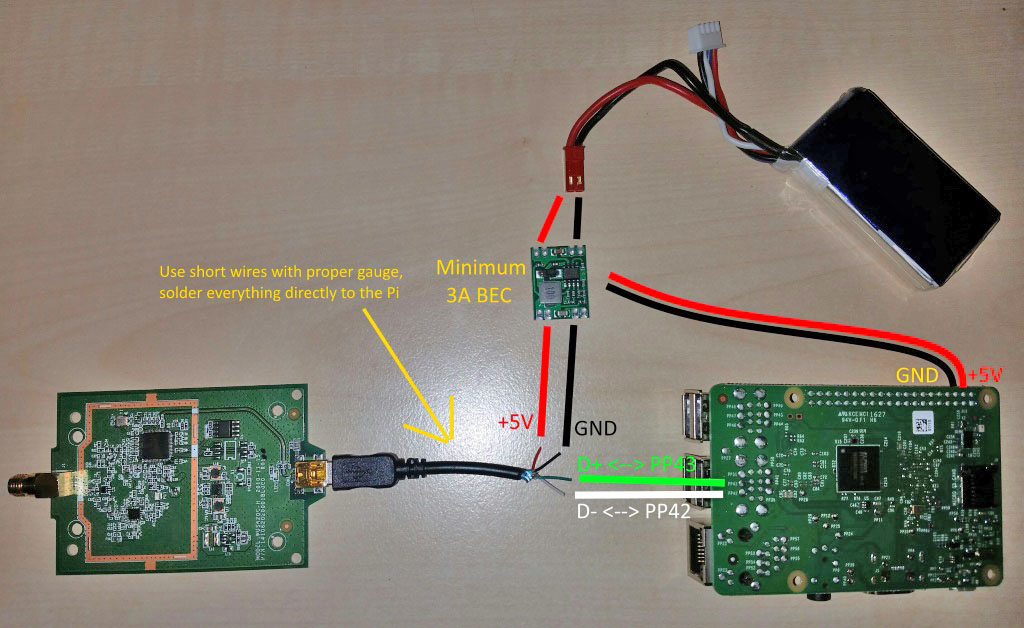
- use short wires
- use wires with proper gauge, 20AWG (0.5mm²) is recommended
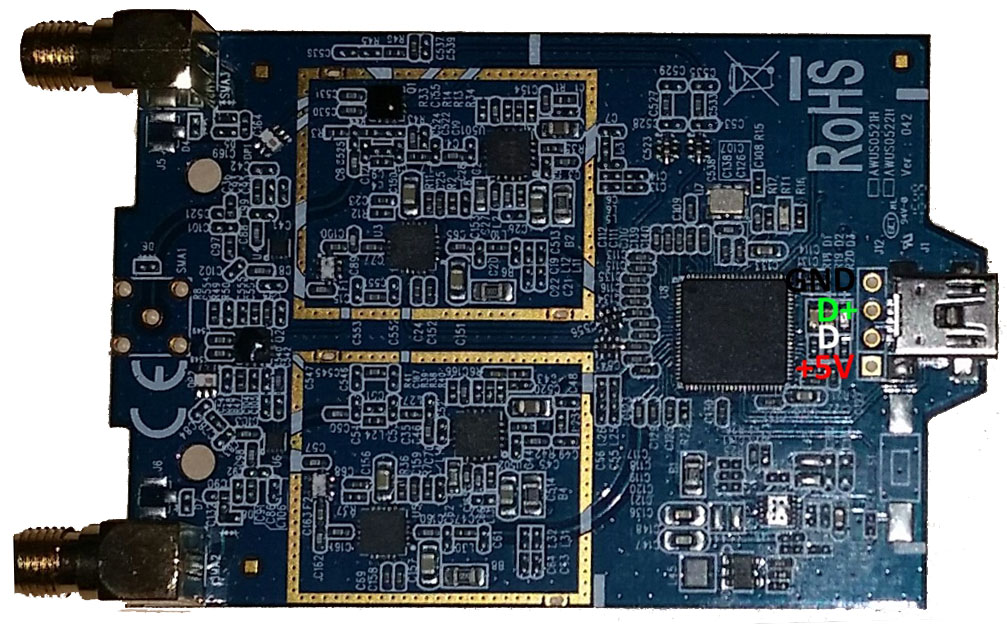
- solder everything, avoid any USB cables or plugs, often they are of questionable quality, wires are too thin and connectors fit too losely and can't cope with vibrations/shocks
- If you don't want or can solder directly to the card (for example on the Alfa AWUS036NHA, solder pads are very small), use a a USB cable and cut it off right behind the connector, then solder thicker wires to it (or directly to the Pi). Another alternative is to buy DIY USB connectors and solder cables to the conenctors directly.
- use a quality BEC which can handle the load, depending on number and type of cards and Raspberrys used, current consumption can be as high as 3A for short peak periods.
- consider adding low-ESR electrolytic caps near the wifi cards and Pi
- do not use USB power banks, often they're of questionable quality and cannot deliver the advertised current
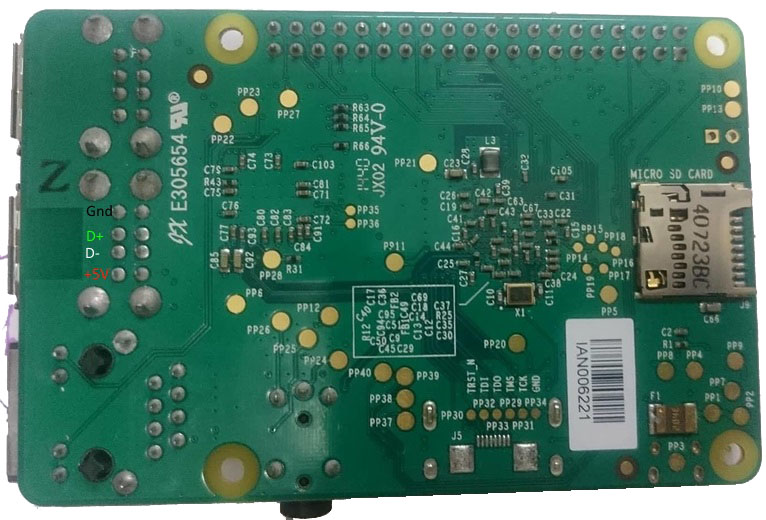
- do not use the micro USB socket for power supply, apart from the drawbacks of the micro USB connector itself, on the Pi1/2/3 (as well as Pi1A+ and Pi3A+) there is a polyfuse in the current-path which lowers voltage and limits current which can lead to issues and instabilitues. If you want to power the Pi through the testpads at the bottom, make sure you use the testpads that are after the polyfuse (search Raspberry forum for details)
- power through the GPIO pins
- make sure the camera cable is properly seated on both ends
- secure the camera cable with some tape or a drop of hotglue
- make sure the Raspberry and wifi cards don't get hot, consider heatsinks
- Keep the antenna away from the camera and camera cable
- The Raspberry (and/or maybe the cam and it's cable, needs to be further investigated) seem to affect both 433Mhz,868Mhz LRS and also GPS reception, consider some seperation or shielding of the components


Example of a groundPi powered through GPIO (+ 5V -> pin 4 / ground -> pin 6) :

The 3A BEC can also power a 7" HDMI screen with a micro USB connector.
General
Hardware Setup
- Proper Wiring
- Power Supply (BECs)
- Supported Pi models
- Supported Cameras
- Supported WiFi Adapters
- Supported Displays
- Antennas
- DIY builds
Software Setup
- Basic configuration options
- Advanced Options
RC Control
- General
- RC with Ardupilot (MAVlink)
- RC with iNav
- DIY builds
Ground Stations
- Mission Planner (Windows)
- QGroundControl (Windows / Linux / Mac / Android /iOS)
- APM Planner (Windows / Mac / Linux)
- Tower (Android)
- FPV_VR (Android)
- GStreamer (Windows / Mac / Linux)
- Fishing FanCam (iOS)
Expert Settings
- OSD MAVLink message types
- Transmit power settings
- SSH shell
- Raspivid camera settings
- Optimizing-Power-Consumption
Extensions / AddOns
- HDMI-in cards
- WebCams
- Video Switcher
- Thermal (FLIR, Seek)
- 360° cameras
Community-HUB
Developer's Corner
- Room for Improvement
- Mounting Images
- Reducing Images size
- WinSCP (copying files)