checklist for a blog post with PDF(s) in the Lumber Collection
- fetch origin from spec-lumber repository in GitHub Desktop
- add digital objects to GitHub repository
- add metadata to csv sheet
- add csv sheet to GitHub repository
- generate derivatives of digital objects
- move derivatives to S: Drive
- create new markdown file in Visual Studio Code
- add frontmatter to post
- add digital objects to post
- preview your post
- push changes (this is a 3-step process)
- Open GitHub Desktop
- Set "Current Repository" to "spec-lumber"
- click "fetch origin"

- open Windows File Explorer
- add PDF files to
Documents/GitHub/spec-lumber/objects/archivesfolder
- add image metadata to the Lumber metadata csv Google sheet
- NOTE: when adding PDFs to the csv sheet, make sure the "format" column is "application/pdf." If this is missing, it will break.
- NOTE: make sure the "filename" column lists the extension as
.pdf. When you run therake generate_derivativescommand on a pdf file (see Step 7), it will also generate some .jpg files (to use as the preview images). However, you only need to add the .pdf extension in the csv spreadsheet because when you add the objectid in the blog post (for example, in the cover-image or an include command), it will automatically pull the .jpg if necessary. - NOTE: view this metadata guide if you're unsure how to fill out spreadsheet
- NOTE: file names cannot contain any spaces, or the
rake generate_derivativescommand will not work. - NOTE: file naming best practice includes only using lowercase letters, and using descriptive naming (i.e.
pg83-folder2-item5).
- open the Lumber metadata csv Google sheet and go to
File/Download/comma-separated values (.csv)to download the Google sheet as a csv - open Windows File Explorer and navigate to
Documents/GitHub/spec-lumber/_dataand replace the existinglumber.csvwith the csv you just downloaded from Google sheets
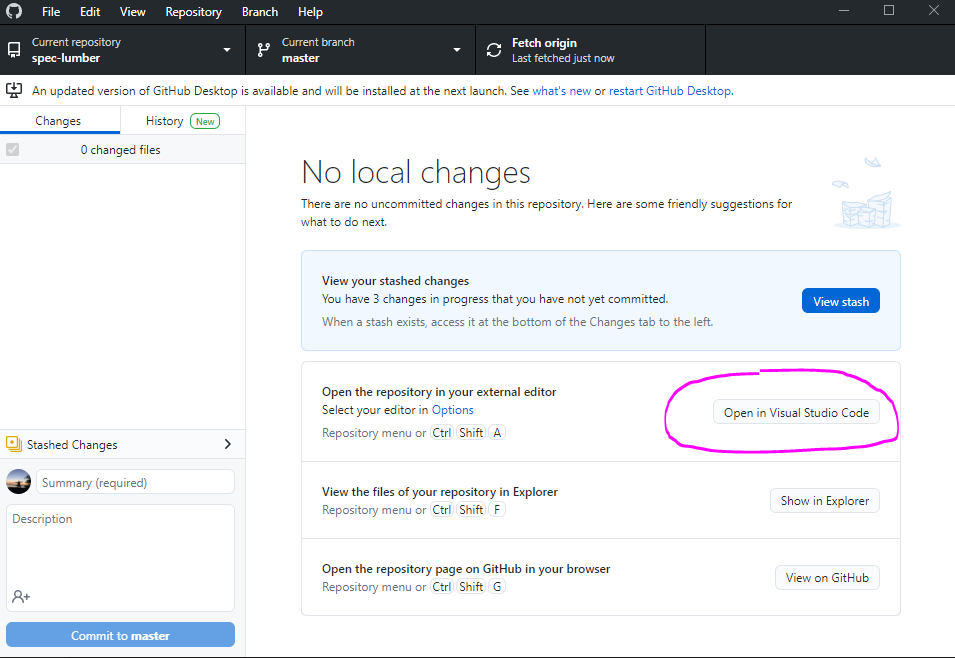
- open GitHub Desktop and click "Open in Visual Studio Code." This will open the spec-lumber repository in Visual Studio Code
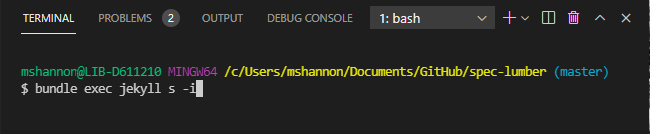
- in Visual Studio Code, click on "Terminal" and "New Terminal" in the top menu
- NOTE: make sure the terminal is set to "bash." The terminal should look similar to this:

If your terminal does NOT look like this, try the following:
- make sure you're viewing the "Terminal tab" (view tabs at top left of screenshot)
- make sure your terminal is using Bash. You can view different terminal types where it says "1: bash" in the screenshot and use the drop down menu to select the correct terminal.
- in Visual Studio Code, type
rake generate_derivativesinto the terminal and hit Enter. This should create derivatives of the digital object(s) you put into theDocuments/GitHub/spec-lumber/objects/archivesfolder.
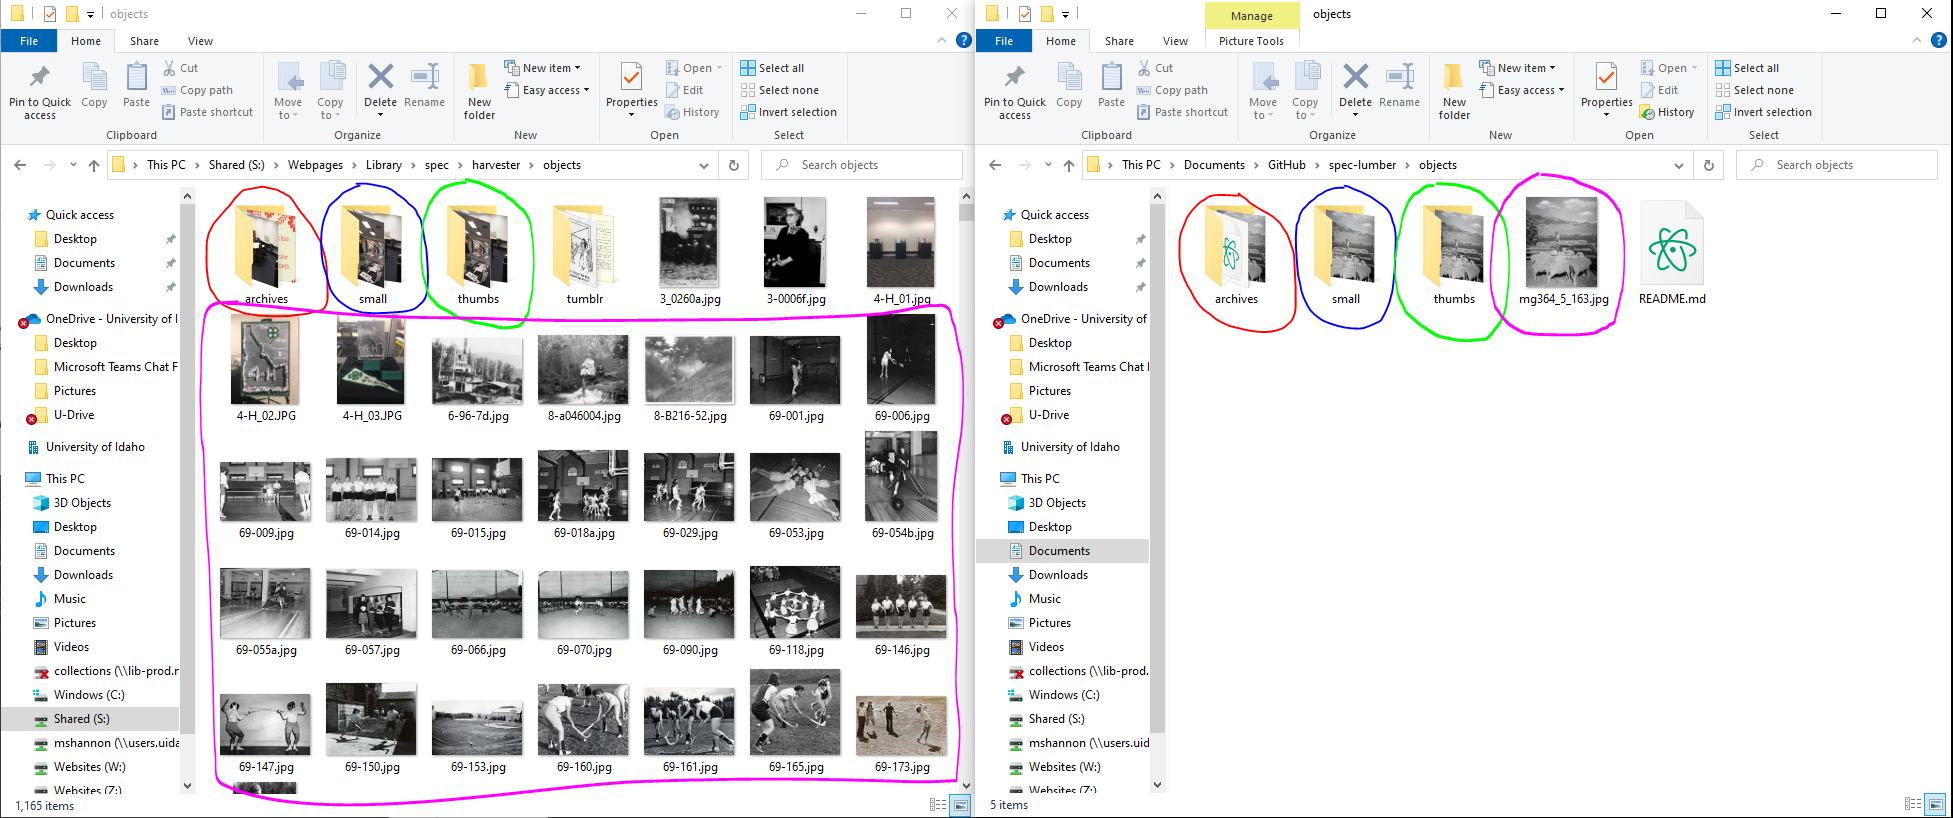
- move derivatives FROM
Documents/GitHub/spec-lumber/objectsTOShared (S:) drive/Webpages/Library/spec/harvester/objects- NOTE: when running the
rake generate_derivativescommand on a .pdf file, it will also generate .jpg files. That's okay - just be sure to transfer the contents of an entire folder to its corresponding folder. - NOTE: it's important to move derivatives into the correct folder, or it can lead to broken images. Use the color code:
- NOTE: when running the
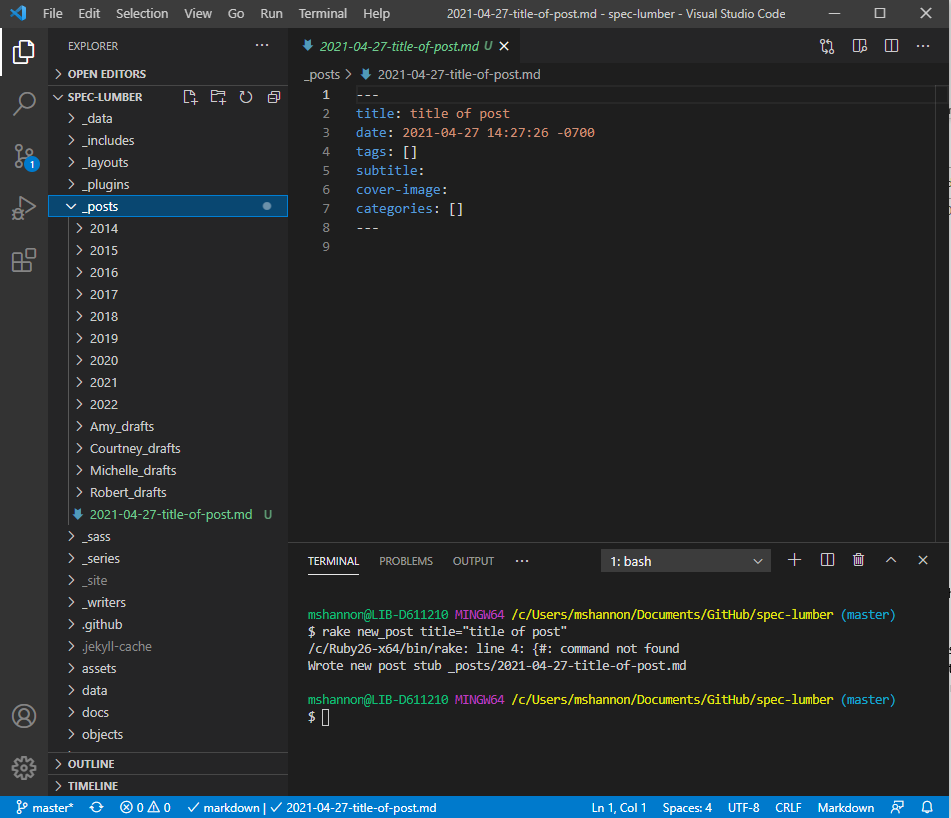
- in Visual Studio Code, type
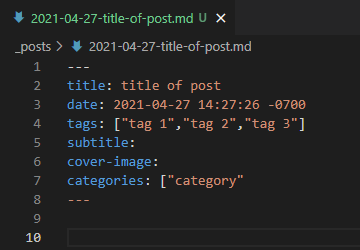
rake new_post title="title of post"into the terminal and hit the Enter key. A new post should be created in the_postsfolder (which you can find in the left-hand navigation menu in Visual Studio Code)- NOTE: the "date" field at the top of the blog post is what dictates when the post goes live on Harvester. The file name (left hand menu) includes the date, but has no effect on when the post goes live. BEST PRACTICE is to match these two dates to whenever you want the post to go live. To change the file name, right-click on the file name (left hand menu) and click "Rename."
- in Visual Studio Code, open the new post you just created. Add the top fields as applicable.
- to add pdfs to the cover-image, just paste the objectid like you normally would. It will automatically pull the jpg (which was generated in the
rake generate_derivativescommand) for the cover image and previews, etc.- NOTE: check out Cover Images Options for Posts for more options
- NOTE: check out Creating a Series and Adding a Post to a Series if your post is part of a series
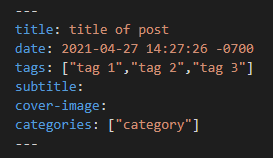
- NOTE: tags and categories must be formatted as follows, or it will break:
-
to add pdfs to the body of the post, use the following command and add the objectid from the Lumber csv spreadsheet:
{% include feature/item-pdf-embed.html objectid="lumber###" %}- NOTE: check out Including PDF Actions for all pdf include options and best practices
- when the content of your post has been written in Visual Studio Code, you can preview the post by typing
bundle exec jekyll s -iinto the terminal- NOTE: PDFs will not render properly in the jekyll preview. This is okay!
- NOTE: the date field at the top must be set for the present day or before. If the date is set for the future, you won't be able to view the post in the preview.
NOTE: if you receive a terminal error like this, it means there is an error in the code that is preventing it from fully parsing. The error will tell you which file, line, and column to look in, so you can narrow your search for the error. Here is the terminal error it will show you:

Here is the error (should be ["category"] with a closing bracket).
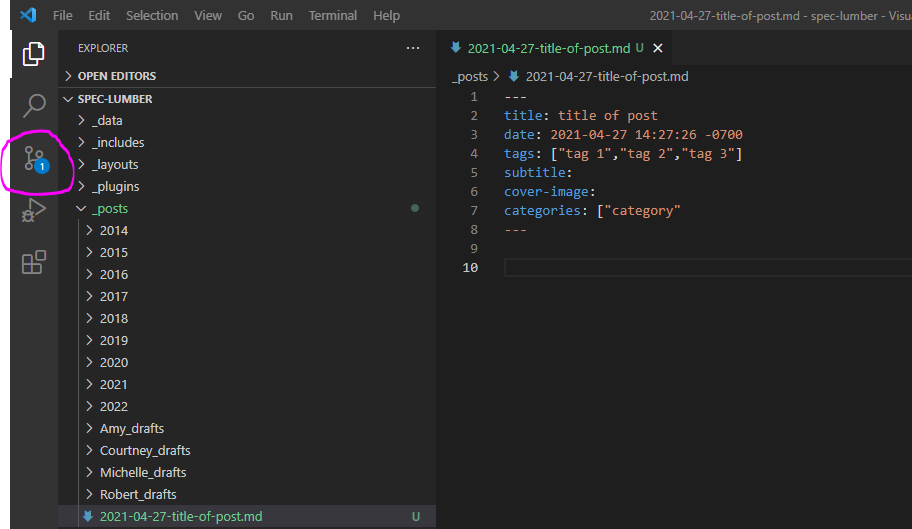
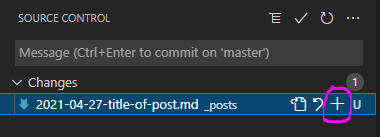
- Go to the Source Control view in Visual Studio Code
- click on the "+" (plus) symbol to stage your changes
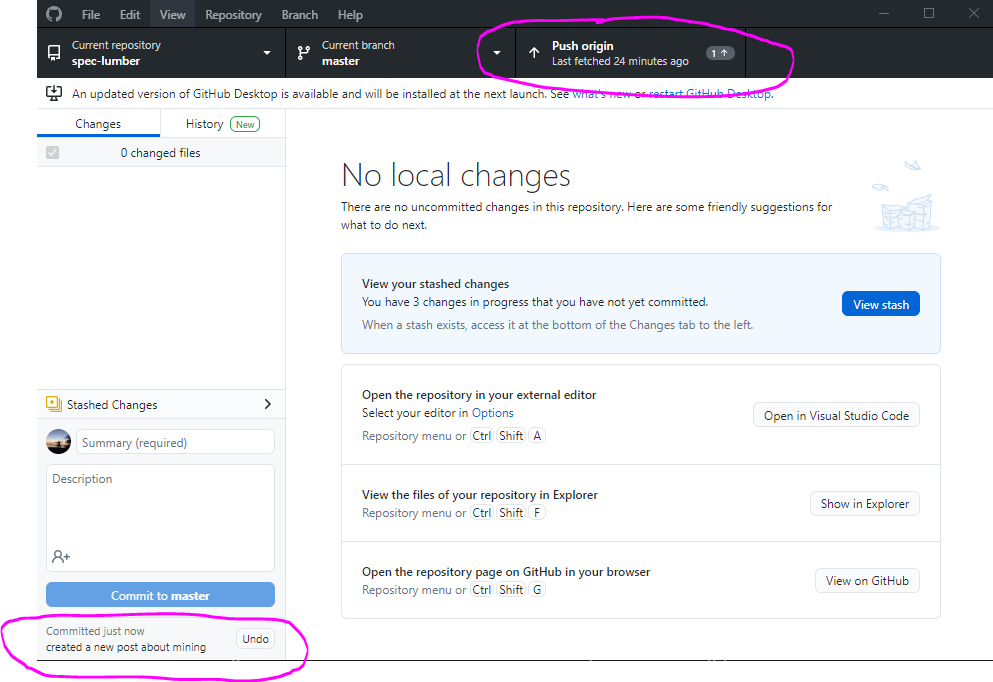
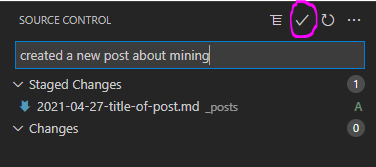
- once your changes are staged, add a descriptive message about what your changes are. Then click on the "checkmark" to commit your changes to your local GitHub repository on your local machine
- open GitHub Desktop. You should see your descriptive message on the bottom left. If you've committed changes by accident, you can undo your commit here. If you want to push your commit, click on "Push Origin" at the top. This will push your commits to the cloud GitHub Repo, and will make your changes live on the Harvester website in approx. 5-10 minutes, or whenever the post is scheduled.