-
Notifications
You must be signed in to change notification settings - Fork 3
Aggregated data Synchronization
→ MetaData Synchronization / Aggregated data sync / Manual Sync
Synchronization for datasets is similar to the events syncronization.
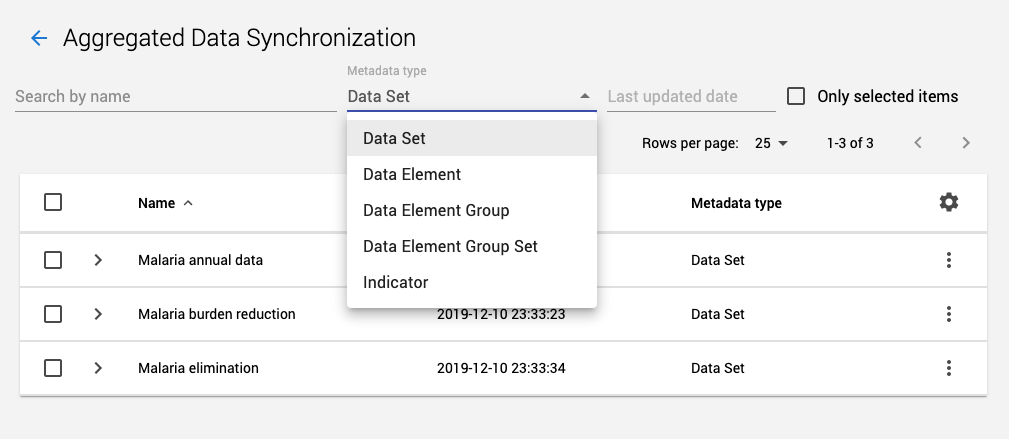
MD Sync will show a screen with a list of metadata objects. To ease search, you can filter these objects by name, by type of metadata and by date of last update.
Don't you find what you are looking for? There might be several pages within this screen. Check the pagination below the search results.

Observe that you don't need to sync a whole dataset, within this window you can unfold the dataset and select/deselect the elements within the dataset. This is useful for data anonymization or simply to send only the meaningful information to the destination instance.
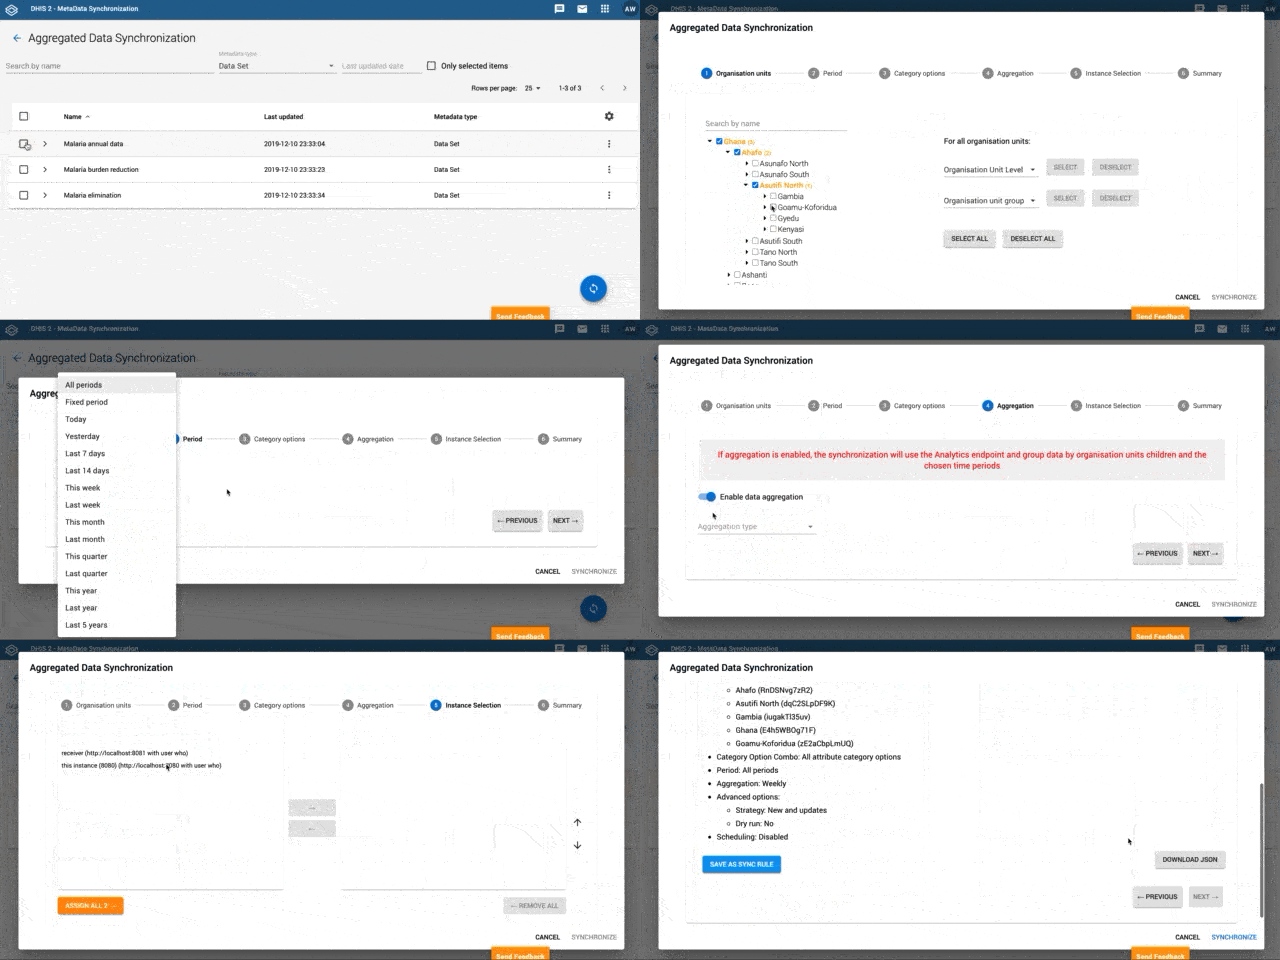
After selecting the elements that you want to sync, start the process, clicking on the sync button ( bottom right corner) The synchronization modal window will appear to guide in 6 steps. Let's explore the process:

- Select the OU for which datasets will be synchronized,
- Select the period of data that need to be synchronized
- Category options. Optional manual selection.
- Aggregate (optional)
- Select the destination instance
- Finally run the synchronization or save it as a rule
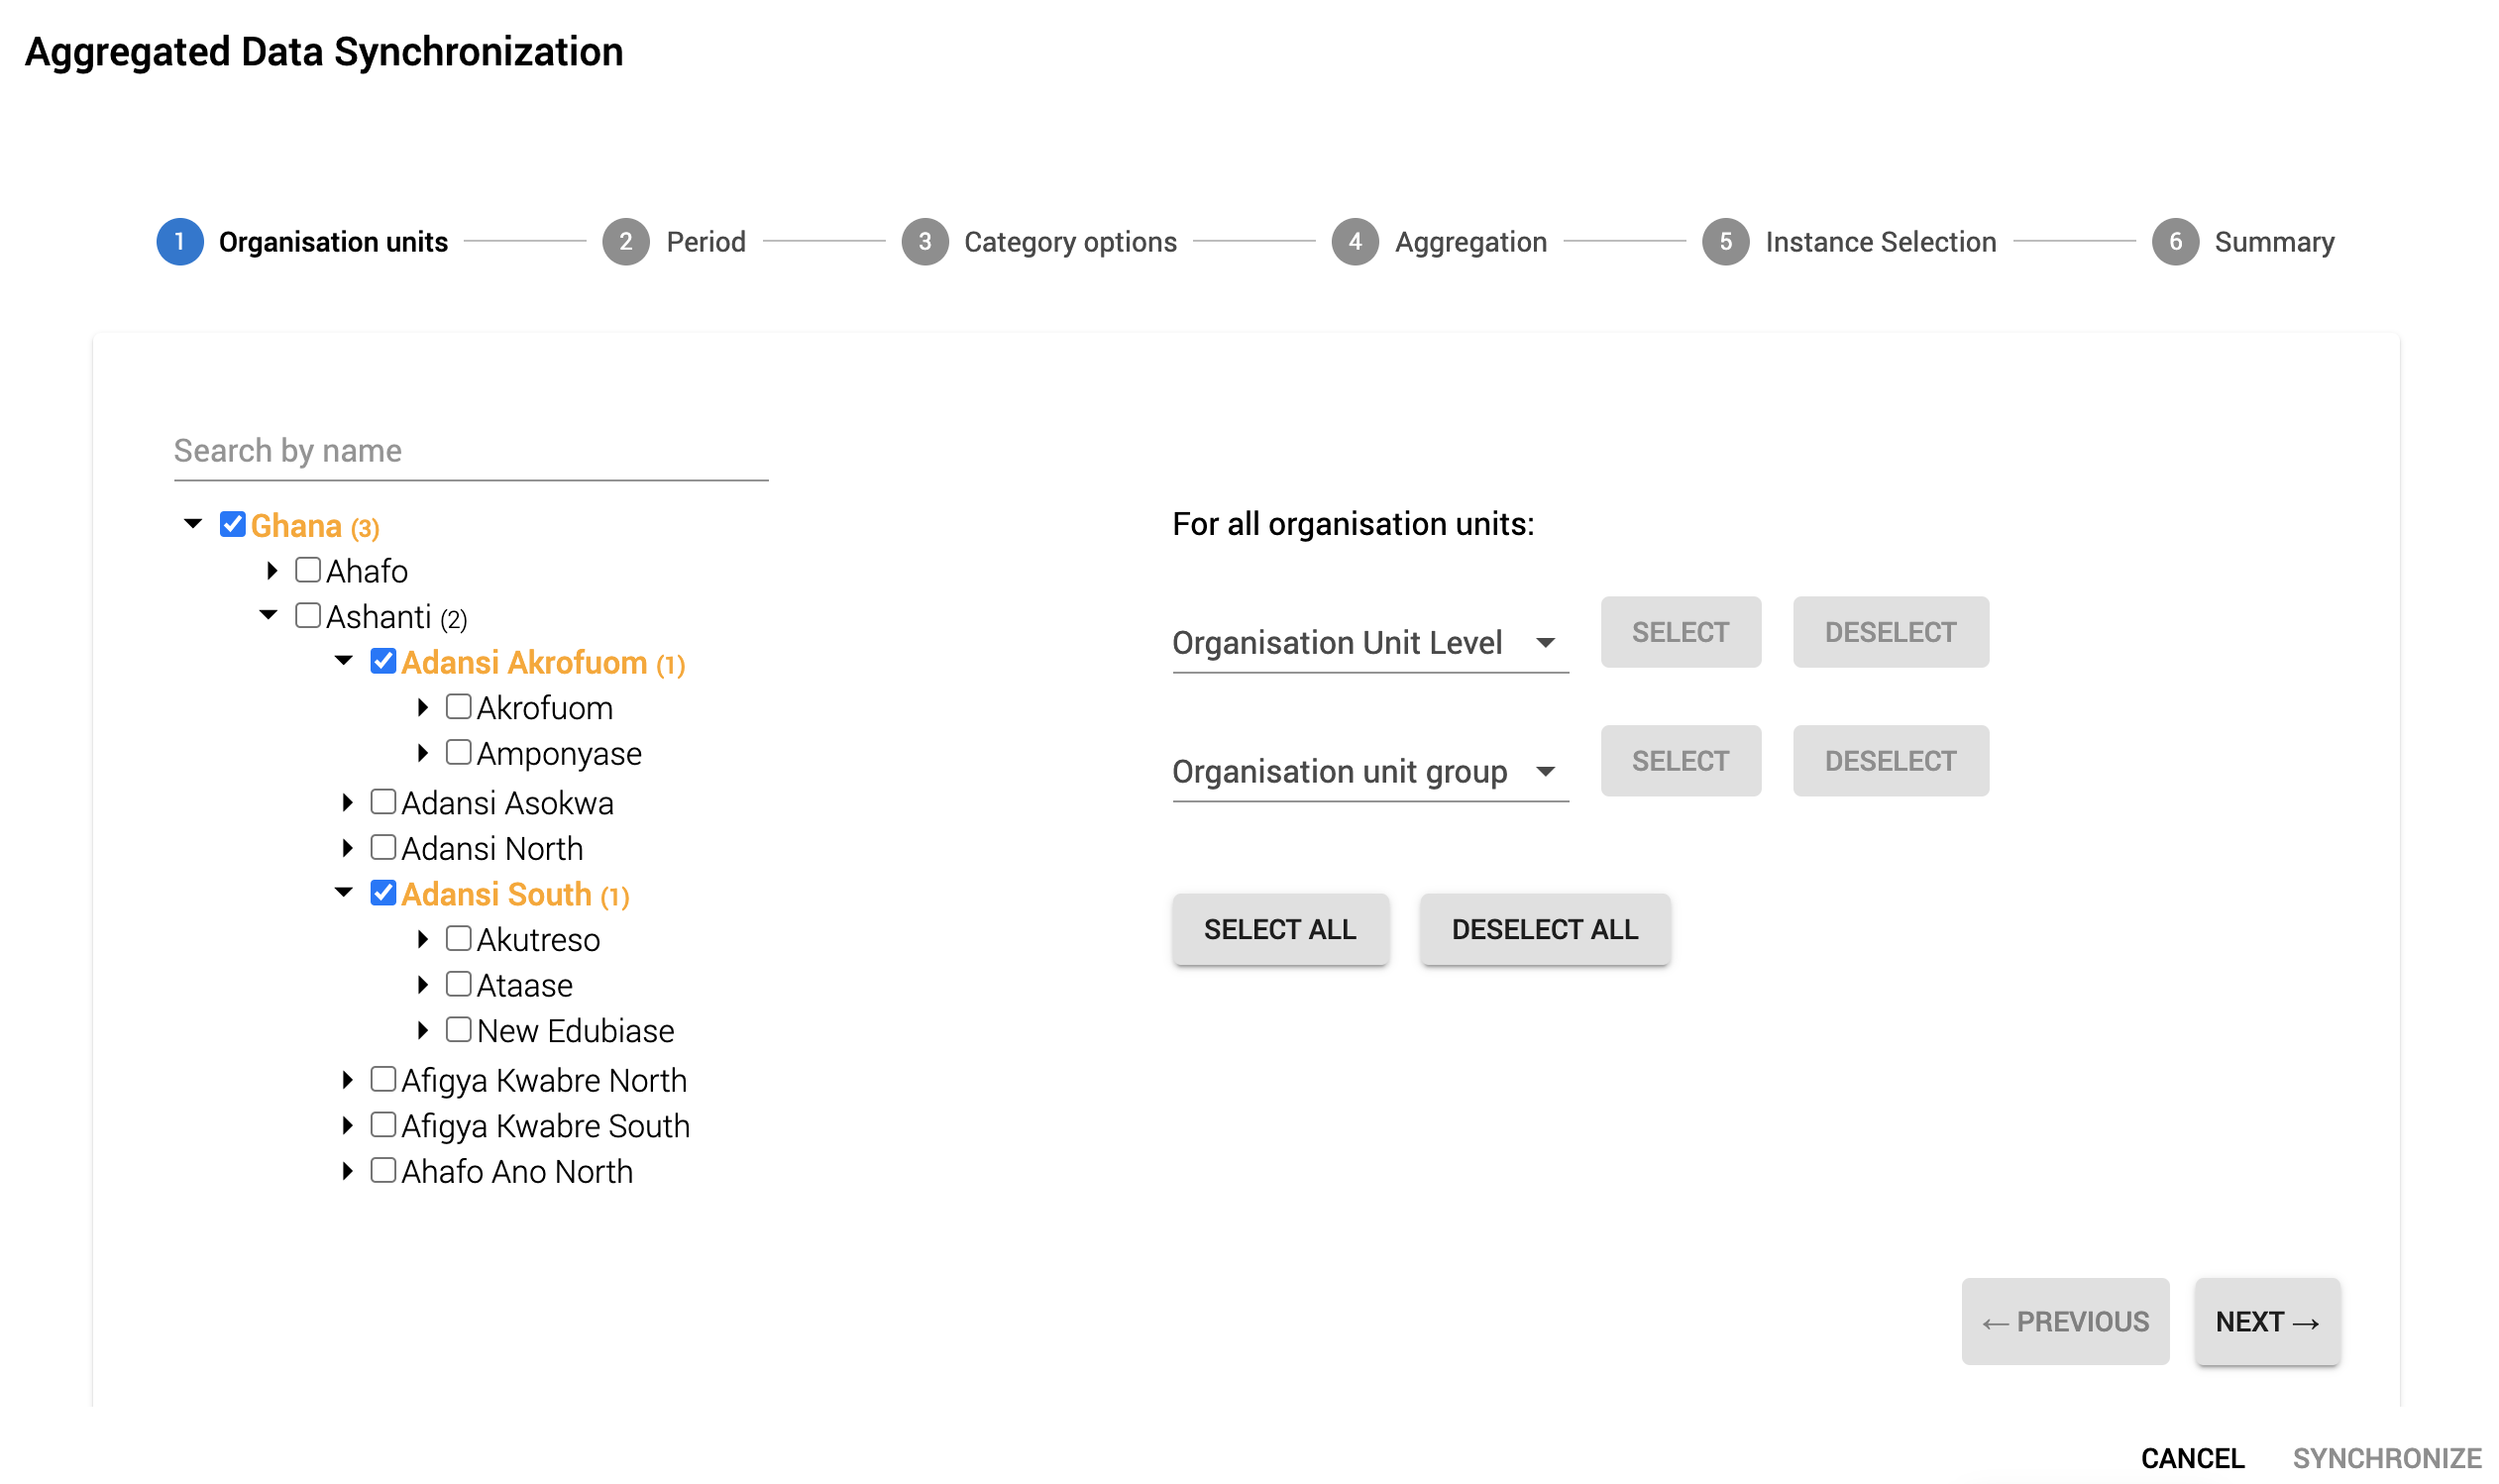
This first step allows you to filter the aggregated data based on the OU where they it was registered. Click on each OU that you need to sync or use the selectors on the right to help you with multiple selections.

When selecting an organisation unit (OU) in the tree: observe that selecting a parent OU doesn't mean that you are selecting all its children. This behaviour is different when you choose to aggregate data on.step 4
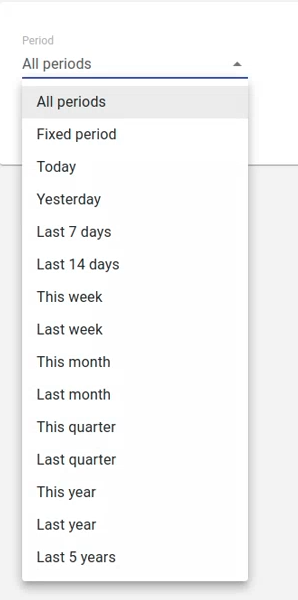
At this step you select the aggregated data based on its date. You can choose a pre-defined period of time or introduce the start and end date.

You can choose between syncing all attribute category options or go for a manual selection and decide which one.
When doing a manual selection, a new panel appears with the subset of category options that are linked to the metadata that you have selected.
Only data with the categories selected on the right-side panel will be pushed to the destination instance

Even though we are already syncing aggregated data, at this step we can perform an additional aggregation.
When you enable it, this aggregation will happen in two dimensions: Temporal and spatial at the same time. Within this step you choose the temporal aggregation (because the spatial aggregation is defined by the Organisation Units that you selected in the step 1). For instance, let's think about what happens when you select Monthly aggregation in this step and you previously selected three OU.

The result is that you will send aggregated data corresponding to the three selected OU and all its children by month. So it takes the OU that are selected on step one and aggregates the information from itself and the children at the level of that OU
If you do not select aggregation the data won't include children OU.
In this step you select the destination instance where the aggregated data will be sent.

Advanced options:
- Dry run: For testing. Try without actually apply changes at the destination instance.
- New and updates / New / Updates
- New: only synchronizes new data
- Updates: Synchronizes only data that has changed from source to destination
- New and Update: both
This step shows you the list of actions involved in the sync. As in other kinds of synchronization you can choose between:
- Synchronize now
- Save as a rule
- Or download the JSON containing the file
When the process is finished, the "Synchronization results report" provides a summary of the result with the following information:
- Summary: How many values where synchronized (deleted, updated, deleted, created) or ignored
- Data Statistics: The list of the data elements created/updated/deleted... with the amount of data values (Not disaggregated by category options)
- JSON Response: The raw response from the destination instance.


The reports from all the synchronization attempts are saved at the history section

