-
Notifications
You must be signed in to change notification settings - Fork 3
Mapping DHIS2 instances
Mapping is one of the most powerful features in MDSync. There are many situations where our destination instance has different metadata than our source instance This may occur when:
- you are sending data or metadata form a development instance to a production instance. In this cases DEV and PROD fall easily out of sync and there may end up being big difference that pose challenges to publish new developments.
- you are collating data from a specific program or disease from different instances (e.g. different country instances). For instance you need to combine data that was gathered in the context of a specific program, but then researchers realize that the information might be useful for another program. Even though metadata is not the same, data could still be synchronized using this mapping feature.
- you have different levels of detail in two instances. (For instance, if the source instance contains data aggregated in 5 age groups and the destination instance in only 2)
- you need to sync programs that are implemented slightly different in different Organizational Units.
In these situations, sending data from one instance to another one is challenging process. MD Sync allows you to overcome this difficulty. It takes data from the source instance and applies the necessary transformation so that it can be received by the destination instance based on the metadata mapping you have previously generated.
Mapping is done between the source instance and each destination instance. Hence, MD Sync will save one mapping per destination instance. To access the mapping configuration, we do it from
→ MetaData Synchronization / Destination Instance Settings/ 3 Dots menu/ Metadata Mapping
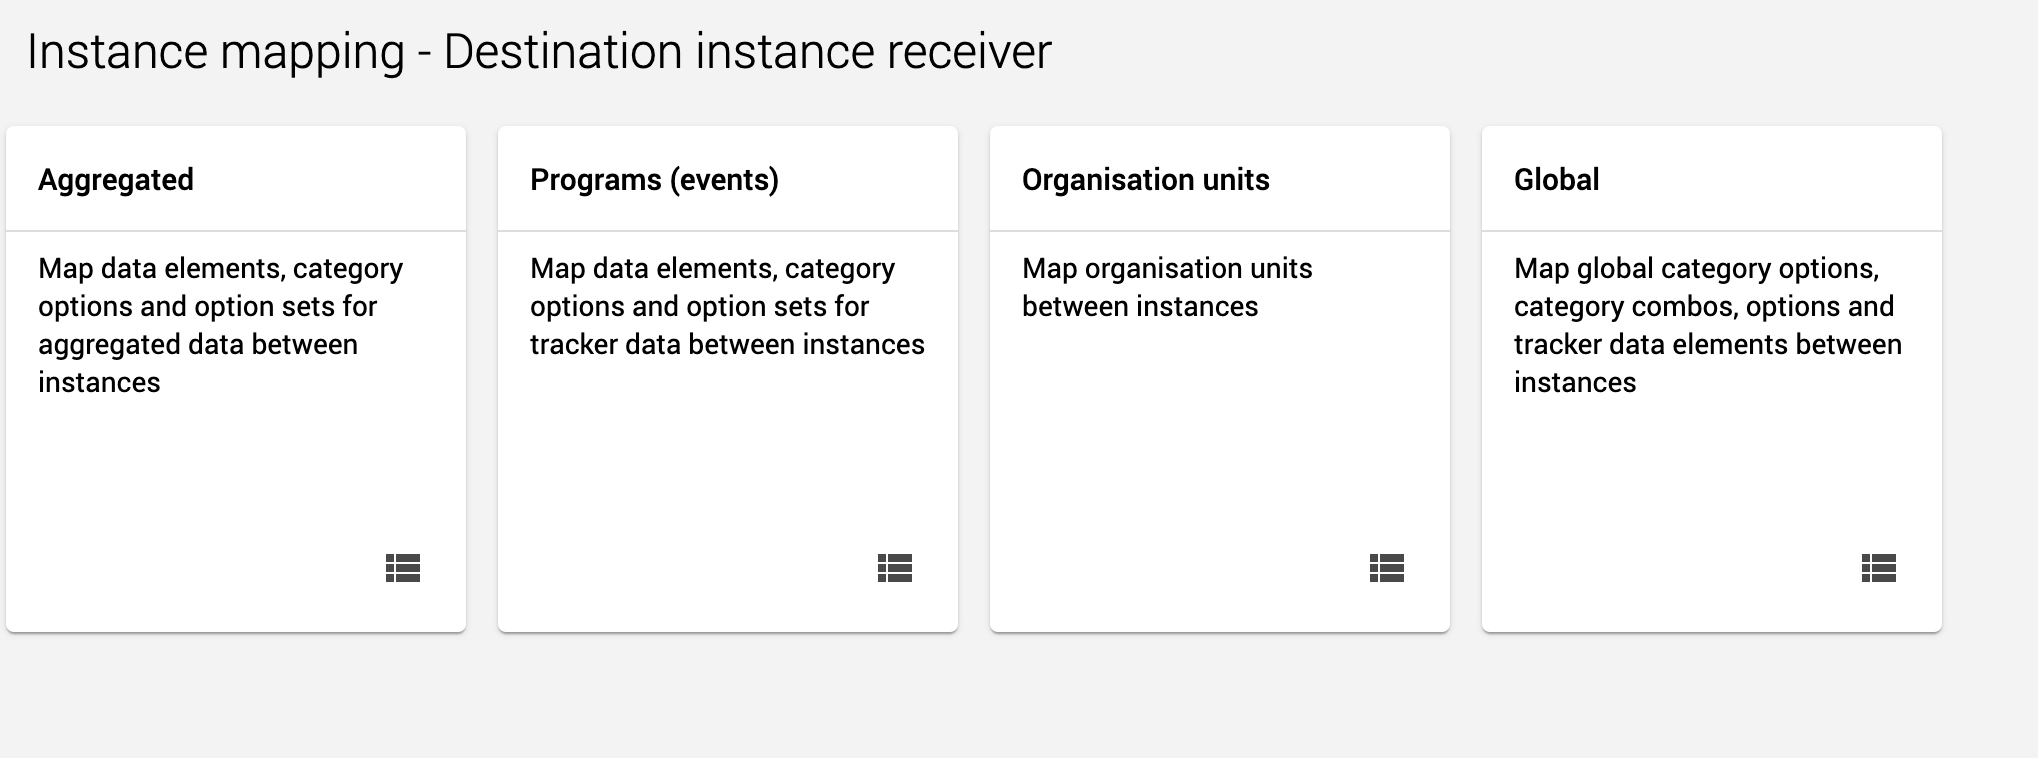
- There are three different sections according to the kind of data you want to send, you may need to map:
- Aggregated metadata, including data elements, category options and indicators
- Programs (events) Programs, Data elements, indicators
- Organisation units
- Global mapping complements the previous sections. It is used to create mappings for Metadata that appears frequently. Sometimes there are option sets or categories that apply to different data elements. Do you have to create a new mapping for one of these elements each time it appears? No, you just simply add that mapping as a global mapping between instances and it will always be applied. If needed, you can later overwrite this mapping for a specific data.

Mapping can be manual o auto-mapping. Continue reading this article to learn how to create mappings.
Inside each of the mapping sections, we have the list with all the metadata objects available for mapping.

For each item these are the options:

Remember that we are defining the mapping for a single destination instance.
-
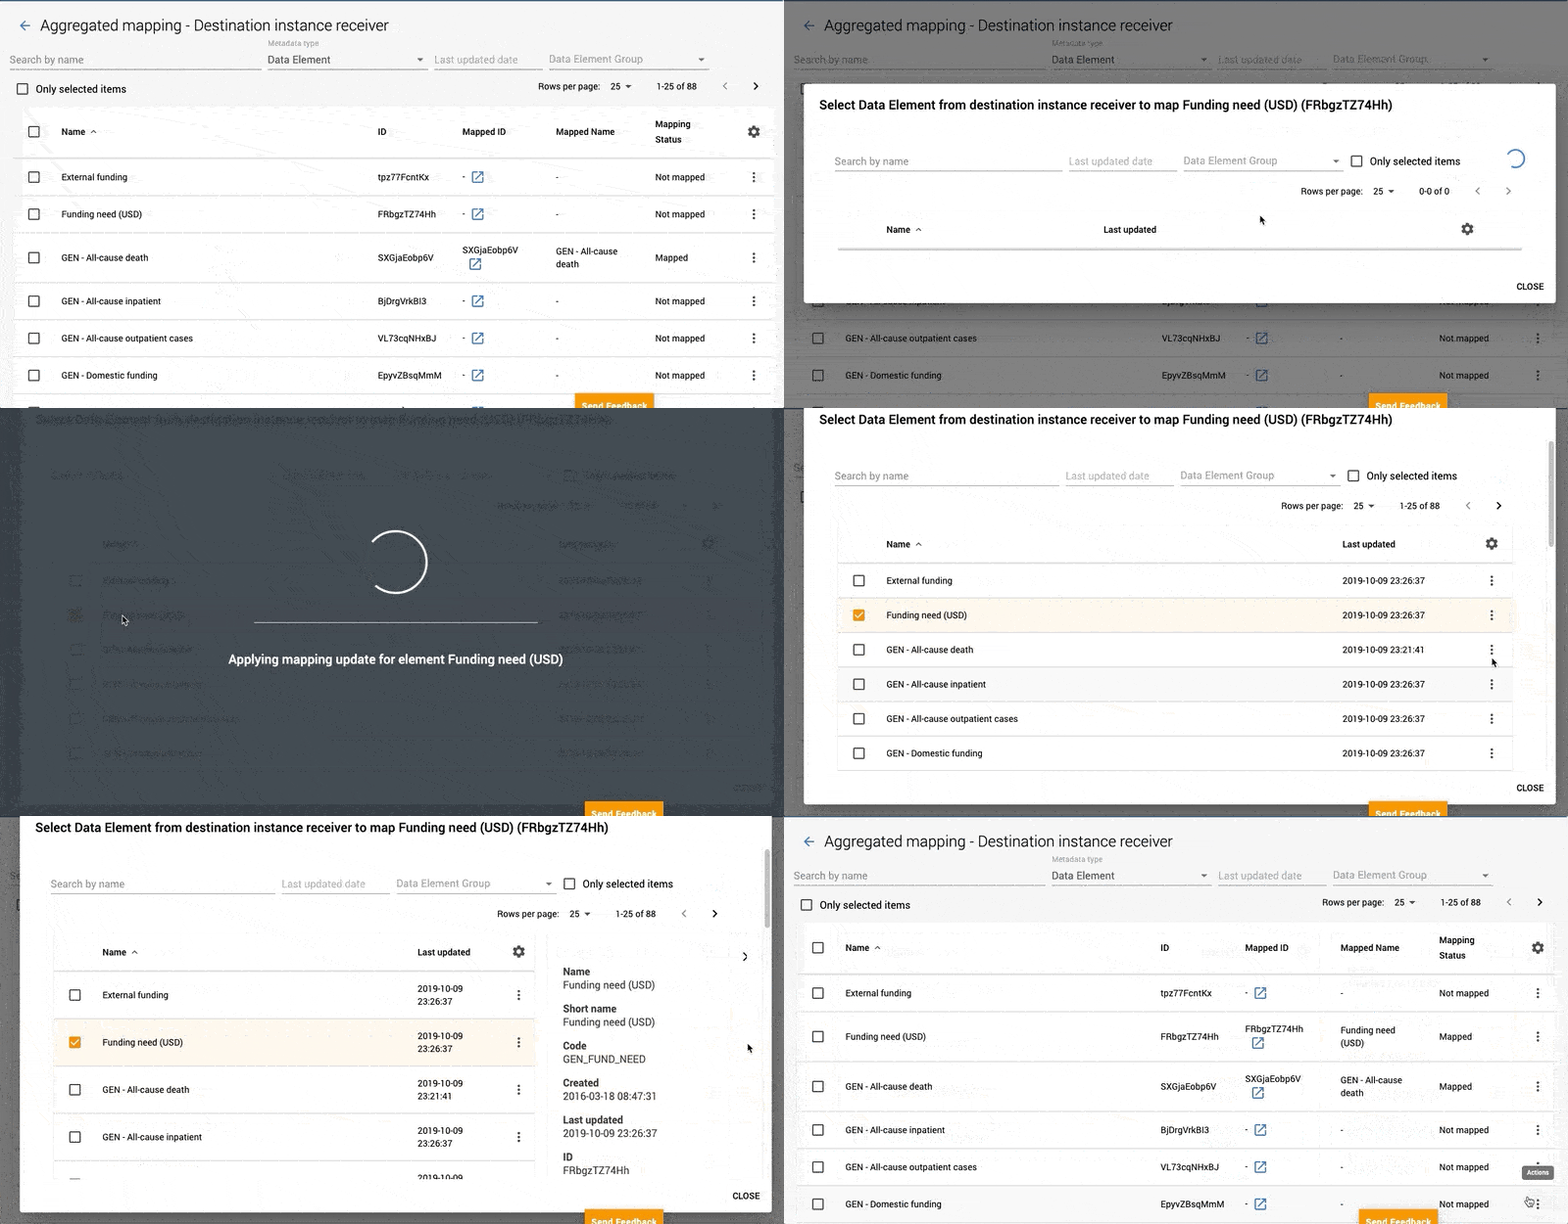
Select source metadata object Select the metadata object on the source instance and click on "mapped ID" icon, (or the "set mapping" option in the three dots menu)
-
Find the ID from the destination instance that maps against the metadata element in the source instance. After selecting the source element, MD Sync will retrieve the destination instance metadata and will let you choose the data elements in the destination instance that maps against it.

That modal window contains the metadata object list from destination instance. Choose the one you want to map. For objects without linked metadata this is the end of the process: the mapping is finished.
-
Related metadata mapping
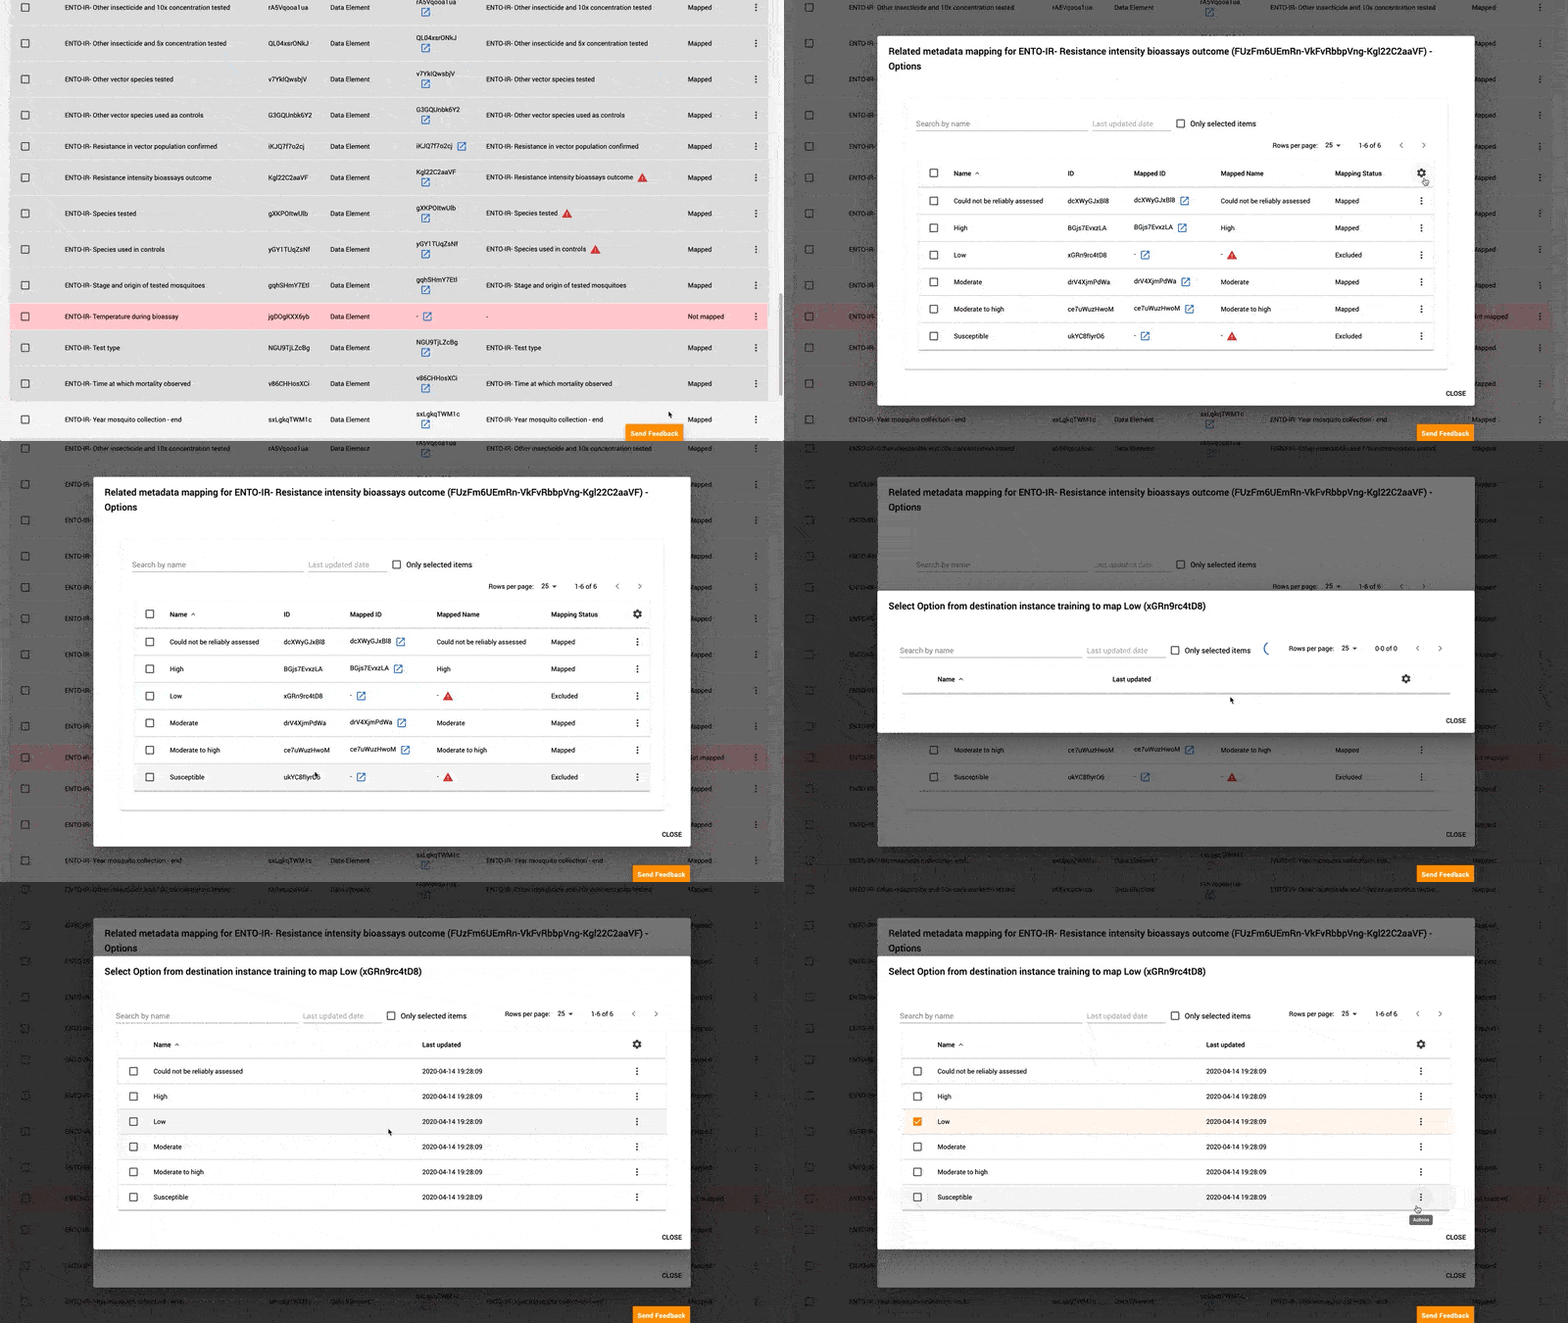
There are some data elements for which you need to do additional mapping. If there are related metadata objects to be mapped (e.g. options or category options) an alert sign would appear by the mapped object.

You just need to indicate an additional mapping because the related metadata needs to be translated to the destination system metadata too. To do that:
- Click on the icon to fix the problem.
- A new window appears with the list of related metadata. The alert icon indicates the objects that needs to be fixed.
- Clicking again on the alert icon for an object shows another list with the available objects at the destination instance.
- Select the destination object to finish this related metadata mapping.
If the option set or category option combo that you are mapping applies to more than one data element, it is recommended to map it from the Global window. All maps done in global will be applied to all metadata elements across the instances.
A slightly special case of mapping is the Organizational Unit mapping (OU mapping). If there are differences between the Organisational Units in the instances, with OU mapping we can define a mapping between one source OU and one destination OU.

Follow these steps to create an OU mapping:
- Select the OU in the source instance.
- Click on the "set mapping icon"
- Select the OU from the destination instance
MD Sync can auto map metadata objects for you. Instead of letting you manually select the object at the destination instance, it automatically searches for the corresponding object. It does so by:
- Searching for metadata objects in the destination instance the have the same UIDs as those in the source instance.
- If there is no match, it searches for metadata objects with the same code
- if non of the previous steps returns a good candidate, it uses a "best effort" algorithm to look for metadata objects with similar names
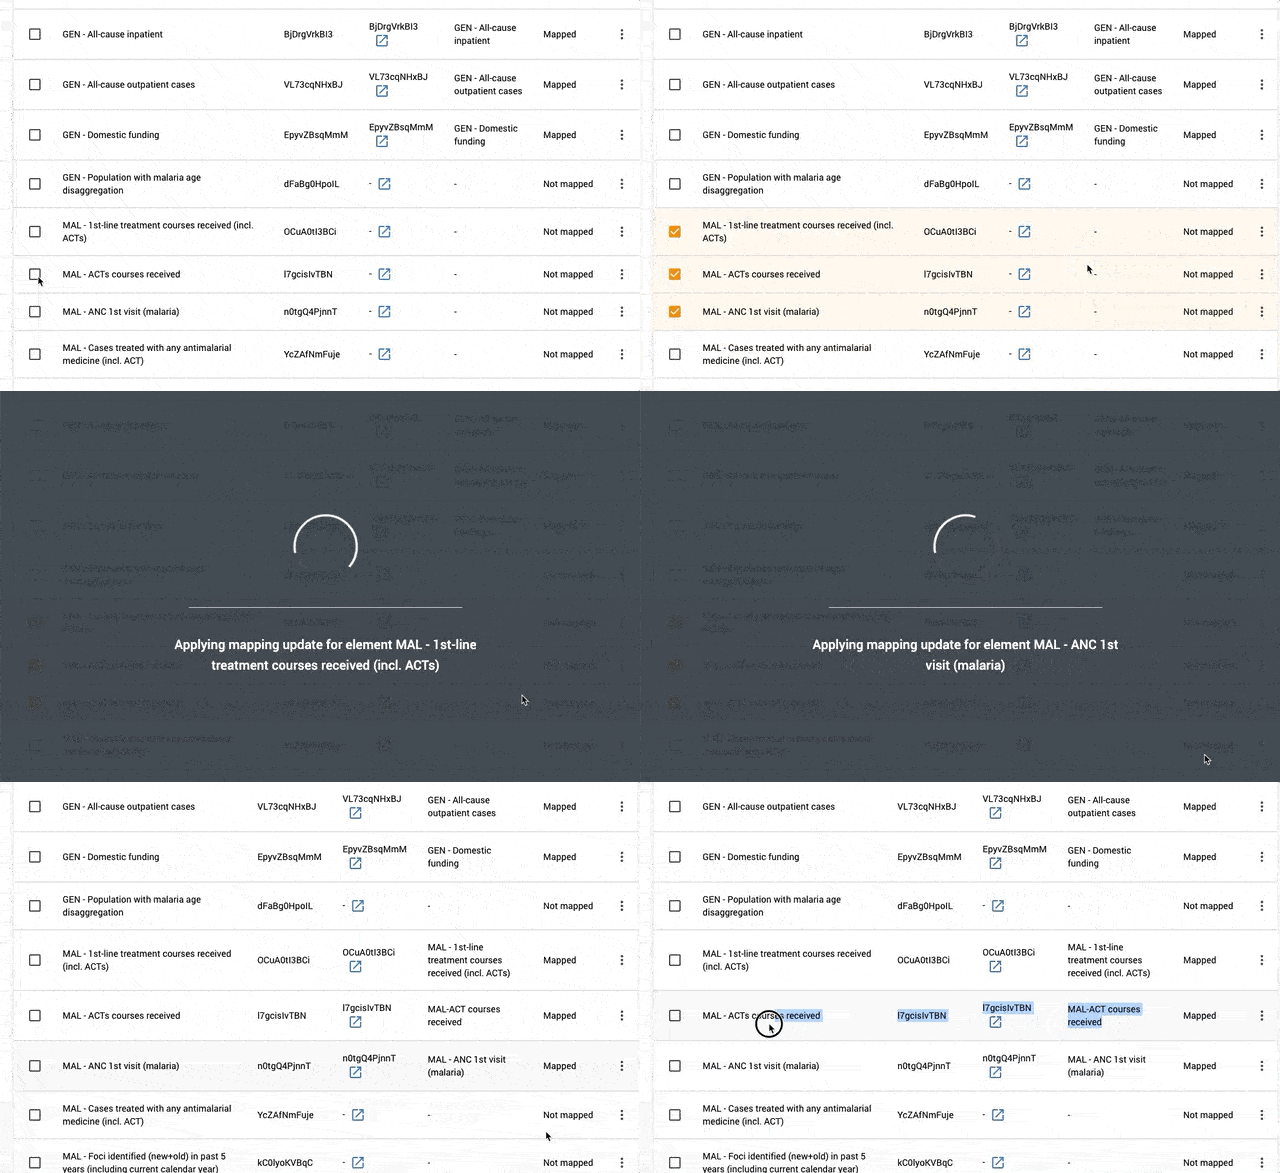
To perform this auto-mapping, select as many elements as you need to map, and then select the three dots menu (or right click) → Auto-map element
In the following clip, the auto-mapping easily manages to find a destination data element with a slightly different name because they share the same UID:
When configuring a synchronization operation you can choose which data elements are you going to sync and which ones you do not want to sync. But now imagine that there is a data element that you never want to sync with a destination instance, for example person's first name or IDs. In this case you don't need to exclude that element manually from every synchronization, you can exclude it from all synchronizations from the mapping page. When you exclude a data element for a particular destination instance, that element will always be ignored during the sync process.
It sets back the mapping to the default state: not mapped.
Take into consideration that If there is no mapping, the synchronization will assume that the same metadata exists at the destination instance. If that is not the case, the process will throw an error, with a detailed log explaining what the inconsistent metadata is

This contextual option only appears for mapped objects with related metadata. It is intended for manual mapping of options sets and category options.
This is an example of related metadata mapping. By clicking on Mapped ID, you can edit the mapping if necessary.
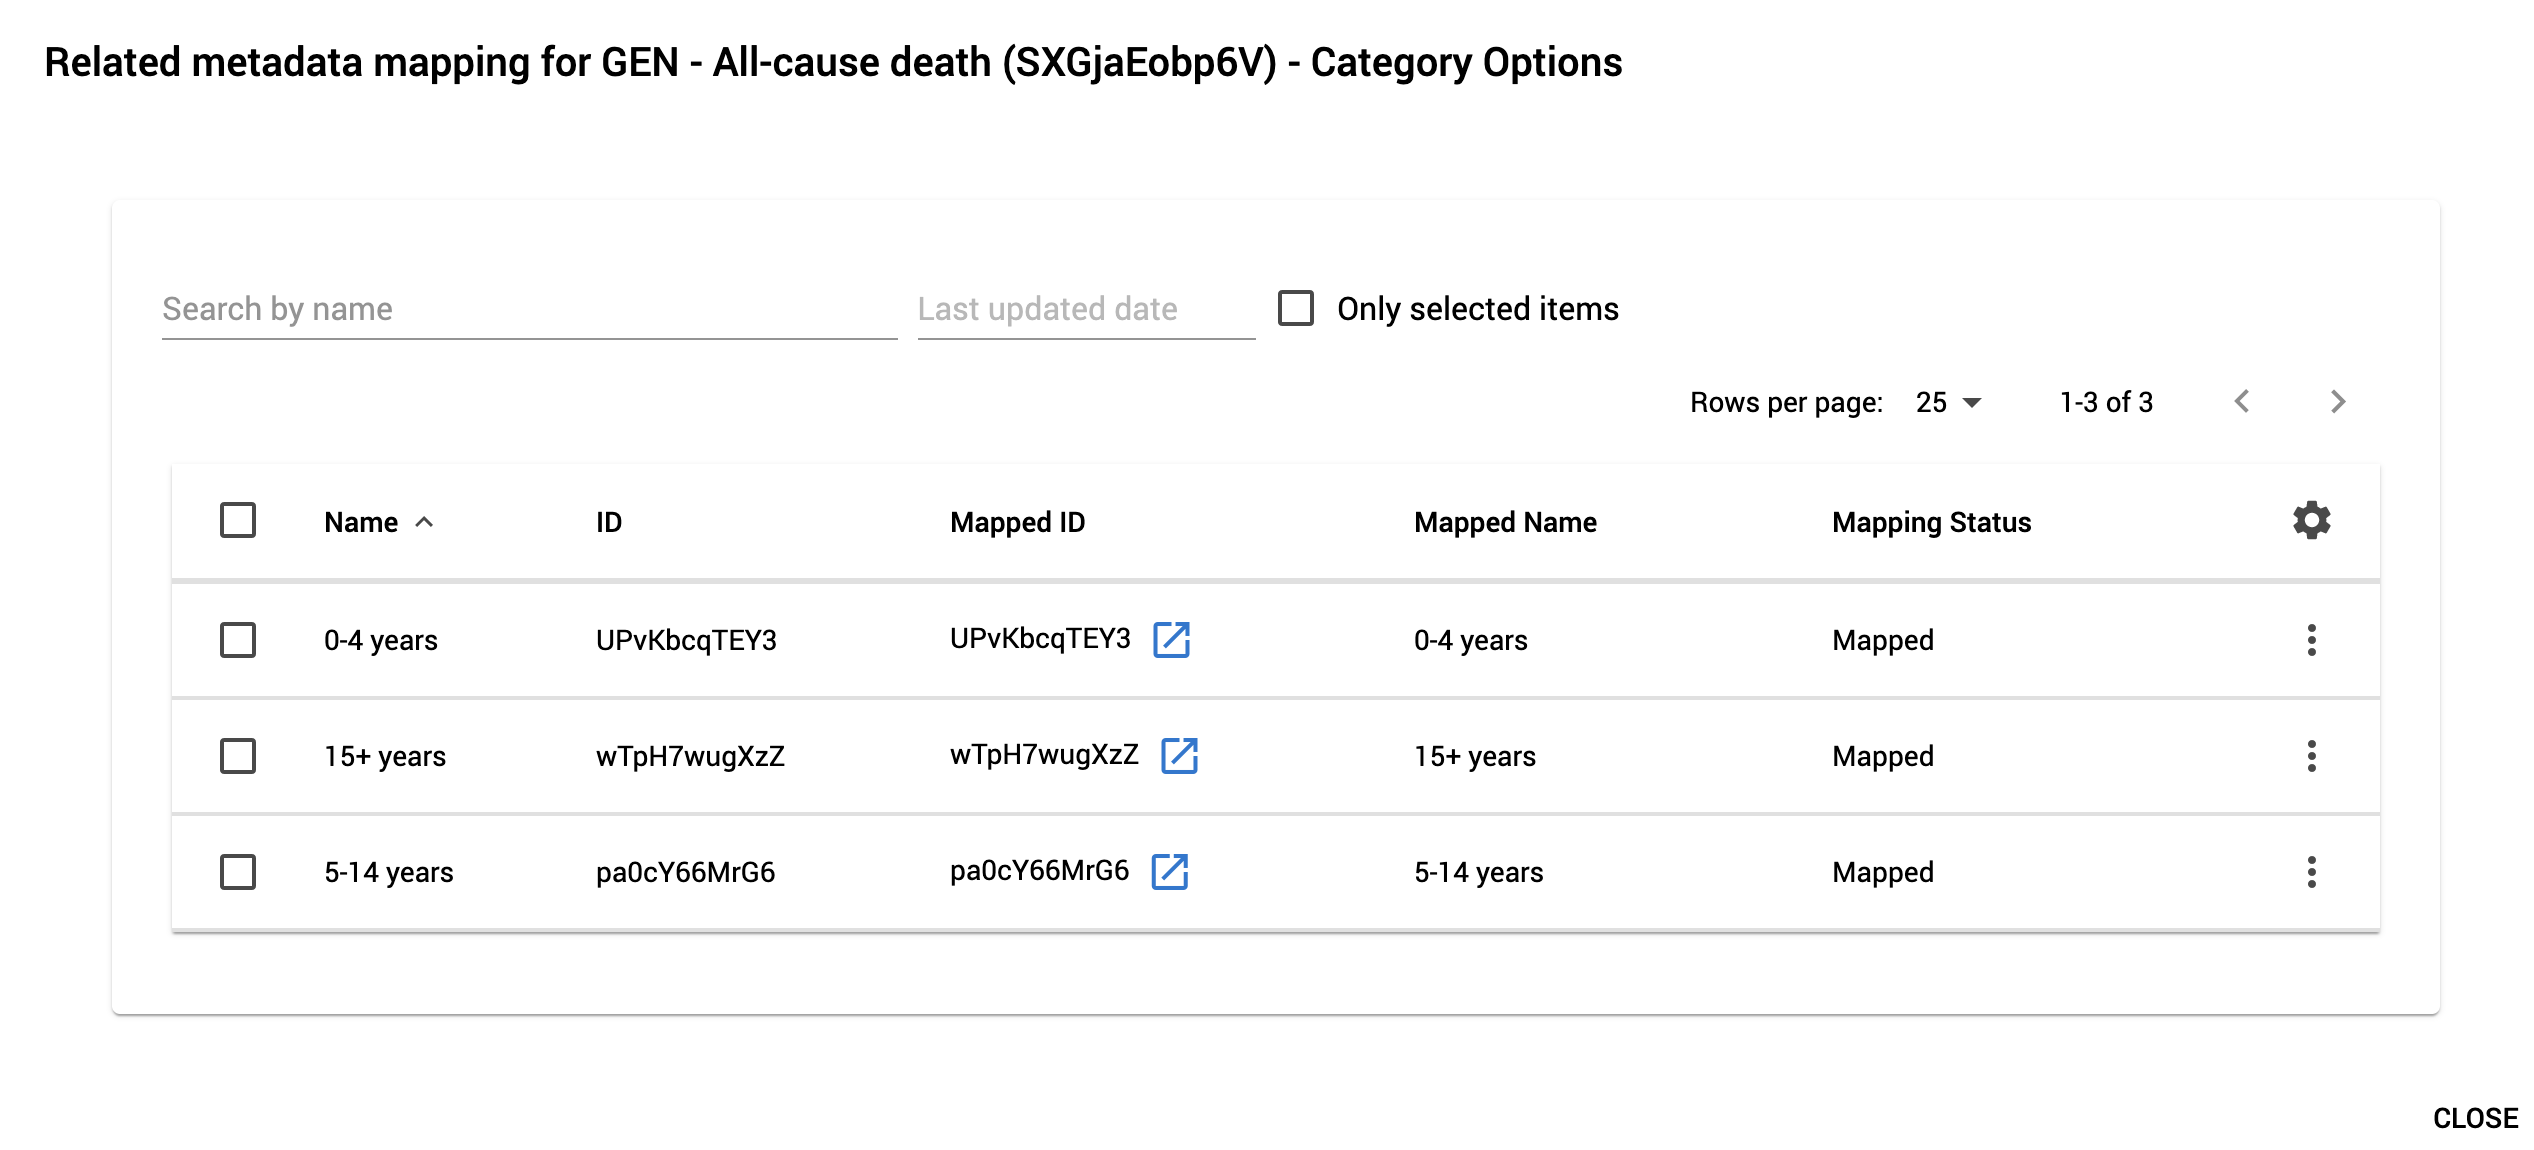
A new window appears with the related metadata objects: Map them with the same three steps:
- Select source object
- Click on the set mapping icon
- Select destination object
After creating the mapping, it is possible to configure the same mapping as a global mapping by selecting the right-click-menu option "make this mapping global"

This contextual option only appears for already mapped objects.

