-
Notifications
You must be signed in to change notification settings - Fork 3
Manual Sync Metadata
MD Sync allows you to send the following types of metadata to one or more DHIS2 destination instances:
- Dashboard
- Data Element
- Data Element Group
- Data Element Group Set
- Data Set
- Indicator
- Indicator Group
- Indicator Group Set
- Organization Unit
- Organization Unit Group
- Organization Unit Group Set
- Organization Unit Level
- Validation Rule
- Validation Rule Group
- Program
- Program Indicator
- Program Indicator Group
- Program Rule
- Program Rule Variable
- User Group
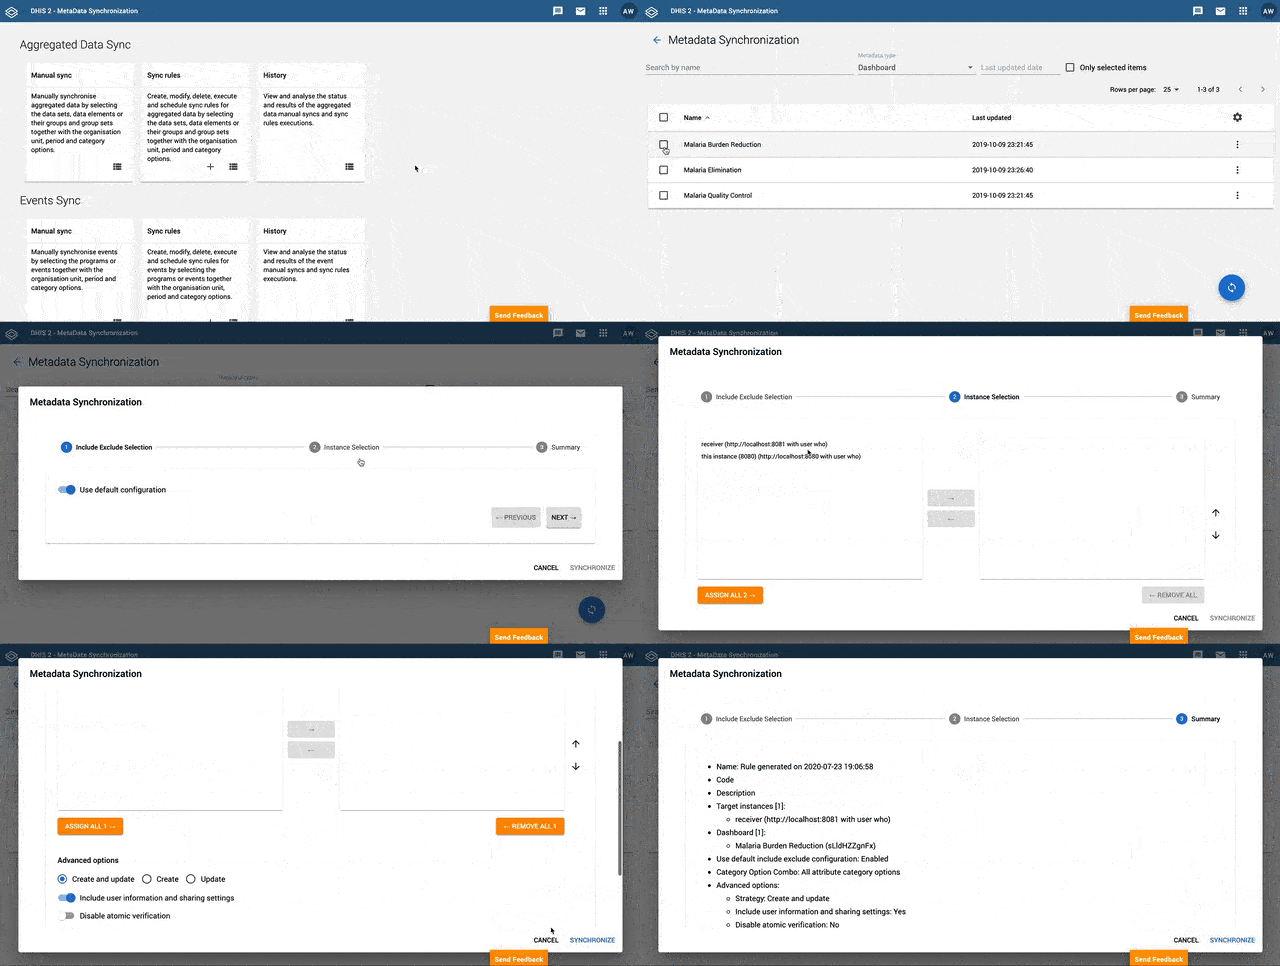
To synchronize metadata manually go to Metadata Synchronization → Manual Sync
The process involves:
- Select the metadata that you need to sync and start the multistep process
- Include/Exclude dependences
- Select the destination instance
- Review the summary and synchronize

Metadata Synchronization main panel
Within this panel you can browse through all the data objects that you have in your instance. As the list is long you can move through the different pages and select exactly what you want to sync.
You can select elements in different pages at the same time, and note that when you have elements from other page you will see this message above the selection

You can select elements in different pages at the same time, and note that when you have elements from other page you will see this message above the selection.
When the selection is ready, click on the sync button (bottom right corner) and the Metadata Synchronization window appears, with three steps:

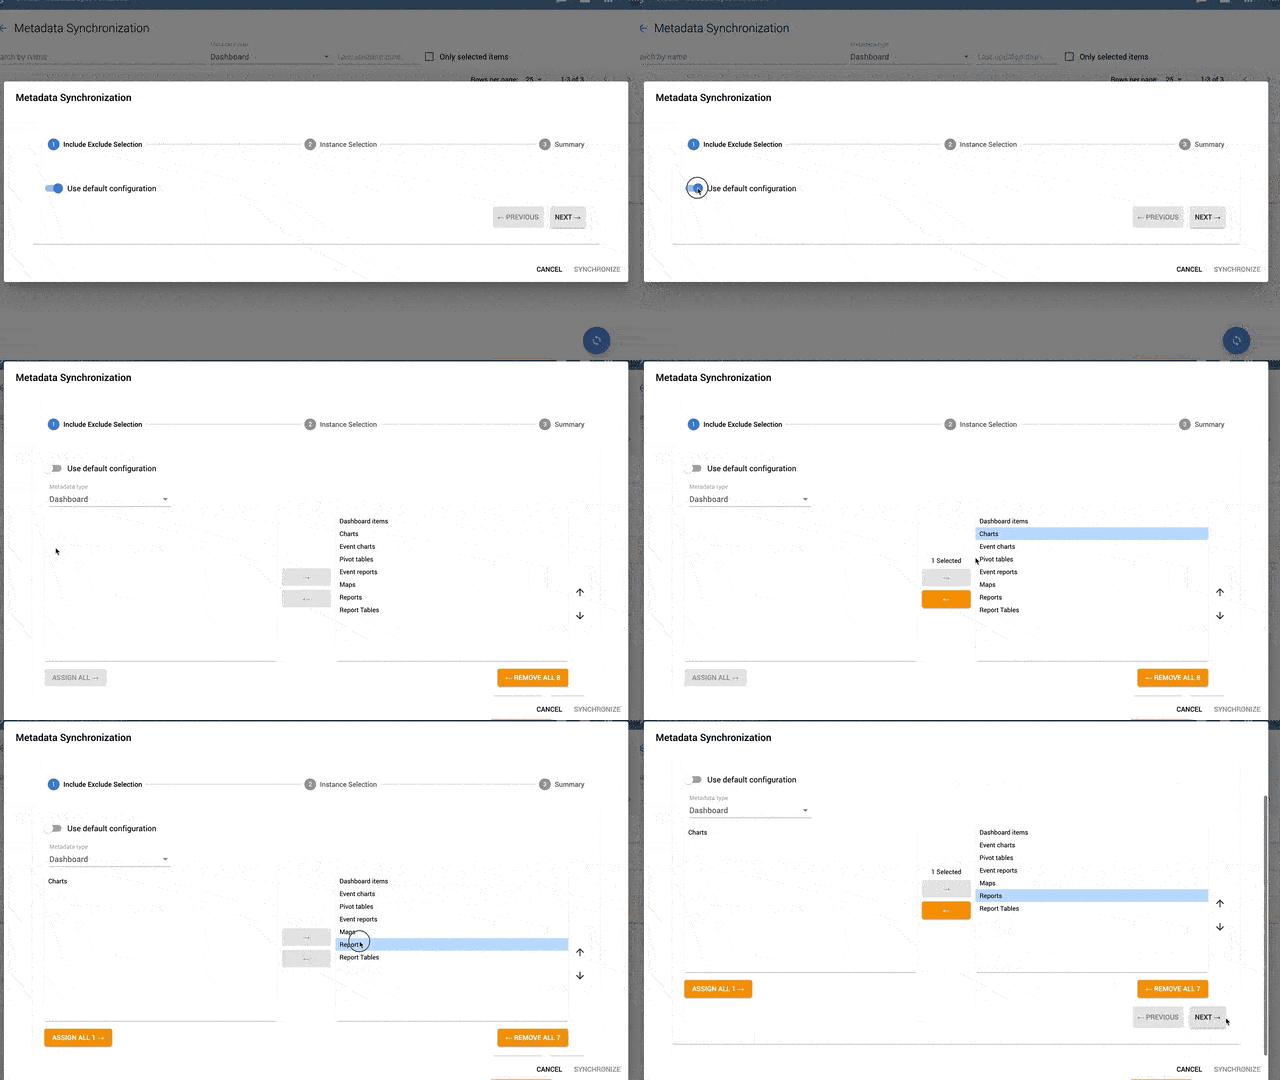
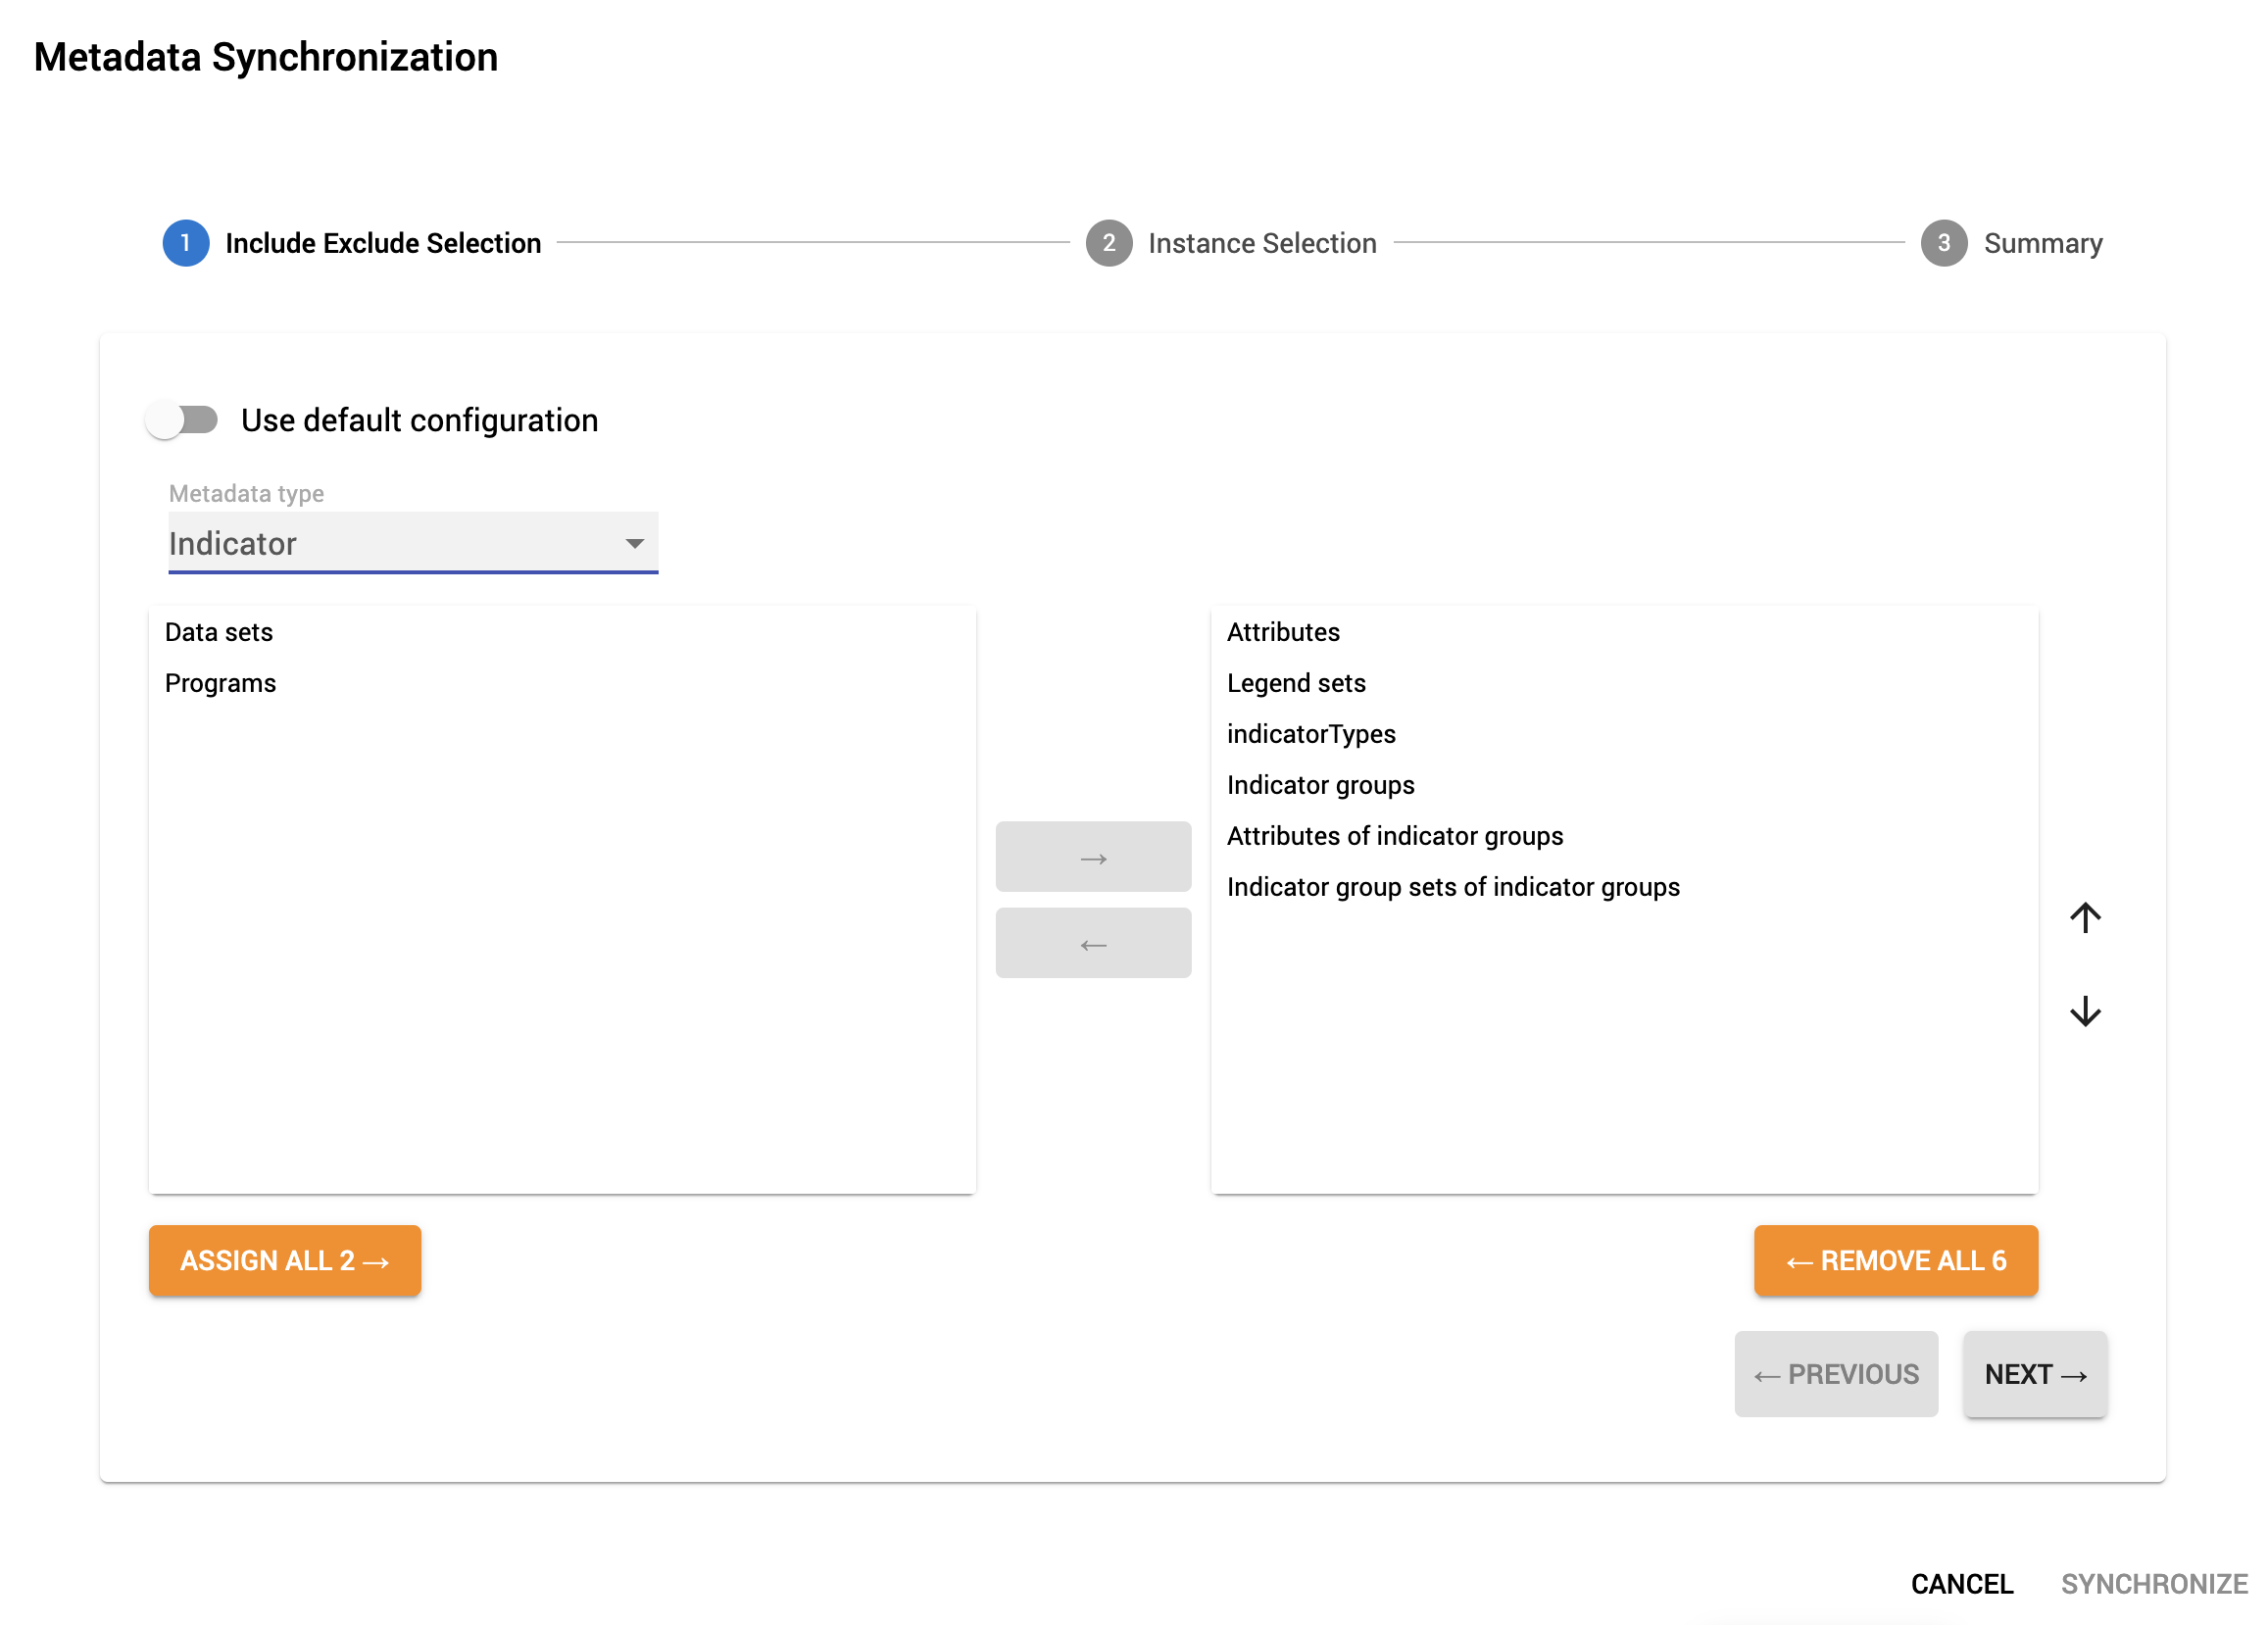
The Metadata sometimes has dependences (for instance one data element can be associated to an option set) If you deselect "use default configuration" you can browse through the dependency tree and select dependencies manually. If you choose the default configuration MD Sync will include all dependencies by default.

Note that the dependencies on the right pane will be included in the metadata to be sent and those on the left pane will be excluded.

On this step you select the instance/instances to push data to.
(if you haven't configured your instances yet, learn how to do it )

Advanced options
These are the typical options you have in DHIS2 import:
- Include user information and sharing settings: DHIS2 metadata objects can be shared with DHIS2 users and user groups, this is called sharing settings. You can decide not to include the sharing settings within the object when importing. Why? Imagine that the two instances are quite different and don't have the same users. In that case uncheck this option and sharing settings on the destination will be imported blank
- Replace objects in destination instance: If this option is selected, objects that already exists in the destination instance will be replaced by the synchronized metadata. If this option is not selected the merge strategy of DHIS2 import will be used: it will only update the modifications.
- Disable atomic verification: If this option is active, DHIS2 will only import the metadata objects if the entire import operation is successful. If there are any errors in any of the metadata objects contained in the synchronization files, the import will be canceled completely. If this option in inactive, DHIS2 will import any objects from the import files that can be imported and exclude those that present errors.
Within this screen you see the summary of all the operations involved for the synchronization that you just created.
You can choose between:
- Synchronize now to actually run the synchronization
- Download a JSON. This is file that contains all the metadata involved in this synchronization. If you Synchronize now, it sends that information to the destination instance. If you download the JSON you can Import it manually in the destination instance at any point later in time.
- Save as a sync rule: to save your selection and be able to execute the same synchronization any time in the future again. Rules can be scheduled to be executed at regular time intervals. For instance, a sync rule could help to maintain OU tree permanently synchronized between two instances, so that changes made to one are propagated to the other one. Read more about rules here
When the process is finished, the "Synchronization results report" provides a summary of the operation with the following information:
- Summary: How many metadata objects were synchronized (deleted, updated, deleted, created) or ignored
- JSON Response: The raw response from the remote instance.


