Hue Binding
Documentation of the Philips Hue Binding
For installation of the binding, please see Wiki page Bindings.
First of all you need to configure the following values in the openhab.cfg file (in the folder '${openhab_home}/configurations').
################################ HUE Binding #########################################

# IP of the Hue bridge
hue:ip=192.168.1.28
hue:secret=pairingKeyForOpenHABSystem
hue:refresh=10000
The hue:ip value is optional. If it is not provided, the binding tries to find the bridge on its own. This may not always work perfectly. The preferred way should be a defined IP.
The hue:secret value is a string that gets stored in the hue bridge when pairing it with openHAB. That way the bridge 'knows' openHAB and allows it to send commands. It is kind of a password. Be aware that it is not encrypted in the communication. You may change this value to anything you like using characters and numbers. It must be between 10 and 40 characters long.
The hue:refresh defines the polling interval in msec to retrieve Philips bulb status. Other apps can change Hue status or a physical switch can turn on / off lamp status. If this happens the status of hue lamps within OpenHAB won't reflect the real status. Currently (September 2014) there is no push technology available, so the only option is to poll Philips bulbs to retrieve status and update items accordingly to reflect changes. Polling is enabled if refresh is specified, by commenting out "hue:refresh=10000" statement. Be aware that polling will consume resources, so a small refresh interval will increase cpu load.
In order to use your Philips Hue system within openHAB you need to publicize openHAB to your Philips Hue bridge. To do so you need to link the systems by pressing the connect button on the bridge when starting up openHAB. In the logs you can see when openHAB is waiting to be paired to the bridge. Look out for the following lines:
Please press the connect button on the Hue bridge. Waiting for pairing for 100 seconds...
Please press the connect button on the Hue bridge. Waiting for pairing for 99 seconds...
Please press the connect button on the Hue bridge. Waiting for pairing for 98 seconds...
If you see this you should press the button on the bridge. You should see the following in the logs:
Hue bridge successfully paired!
This procedure has only to be done once. Now you are ready to go.
In order to bind an item to a Philips Hue bulb, you need to provide configuration settings. The easiest way to do so is to add some binding information in your item file (in the folder '${openhab_home}/configurations/items'). The syntax for the Philips Hue binding configuration string is explained in the following sections.
The switch item is the easiest way to control your bulbs. It enables you to turn on and off your bulbs without changing color or brightness.
hue="<bulb number>"
The bulb number is assigned to the bulb by your Philips Hue bridge. The numbers should start with 1 and increase for every connected bulb by 1. If you have a starter kit, the first bulbs are numbered 1, 2, 3.
Here are some examples of valid binding configuration strings for switch items:
hue="1"
hue="2"
hue="3"
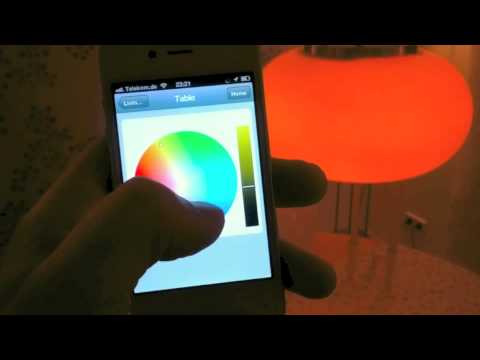
The color item allows you to change color and brightness of a bulb.
hue="<bulb number>"
The bulb number is assigned to the bulb by your Philips Hue bridge. The numbers should start with 1 and increase for every connected bulb by 1. If you have a starter kit, the first bulbs are numbered 1, 2, 3.
Here are some examples of valid binding configuration strings for switch items:
hue="1"
hue="2"
hue="3"
Dimmer items enable you to do two different things:
- Change the brightness of a bulb without changing the color, or
- Change the color temperature of a bulb from warm to cold.
hue="<bulb number>;brightness[;<step size>]"
where the part in [] is optional.
The step size defines how fast the dimmer changes the brightness. If no value is defined the default value of 25 is used.
Here are some examples of valid binding configuration strings for brightness dimmer items:
hue="1;brightness"
hue="2;brightness;20"
hue="3;brightness;100"
hue="<bulb number>;colorTemperature[;<step size>]"
where the part in [] is optional.
The step size defines how fast the dimmer changes the color temperature. If no value is defined the default value of 25 is used.
Here are some examples of valid binding configuration strings for brightness dimmer items:
hue="1;colorTemperature"
hue="2;colorTemperature;20"
hue="3;colorTemperature;100"
As a result, your lines in the items file might look like the following:
Switch Toggle_1	  "left bulb" 	(Switching)	{hue="1"}
Switch Toggle_2	  "center bulb"	(Switching)	{hue="2"}
Switch Toggle_3 	  "right bulb" 	(Switching)	{hue="3"}

Color Color_1 	  "left bulb" 	(Colorize)	{hue="1"}
Color Color_2         "center bulb"	(Colorize)	{hue="2"}
Color Color_3 	  "right bulb" 	(Colorize)	{hue="3"}

Dimmer Dimm_1 	  "left bulb" 	(WhiteDimmer)	{hue="1;brightness;30"}
Dimmer Dimm_2 	  "center bulb" (WhiteDimmer)	{hue="2;brightness;30"}
Dimmer Dimm_3 	  "right bulb" 	(WhiteDimmer)	{hue="3;brightness;30"}

Dimmer CT_Dimm_1 	  "left bulb" 	(CTDimmer)	{hue="1;colorTemperature;30"}
Dimmer CT_Dimm_2 	  "center bulb" (CTDimmer)	{hue="2;colorTemperature;30"}
Dimmer CT_Dimm_3 	  "right bulb" 	(CTDimmer)	{hue="3;colorTemperature;30"}
As a result, your lines in the sitemap file might look like the following:
Switch         item=Toggle_1                                label="Bedroom"
Colorpicker    item=Color_1    visibility=[Toggle_1==ON]    label="Bedroom Light Color"
Slider         item=Dimm_1     visibility=[Toggle_1==ON]    label="Bedroom Brightness"
Slider         item=CT_Dimm_1  visibility=[Toggle_1==ON]    label="Bedroom Color Temperature"
Use the corresponding items within the rules:
sendCommand(Toggle_1, ON)
sendCommand(Color_1, HSBType::GREEN)
sendCommand(Dimm_1, 20)
sendCommand(CT_Dimm_1, 60)
To set a custom color within a rule file:
var DecimalType hue = new DecimalType(240) // 0-360; 0=red, 120=green, 240=blue, 360=red(again)
var PercentType sat = new PercentType(100) // 0-100
var PercentType bright = new PercentType(100) // 0-100
var HSBType light = new HSBType(hue,sat,bright)
sendCommand(Color_1, light)
Or use variables for the brightness:
var PercentType bright = new PercentType(30) // 0-100
sendCommand(Dimm_1, bright)
For more information on the used API see the following link: http://developers.meethue.com/
If you like dedicated Hue icons, please consider using those posted in the forum: https://groups.google.com/d/msg/openhab/1FXial-JCA0/gjd1Fq-sniQJ. Versions of openHAB after March 2015 include these images in the release. You can now show icons using:
Switch Toggle_1 "left bulb" <hue> (Switching) {hue="1"}
The LivingColors remote is only compatible to Philips branded bulbs. We can't control for e.g. Osram bulbs with this remote. However the Hue Bridge can control these bulbs, since it fully supports the underlying ZigBee protocol - I guess the LivingColor remote and Philips bulbs use some proprietary protocol to communicate with each other.
I use one of my LivingColor remote's scene for a sunset-like ambience. The following rule basically listens for a certain hue value from one of my Philips bulbs (which can be controlled by the remote) and if these values match (=when I activated the sunset scene) it sends a command to the unsupported bulb. This turns on the light with a delay of several seconds, since OpenHAB polls the values from the bridge every few seconds and while the bridge itself is also just polling the values.
rule "LivingColorsRemoteGrab"
	when
		Item philipsColor1 received update
	then
		logInfo("RemoteGrab", "philipsColor1 was updated")

		if (philipsColor1.state instanceof HSBType) {
			var HSBType currentState
			currentState = philipsColor1.state

			var DecimalType hue = currentState.getHue()
			var PercentType sat = currentState.getSaturation()
			var PercentType bright = currentState.getBrightness()

			// Check if new values match our scene's values pressed on LivingColors remote
			if ( hue > 23 && hue < 25 && sat == 100 ) {
				logInfo("RemoteGrab", "philipsColor1 was set to SUNSET")

				// Send command to unsuppoted bulb
				sendCommand(osramColor1, new HSBType(new DecimalType(37.5),new PercentType(100),new PercentType(100)))
			}
		}
end